Tutorial – Technical – ProCam – Using The Video Camera Function
When I wrote the first ProCam tutorial, I was still working with an iPhone 4 so there were a couple of functions that I couldn’t use as they were iPhone 5 specific. Since then, I have picked up my iPhone5…so there are a couple of areas I’d like to discuss. In this one, let’s take a look at ProCam’s video camera.
This is a pretty straightforward video camera…not lots of bells and whistles which is good! (If you want all of that…the bells and whistles…there are other video dedicated apps to use). What you have with ProCam’s video camera is an easy to use way of capturing videos while still working within in the app’s interface.
ProCam retails for $0.99/£0.69 and you can download it here.
Step 1
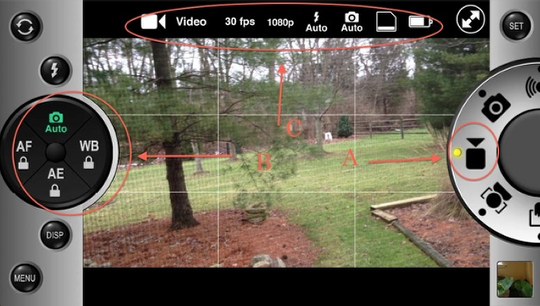
A quick tour. To access the video function, you’ll have to turn the selection dial to the video camera icon. (A) (Just a side note: when using this function, the zoom is turned off…which is a shame! Maybe they can add this in a future update?)
The exposure settings (B) are still active so if you’e into using these…go for it. I left mine set to “Auto”. (I figure if I’m capturing video I don’t want to have to worry about exposure).
The top panel (C) shows you all your settings that can be changed in the menu window…and I’ll get to that next.
Step 2
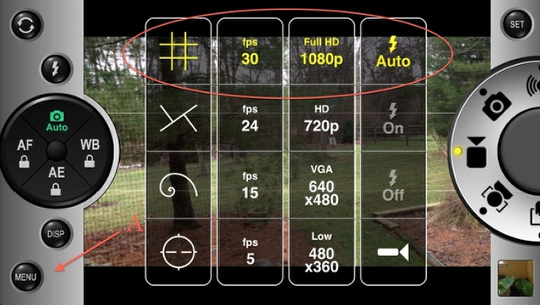
Clicking on “Menu” will bring up the Video setting screen. Each of these settings work independent of each other…meaning you can choose a different fps rate as well as a different resolution. This is great as not only can you capture video at full bore HD at 30fps, which is where I’ve set mine, you can also have some fun playing with different rates and resolutions or set to a lower setting to save memory space.
Step 3
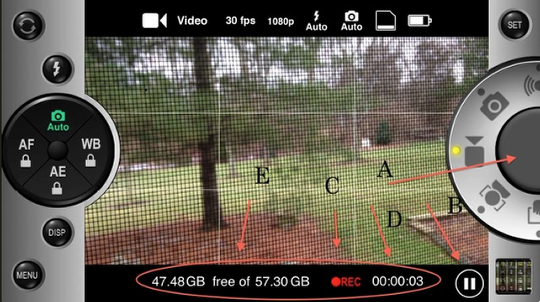
Once you’re under way with your video (A), ProCam then gives you a “Pause” button (B) as well as displays a “Rec” indicator (C) to let you know that your are recording. It also shows how much memory space you have available (E) and the length of your video (D). (Keeping track of memory space is important, as video will eat this up in a hurry!)
Step 4
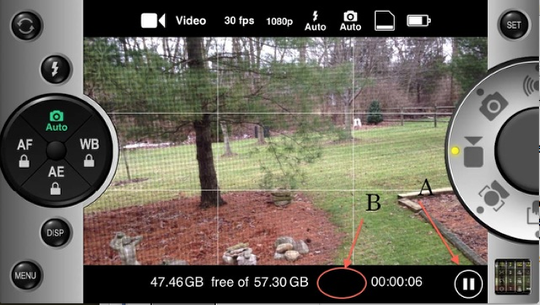
To activate “Pause”, click on the double-bar icon (A) in the right hand corner. You’ll note that the “Rec” indicator light will go out when you do this. Your screen will still be active as will the video camera function in the control dial.
Step 5
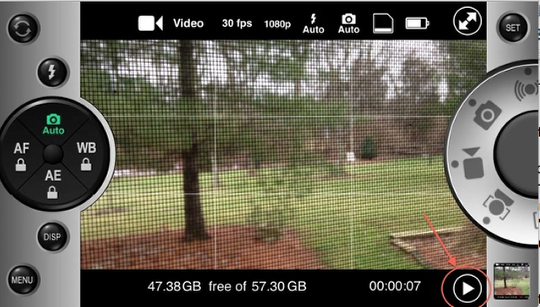
Clicking on the “Pause” icon also brings up an arrow icon in its place. Click on this to continue your video!
Step 6
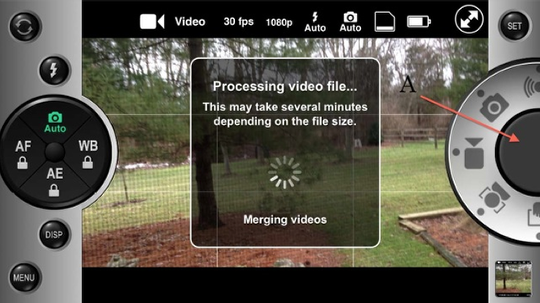
Here’s something to keep in mind about using “Pause” instead of just stopping the video. If you have used “Pause” sometime during your capture, when you do click on the shutter button to stop recording, ProCam will automatically merge all these clips. Not a big deal, but if you want to keep your clips separate to make your editing easier, don’t use “Pause”. Instead…make sure to click on the shutter button.
So there you have it…a “quickie” on how to use ProCam’s video function. Give it a whirl and see what you think!
Step 7
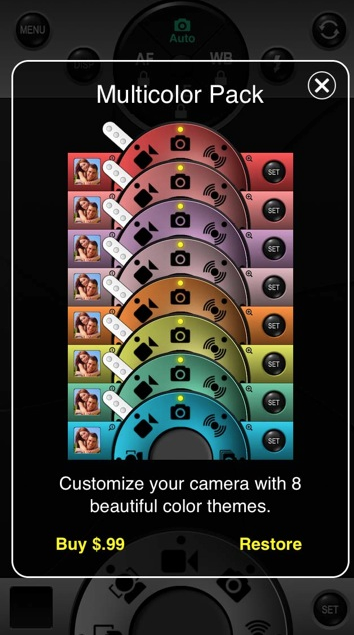
P.S.: Just as I was completing this tutorial, ProCam came out with an update…mostly bug fixes and the like. Something new of note is an in-app purchase of new camera themes to personalize your ProCam. Fun stuff!!


