
Mobile Photography – Tip Of The Day – Number 30
Welcome to another brand new section from your favourite mobile photography website and one of the most popular in the world. Today, we’re publishing our 30th Mobile Photography/Art Tip Of The Day to our brand new section of the site.
Every day we will publish a short quick tip to help you with your mobile photography, this may be related to editing your image, capturing your image, printing your image, all manner of things, across the complete photographic and art mobile genre – we’ll be featuring great mobile street photography tips, great blending tips, great cloning tips, we will cover it all from some of the greatest mobile photographers and artists in the world.
We’ll also have a widget in our right hand column, displaying the Tip of The Day every day, just click on that and you will be taken to our tip of the Day archive.
We are delighted to publish our thirtieth Tip Of The Day today with an excellent one from our newest staff member and tutorial writer, Jerry Jobe. We have published several of Jerry’s tutorials already and if you have missed those, please go here. Take it away Jerry (foreword by Joanne Carter)…
‘Here’s a tip I call “A little perspective”:
The brain, in processing input from the eyes, will make all kinds of correction on the fly. We can see into shadows while not having highlights blown out. We can straighten what we see in our heads, knowing that a line is vertical even though our head is tilted. And we can also correct perspective, knowing that a building is really not tilting away from us.
But when we look at a photo, all those problems that our eyes correct for are present. So we have apps that correct exposure, tilt and perspective. But it addition to fixing problems, those tools can also add these issues as an artistic decision. Today we’re going to force some perspective where none is present.
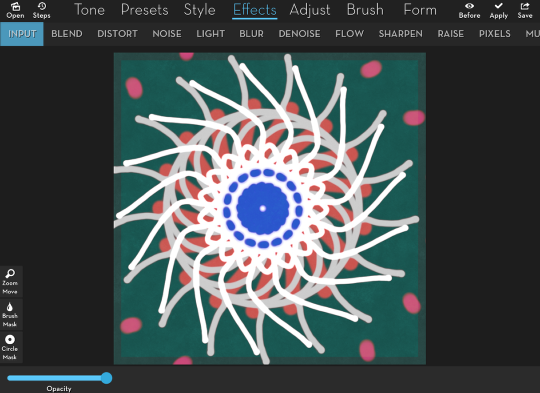
We start with a figure I created in iOrnament. I am going to use this to create a tiled floor that looks as though it stretches into the background. Since it was created with a black background, I brought it into iColorama to blend it with a green background; and since it was a light ornament, I used Lighten blend mode to drop out the black.
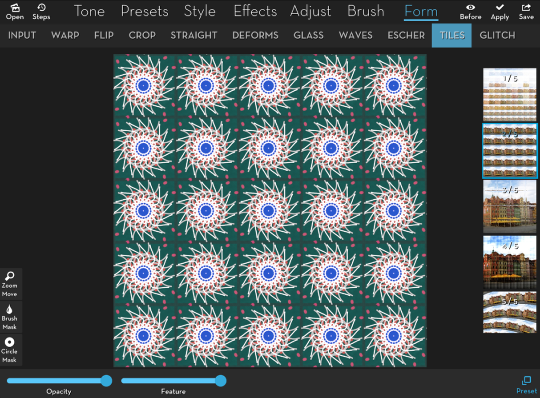
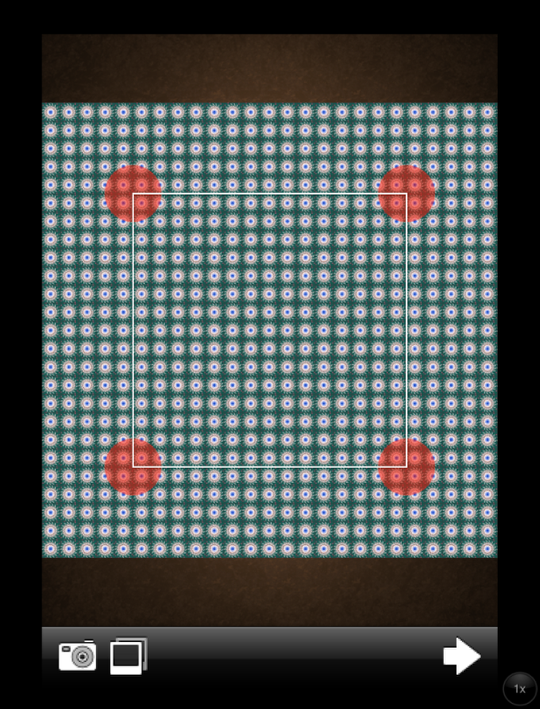
In order to create a tiled floor from this single tile, I use the Form>Tiles>2 preset, which defaults to a 5×5 tiling.
That’s not enough tiles for me, so I run the same preset again, making it 25×25.
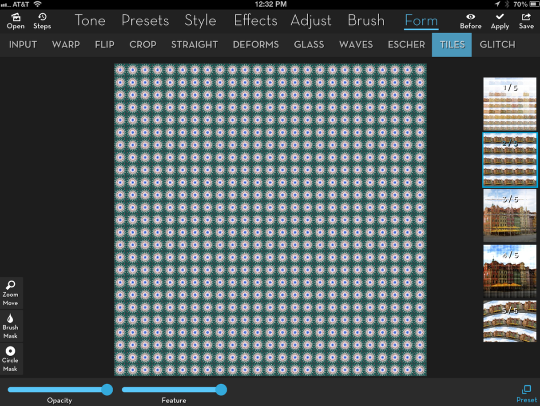
I save that, to use another app to introduce some perspective.
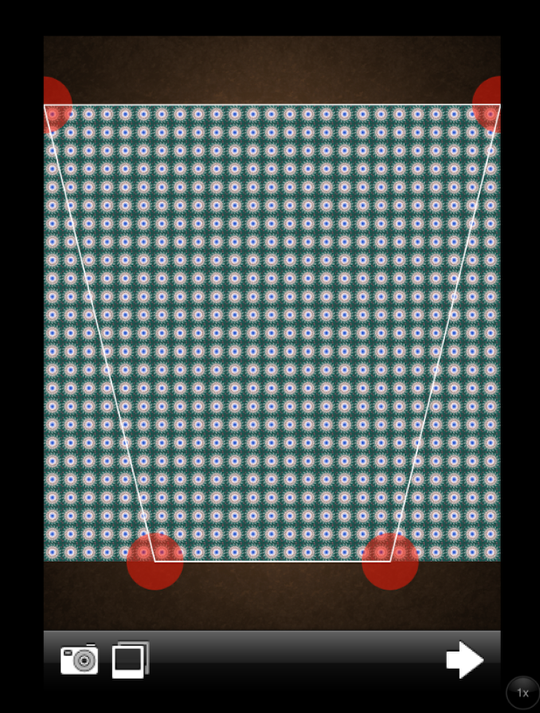
Below I’ve brought the tiles into FrontView, which is used to correct perspective. Normally you would use the lines on the interior box to line up with the verticals and horizontals in your photo, bringing a building to square. We’re going to do the opposite here, taking it out of square.
If you think of a floor going into the distance, the tiles closest are larger, while those farther away are smaller. That’s why I’ve formed this trapezoid with the larger end on top: you see fewer tiles up close than you do farther away. Because I want the perspective to be equal on both sides, I bring in each bottom corner six tiles from the edge.
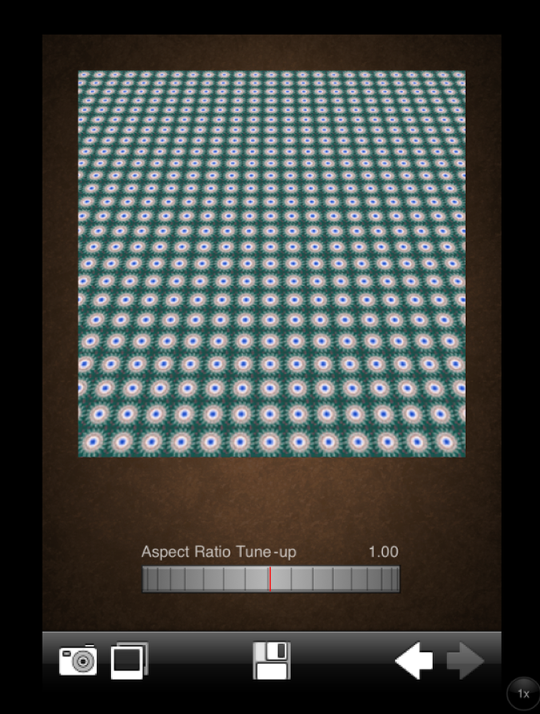
Tapping the right-facing arrow brings me to the aspect ratio screen. You’re beginning to see where I’m going with this; the floor is moving away from you.
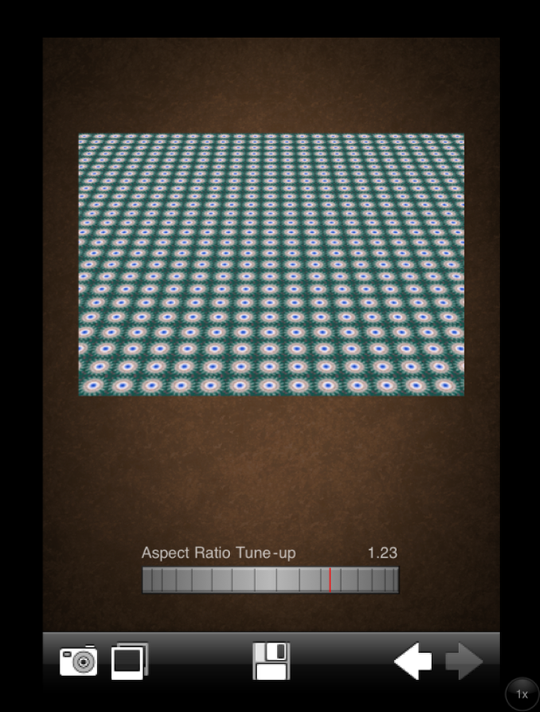
But the perspective can be forced farther if we squash the aspect ratio vertically. I move the aspect ratio dial to 1.23, and get the following result.
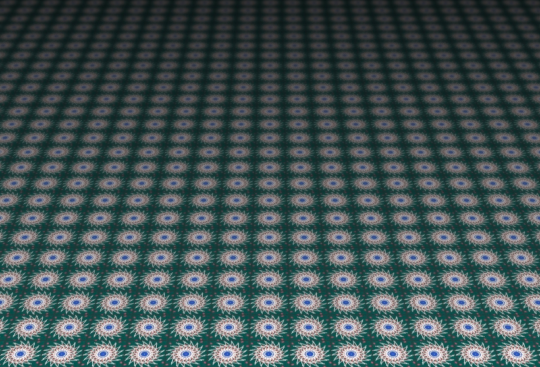
Now, what would make this more realistic? Maybe if we introduced some depth-of-field and lighting effects. If the tiles blurred and got darker as they faded away, that would be a help. I take the result into iColorama to add some blur and fading light.

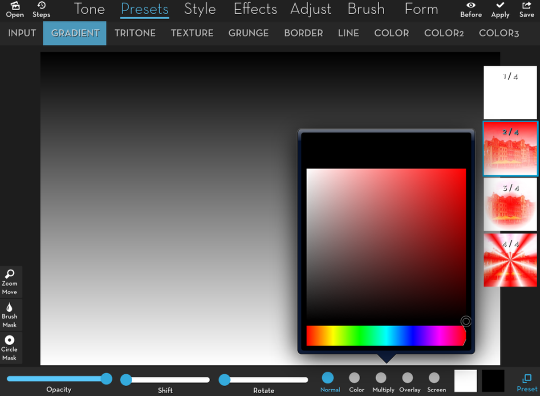
A top-to-bottom dark-to-light gradient will serve two purposes here: we can use it as a mask for the blur, so that there will be more blur as we get “farther away”, and we can also use the same gradient in multiply mode to darken the image as it gets “farther away”. So we use Presets>Gradient>2, and change the rightmost of the two swatches to black from the default red. I save the gradient – but I don’t hit Apply. You can save intermediary steps in iColorama without applying them, and in this case I want to go back to the original.
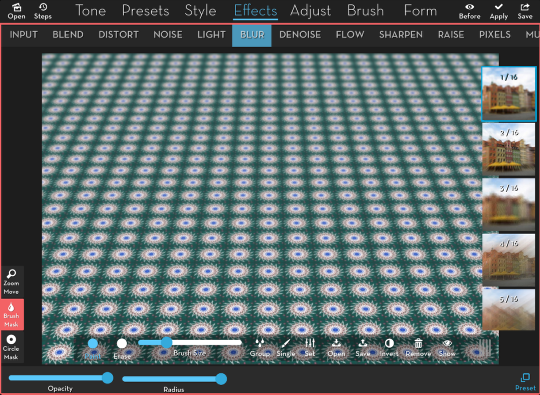
I now add Effects>Blur>1. It applies to the whole image, while I want it to fade to sharp at the bottom. So I tap the Brush Mask, then the Open icon in the Mask toolbar. I am going to choose the gradient I just saved as my mask.
Below you’ll see the result. The image gets more blur as it fades towards the top, or “farther away”. I Apply that change, then tap on the Remove icon in the Mask toolbar; I don’t want the Gradient mask to be applied to further changes.
Finally, I want to use the same saved gradient to darken the top of the image. I use Effects>Blend and tap the Image icon at the lower right to load the gradient from my Camera Roll. The default Preset, or Blend Mode, is Normal.
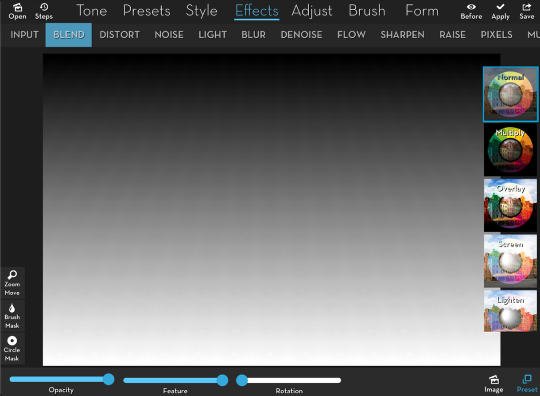
I change the Blend Mode to Multiply, and lower the opacity to an=bout 70%.

And here’s the result:
I hope this was helpful in adding a little perspective to your images!
Jerry Jobe
Never content with just scratching the surface of what an app can do, Jerry Jobe decided to pass on what he learned about imaging apps to others. He’s constantly trying to figure out just what tools other artists have used, and trying to incorporate them into his own work, in an attempt to find his style. He’s written tutorials on over 145 apps so far, which you can find (along with his Song of the Day entries) at http://enthusiasmnoted.wordpress.com/ He lives near Atlanta, Georgia, where he also finds a creative outlet in acting and directing in community theater.

One Comment
Carolyn Hall Young
Another great one, Jerry! Thanks!