
iOS Photography Tutorial – Painted Camera – by Jerry Jobe
We are delighted to publish our latest iOS Photography Tutorial by Jerry Jobe. This week Jerry puts Painted Camera through it’s paces, with some incredible results. Don’t miss this, (over to you Jerry).
Painted camera retails for $1.99/£1.49 and you can download it here.
“Last August I covered Glaze, an editing app that turns your photos into painted images. You import a picture into Glaze, choose one of the presets and your image is reconstructed with paint strokes. The depth of the strokes is what set Glaze apart.
How cool would it be to be able to see the ending effect as you’re snapping the photo? Pretty cool, as it turns out. The 11ers have come up with “instant Glaze” in the form of Painted Camera, released at the end of last month to the App Store after months of anticipation”.
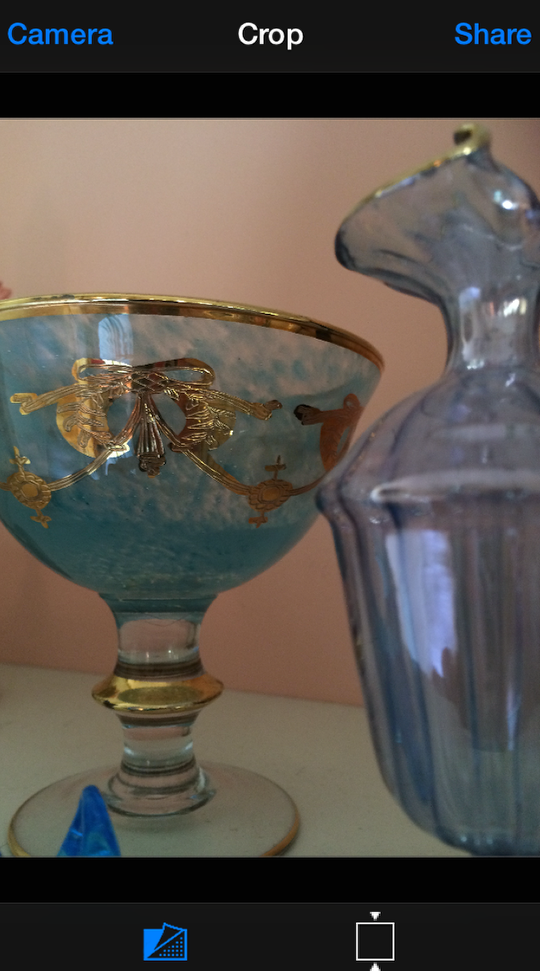
Painted Camera is a very simple app to operate, so there won’t be much in the way of teaching necessary. Instead, this week’s post will be full of examples of the output, to let you know whether you’ll want to add the app to your iPhone. The screenshot above is the Information screen; this is all you get, since there are no help screens or app settings available.
The controls are simple. Across the top of the screen is the I for Information icon; the Flash icon for controlling the flash, and the Camera icon for switching between the rear camera (shown here) or the front-facing “selfie” camera. At the bottom are the shutter button and a switch for changing from still to video capture.
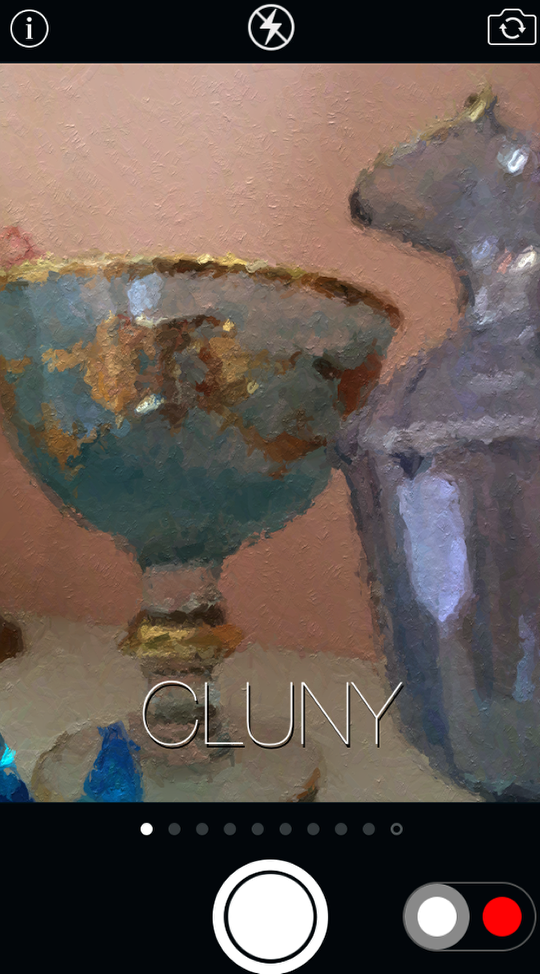
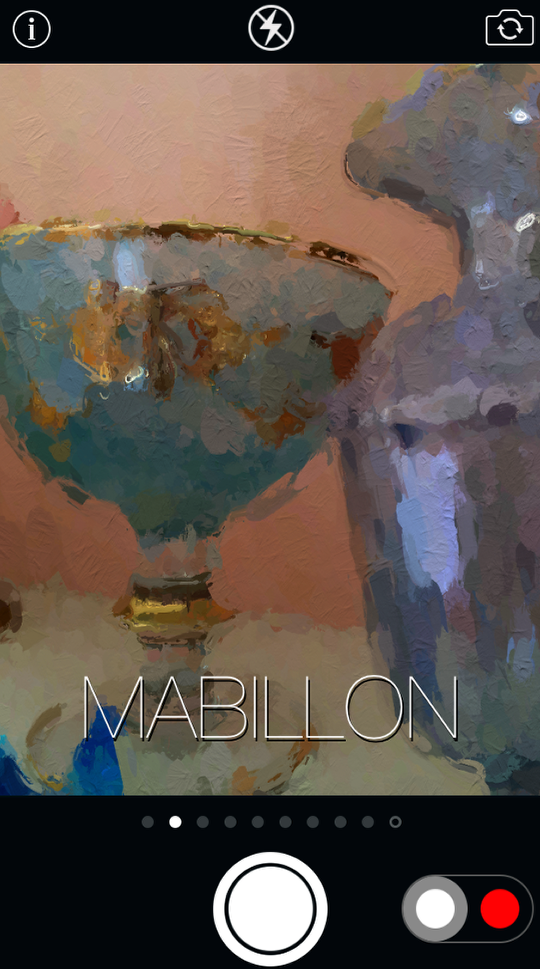
There are nine different presets for the type of “painting” done to your images, each named for a different stop on the Paris Metro. There is also a tenth random setting. In order to switch between the different presets, you just swipe horizontally on the names within the viewfinder. Below, I have changed from Cluny to Mabillon.
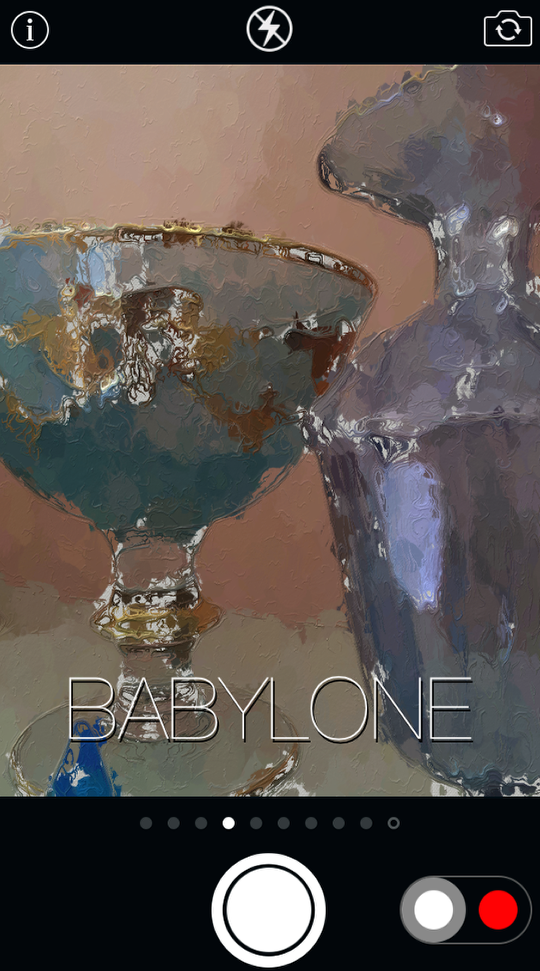
From Mabillon, we move on to Sevres and Babylone. Notice how, in Babylone, the “paint strokes” do not cover the entire “canvas”.
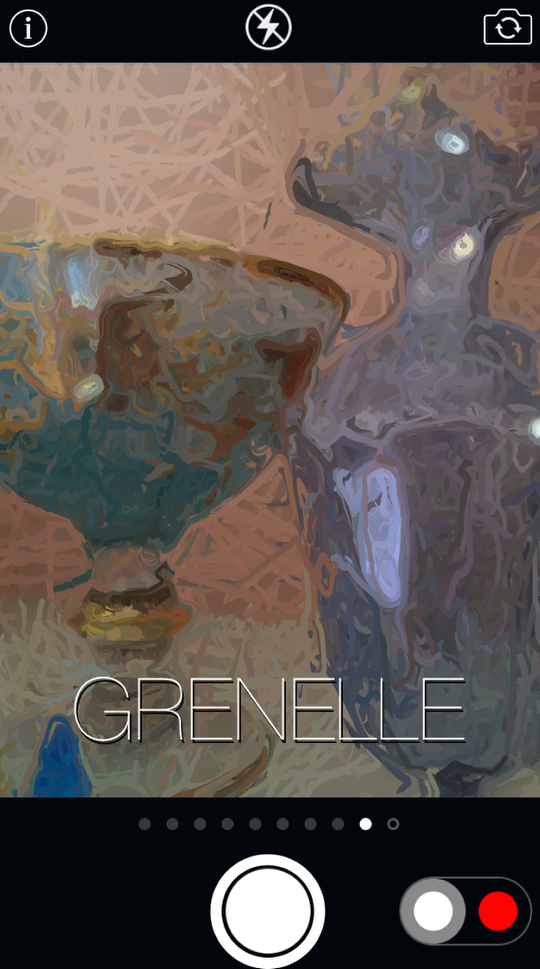
There is significant difference between the styles, as we move on to Duroc, Segur, Lamotte, Piquet and finally Grenelle.
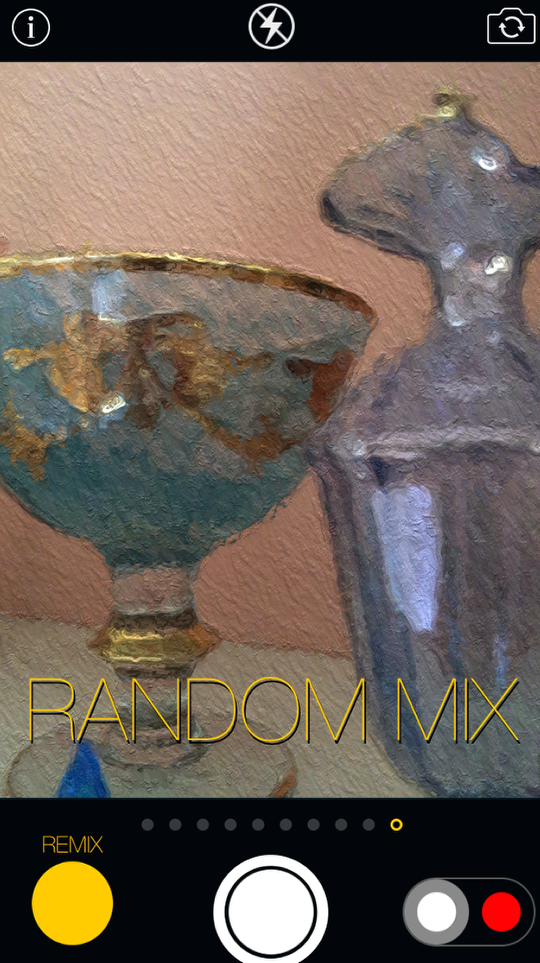
The final preset, all the way to the right, is Random Mix. This brings us to the first drawback of Painted Camera. Unlike Glaze, these random settings cannot be saved. So when I find a setting I like, such as the one shown below, I do not want to hit the Remix button to get another Random setting. I may like it, or I may hate it and hit the Remix button again – but I cannot return to a setting I like.
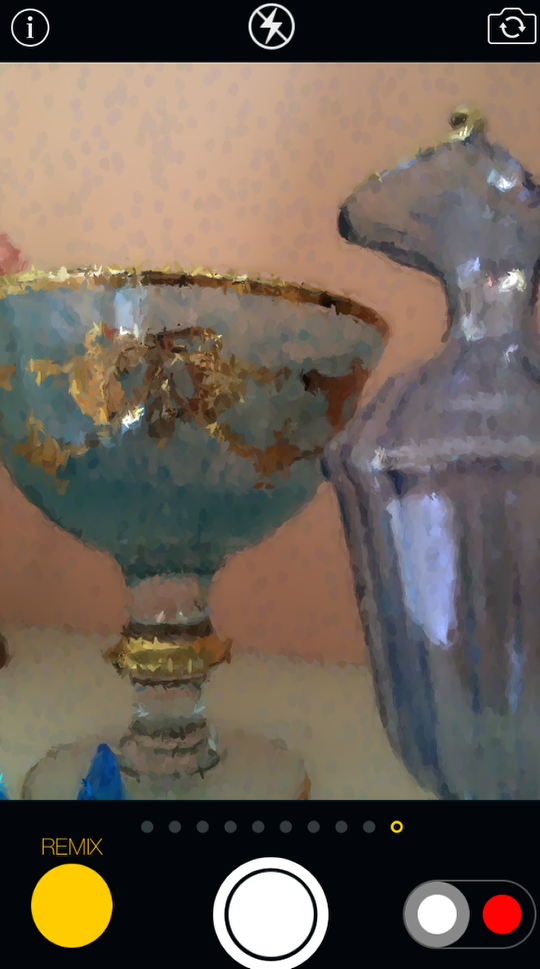
But, just for you, dear reader, I made the sacrifice and pressed the Remix button. The result is shown below. Nice, but I liked the setting I had more.
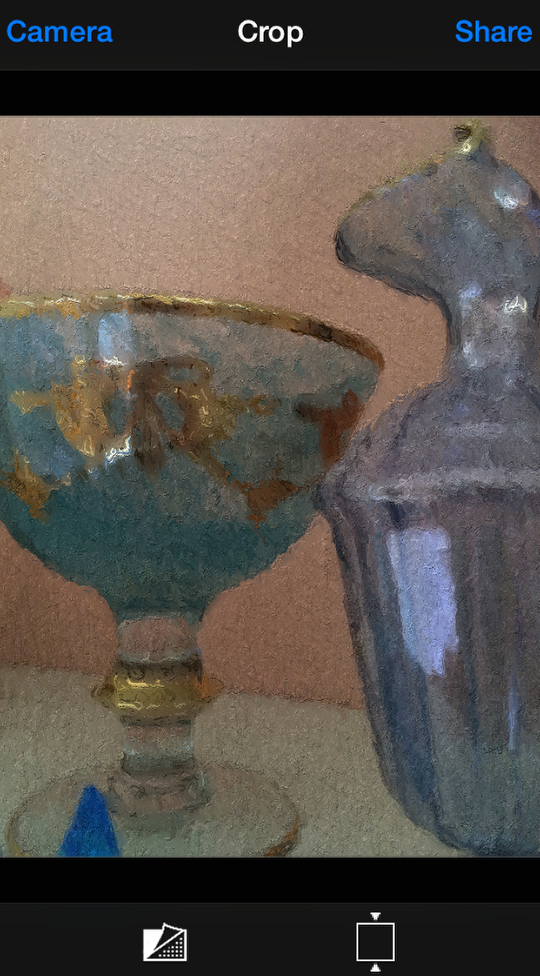
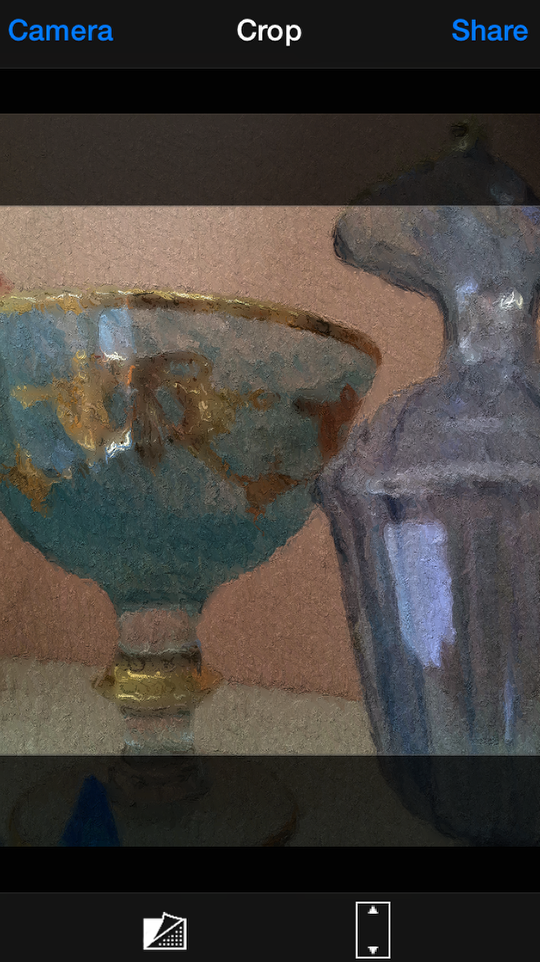
Below I tapped the Remix button once again and found a setting I like even less. Nevertheless, I tapped the Shutter button to take the picture. The painted version of the image is automatically saved to your Camera Roll, and you get a message telling you it has saved which fades out. You are now in Crop mode (see how the word Crop is white at the top). At this point you can use the crop button at the bottom right to crop the image into a square. One other thing you can do is to choose to view the unpainted version of the image by tapping the “pullback” icon at the lower left.
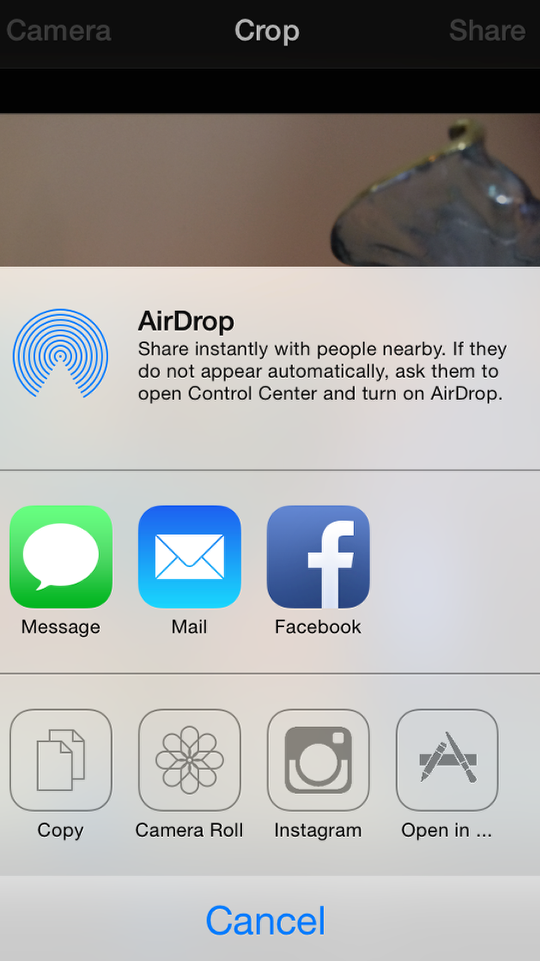
When you tap the pullback icon, the original is displayed. You can then choose to save the original, so that you can blend it back with the painted version later. You save it by tapping the word Share at the upper right.
The Share options are the standard iOS 7 dialog box options.
If you wish to crop, tapping the box in the lower right gives you a square overlay that you can move around your image. This will not be saved automatically, and you would use the Share button to save it manually.
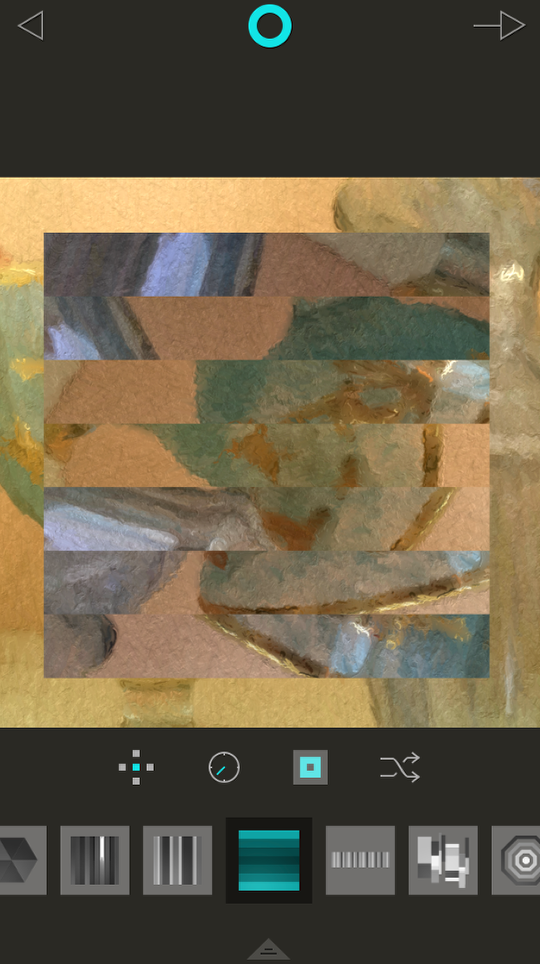
Below, rather than saving it, I instructed Painted Camera to open the cropped version in Fragment. Pretty cool.
That’s pretty much it for operation of Painted Camera. Oh, yes – you can also take videos, if you like (link).
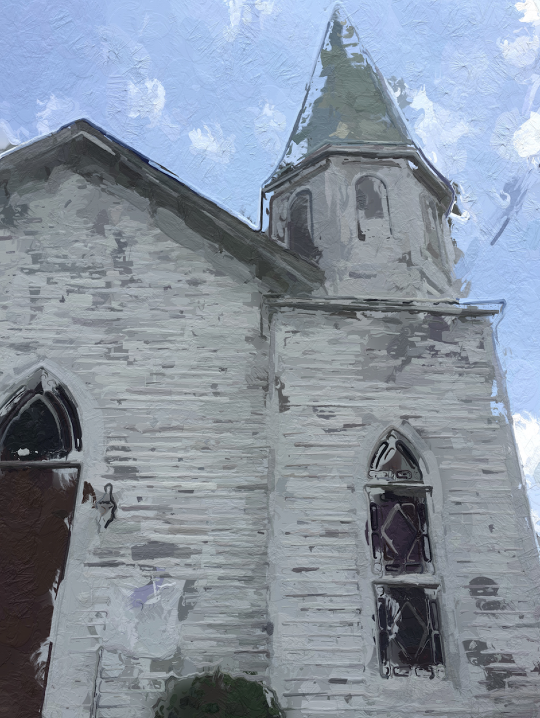
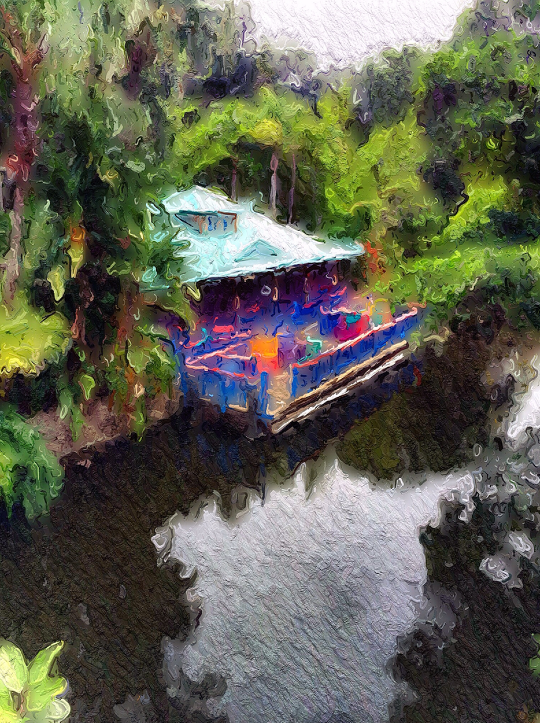
Let’s finish up by looking at some examples. We’ll start out with four separate pictures of the same subject: a nice white frame church. Unfortunately, I don’t have the expertise to tell, for absolute certain, which preset was used in each. I think the first is Babylone.
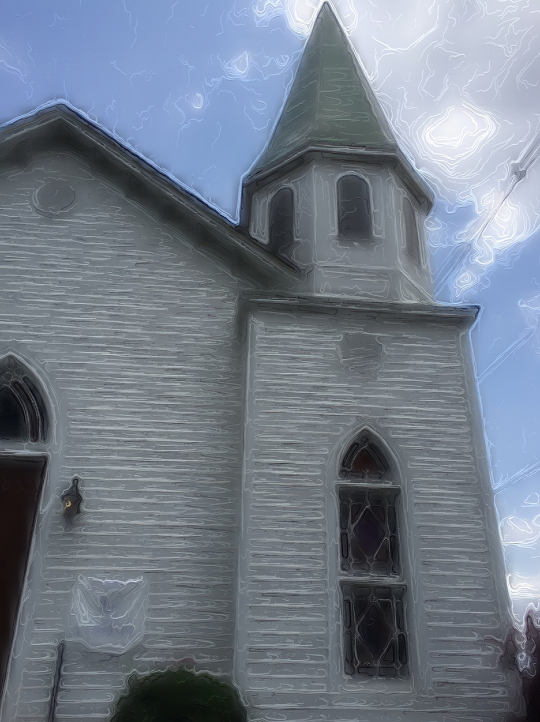
And the next certainly looks like Duroc.
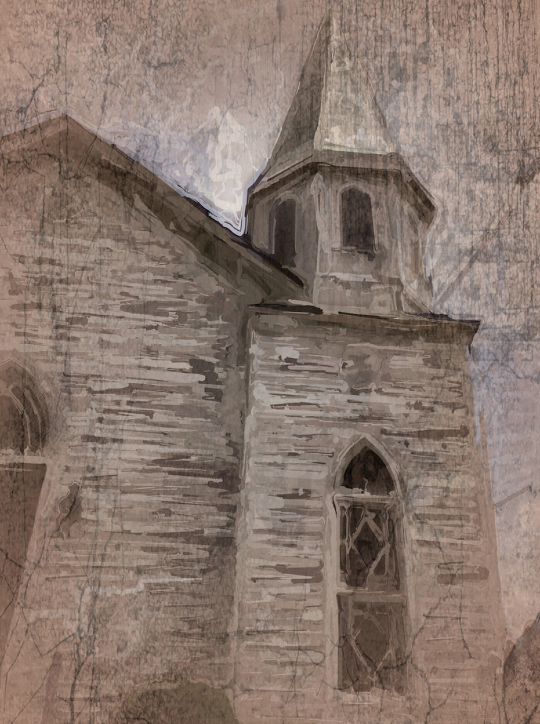
I’m almost certain the next was Lamotte.

But I finally chose the Random Mix I liked so much (that is now gone from me). I then took it through Vintage Scene. As always, other apps can be used to enhance your paintings.
The next image I merged back with the original image to lessen the effect a little. Then I took it through Stackables to tune it up and grunge it up a little.
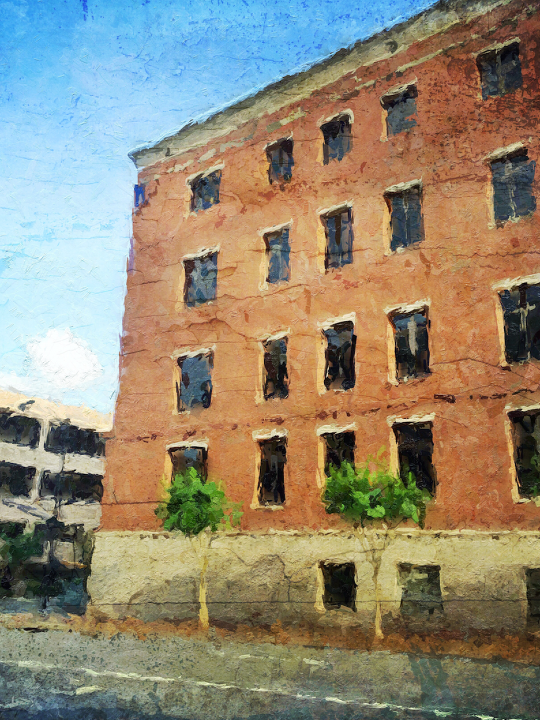
The next six images are shown here just as they came out of Painted Camera. In my opinion, such a faithful rendition of the color and contrast of the original scene does not always serve a painting well. A set of controls for Brightness, Contrast and Saturation of the painted image would be a worthy addition to this app.
Can you guess where I was when I took the image below? If you live in the southern US, you should have a good guess.

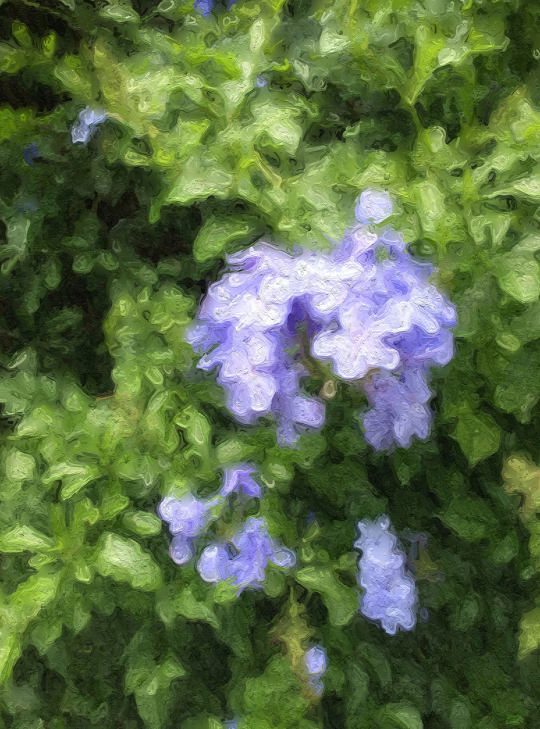
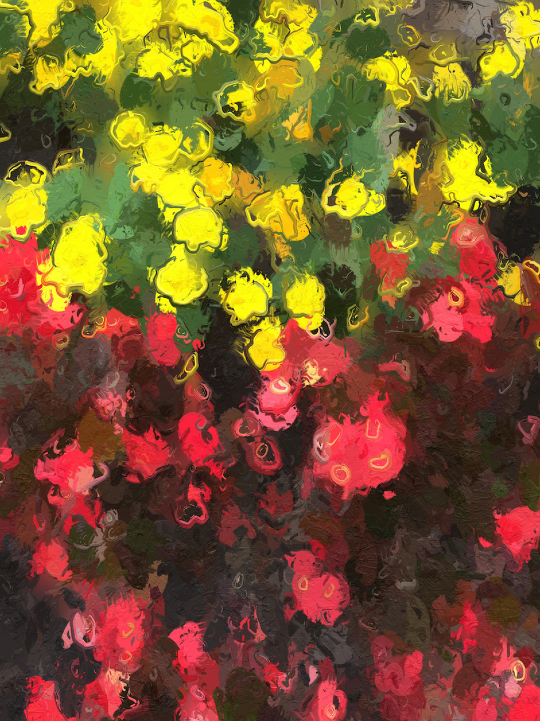
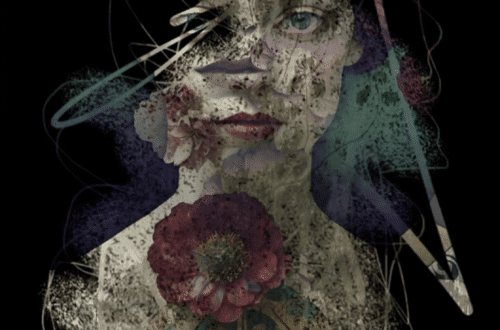
Flowers are always a good subject for Painted Camera.
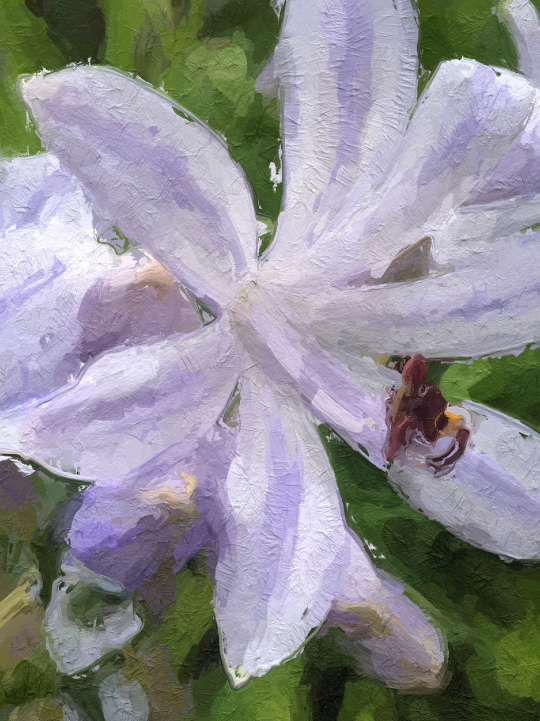
Always.
The flowers below could use a punch up.
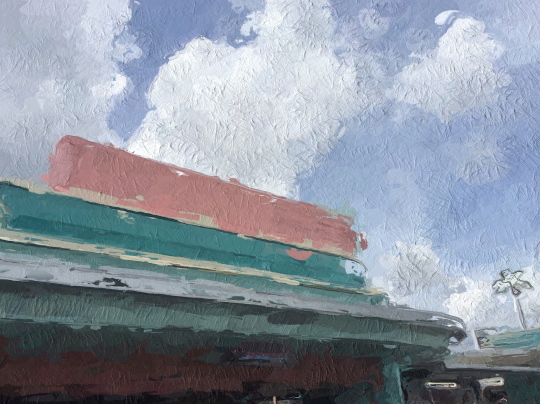
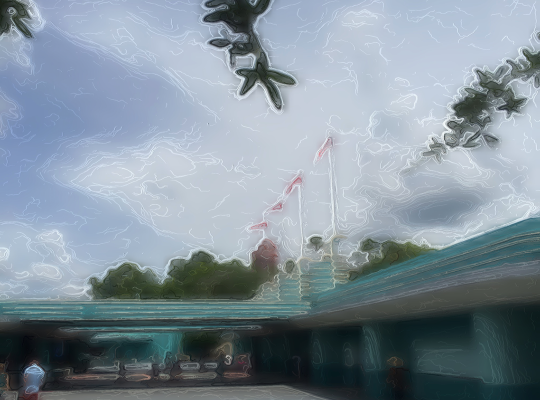
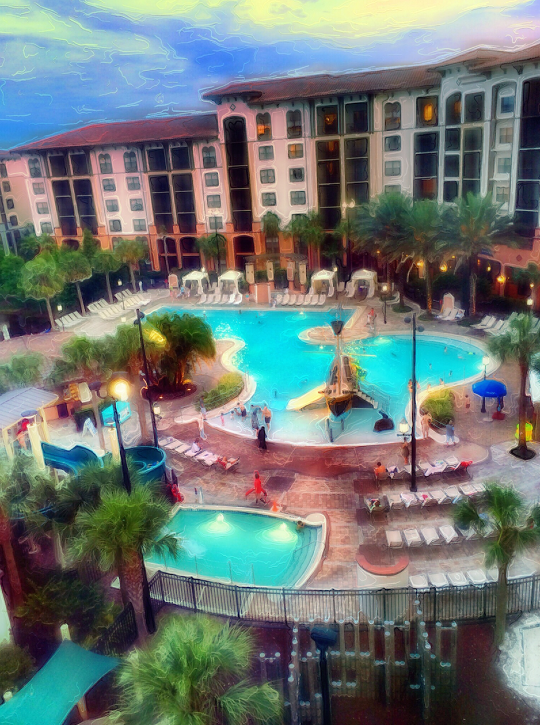
Certain of the presets eliminate a lot of detail. The signs on the buildings and the distant palm tree are almost completely obscured in this shot from Disney’s Hollywood Studios.
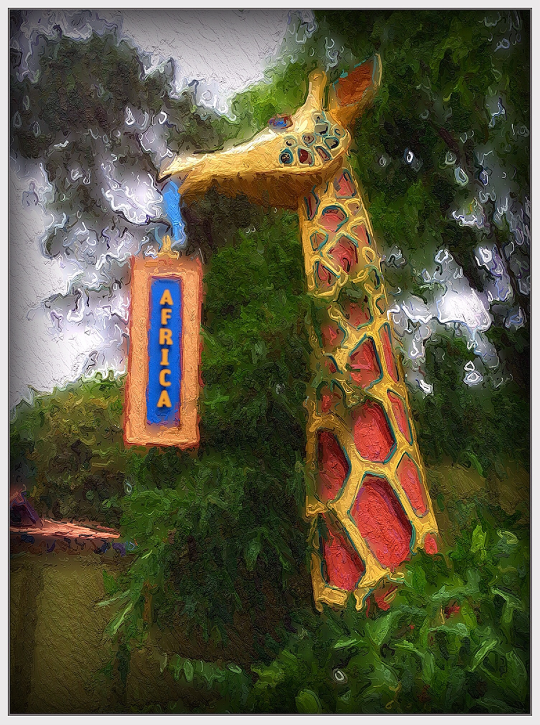
Details are also smoothed over in this shot at the same place.
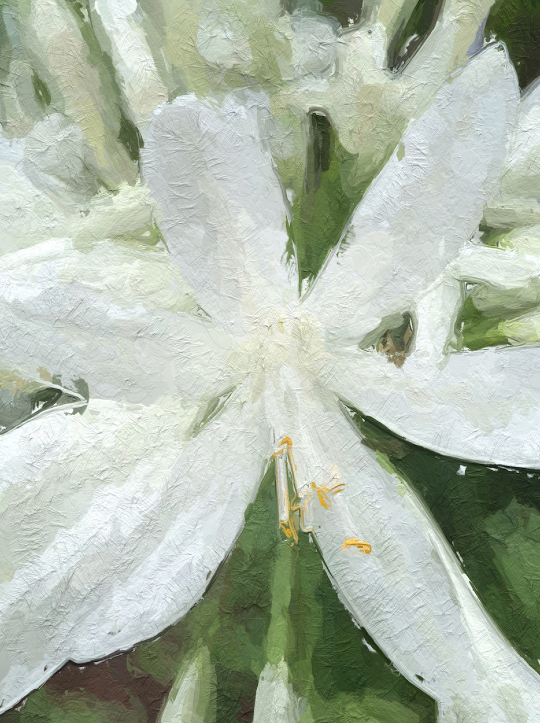
Sometimes, passing the image through Snapseed afterwards will let you give it that zing you want. The flowers below had contrast and saturation boosted.
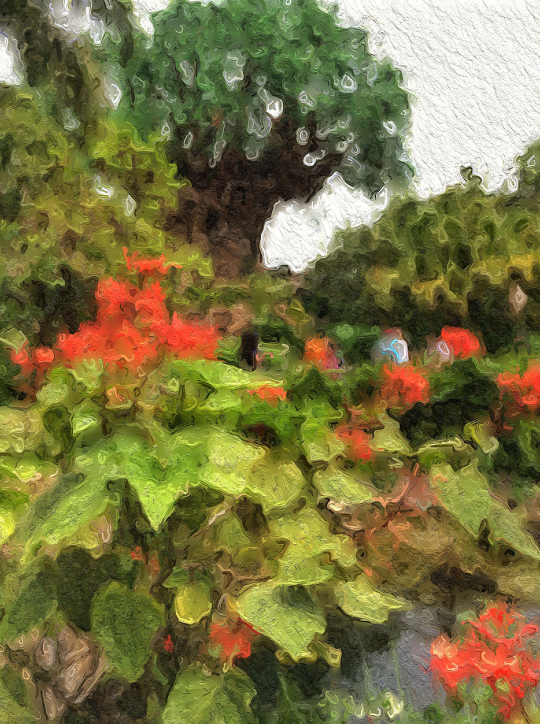
The same was done with the shot below from Disney’s Animal Kingdom. In addition, a trace of sharpness helps bring out the brush strokes.
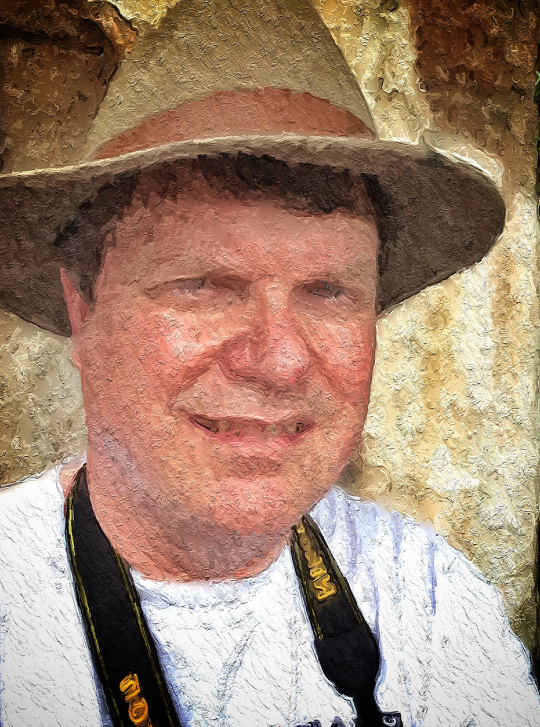
Using Snapseed, I warmed up this selfie and added a bit of a vignette.
Same issues – brightness, contrast and saturation – were fixed in this image after the fact.
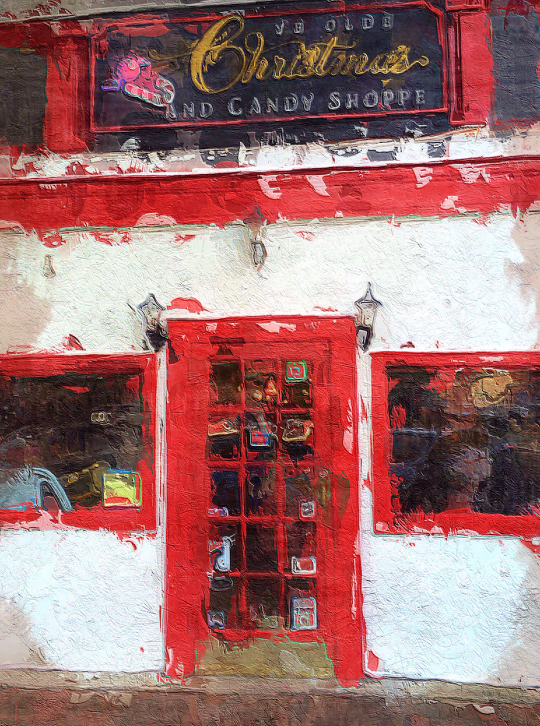
The final three images were touched up using the original photo that was captured at the same time. In the following image of a shop, the paint strokes made the sign almost illegible, so a quick trip into iColorama to blend the painted and original photo made certain we could read every word. A painted, low-opacity border was added as well.
The smooth look of the Segur setting loses a lot of detail, which can be regained by doing a blend in Image Blender, iColorama, Union or a number of other apps. A dialed-back Tone Lab 4 in iColorama made the colors pop.
The final image was also improved in iColorama by masking in the original sign rather than blending. The shadow-box treatment was done with four different applications of Border in iColorama.
All in all, I had a lot of fun with Painted Camera. It’s simple to use, which is imperative when you’re using an app as a camera. (A tip: the real-time “painting” is processor-intensive, so my iPhone 5S became noticeably warmer and the battery drained more quickly if I left the app open as I was walking around taking photos.) A little more control to the basics of the photo (brightness, contrast, saturation), as well as a way to save some of the Random looks, would make this a must-have app. Enjoy!
Jerry Jobe
Never content with just scratching the surface of what an app can do, Jerry Jobe decided to pass on what he learned about imaging apps to others. He’s constantly trying to figure out just what tools other artists have used, and trying to incorporate them into his own work, in an attempt to find his style. He’s written tutorials on over 145 apps so far, which you can find (along with his Song of the Day entries) at http://enthusiasmnoted.wordpress.com/ He lives near Atlanta, Georgia, where he also finds a creative outlet in acting and directing in community theater.
3 Comments
Egmont van Dyck
Thank you for a wonderful tutorial on Painted Camera. I agree that some additional controls would be great.
I have been experimenting with Painted Camera in video portion of it with the iPhone 4S, which runs at about 2 frames a second and when moving the camera very slow to compensate for the 2 fps rate, one gets better base results. In another program the film clip is speeded up to 2X, allowing for a smoother transition from image to image.
All this takes is enormous processing power and maybe developing an application like Painted Camera to be able to import a video clip and then convert it to a painting is impossible. It would be great though to be able to do something like this. I’m just dreaming . . .
Carolyn Hall Young
This is a terrific tutorial of an intriguing app! Thank you!
Brynze
So curious to know what one does with the artwork they create on their phones (photos, drawings, etc). Wouldn’t the quality still be too low in comparison to the real commercial photography world to even compete, let alone print beyond say an 8×10 size or so?? I was just viewing some amazing pieces of artwork that resembled Dali’s surrealist paintings yet they we’re all created thru apps on ipad and iphone? But again I’m just wondering, would they even be able to market such pieces and if so, how…?