
Mobile Photography App Tutorial – Oggl – A Love/Hate Relationship – TheAppWhisperer
Back in November of 2012 I wrote my first article on iPhoneography apps. It was an attempt to cover Hipstamatic. I chose Hipstamatic because the app sparked my interest in iPhone photography. The fact that I was getting wonderful results, blindly, was fascinating. You couldn’t see, through the viewfinder, what the resulting image would look like. I found myself taking many photos just to see what they would look like.
That is both a blessing and a curse of Hipstamatic. It was terrific for me, who was just starting out and had a number of friends asking how I got those results. For those who were more studied in their approach (as I have now become), it is frustrating. Many people all over the world asked Hipstamatic to allow them to choose the filter afterwards. As it turns out, that capability was never (and most likely, will never be) added to Hipstamatic. Instead, another app was created to allow for post-capture addition of Hipstamatic lenses and films – Oggl.
The trouble is that Hipstamatic wasn’t content to leave it at just making the filters a post-processing alternative. They decided to create a new social photograph network like Instagram at the same time, and also improve their revenue stream by eliminating free “Hipstapaks” from the Hipstamatic app and charging a subscription for Oggl. New monthly Hipstapaks are free under the subscription in Oggl, but cost a dollar in Hipstamatic. On the other hand, you can’t buy them in Hipstamatic and use them in Oggl without paying for the subscription. So in order to get the full benefit in both apps, you have to pay twice – a dollar a month in Hipstamatic and a ten-dollar yearly subscription in Oggl. Definitely not cool.
And yet I pay for it (at the moment). Why? Because I still like the look of my images processed through those lenses and films. Because I still get a little bit of the “ooh, look at that!” feeling when I take shots in Hipstamatic or process them in Oggl. Because I hold out a slim hope that they will come to their senses and stop gouging their customers.
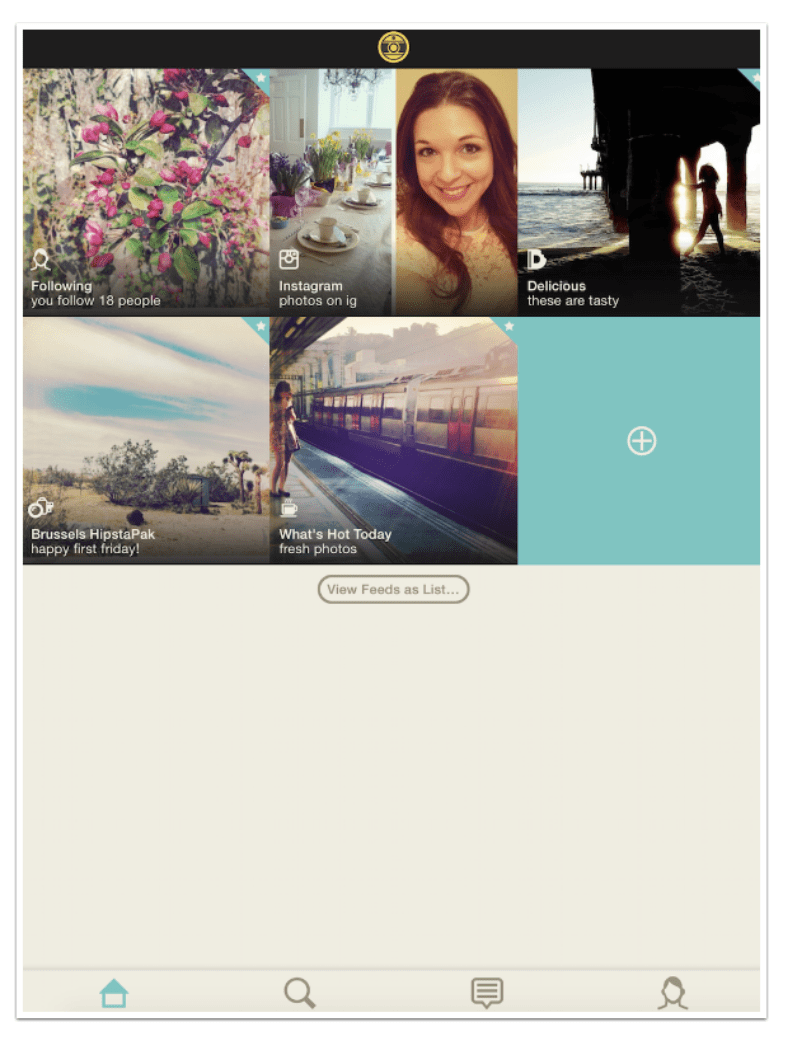
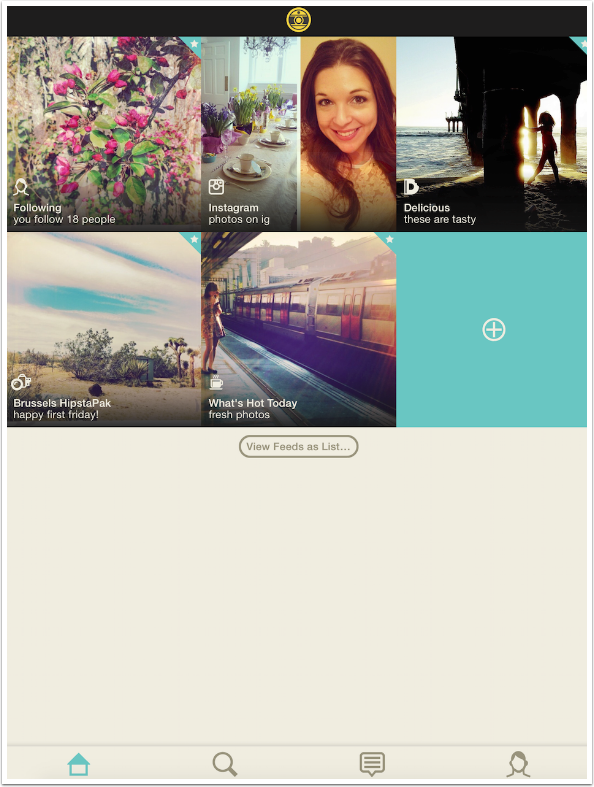
Let’s take a look at the somewhat convoluted interface of Oggl. The first thing you’ll see is the Home page. The Home page plays up the “social networking” portion of the app, with “feeds” of the people you follow as well as your Instagram feed and various promotional feeds.
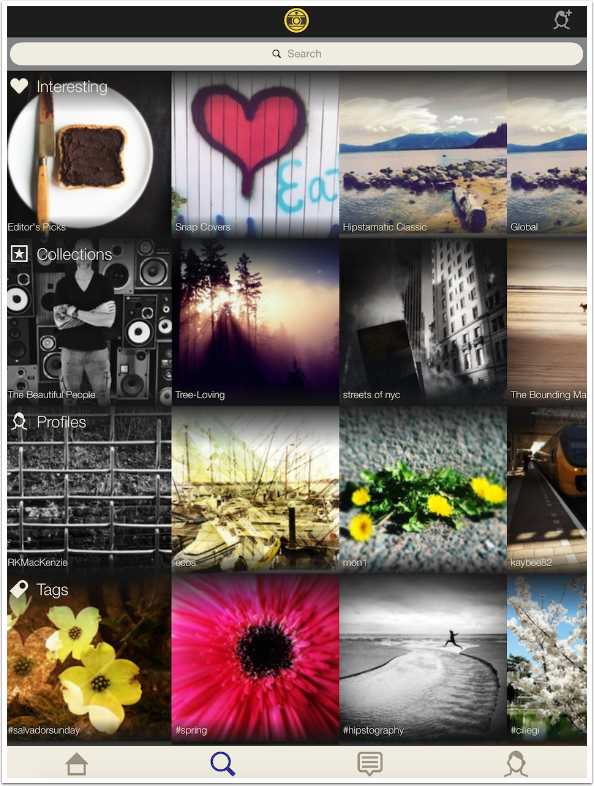
Moving across the icons at the bottom of the screen, the next stop is search. This allows you to search for profiles, tags (entered in captioning process), locations and categories.
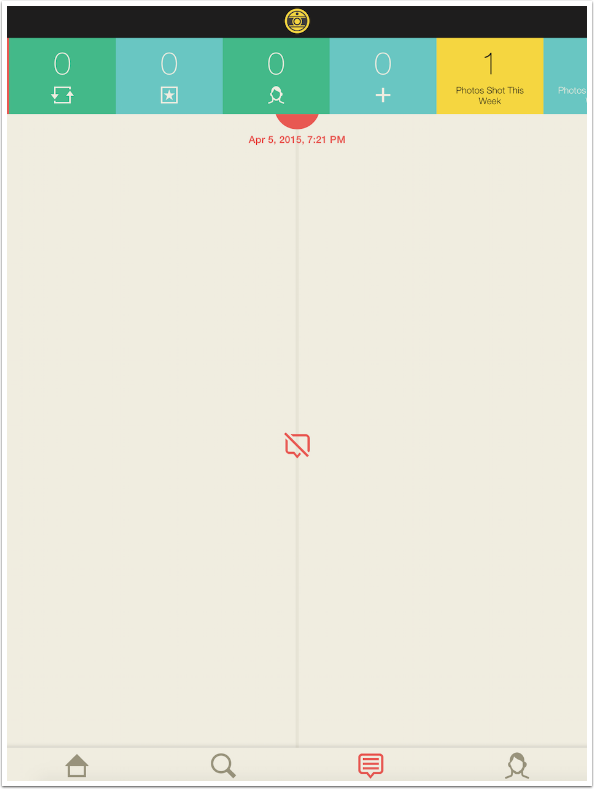
The next screen, I am guessing, is to keep track of your activity and the accolades your images have received. The reason I have to guess is that, like Hipstamatic, Oggl has no help available.
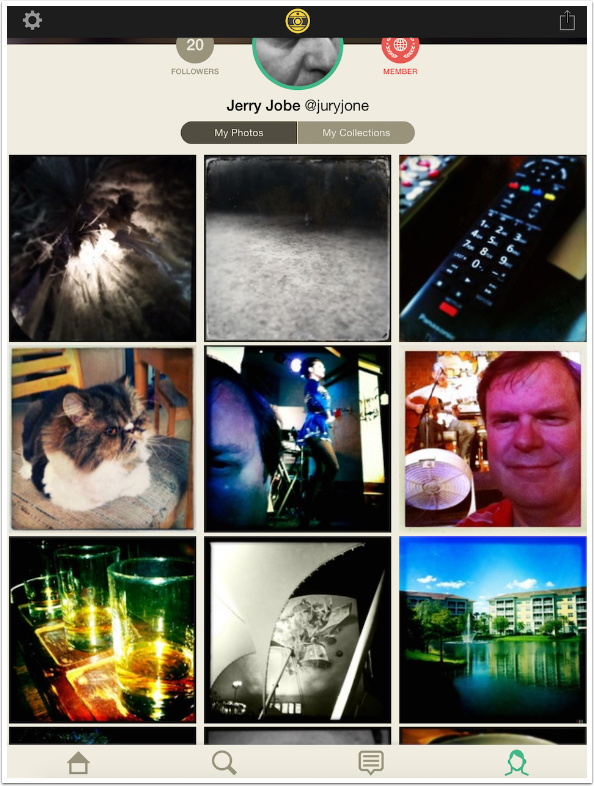
The last icon on the bottom is for your profile. I see at the top that I have 20 followers and that I’m currently a member (paid up on subscription). Then I see the photos I’ve already posted. By tapping on them I am given the opportunity to group them into Collections, or albums.
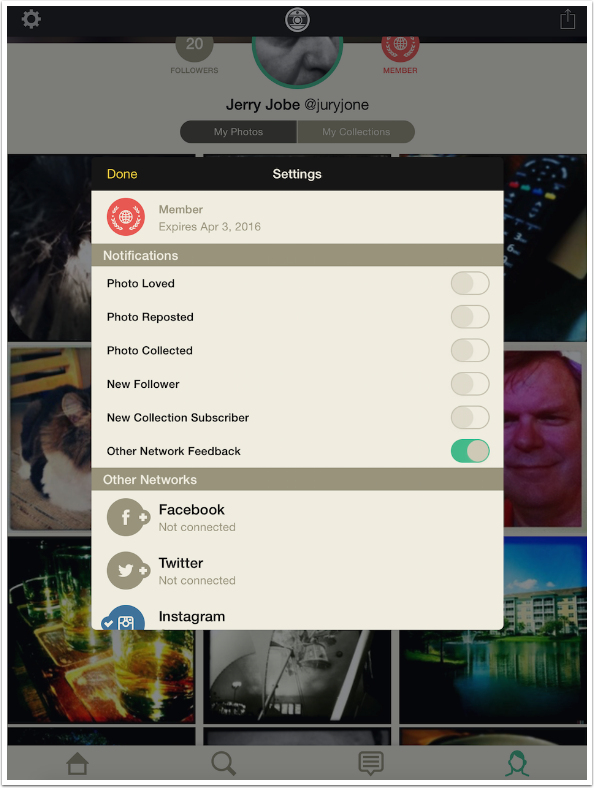
The Gear icon at the top left of the Profile screen takes you to the Settings screen. You can set notifications and connect to other social networks. What it doesn’t give you, as I’ve said, is any kind of help.
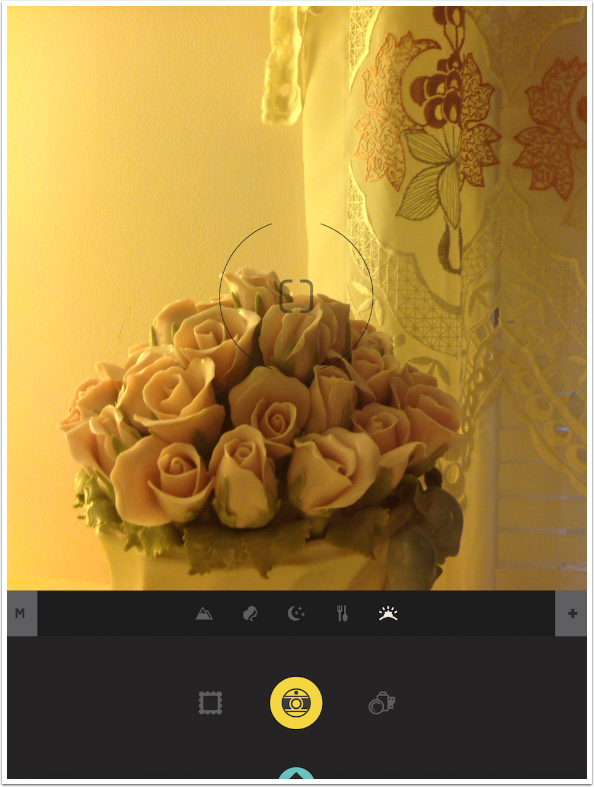
Tapping the yellow and black icon at the top center will take you into camera mode. You can capture your image directly in Oggl, using the lenses and films available. You will initially see a representation of the scene with the applied lens and film, but that will fade to allow for proper composition and focus setting. Just as with Hipstamatic, tapping on the viewfinder will reset the focus. Unlike Hipstamatic, however, a tap on the viewfinder will also allow you to access the front-facing camera for all your Hipsta-selfies.
The yellow icon becomes your shutter release. On the left side, the frame icon allows you to load an image that was already shot. On the right, you can see the lens and film options. In the bar between the shutter release and the viewfinder are several pre-packaged “favorites”, and there are also two icons with gray backgrounds: on the left (M), an icon to manually choose the lens and film; on the right (+) an option to create your own favorite.
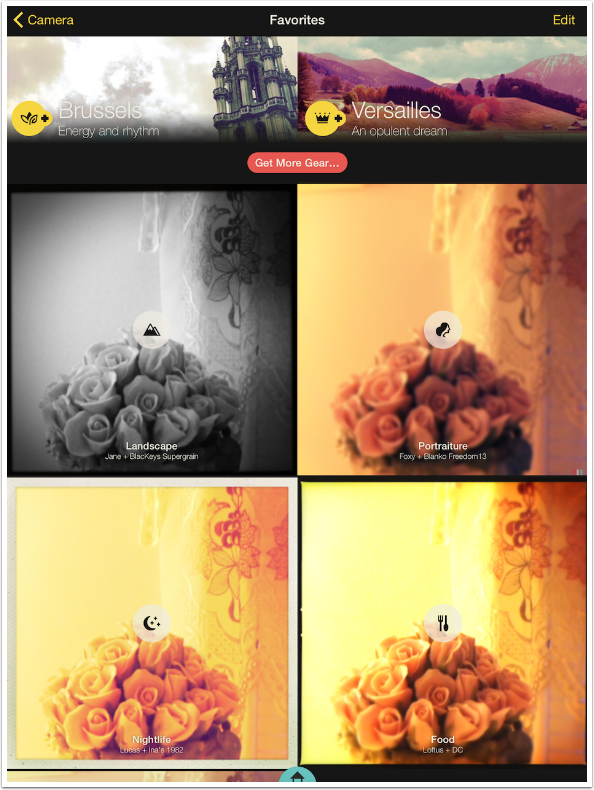
Choosing the lens and film option brings you to the following screen, which suggests some recent Hipstapaks and shows you the contents of the viewfinder with the Favorite lens and film combinations. You’ll see a “Get More Gear” button that allows you to import all the lenses and films you’ve already bought for Hipstamatic, including those (like the Nike pak) that are no longer available. At the top right is an Edit button, which allows you to delete Favorites you no longer need. At the lower right you will see the thin black edge of a box, which resides at the end of your list of favorites, that allows you to add a new favorite.
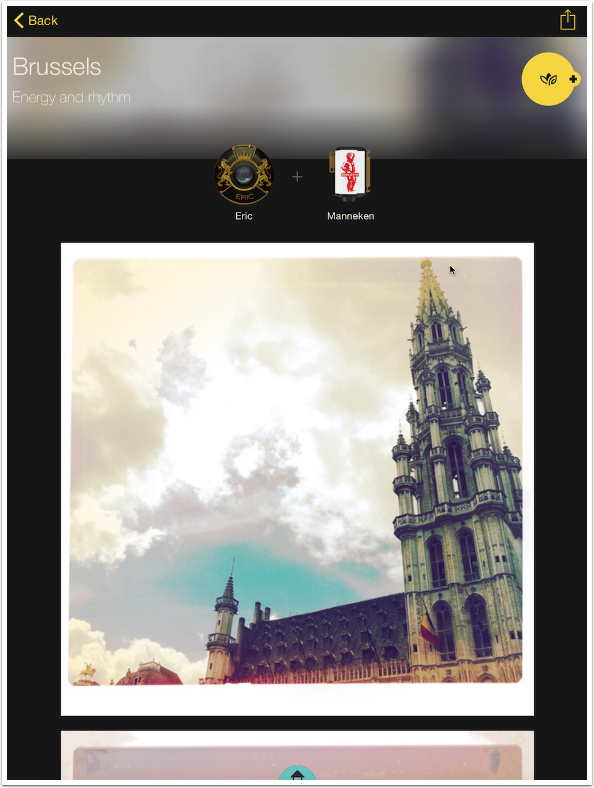
Tapping one of the boxes for the most recent Hipstapaks brings up a representation of the lens and film available in the pak. Brussels is shown below. The yellow button at the top right allows you to download that pak.
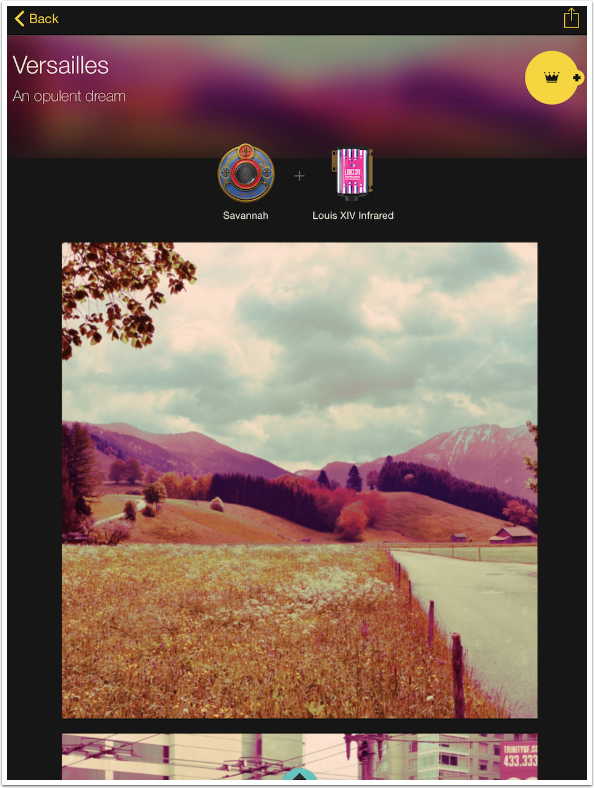
Here’s the other pak advertised, Versailles. It has the Savannah lens and the Louis XIV Infrared film.
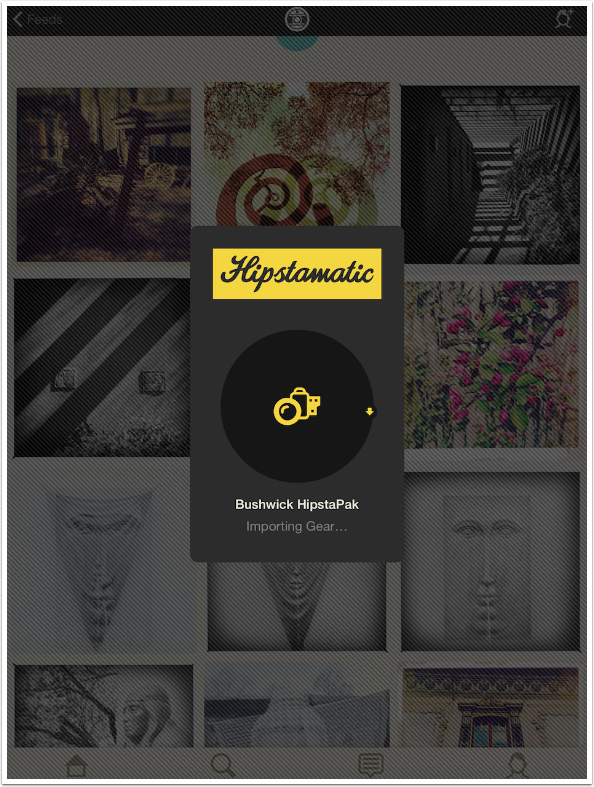
Tapping the “Get More Gear” button presents another screen that allows you to Import all the Hipstapaks from Hipstamatic. A pop-up shows the current status of the import.
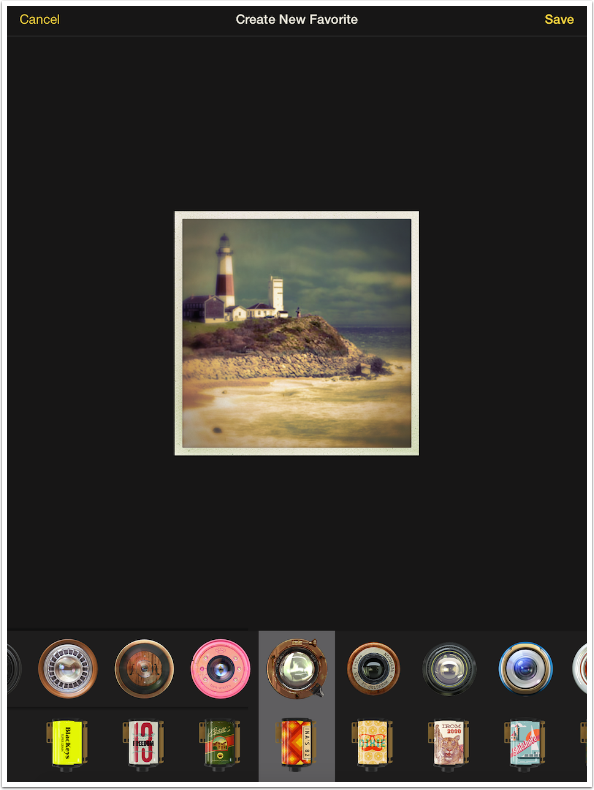
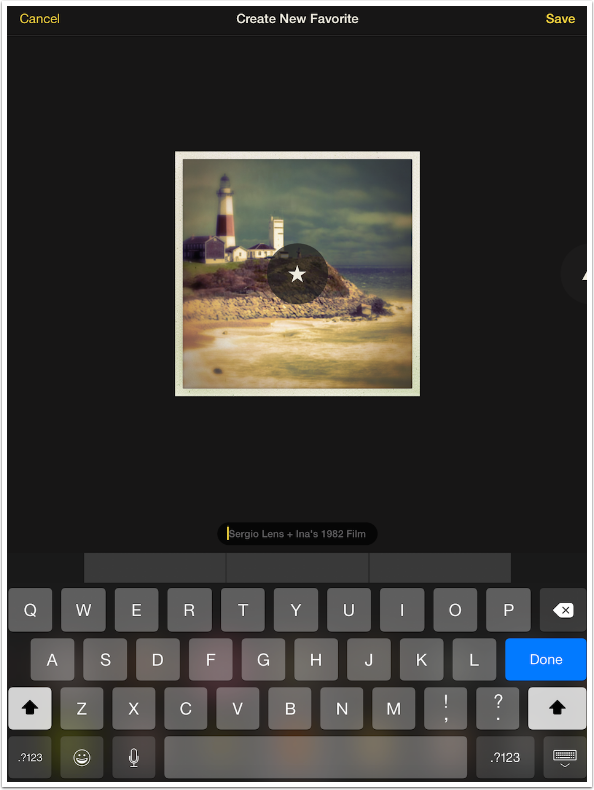
If you choose to create a favorite, a screen appears with all your lenses and films, horizontally scrollable, at the bottom. The lens and film you select are represented in the canned image of a lighthouse shown here.
When you find the correct combination and tap Save at the upper right, a keyboard appears to let you name your new favorite.
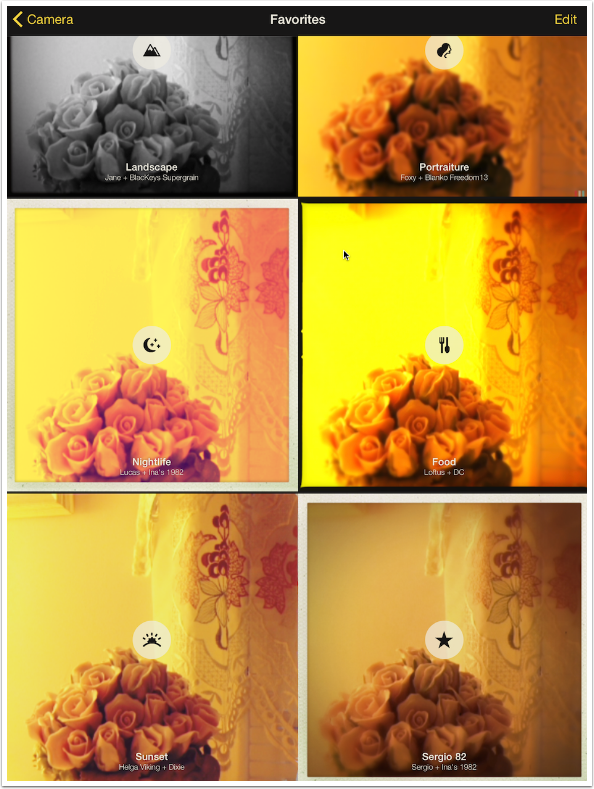
That new favorite (Sergio 82 in my case) is added to the end of your favorites list. These favorites can be rearranged by holding and dragging the icons. Unfortunately, the same cannot be said of the lenses and films. I have about 50 lenses and over 50 films, and while I can change the order in Hipstamatic to make them easier to find, I cannot do that in Oggl.
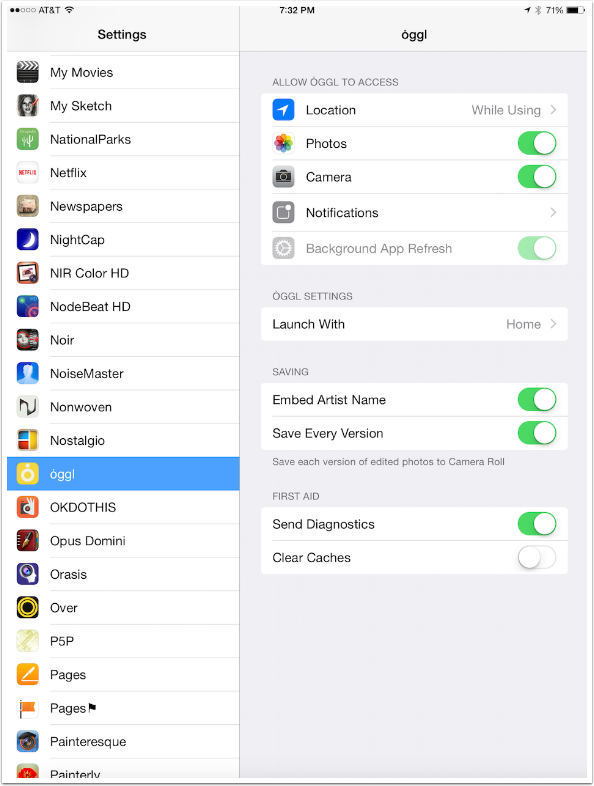
Before we move on to work with images, let me recommend that you go to the app Settings and find the settings for the Oggl app. By default, Oggl will save modifications over the existing image. For example, if you have an image taken with the John S lens and Blanko film in Hipstamatic, and change the lens/film to Jane/Kodot Grizzled, you will only have the second version left on your Camera Roll. I don’t care for that. If I make a change, I want that to be saved separately. It nothing else, it allows me to actually blend different versions later. So I recommend that you turn on “Save Every Version”.
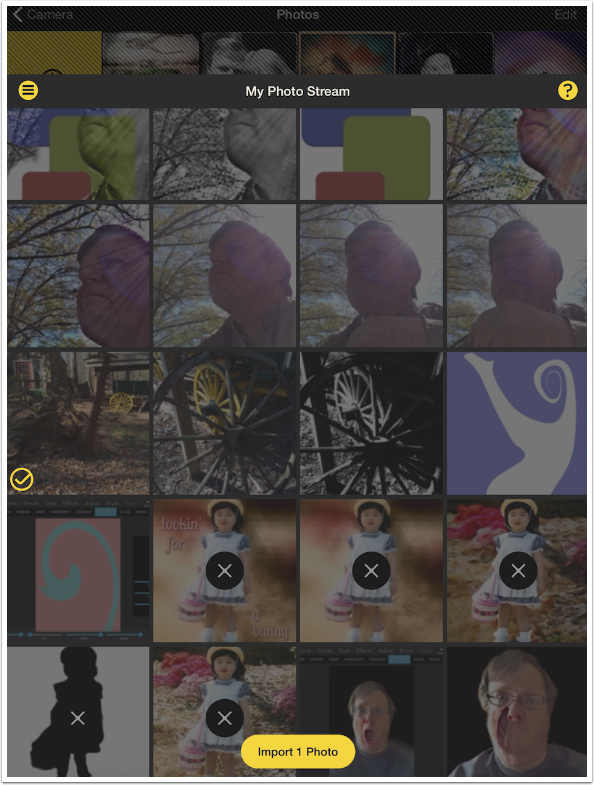
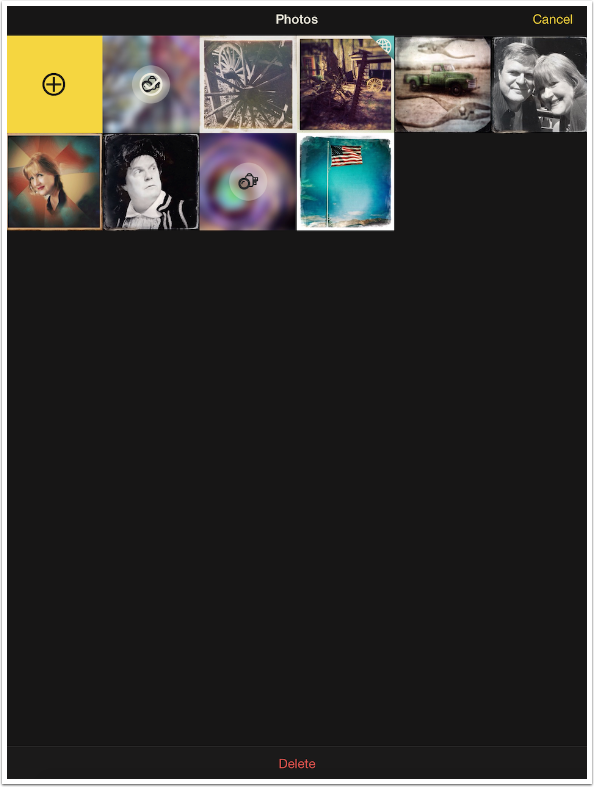
As I said at the beginning of this article, the main impetus for Oggl (other than as revenue stream) was to give you the ability to apply Hipstamatic lenses and films to already-captured images. You load an image from the Camera screen by tapping the frame icon to the left of the shutter release. You are taken to a Gallery. You add images to the Gallery by tapping the yellow Plus sign at the upper left.
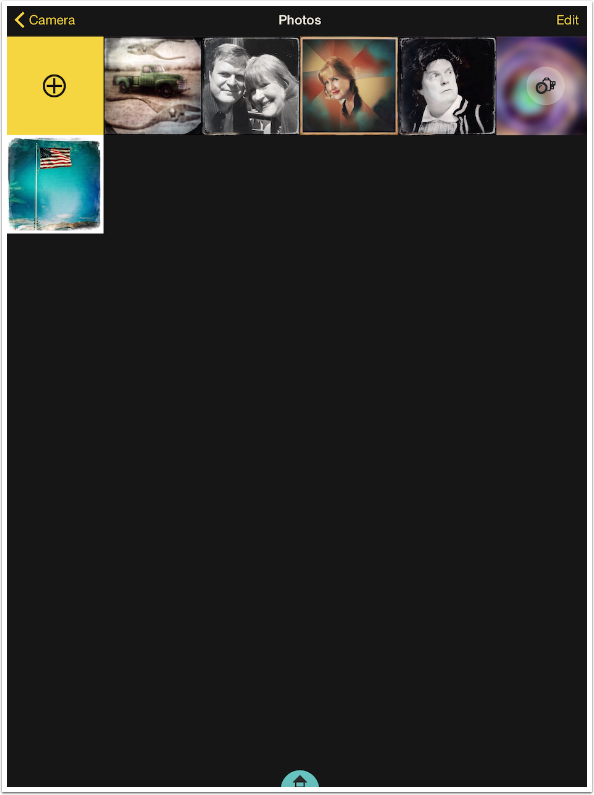
You are taken to the Camera Roll by default, but can change the album by tapping the yellow button with the three lines. Oggl does not permit the editing of really low resolution images, so any image smaller than 1024×1024 will have an X on it and cannot be selected. After tapping your chosen image, a checkmark will appear on the image and a yellow button appears at the bottom. You have to tap that button to import the image.
The Edit screen defaults to showing the Favorites at the bottom. Mine was loaded with the Sunset favorite, identified by the yellow button on the thumbnail and the text at the bottom center of the image.
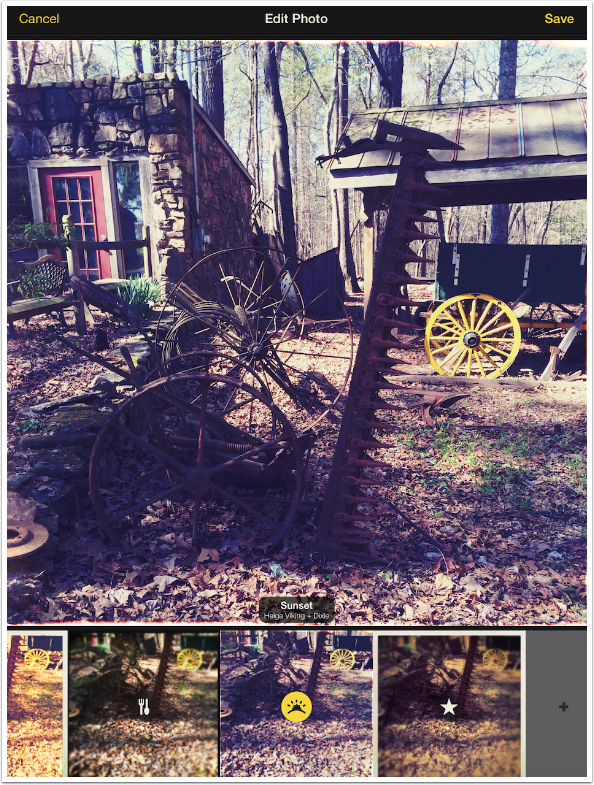
I choose my new favorite, Sergio 82, by tapping on the correct thumbnail.

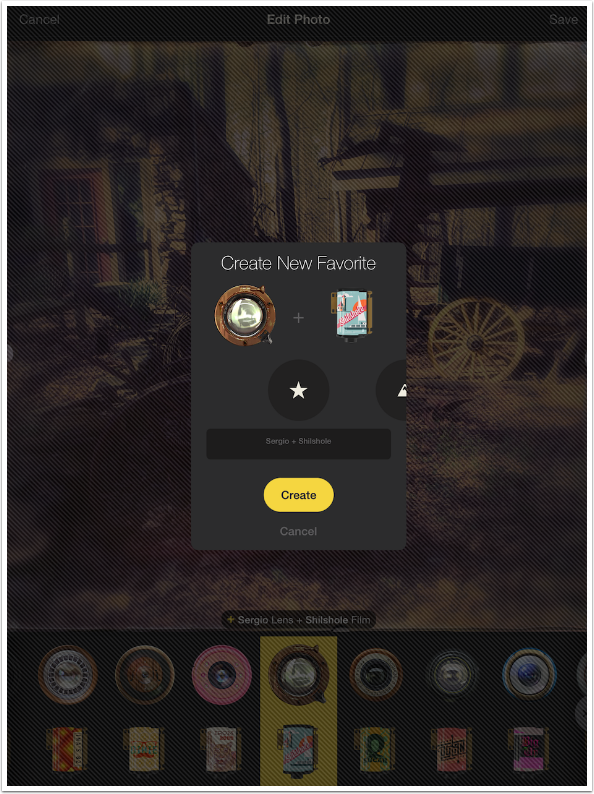
If you scroll to the left side of the thumbnails, you’ll see an “M” button that allows you to choose manually from the different lenses and films. If you really like the combination you choose, you can create a favorite directly from that combination by tapping the + sign by the text at the bottom center of the image. If you look at the screenshot below, you’ll see that I left the lens as Sergio, but changed the film to Shilshole. A yellow + appeared next to the identifying text, and I tapped that. A pop-up appeared that would allow me to create a new favorite.
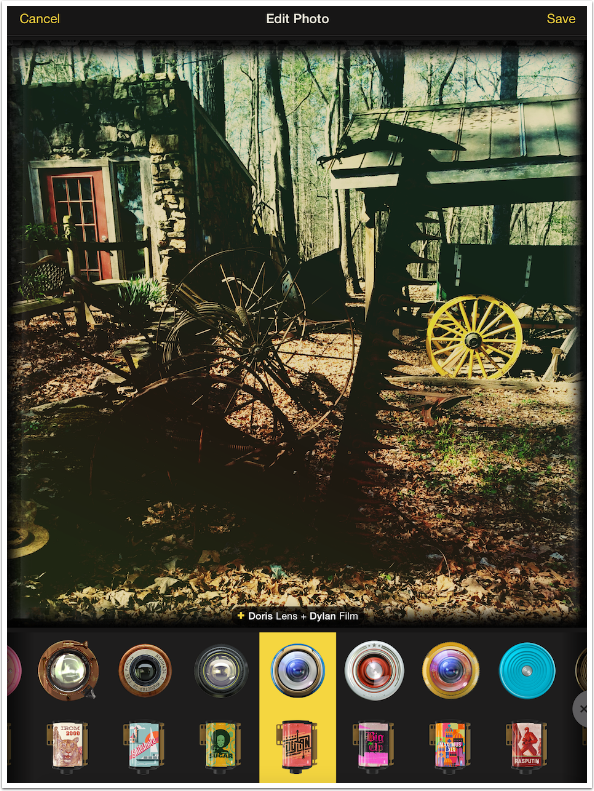
Below I’ve scrolled to a new lens/film combination, Doris/Dylan.
When I tap Save in the upper right corner, the image is saved onto the Camera Roll. (If I have not changed the setting to “Save Every Version”, then it is saved on top of any prior version.) I’m then taken to the screen below, where I can go back to the Gallery. I can also tap the lens and film at the bottom center and continue to work with the same image, saving off more versions with different lens/film combos.
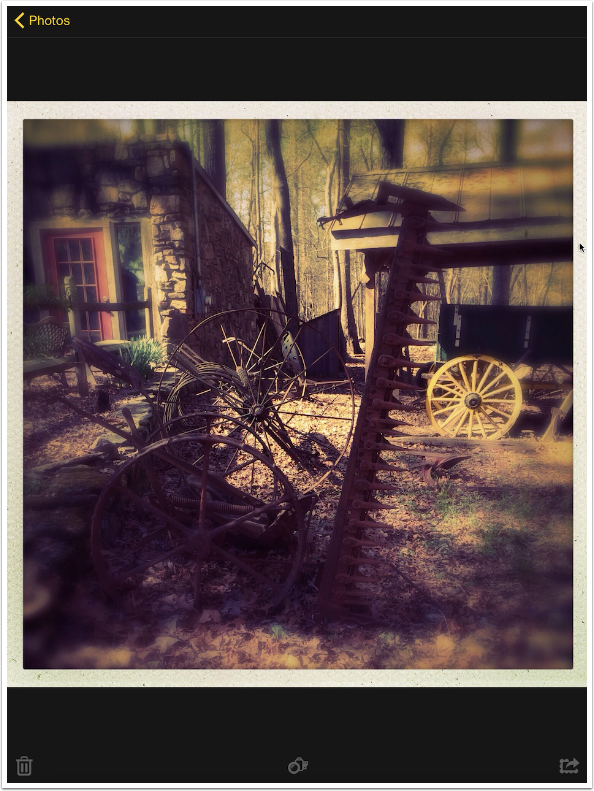
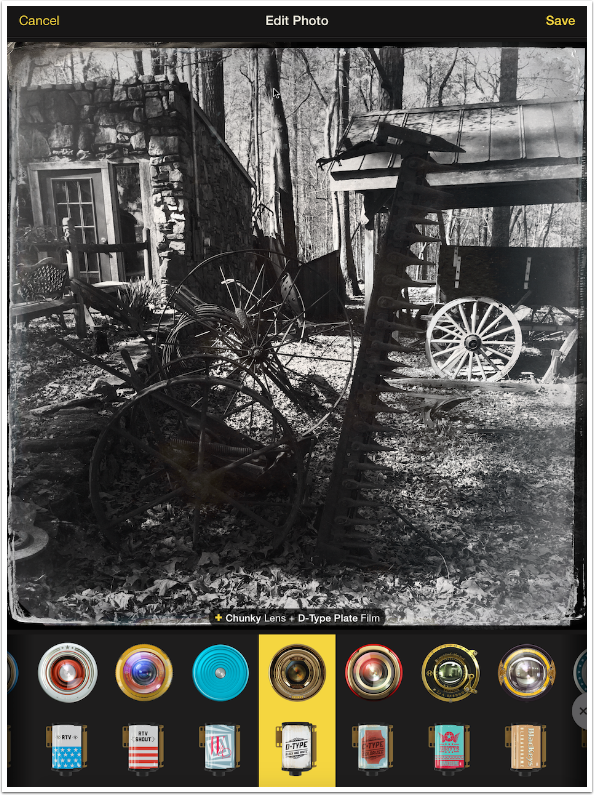
That gives me the opportunity to try Chunky/D-Type Plate.
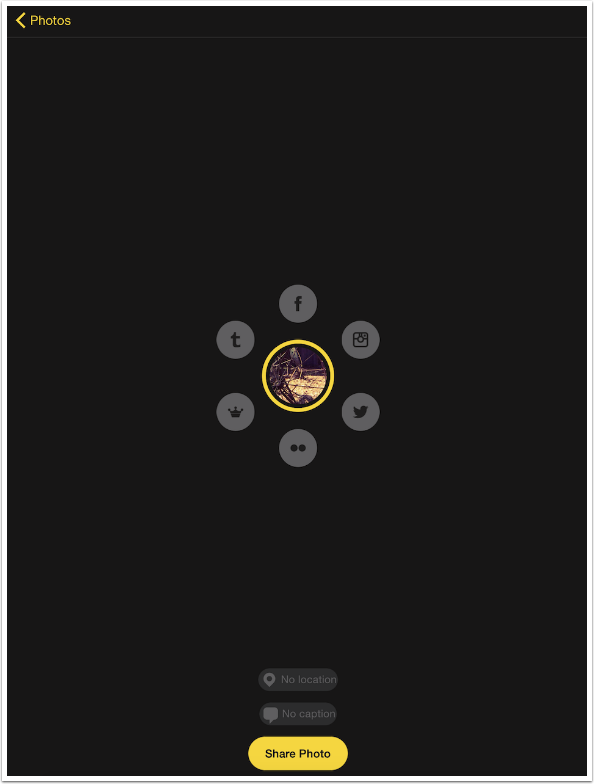
Also, instead of going back to choose another image to work with after saving, I can choose to share the image. When sharing, the least I can do is share with the Oggl community, If I like, I can also tap the indicators for Twitter, Facebook, Instagram, etc. At the bottom of the screen I can edit the location and add a caption, including any hashtags I would like. When ready, tap the Share Photo button at the bottom.
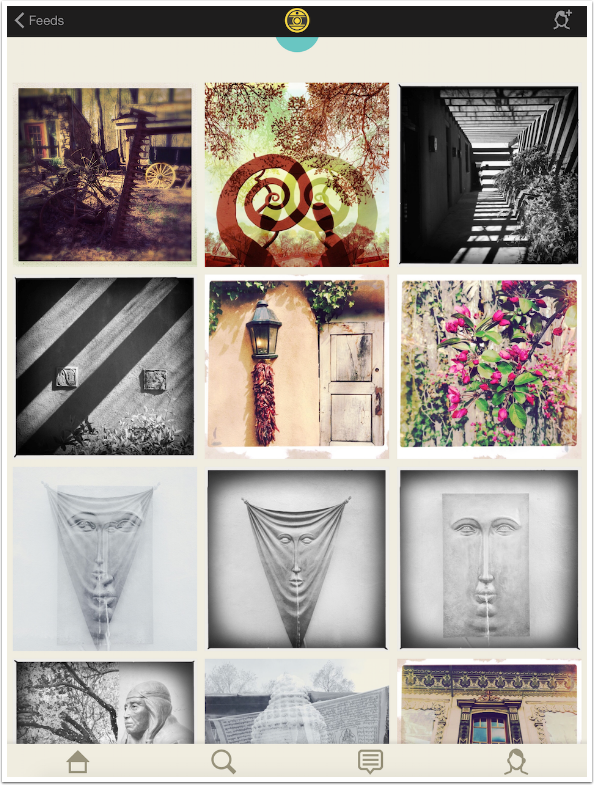
After sharing, you are taken to the Recent Images feed to show that your image has been added to the Oggl community.
As with all apps that keep their own Gallery, including Hipstamatic, Oggl will take up additional app space for every image in the Gallery, So you want to keep it clean. From the Gallery screen, tap edit at the top right, then choose the images you want to delete and tap the red Delete button at the bottom. The images will not be removed from the Camera Roll – only the Gallery.
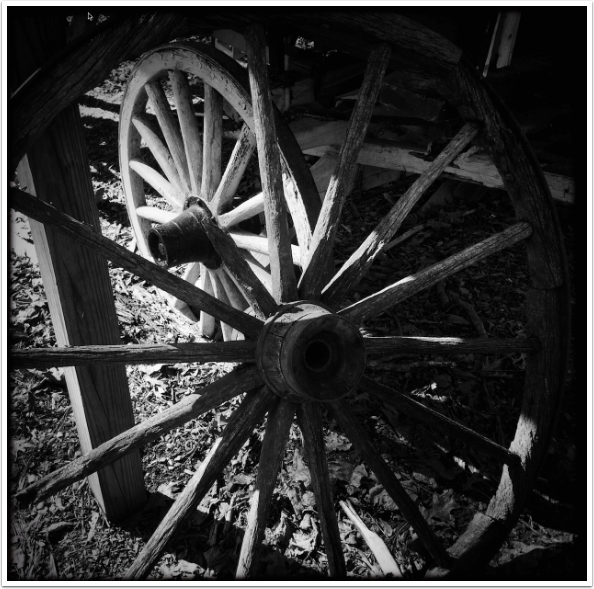
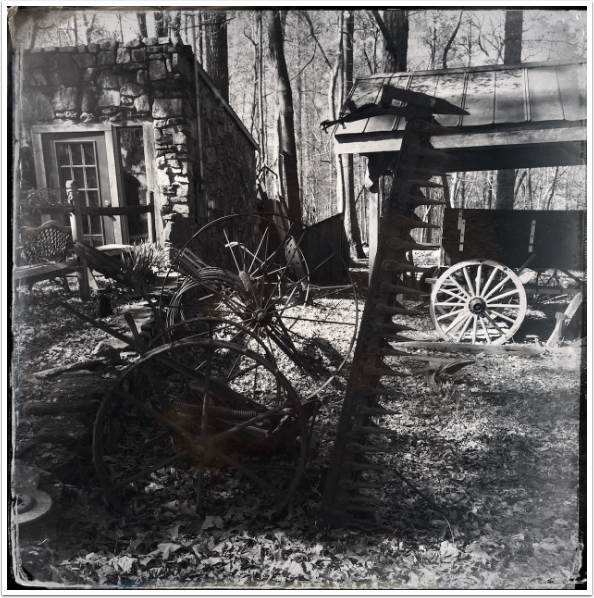
Let’s take a look at some sample images. I did not keep track of all the lens/film combos, but I’ll identify them when I can remember what they are. This first one is a nice high-contrast B&W.
The Salvador 84 lens works in Oggl, giving you a double exposure of your image. Here it’s paired with Dream Canvas – it came in the same Hipstapak.
This Mabel/Uchitel 20 combination worked so well I made it a favorite and called it Washout.

Next is the Sergio/Ina’s 1982 combo I started with.
And the Chunky/D-Type Plate.
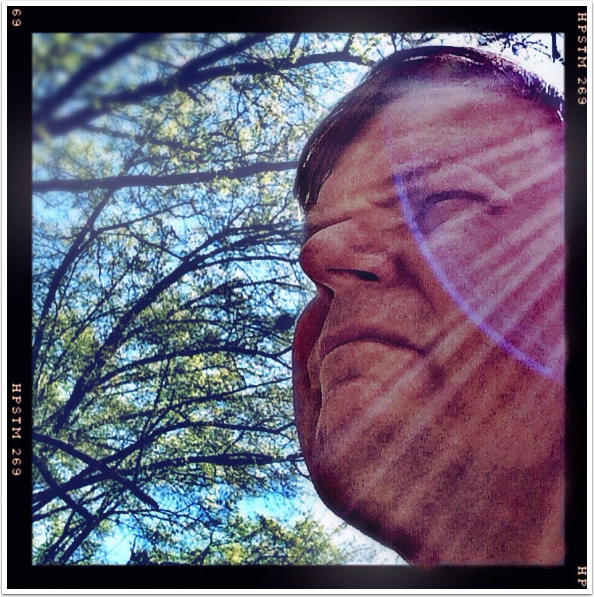
You can get some interesting portraits too. I’m not sure what the combo is.
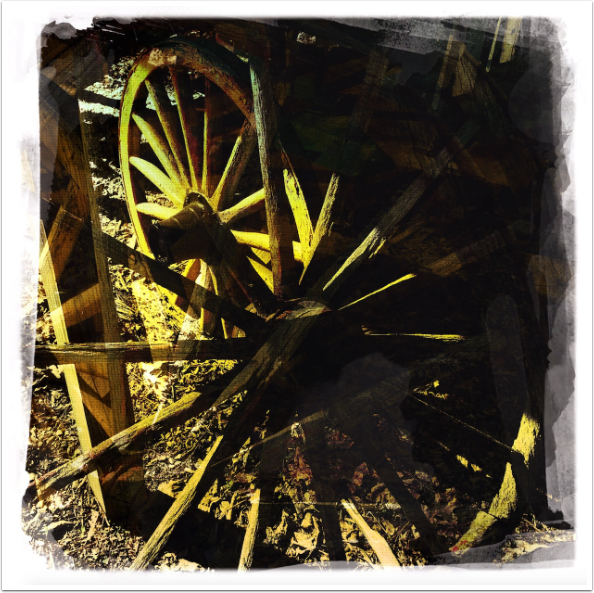
Here’s Salvador 84 again. Why am I including that lens again? As a warning! This image is not what I saw on the screen before saving. The Salvador 84 gives a random twist to the photo as part of its double exposure process. I saw a horizontal mirroring on the screen, like the wagon wheel image above. When I looked at this image on my Camera Roll, I saw that it had actually mirrored vertically. (Horizontal was much nicer with this picture, giving a ghost image on the left side looking to the right.)
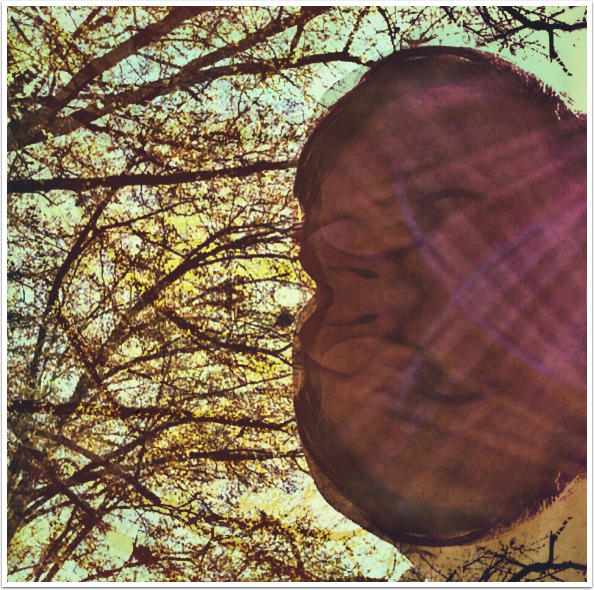
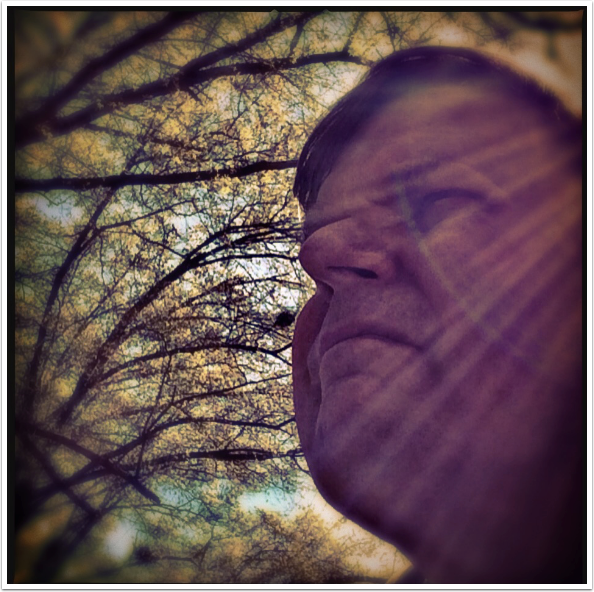
Finally as I said somewhere above, saving multiple versions allows you to merge two looks together. I took a lens that gave me a dreamy look for the tree, and merged it with an image with a lens that gave a harsh look to my face.
So, bottom line: can I recommend Oggl? Even though I am using it and like it, sadly, the answer is no. There are too many drawbacks – the cost, the inability to arrange lenses and films, the confusing interface that nearly forces you into yet another social network, the randomization that still makes you save a different image than what you see on the screen, the Gallery (a pet peeve of mine)…
But the results are so nice. All I can do is hope that the folks at Hipstamatic will someday release the Oggl that all Hipstamatic users wanted, rather than the one they want to force us to use – at a cost.
Jerry Jobe
Never content with just scratching the surface of what an app can do, Jerry Jobe decided to pass on what he learned about imaging apps to others. He’s constantly trying to figure out just what tools other artists have used, and trying to incorporate them into his own work, in an attempt to find his style. He’s written tutorials on over 145 apps so far, which you can find (along with his Song of the Day entries) at http://enthusiasmnoted.wordpress.com/ He lives near Atlanta, Georgia, where he also finds a creative outlet in acting and directing in community theater.

3 Comments
Tony Dunleavy
I have been taking iPhone photos since 2008, it became my favourite form of photography and my SLR’s have been lying dormant ever since. In 34 years of taking pictures I have never had so much fun! Hipstamatic was brilliant when it was introduced (2009?) and that’s pretty much what I have stuck with. I don’t process shots as my challenge to myself has always been to get the shot right in the camera, but I decided to give Oggl a go. I found it to be confusing and not user friendly, I still have the app but never use it.
Diana Jeon
Interesting. I, too, have been paying for Oggl from the get-go. To the point where I actually forgot I had to pay once a year. Thanks for reminding me, I am doing my taxes now, and it is a business expense. 🙂
Larry Zasitko
Actually Oggl can import your purchases from Hipstamatic and you aren’t required to have a subscription to do it, whatever paks you have bought in Hipstamatic copy, those you chose not to buy don’t come over.
I had a year subscription when it first came out but like many others found it got little use so when my year was up I didn’t renew it.
I have not liked some of the recent paks so have not bought them. Maybe when they come as a retro pak at a reduced price.