Mobile Photography & Art – The Recipe I Can’t Live Without with Jerry Jobe from the United States
We have a new section at TheAppWhisperer.com and it’s called ‘The Recipe I Can’t Live Without’, within that we are asking highly successful mobile artists to give us their one recipe (tutorial) they can’t live without in relation to editing their images. Kicking us off today, is Jerry Jobe from the United States. He has created an brilliant rich and bold portraiture family recipe . To read the others in this new series, please go here. (foreword by Joanne Carter).
Description
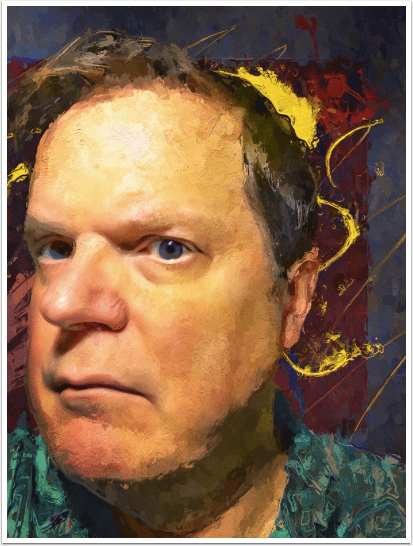
Here’s a quick recipe for a bold painted portrait. It should take you just moments to prepare, and I find it very satisfying.
Ingredients
iPhone/iPad
SuperimposeX
Vinci
Big Photo
Glaze
iColorama
Method
Step 1: SuperimposeX
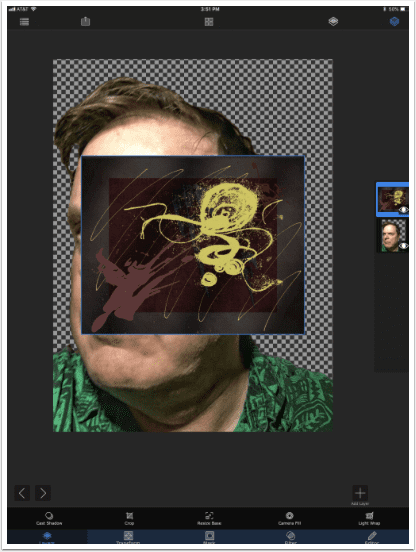
First you need to examine the portrait, specifically the background. Is it right for your taste? If so, you can move on to step 2. If not, you’ll want to isolate the subject and remove the background with SuperimposeX. I want to replace this boring background. I start by choosing the Brush masking tool to do the largest share of the masking work.
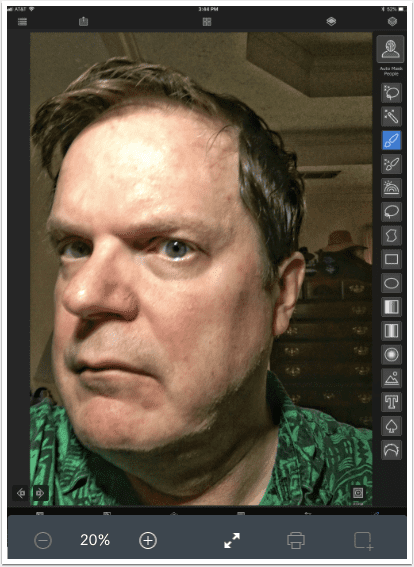
Once I’ve removed the bulk of the background, I change tools to the Smart Brush.
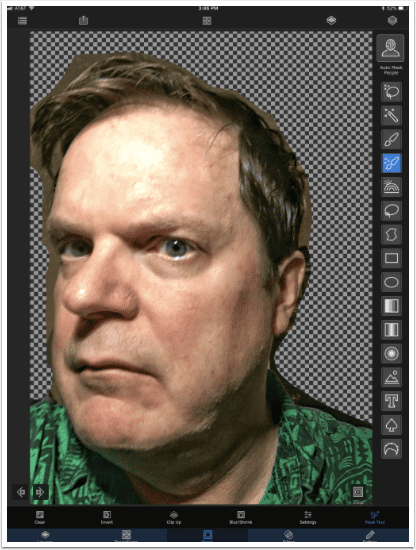
Zooming in, I go around the outline. This is the most tedious part of the recipe, like chopping vegetables.
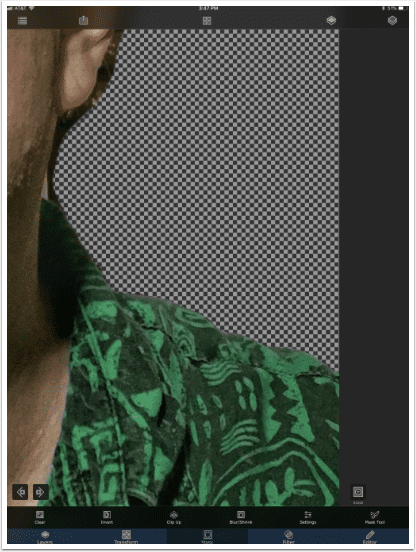
Once masking is completed, I add another photo layer: my background. I use a previously prepared abstract. I then drag the background layer below the portrait and, using the Trasform tool, resize the background to taste.
Step 2: Vinci
I get a nice illustrative look from Vinci. Many times I use the Shadow preset. You have to be cautious with this preset, because it introduces circles you may not like. I’m not particularly happy with the color change this time, so I will move on to another favorite preset.
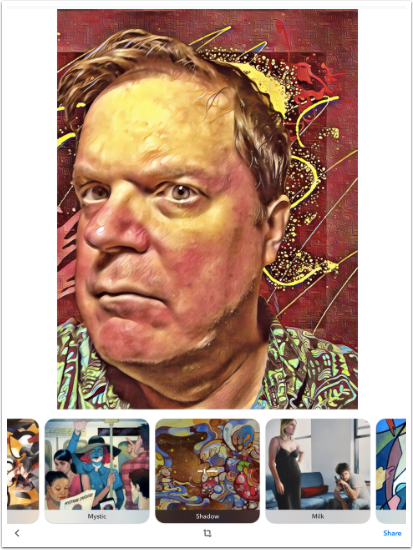
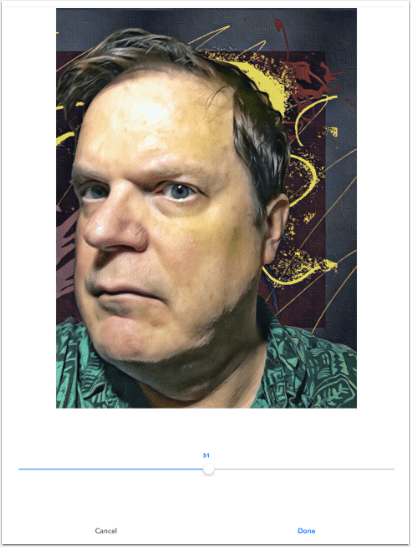
I use Msqrd preset and reduce the opacity to a medium.
Step 3: Big Photo
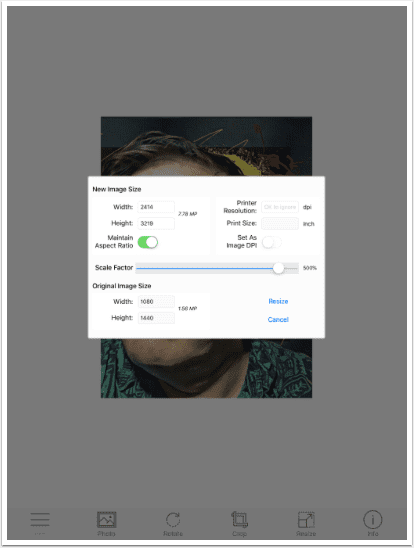
Vinci reduces the size of the image, resulting in lost detail when the image is passed through a painting program. So I expand it using Big Photo.
Step 4: Glaze
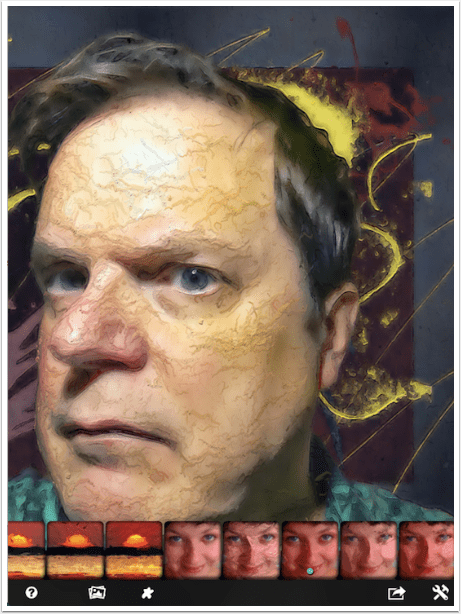
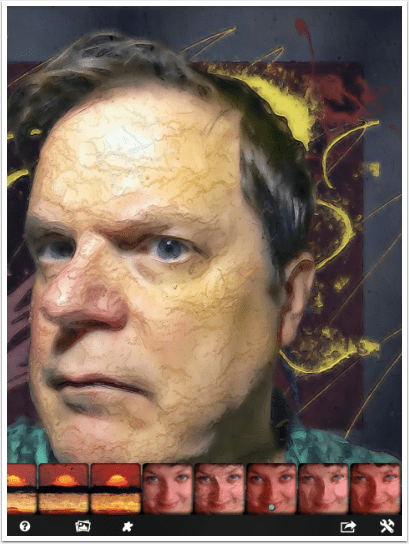
Next we take the larger image into an auto-painting program. I like Glaze for this most of the time, but you may like Brushstroke, becasso, iC Painter, Simply Watercolour, etc. Presets in Glaze are not named, so I will tell you that I like both the third and the fifth portrait presets. Here is the third.
But I choose the fifth.
Step 5: iColorama
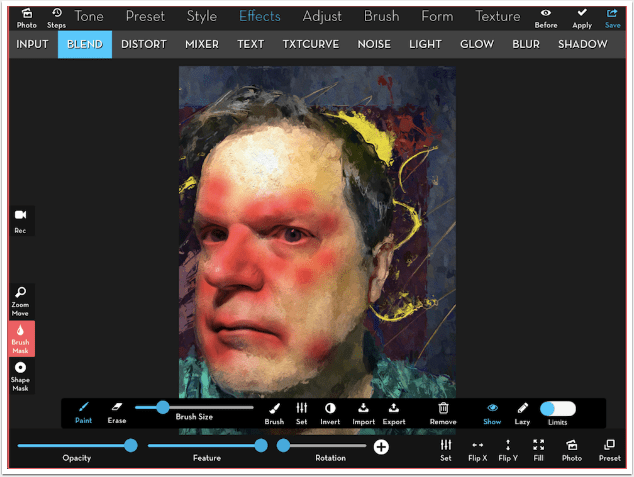
iColorama blends and puts the finishing touches on the portrait. I load the output from Big Photo, then use Effects>Blend to add the Glaze output. Glaze destroys some important details and adds a texture to the skin that is less than optimal, so I mask parts of the Glaze image out. I also reduce the overall opacity of the layer to about 80%.
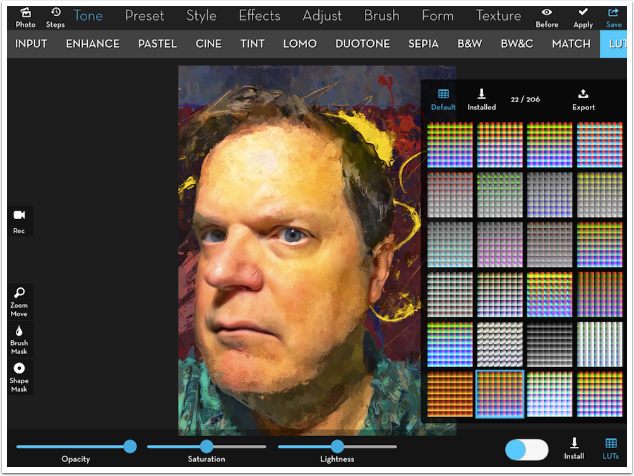
With a bold portrait, I like to do some bold recolouring. Here I use Tone>LUTs>22.

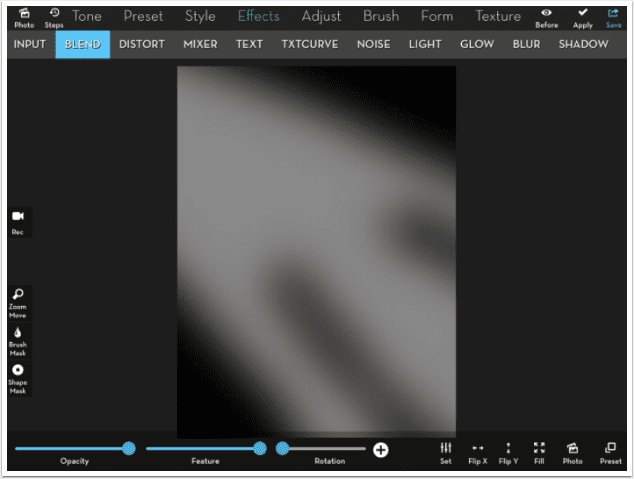
Finally, I want to add some dramatic lighting. I do this with a homemade “light leak” image that I blend in Overlay mode, reducing the opacity to about 30%.
This recipe is highly adaptable to your taste. Enjoy!
Hello again…please donate
TheAppWhisperer has always had a dual mission: to promote the most talented mobile artists of the day and to support ambitious, inquisitive viewers the world over. As the years passTheAppWhisperer has gained readers and viewers and found new venues for that exchange.
All this work thrives with the support of our community.
Please consider making a donation to TheAppWhisperer as this New Year commences because your support helps protect our independence and it means we can keep delivering the promotion of mobile artists that’s open for everyone around the world. Every contribution, however big or small, is so valuable for our future.
