Mobile Photography / Art Tutorial – An Edgy Discussion with Jerry Jobe
We are delighted to publish Jerry Jobe’s latest mobile photography/art tutorial for our reading and viewing pleasure. This time Jobe takes a look at art of creating lines/edges within iPad art. Read Jobe’s thoughts about this critical subject (foreword by Joanne Carter). Take it away Jerry…
“Those of us who came into artistic endeavours late, like me, find ourselves using photos to create our art. Of course, artists in traditional mediums might use photos also, as a reference, but that’s not how I use them. Artists that have been trained in traditional mediums are used to sketching out a work and getting the lines to look pretty much like what they wanted. Try as I might, I can’t – this line is too thick, that line is too jagged, I have no earthly idea what that figure was supposed to be. I understand the purpose of the line work – to add structure to the artwork – but I can’t make my fingers produce the useful lines. So I depend on software to create the lines, and I am constantly searching for the perfect line for use in my artwork.
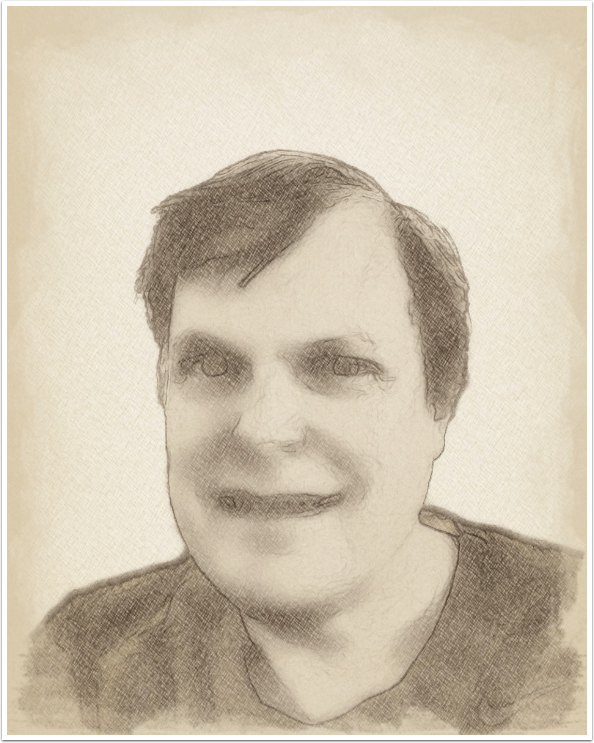
I write a lot about iColorama because I use it constantly. iColorama has an Edges submenu under the Style menu with 19 Edges presets. Sometimes those edges are just the lines I require, but many times they are not. So in this article I am mostly going outside iColorama for a source for my edges. I then use iColorama to modify and use those edges. This first image (which I will recreate later) uses iColorama Edges exclusively”.

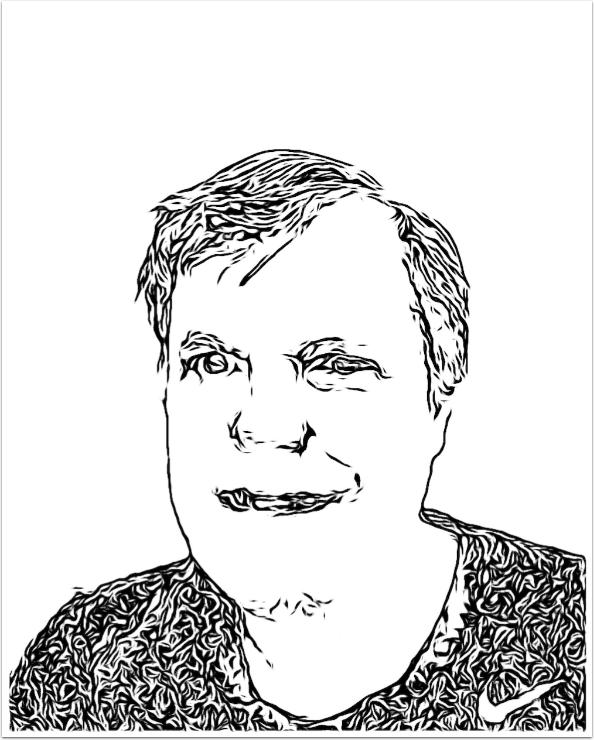
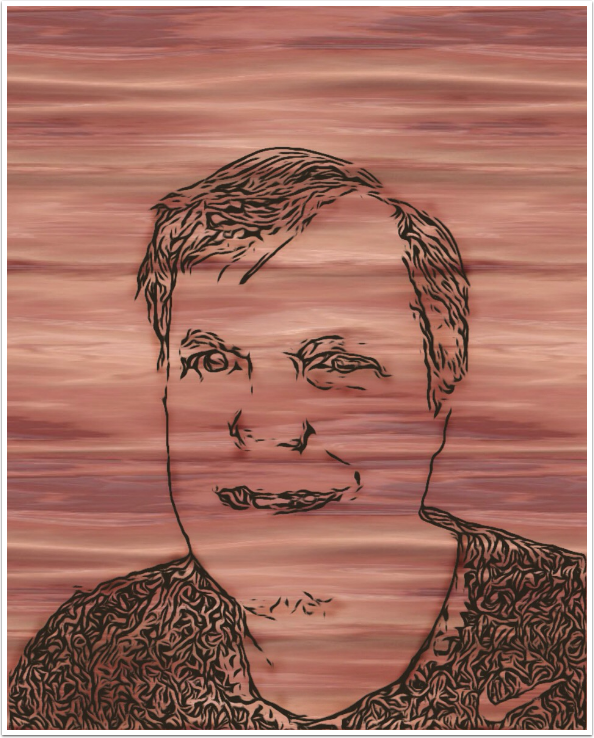
If there is one type of image that I find myself most incompetent at sketching, it’s a portrait. I prepared this image of myself by clearing the background and smoothing my skin. (Any app that produces edges or sketches will pick up any skin imperfection, or any abrupt shadow, and create a line from that.)

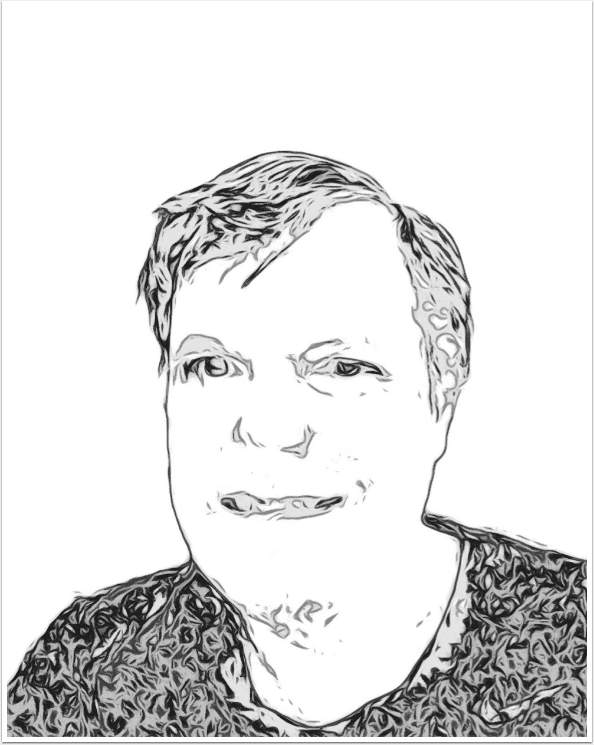
One of my favorite apps for producing smooth-lined sketches is Pencil FX, which I covered in June of 2014. Below I have reduced the number of strokes, increased the Contrast and Hardness of the strokes, and reduced the size of the smudging. Pencil FX does create quite a bit of smudging, which can be a problem when you are wanting clean lines only. But that can be fixed down the line, so don’t try to get rid of all the smudging – it’s not really possible in Pencil FX.
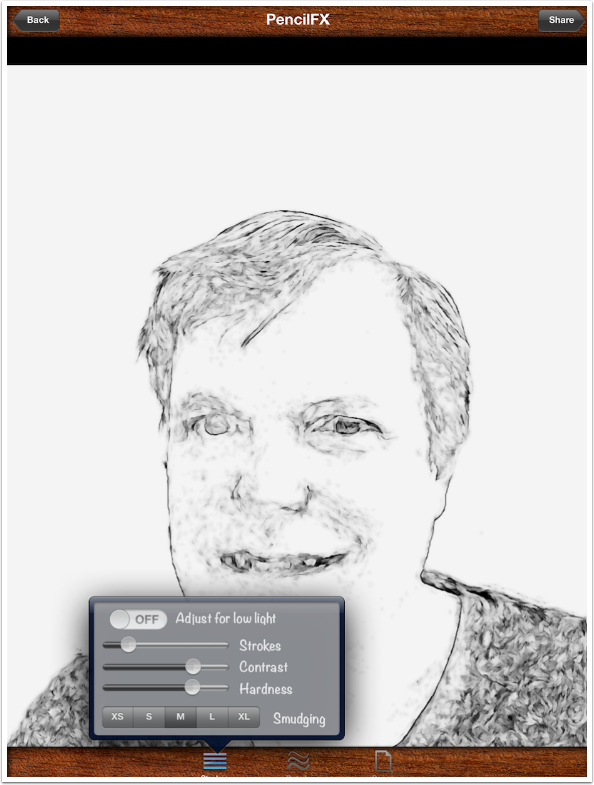
Here’s the result. It’s got nice, strong lines around the face and eyes, and that’s what I was wanting.

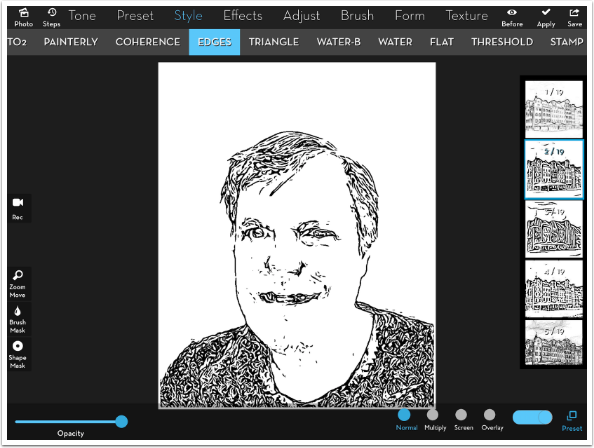
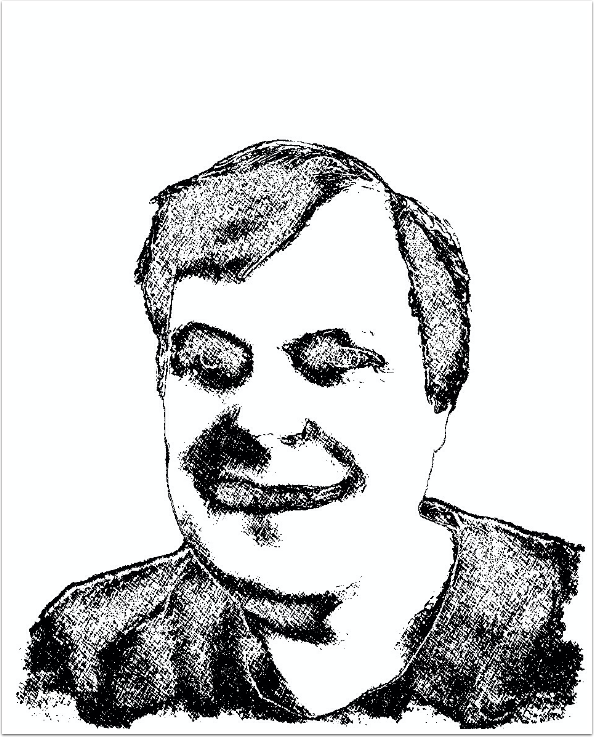
That light gray smudging on the face, mostly around the mouth and chin, is my first problem. In no way can I consider that smudging useful edges. One way to eliminate the light gray areas is to use Style>Threshold. The default of Threshold is to create pure blacks and whites only – no grays. The first preset does just that. But other presets can introduce some mid-tone grays, and I find Preset 5 will often give me an effect I like. The first Radius slider, which I have moved slightly to the right, brings some of the blacks to a dark gray. The second Radius slider creates a bit of a negative feature, turning the black interior of some of the areas white. Experiment with these sliders, especially the second, and you will see the difference.

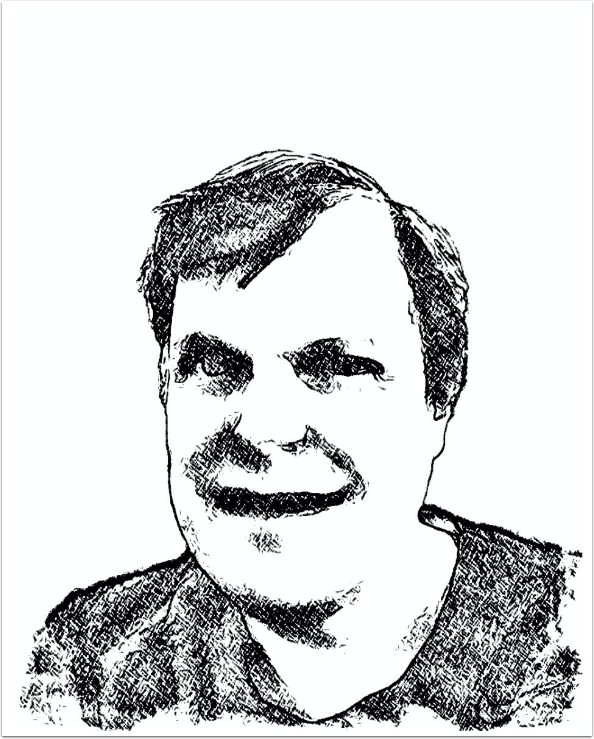
I still want thicker, smoother lines at this point. That can be done with Edges>2. Don’t be afraid to use combinations of Edge presets to get the look you require.
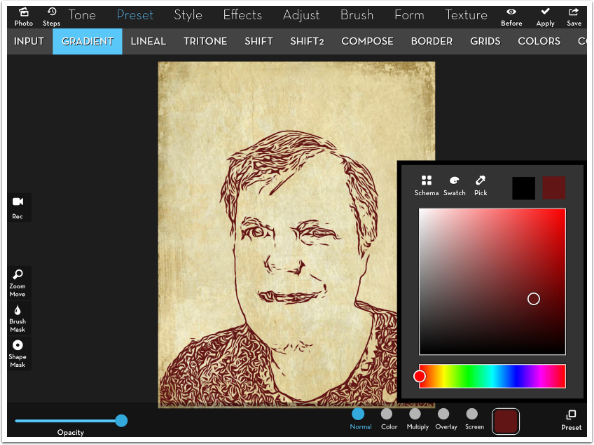
You can also touch up your edges. There are still some stray lines, especially on the face, that I don’t want. In order to get rid of those black lines, I want to paint over them with white. I do that by going to Preset>Gradient and using the default white, which covers the entire image. I pull up the Brush Mask toolbar and Invert the mask. Now the white gradient covers nothing, and the brush paints the white in. I choose a hard edged round brush and paint over the lines I no longer want.
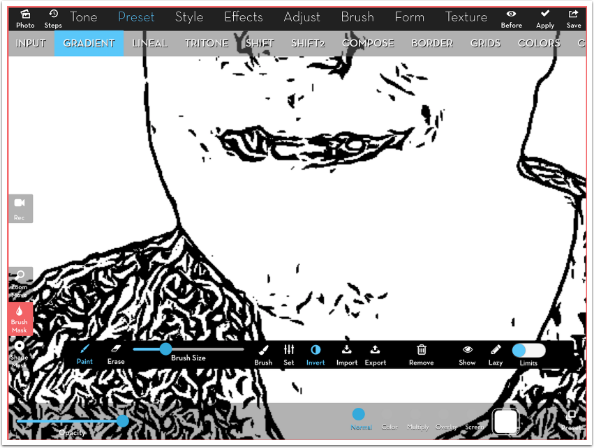
I work my way around the face, leaving only those lines that help define the features.
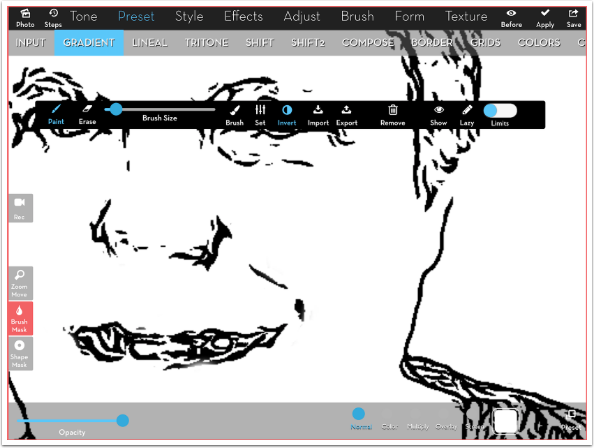
The lines produced by Edges>2 are thick, but blocky. When I zoom in, as seen above, you can see the jagged, pixilated blockiness of the lines. Using Style>Flow smooths out those lines. I prefer this look; you may also.
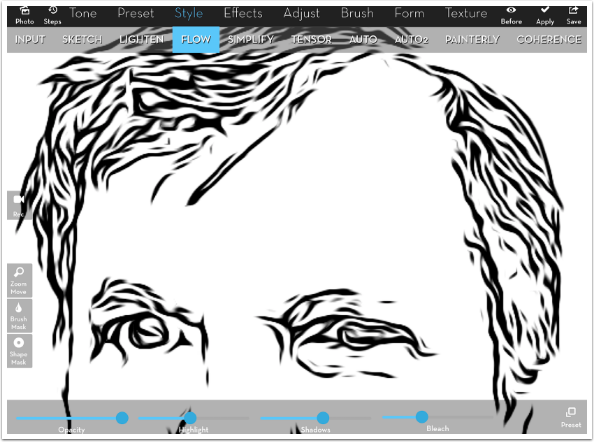
Here are my edges, produced from a Pencil FX sketch, then using Threshold 5, Edges 2 and Flow 1 with a bit of brushed-in touchup in between. Let’s use these edges.
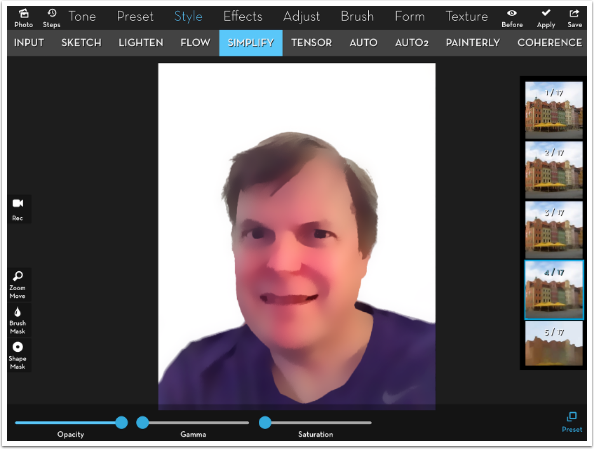
A traditional use of edges is to use them in a “comic” manner. The edges surround large areas of smooth color. We can produce those large areas of smooth color by applying Style>Simplify>4 on the original image. (You could also use Median Blur in Blur FX, another app I’ve covered, to get the same effect.)
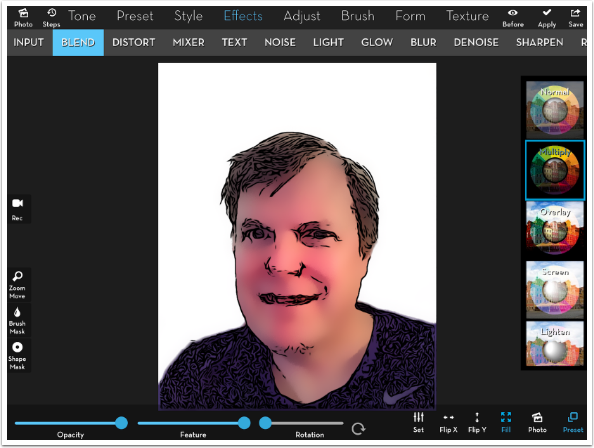
I use Effect>Blend in Multiply mode to bring in the edges over the simplified colors of the original. You could also do this in Leonardo, using the edges as a new layer.
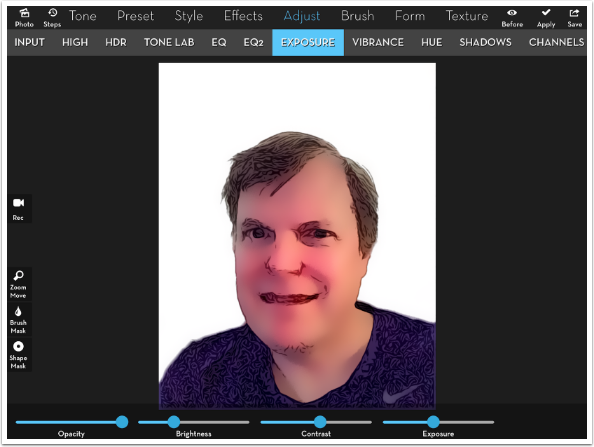
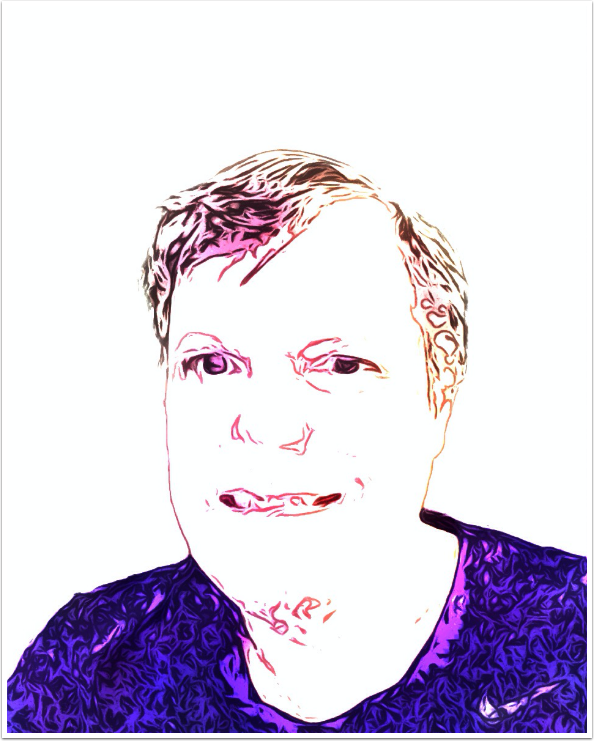
You might find the black edges to be too harsh. What if you wanted the lines to be coloured like the blocks of color they define? Then you can use the Edges as a mask. In the image below, rather than overlaying the black lines on top of the colors using Effects>Blend, I Imported the lines on the Brush Mask toolbar. Black, on a mask, reveals changes while white conceals them. The change I made in this instance was lowering the Brightness and Exposure using Adjust>Exposure. This made the lines a darker version of the same color. So the lines in the hair are brown while the lines on the shirt are purple.
Using your edges as a mask opens up all kinds of possibilities. Below I brought in a texture for my background and masked in a single-color Gradient with my imported edges.
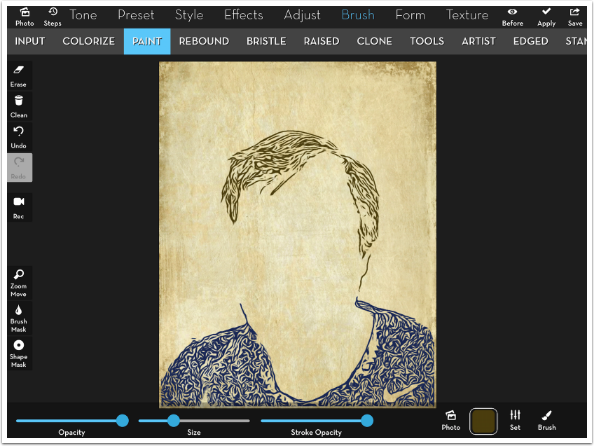
Have you ever painted over a mask? By changing the color as you paint, you can choose different colors for individual lines. I imported the mask, then turned the Brush Mask toolbar off. (If I did not do that, any touch to the image would affect the mask, not apply the paint.)

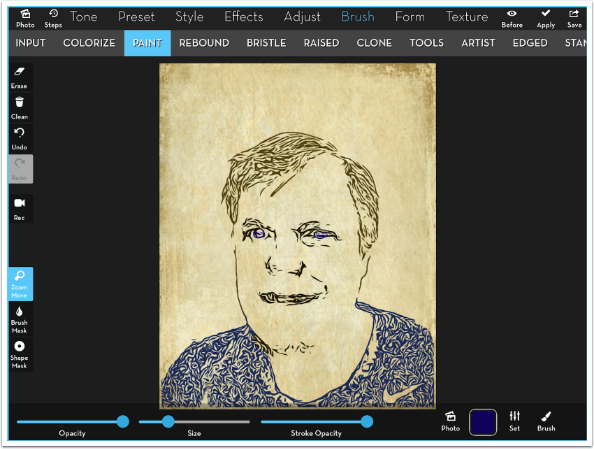
I painted the shirt part of the mask with a dark blue, and the hair with a brown.
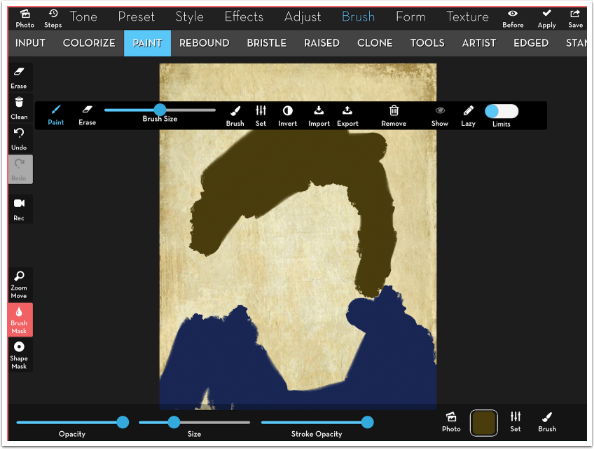
If I remove the mask, you can see that I am painting large globs of color, but the mask made of edges gives it structure and meaning, without my having to worry about the fluidity or accuracy of my brushstrokes.
I finish painting with a darker brown for the facial features and some blue for the eyes.
Using a different combination of sources for the sketch and the possible Threshold, Edge and Flow steps will result in different looks. Below is a different Pencil FX sketch with Threshold 5 and Flow, but no Edges
I masked in the original with the edges, then boosted the brightness and saturation.
Here’s an image out of Toon Camera, covered in April 2015.

Using the second Radius slider in Threshold 5 dropped out the dark pupils in the eyes, and even the dark shirt. Then I masked in Edges>18 into the empty area around the person, and got this set of edges.
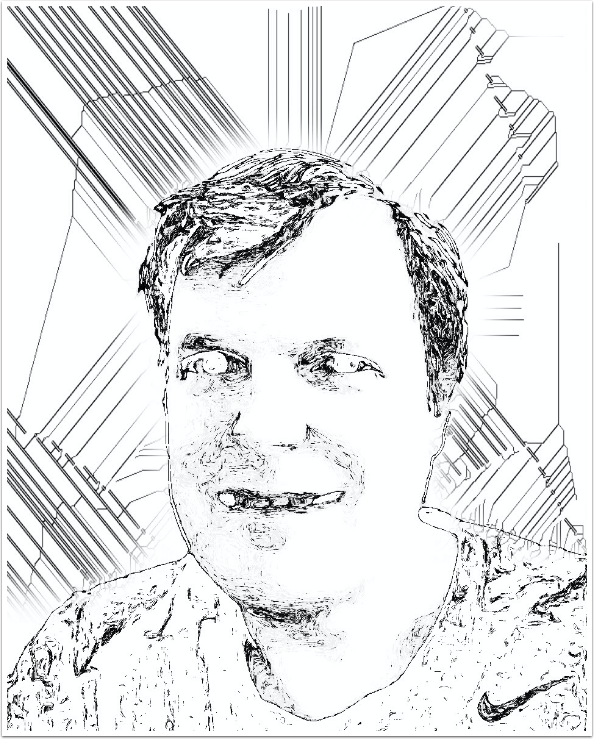
I masked in the original at low opacity for the figure, and a circular gradient into the background.

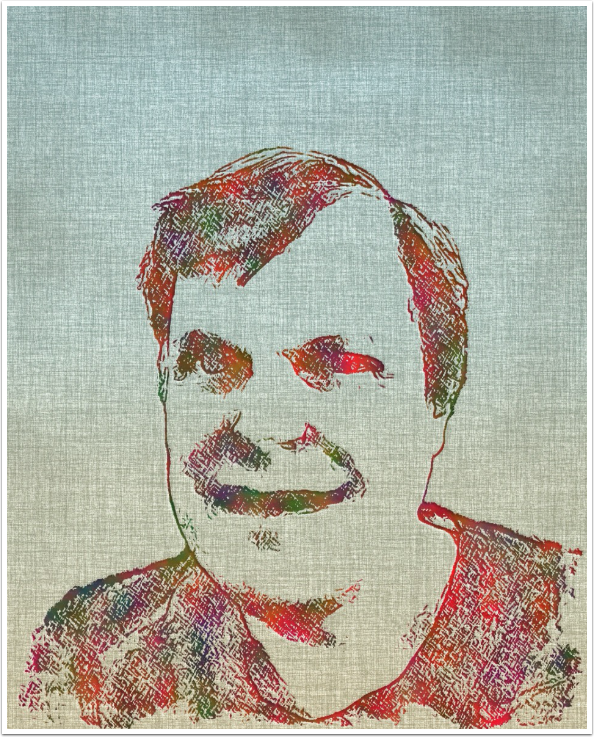
It’s possible to use a coloured image as a mask, since the mask is based on the luminosity, rather than the color, of the mask. So I have no problem using output from apps such as Jixipix’s Artista Sketch for masking.
Regardless, the application of Style>Threshold gets rid of the color. This time, I don’t particularly like the “negative” quality of Threshold 5.
I use Threshold 1 instead.
I used Texture>Noises>6 for the background, the sketch for the mask, and filled it in with Tensor>2, which gave it the multicolor look.
Returning to the original set of edges, I created a woodburning look. The “bloom”, as if the burning stylus was held in place too long, charring the surrounding area, was done by inverting the mask and using Brush>Tools>Burn with a soft-edged brush.
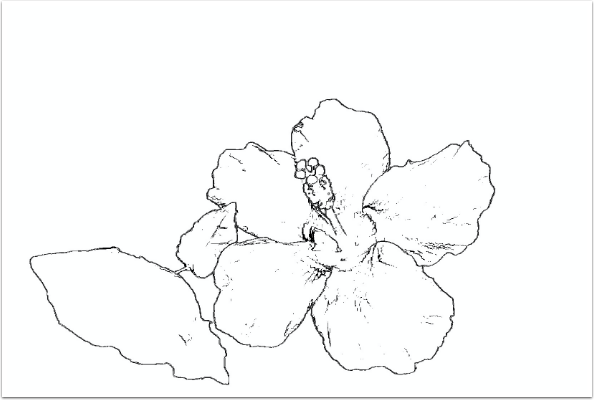
Let’s get away from my portrait for a minute. (Was that a cheer I heard?) As I said at the top, iColorama has a number of Edge presets, but I have a problem with some of them. Edges>5 is shown below, used on a bloom and leaves I had placed on a blue background so I could use Chroma to place it in any picture. The outer, thick edges are fine, but the inner edges which show the contours of the leaves are too fussy for my taste. If you zoom in you’ll see that they are not smooth, but jagged like stair steps. I can tell when someone uses these edges without modifying them – it leaps out at me.
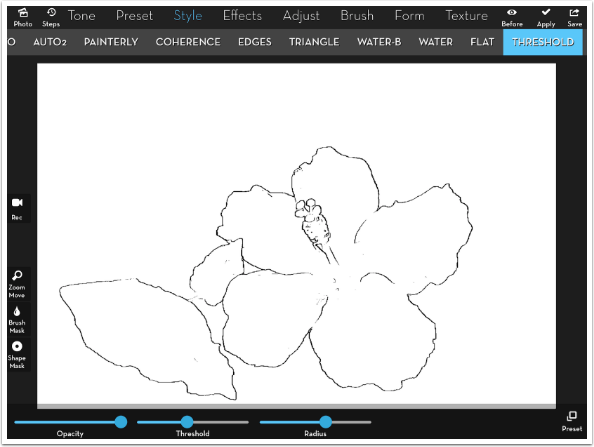
Just running a Threshold>1 on them gets rid of those contour edges, and leaves just the edges I like.
Conversely, I could use Threshold>5 and get rid of most of the contour lines, but make those that remain thicker.
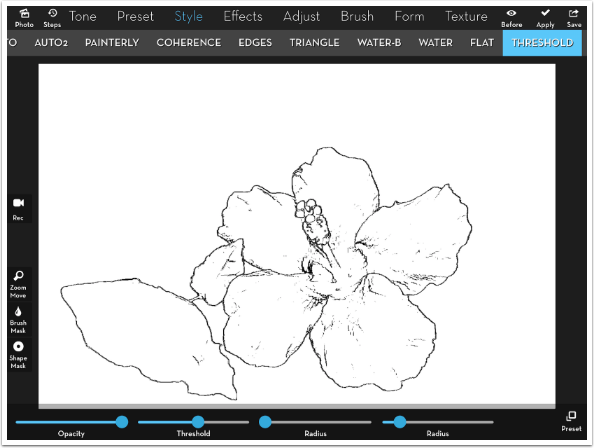
I decide I like that, and I save it.
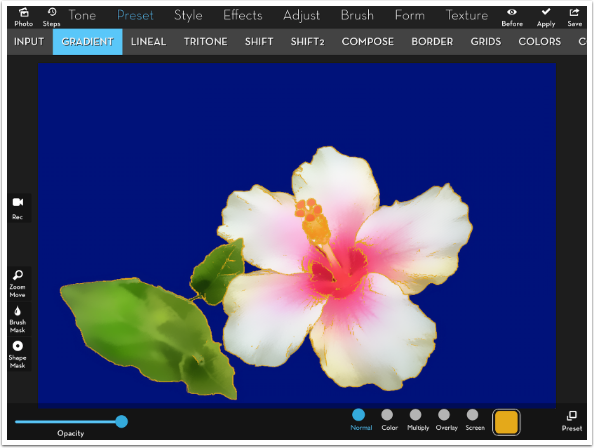
I simplify the flower removing the texture on the leaves and petals, and Blend the edges in Multiply mode. Now I have a “cartoon flower” that I can place into any image.
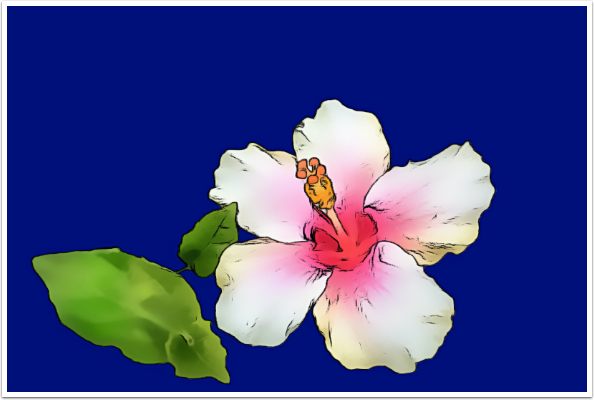
Of course, I could use the edges as a mask also, How about a light orange stroke?
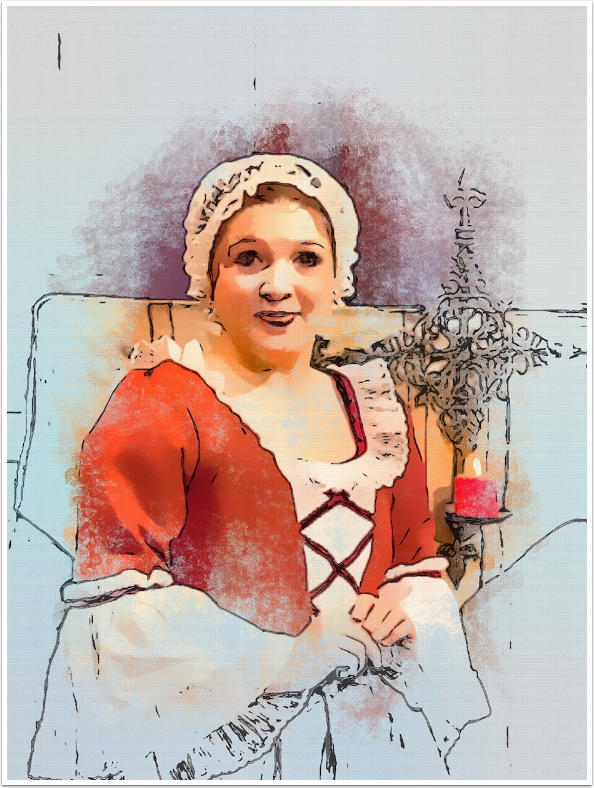
I place it into the Hawaii image from the beginning of this article.

Edges can be a huge help to your art. There are many ways to “wash out” detail: blur, glow, simplifying, brush strokes like a bristle or a watercolour. Edges help bring back some of the lost detail. If you can only draw in stick figures like me (and lame stick figures at that), then you can use the output of sketch apps, either directly applied or as a mask, to give you your nice edges. Experiment with them, touch them up, and treat them as you would any other part of your image. I worked on the edges in the image below as long as or longer than the “painting” and texture.
Let me know: Do you use edges/sketches for linework? How do you use them? Was this article of any use to you, and would you like to see more like it?
Until next time, enjoy!
Jerry Jobe
Never content with just scratching the surface of what an app can do, Jerry Jobe decided to pass on what he learned about imaging apps to others. He’s constantly trying to figure out just what tools other artists have used, and trying to incorporate them into his own work, in an attempt to find his style. He’s written tutorials on over 145 apps so far, which you can find (along with his Song of the Day entries) at http://enthusiasmnoted.wordpress.com/ He lives near Atlanta, Georgia, where he also finds a creative outlet in acting and directing in community theater.
You May Also Like
Joanne Carter – TheAppWhisperer Speaks at The Photography Show 2015 – Day 2 – Seminar 3 (Part 1 of 5) Mobile Art Tutorial by Bobbi McMurry
iOS Photography App Tutorial with ‘Monokrom’ – Instantaneous Monochrome by Jerry Jobe

One Comment
Pingback: