Olloclip – Tutorial And More Excellent Tips Using The Fisheye Lens
The Olloclip lens system consists of three lenses. A wide-angle, fish-eye and a macro lens. The Fisheye lens captures approximately a 180 Degree field-of-view and produces some striking images. This is the second tutorial by Andrew Proudlove and once again it contains valuable and excellent tips to get the most from your fish-eye lens. If you missed that previously, you can read it here.
Foreword by Joanne Carter
Of all of the different lens types that you can use with pretty much any type of camera, the Fisheye is one of those types of lenses that has a polarizing effect – you either love it or hate it. The funny thing is, that it is both loved and hated for the same reason, the extreme wide-angle view that it provides and the distortion that it adds to an image.
Used properly the distortion can add an extra something to the image, providing that you frame and compose it well, in others the distortion will spoil the image, so here you need to look at what you want to retain in the image and then frame it so that afterwards when you crop to remove the distortion, you keep a nice wide-angle shot of your subject.
Consider the two images below, both were made using the same process, that is using the Olloclip Fisheye lens and in this particular tutorial, the Pano application.
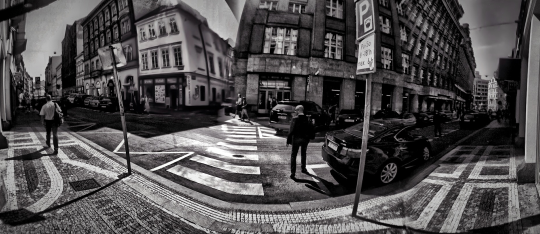
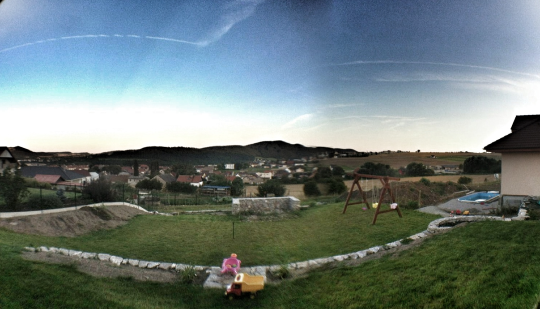
SetUp
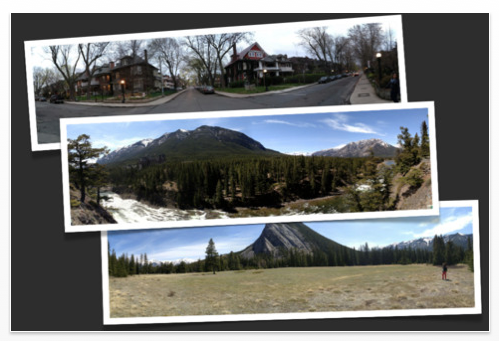
- First of all for any kind of panorama photography, whether you have a fisheye lens or not a tripod is a good start, if you don’t have one, try to find a solid surface to support your iPhone or yourself while you’re taking the shots.
2. If you are using a tripod, try to use the self-timer or the shutter release on the headphone cables to take the picture, as this will mean less vibration and result in a sharper image. If you are doing it by hand, some people find that holding their breath when pressing the shutter is best, others do it when they exhale, just find whats comfortable for you.
3. You may want to use an app, such as 645 PRO or ProCamera that allows you to lock exposure, this will ensure that each of the images you take will have a consistent look to them. As I am using Pano, I won’t be doing this as Pano seems to handle it well by itself and the length of time between shots is less than a second.
4. For shooting landscapes, usually the best kind of light is side-light as this will add depth and texture to the image, valley’s, hills, trees etc will become more pronounced. In town similar rules also apply, as they will add interest to the buildings.
Capture
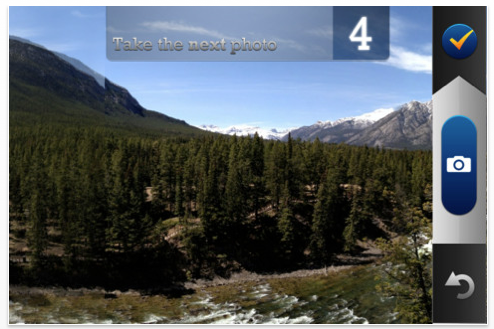
5. First things first, be careful when composing your shots with the fisheye to raise your camera a little higher than you usually would. This is because the extreme wide-angle of the lens will also capture your feet if you’re not careful.
6. When taking the images for the panorama, try to keep the areas that you want in the final combined image as close to centre frame as you can. This is not only due to the distortion but also because of the blur that occurs towards the edges of the lens, meaning you will lose detail.
7. You may find that yo achieve better results with your final image if you take two additional photos, one pointing down from what will be the centre of your final image and one pointing up from the centre of your final image, especially if you will use an app like AutoStitch to combine them later.
8. Once you have taken the first image, keep your body still on the same spot and rotate a few degrees to the side (or turn your iPhone on your tripod slightly), allow your next image to overlap the first, I seemed to get better results with the fisheye when I overlapped the previous image with a quarter of the next image. Keep turning to the side until you have all of the elements in the image that you want to capture. You will find that using a fisheye, you will need fewer source images than you would if you were shooting using the standard lens.
9. Once you are done capturing, you now have to merge the individual photographs together. If you are using Pano as I did for this, it will handle the merge for you automatically, if you are using one of the alternative camera apps, you will need something like AutoStitch to combine the images for you.
My Process
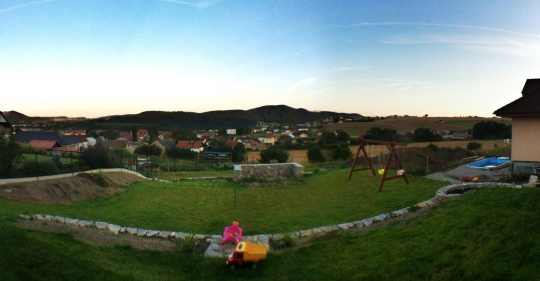
Above image, Landscape – Pano Cropped – Final
Landscape images
Pano
- After attaching the Olloclip fisheye lens to my iPhone, I launched Pano.
- I switched Pano to landscape mode by tapping its rotate icon
- Starting from the left-most point that I wanted in my image, I pressed the shutter release and then rotated myself on-the-spot slightly to the right. Pano makes this easy as it overlays part of your previous image onscreen allowing you to align the next shot.
- I repeated this process until I had captured all of the panorama that I wanted and then told Pano to merge the images.
- I took the final merged image from Pano into Snapseed where I cropped it to have even sides and added a slight drama filter to it.
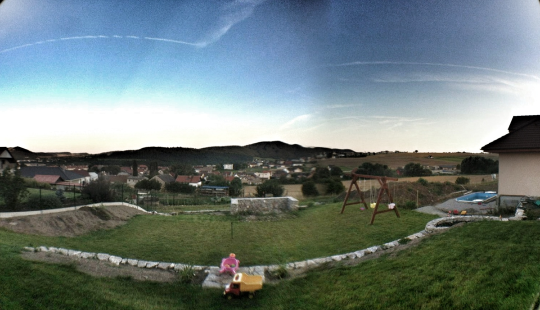
Above Image – Landscape Final Image
Autostitch
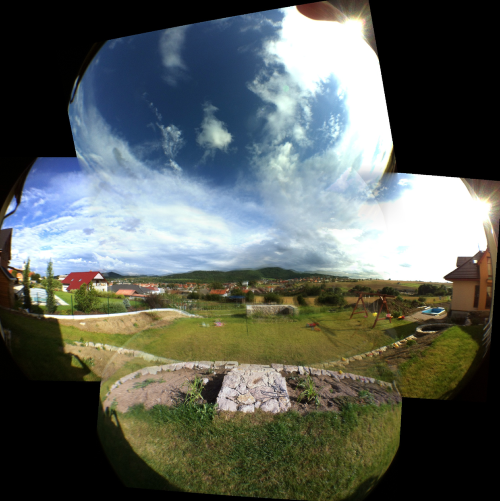
Just for comparison, I repeated the above using the standard Apple camera and AutoStitch.
- As with Pano above, I attached the fisheye lens to my iPhone, started Apple’s camera app and proceeded to take pictures, while rotating on-the-spot to the right.
- I found that overlapping the previous image by roughly 1/4 provided better results
- I also took a picture of the zenith and the nadir to add into the final merge.
- Once I had all of my images, I launched the AutoStitch app
- From there I selected “Select Photos” and proceeded to select all of the images to merge by tapping on each each once and then tapping on “Stitch” once all of the images were selected. The image above was the result;
As you can see the Autostitch image didn’t come out as well as the image from Pano, with some ghosting on parts of it. Pano will merge the images for you after capturing them. However the disadvantage with Pano is that it can only merge images across one axis, that is it can only merge a row of horizontal images or a column of vertical images, if your panorama includes additional images, you will need something like AutoStitch.
Keep in mind that the distortion caused by a fisheye lens can make it difficult for apps to merge the photographs successfully and that some apps will do a better job with certain types of image than others. For example I had the most success with landscapes when using the fisheye lens when I created the panoramas with Pano, any other app created too much ghosting but it’s really worth trying different apps yourself to see which one best suits what you’re trying to accomplish.
As a further test, I also tried out Pano and the fisheye lens in the city. My process was as follows;
- Attach the fisheye lens and launch Pano
- Capture the images moving from left to right until the whole scene is captured.
- Merge the Photos
- Load the merged result into Snapseed and crop as required, as well as adding a slight Drama filter. Save
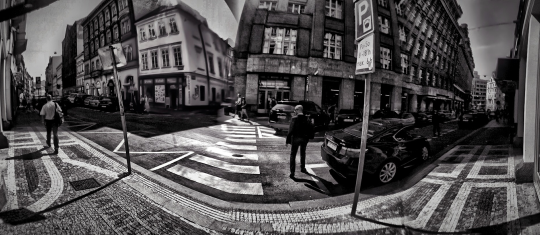
- Load the Snapseed image into Noir and adjusted the tones and contrast until I was happy with the image and saved.

From the image, you can clearly see the level of distortion caused by the fisheye lens but I think that in this image, the distortion effect adds something to the overall image. It does however reinforce the point that location is also important when taking photographs, for example, consider this image that I took, just 5 steps to the left of the previous image.
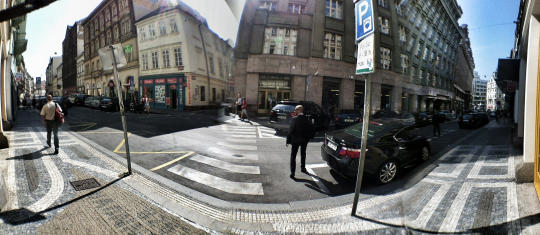
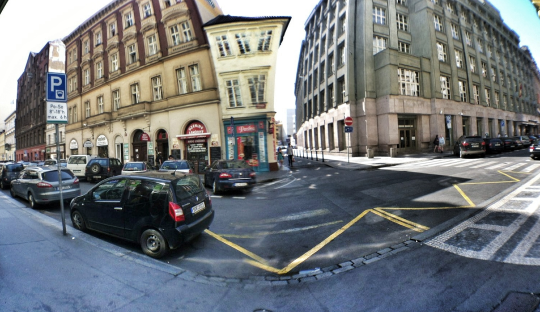
If anything this just adds to the age old adage that you really need to be aware of your surroundings and try captures from different positions and angles as you never know what you might find 🙂
The Olloclip Lens System
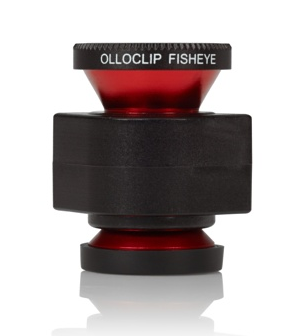
If you are interested in purchasing an Olloclip and we would highly recommend it, Apple sell them in their online stores, you can go here to view or order.


6 Comments
David
Andrew! This is a great tutorial…and your images are wonderful! I need to try all of this out…very soon!!! Thanks for sharing all of this with us!
Andrew Proudlove
Thanks a lot David, glad that you liked it 🙂
Geri
Wonderful tutorial!!! Now I’ll have to buy the Pano app to try with my Olloclip!
Andrew Proudlove
Pano is pretty good Geri, Ive only had good experiences with it so far at least. If you do get it, hope you enjoy using it as much as I do. 🙂
Adrienne Parks
Andrew, I enjoyed reading your tutorial. Thank you for all the time and effort you put into it.
Andrew Proudlove
you’re more than welcome Adrienne! Thank you for taking the time to read it and to comment, Im really glad that you liked it 🙂