Big Lens – Tutorial – Using Blur To Improve Your Mobile Images
A few days ago I was having a lovely conversation with my very good IG friend Ian Garrington (@iangarrington on Instagram), about the various blurring apps that one can find around. At one point he said something that made me come up with an idea, one of those moments when a light-bulb lights up over your head…
If you are in the business of completing online surveys or if your job requires you to view webpages continuously in a day, then you probably got your fingers hurting because of endless mouse clicking. Auto Clicker download could be the solution to your painfully repetitive task.
So here it is, the first of three tutorials of my very favourite blurring apps, in this instance BigLens £0.69 or $0.99. For this tutorial I will use one portrait photo of a friend of mine, which I took sometime ago in Italy while he was concentrating on his gelato, I quite liked his expression of satisfaction, however I am not to keen on the background and these apps come perfectly handy for my purpose!
Step 1
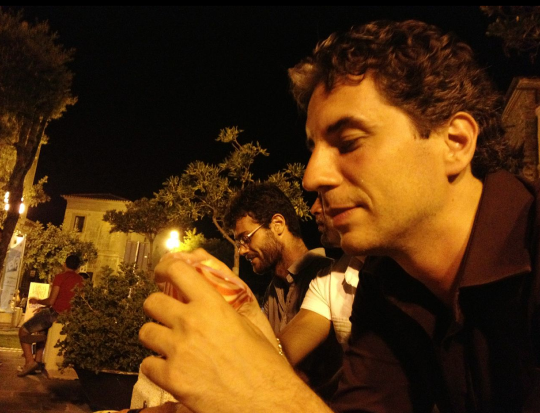
As you can see, the background has nothing too special about it and I just want to concentrate on the main subject. I have already played around with this photo using Camera+; you can find a tutorial about this app here.
Step 2
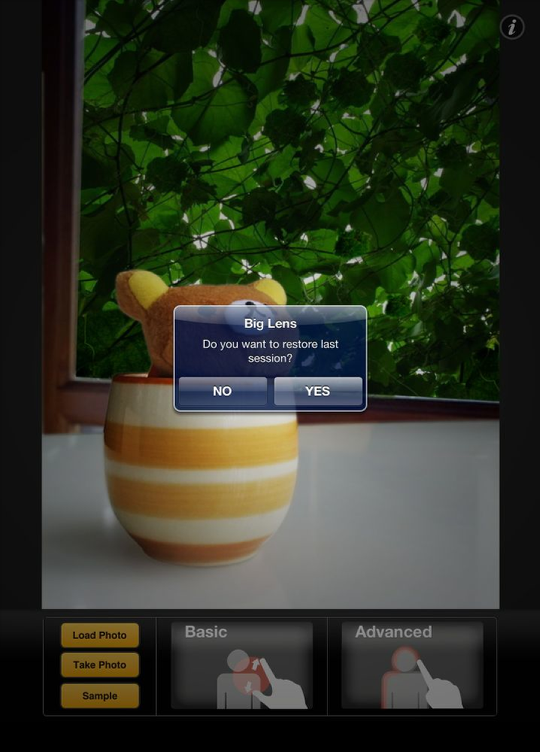
When you first open BigLens, and if you had been working on a photo, it will ask you if you want to restore your last session, just say no and then click onto Load Photo and choose advanced.
Step 3
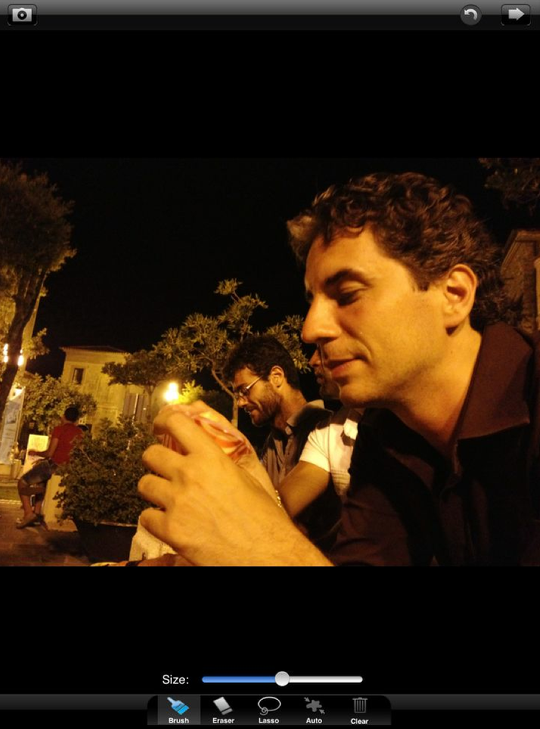
You have four different tools: the Brush, the Erase, the Lasso, the Auto and the Clear button. You can adjust the size of your brush and eraser via the bar above the buttons.
Step 4
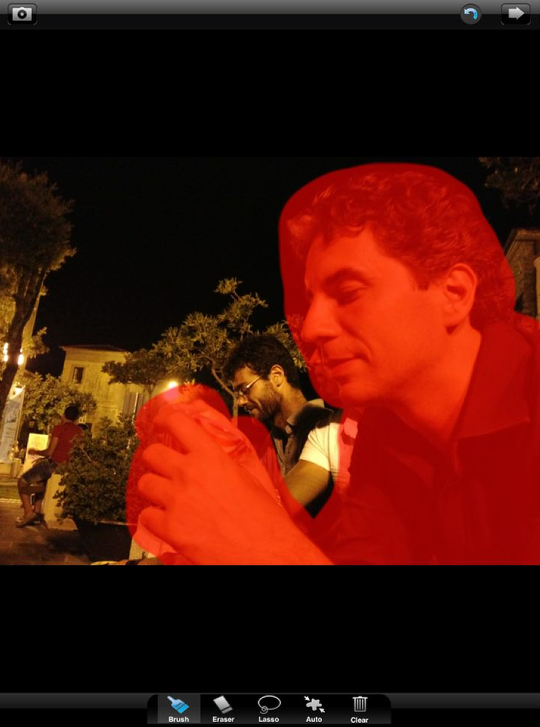
I always start with a larger size brush and quite carelessly outline my subject. As you can see it is spilling all over the place, but I have my secret weapon: the Auto button! So once you have masked what you want to mask then just press the Auto tool.
Step 5
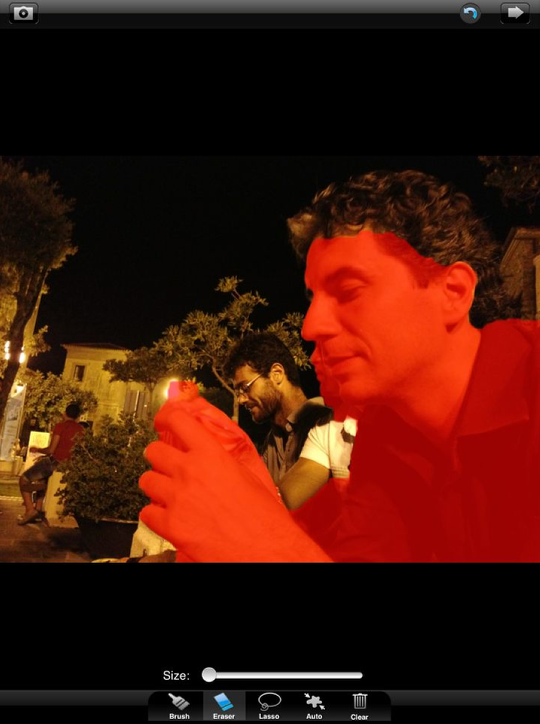
The Auto tool doesn’t do miracles, but it can really save a lot of time by automatically understanding what you want to mask. There are, however, unmasked areas and spill overs, so it’s time to roll our sleeves and use the Brush tool and the Erase tool to polish it up… Resize your brush or eraser, I usually go with the smallest size and start with the finishing touches…
Step 6
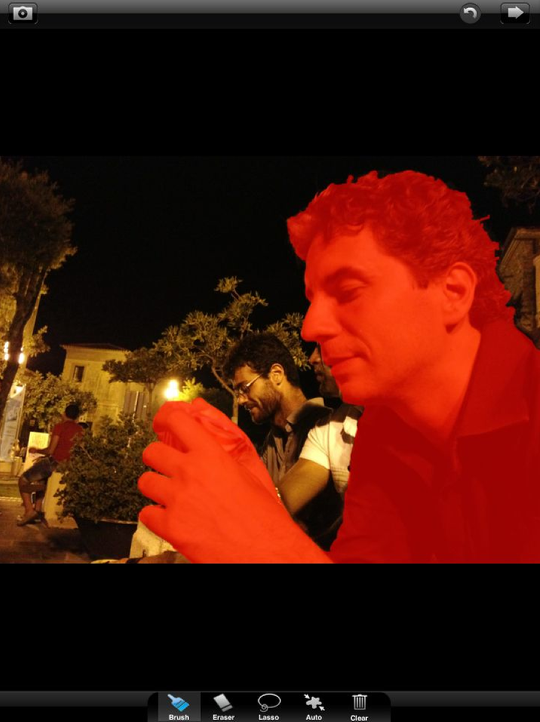
4 minutes and 37 seconds later I am all done. The portrait is nicely masked and ready to be worked with the other options. Just press the Arrow on the top right corner to go to the next level.
Step 7

By default, BigLens, opens up with an aperture of f2.8 and with the focus/blur bar almost towards the left, what this means is that the outline of your subject is slightly focused, I always pull the bar completely to the left, so that the edge isn’t focused, but nicely taken care off.
Step 8
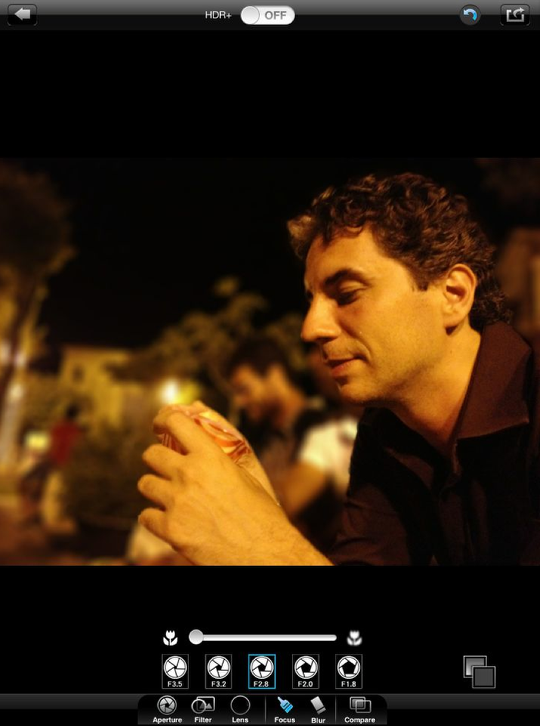
You will notice a nice even blur with no spill over around the edge of the image. The following four images will show the different aperture’s intensity level available. This one is at f2.8
Step 9

Aperture f3.5 is almost focused and the blur is very light. This is great if you want to show your background while focusing on your subject.
Step 10

f3.2 stronger blur, however you can still see the background.
Step 11
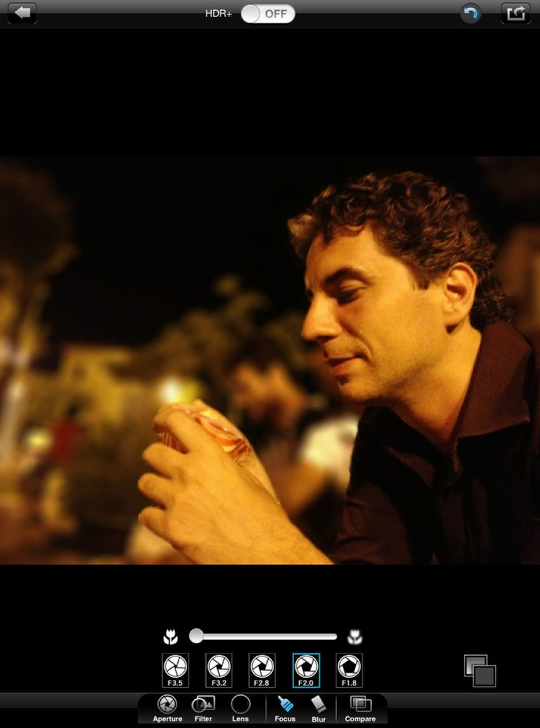
F2.0, you can start noticing that the background is disappearing and I am quite happy with this.
Step 12

And finally, f1.8 the background is completely blurred and I will stick with this one for this particular photograph. Now we will play a little bit with the Lens option.
Step 13

The Lens section allows you to choose a set of effects that will further alter your background, providing you a Bokeh feel. Bokeh is often most visible around small background highlights, such as specular reflections and light sources, which is why it is often associated with such areas. However, bokeh is not limited to highlights; blur occurs in all out-of-focus regions of the image. In here you can choose from different bokeh effects, such as stars, cross, hearts, triangles and many more.
Step 14
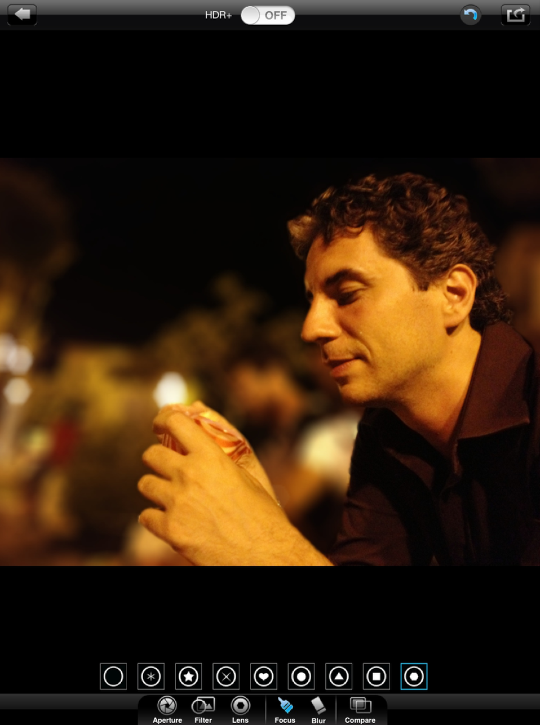
As you may notice, I have chosen the pentagon and if you look the lights in the background these have changed, but you will notice it even more with the next few images.
Step 15

The cross effect is quite visible and strong.
Step 16

Hearts? Maybe not…
Step 17

I’ll stop with the squares, which will do me good! But go and try the rest, BigLens, no doubt, has the best bokeh around.
Step 18
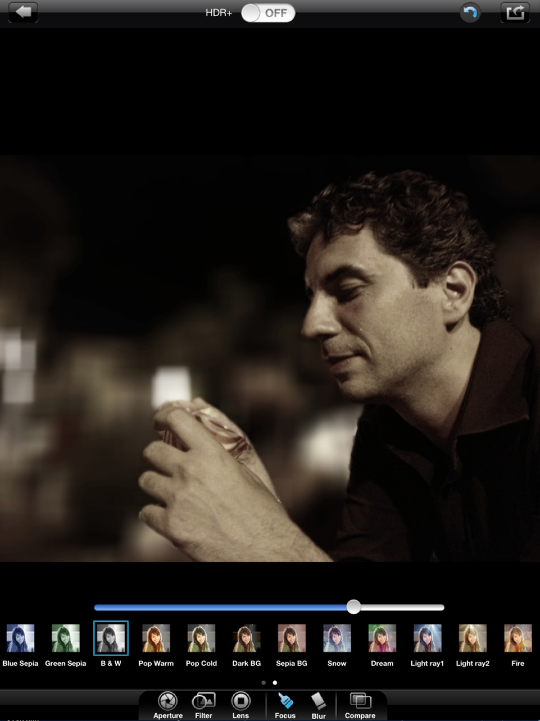
In BigLens there are many different Colour Filters, I have gone for the B&W. The great thing in BigLens is that it allows you to choose the strength of your colour, so when you first choose your filter you can decide if you want it fully B&W or faded colours and so on, just move left or right the colour bar to add or remove the effect.
Step 19
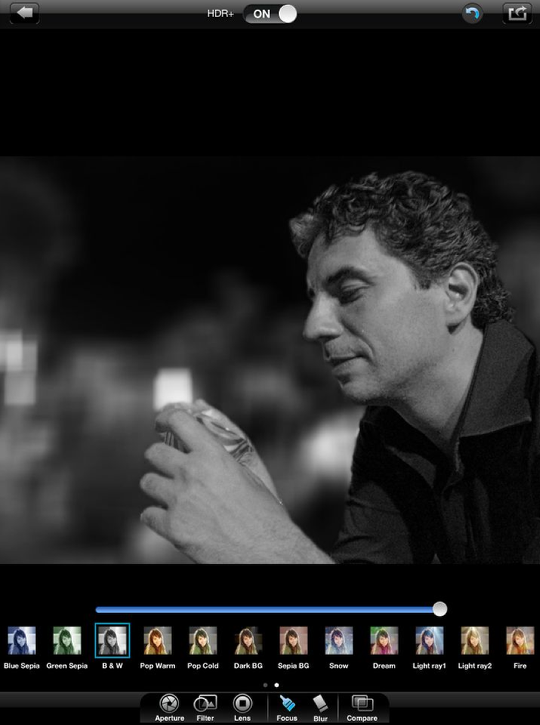
The B&W in BigLens is not bad at all, although I don’t usually go for this and use apps such as Noir or VSCO Cam, this will do me fine for now, however.
Step 20

HDR gives more light to the image, the focus/blur tools allows you to tweak your image while you are still in this section, without the need to go back to the previous screen and finally the Compare tool allows you to see how it looked like originally.
Step 21
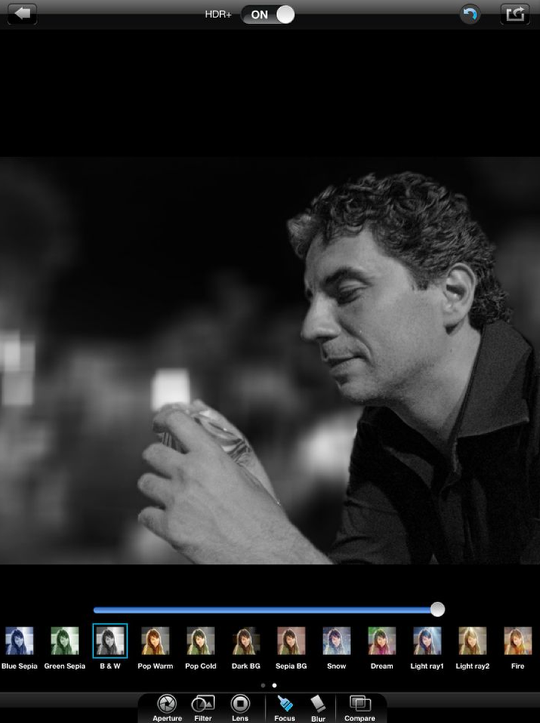
So all in all BigLens it’s a very quick and powerful tool that one can use to blur one’s images. My favourite actually, it’s simple, fast and reliable, it does the job without no huss no fuss. You have, by far, the best bokeh effects and the colour filters are very good too. It really is not hard to work with and the Auto tool makes this app the fastest among the three.
However, if you are trying to blur two or more subjects, not always it is that precise, sometime, unfortunately it ends up blurring more than what you had asked and it is a bit fiddly to sort the focus and blurring. Moreover, it has only one type of blur effect, and that is the classic Gaussian Blur, not much choice there, which is a bit of a shame. This leads us nicely to After Focus.
Please help us…
TheAppWhisperer has always had a dual mission: to promote the most talented mobile artists of the day and to support ambitious, inquisitive viewers the world over. As the years passTheAppWhisperer has gained readers and viewers and found new venues for that exchange. All this work thrives with the support of our community.
Please consider making a donation to TheAppWhisperer as this New Year commences because your support helps protect our independence and it means we can keep delivering the promotion of mobile artists that’s open for everyone around the world. Every contribution, however big or small, is so valuable for our future.

13 Comments
Anne
App looks good. Can’t wait for After Focus tutorial.
Dilshad
Really glad that you liked it!! There is much more to come;)
Geri
Thanks for sharing your info Dilshad. I have used BigLens but completely forgot about the Auto button! =) Looking forward to some new tricks I’ll learn with AfterFocus
Dilshad
And then there is even more to come!! Happy birthday, in advance dear!!!
melia
i love this app. i don’t use it enough. thanks for this great tutorial reminding me to go back and visit BigLens
Dilshad
Really pleased that you liked it!! Let me know if you need any more help!
kim martino
Great tute! I definitely haven’t given this app a chance, it does WAY more than I thought, THANX!!
Dilshad
I know, right;) go and play with it! There are so many things you can do with it!
Veevs
Great tutorial!
Dilshad
Thank you so much, really glad that you like it!
Richard Gray (@rugfoot)
Great tutorial Dilshad. Roll up your sleeves – love that. And the time required for the work! I haven’t used it much but have a photo I took today that could be just right for it. I love that auto function. I guess it’s like the mask wizard in apps like Photo Wizard, expect it trims back rather than expands out.
Dilshad
Thank you so much! It’s a brilliant little app, quite simple too.. I look forward seeing your image!
LynneM
Excellent tutorial. Just what I needed to know. Thank you.