APPart – Mitochondrial DNA
We’re delighted to publish Mel Harrison’s first article for her brand new weekly column with us, entitled APPart. Mel has written a wonderful tutorial that many women will certainly intimately understand and one that all men and women will marvel at, with her incredible creative process to produce the most fascinating art from something quite mundane. Over to you Mel. (foreword by Joanne Carter).
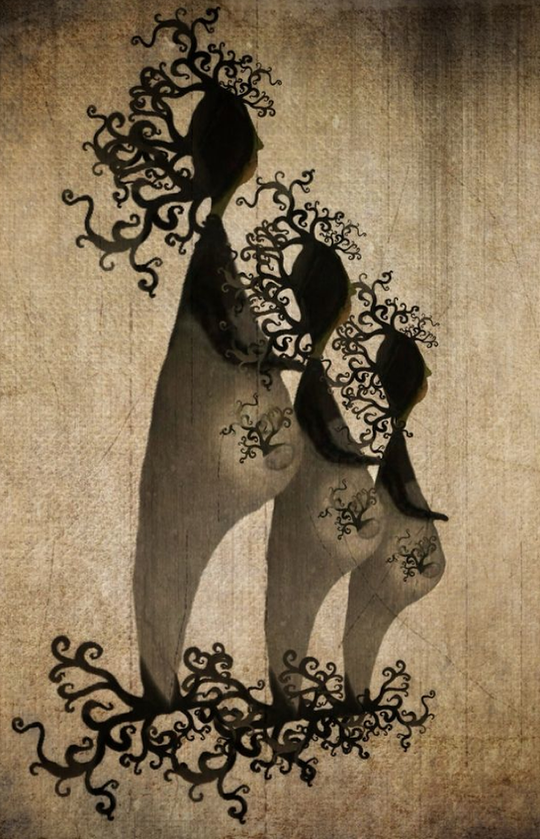
Mitochondrial DNA is an image that has a lot of personal meaning to me. Mitochondrial DNA is passed down from mother to child virtually unchanged across the span of generations. As the mother of only sons it makes me sad that the DNA history of all the woman who went before me will stop with them.
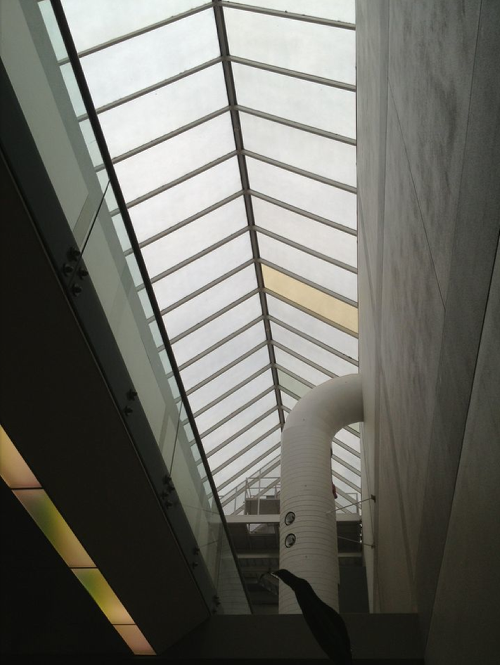
This image started life as a native camera photo of the internal roof and skylight at my local hospital. I was waiting for my 3rd son to finish at an appointment and the air vent and panelled roof caught my attention.
Glaze
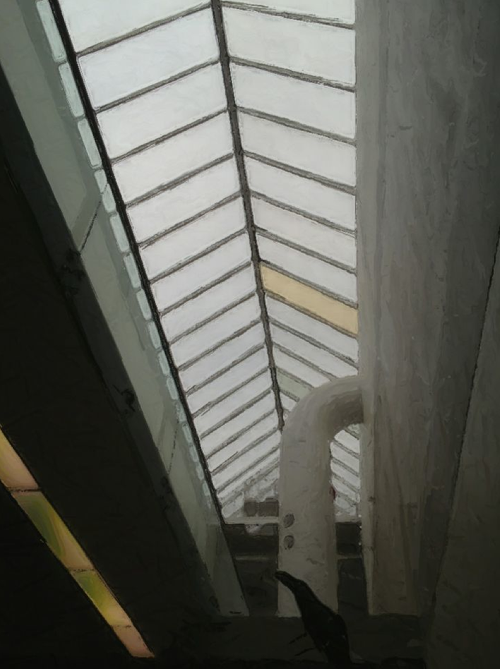
Then the image went into Glaze, all my recent character work has Glaze as it’s first point of call. I don’t use one particular setting in Glaze, each image works differently so it really is worth taking the time to run an image though them all to see which one is most effective.
Juxtaposer
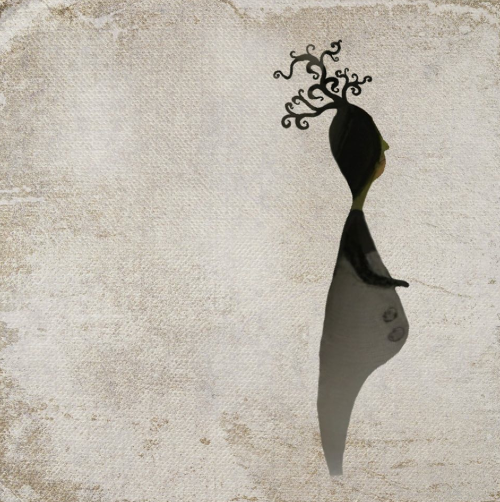
Next step is Juxtaposer, I use a stylus, and use the soft white masking tool to sculpt out parts of a character, this is a lot of back and forth, saving stamps and opening the image fresh again to start on the next part. I carve out the body, arms, head, feet etc individually then start a fresh image and construct them into the final character.
Trio
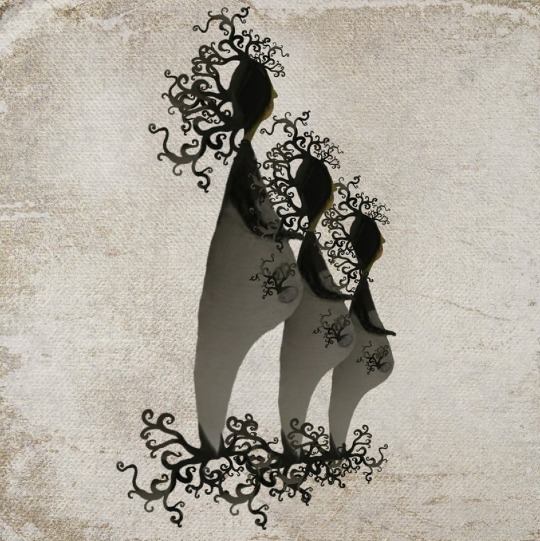
For mitochondrial DNA three of the images were placed on the background in descending size, I then arranged the curls/tendrils to link the 3 together and the single set in utero of each figure.
Photowizard
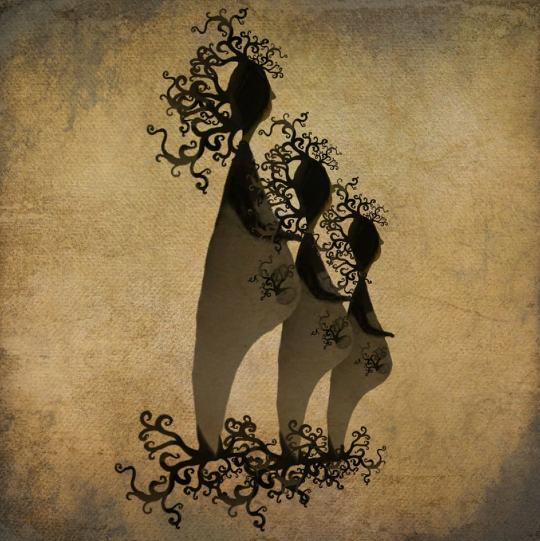
My next step was adding some texture in Photowizard, I added texture 5 and texture 6 in mid strength opacity.
ScratchCam
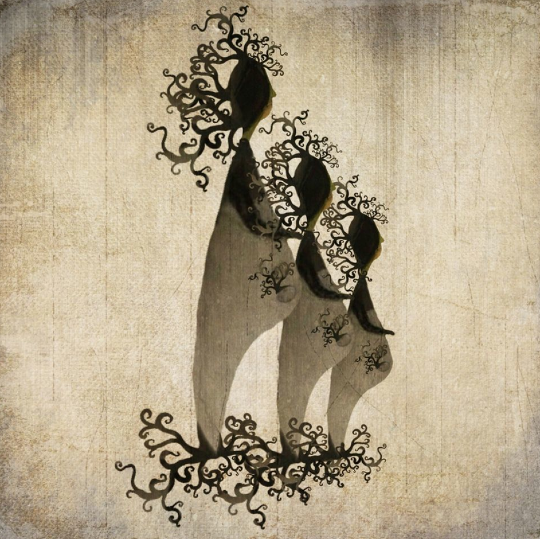
Scratchcam was next for some extra grunge and texture. I am loving the new stamp feature in Scratchcam, if you have not updated yet make sure you do.
Snapseed
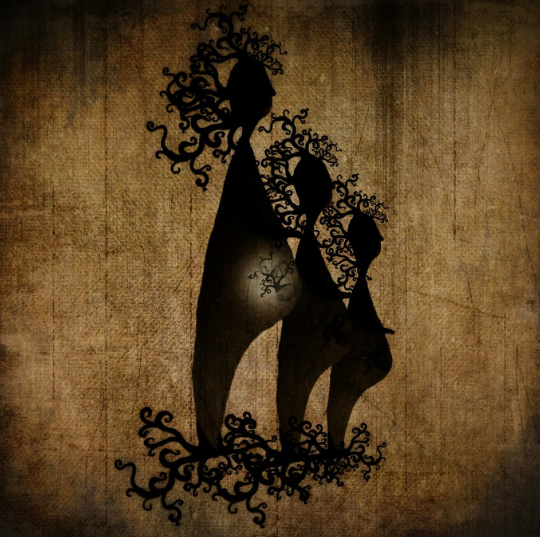
The next step was Snapseed and this was a step that I stumbled across quite by accident. I am really liking the old lens filter which is hidden in behind the center focus option. Using that filter and placing the center focus circle over the belly of the largest figure it created a lovely dark silhouetted image. I didn’t want quite that dark this time but I really loved the effect and will use it again.
Image Blender
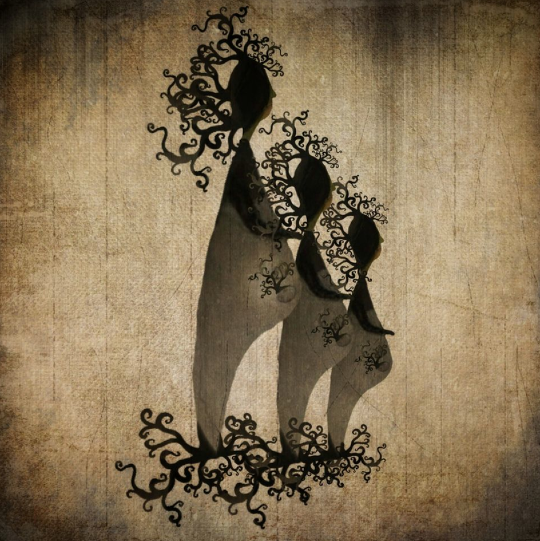
I used image blender to balance out the silhouetted image with the pre-Snapseed image which added just a touch of depth to the colour.
Paintfx

Next I went into Paintfx to add brightness just to the bellies of the figures. Paintfx is excellent for selective placement of a very large range of effects. It is one app I would not be without.

11 Comments
Wyethia
I love the article but one step entirely confuses me- what does the roof shot have to do with the starting “woman” image? I don’t see any relationship?
Mel Harrison
hi Wyethia, that is a very good question and your right the before shot as a whole has no intrinsic relationship with the final image theme, though it is the hospital I gave birth to my 4 sons so there is a personal emotional layer added to the final image.
As Laurence (thank you <3) so eloquently answered when I look at images for this type of work I stop looking at it as a whole image and analyse the individual components for shape, texture and colour.
Each part is "cut out" individually in Juxtaposer, flipped or rotated if need be then saved as a stamp. When I have all my needed parts then I come back with a fresh back ground and construct the figure.
I hope that answers your question but do feel free to ask more about my process I am very happy to answer any questions.
Mel xx
David
Wow! Very impressive, Mel! I always learn a new trick or two from your images. Thanks for sharing how you created this wonderful image!!!
Mel Harrison
Thank you David! If you learnt something then my job is done 😉 Thanks again my friend for your support <3
Mel
Laurence Zankowski
Wyethia,
Look closely again, notice the two small round shapes on the pipe in the starting image. Mel is obviously a very intuitive image maker. She seems to work from a deeper magical space, revealed by the creative process. Sometimes referred to as ” post – viz” .
Be well
Laurence
Mel Harrison
Laurence thank you, I feel a kindred spirit. Your words are more then kind and mean a lot to me.
Mel xx
maktub77
Awesome, Mel. Thanks for sharing!!!
mahoganyturtle
Anytime Sacha!
Mel xx
Robert Lancaster
Fantastic tutorial Mel!
I am still a bit stymied as to how you get the base image for use in Juxtaposer to start sculpting your characters.
Is this a texture applied over your hospital image and then removed per se with the stylus to create the shape in Juxtaposer?
Thanks again for sharing with us.
Mel Harrison
Hi Robert yes! I have a folder of background images that are just painted over images usually prepared in Paintfx.
Cheers Mel
Tommy
As usual Mel, true artistic genius and nice to read your work flow.