Xtrafolio – Professional iPad Photo Portfolio Tutorial – Adding Captions
Time to take another look at this pro level presentation iPad app! In my first tutorial I did a bit of a “grand tour” of Xtrafolio and how to do a basic folder set-up. Given the depth that this app gives you as a presentation tool, I thought it best to be a bit more focused with each new Xtrafolio. With that in mind, let’s take a look on how to add captions to the images you’ve imported into your folder.
(We previously published an earlier tutorial helping you get started with this app, if you missed that please go here). Xtrafolio retails for $16.99/£11.99 and you can download it here.
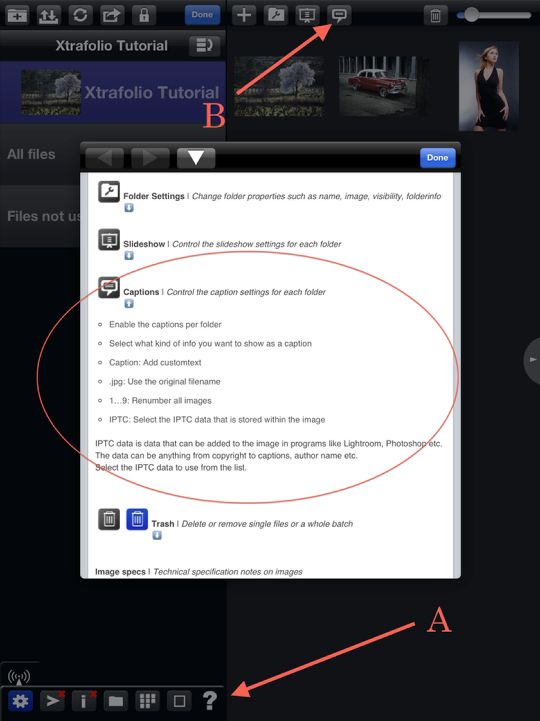
Let me first point out that Xtrafolio comes with a great Help menu that you can always refer to while setting things up. Clicking on the question mark icon (A) while in any given view will bring up the appropriate help page. I’ve circled the info on Captions that refer to the Caption icon (B) at the top of the screen.
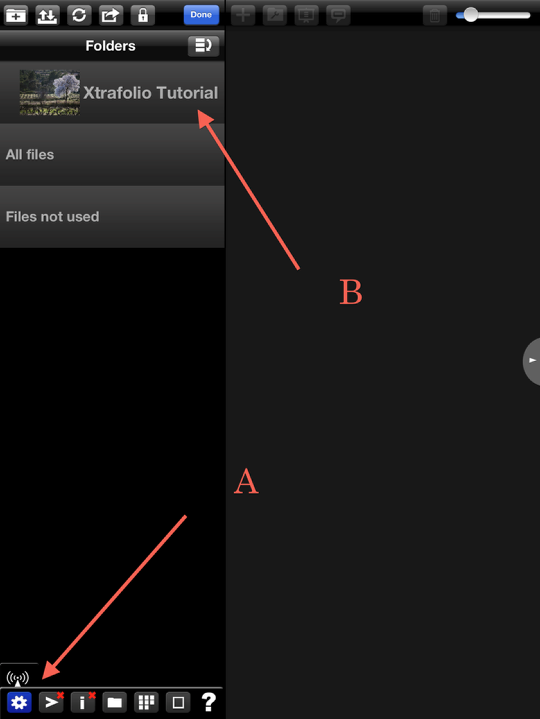
To get things started, make sure you’ve clicked on the Gear icon (A) to come back to the Folder menu. Click on the Folder you want to work with (B)….
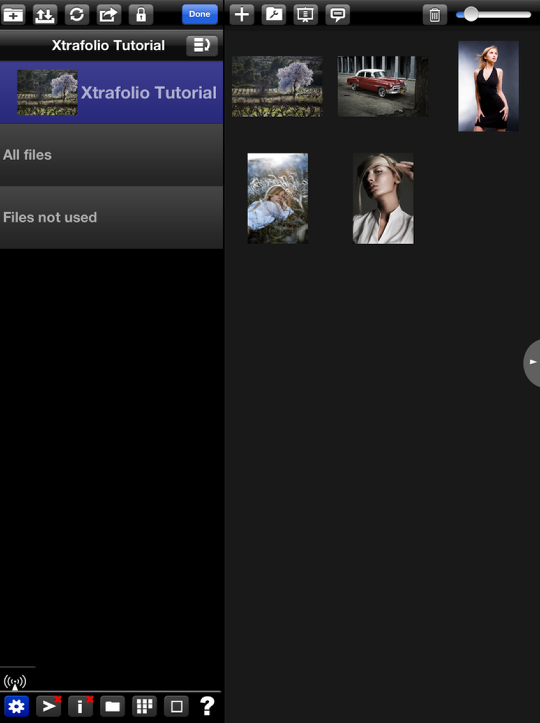
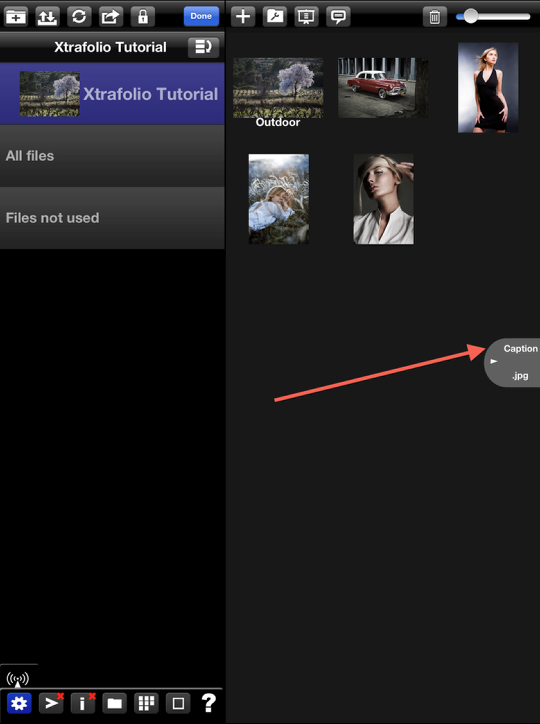
…and this will bring up all the images you’ve imported into that folder. Notice that none of these images, which were supplied to me by the developer, are showing captions. I’m going to take you through several different methods to do that!
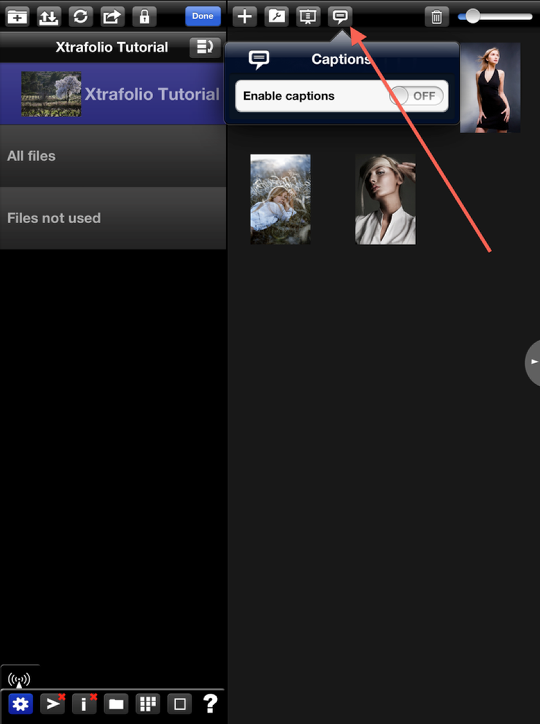
The first method is while you’re still in this screen mode is to click on the Caption icon that I pointed out earlier. This will open this drop-down menu. Notice that the “Enable caption” slider is “Off”.

Sliding this to “On” gives you four caption choices. “Caption” allows you to add your own custom captions, “.jpg” keeps the file name as is, “1…9” numbers the images in consecutive order, and “IPTC” uses this info if it’s available. I’m going to use “Caption” for this tutorial.
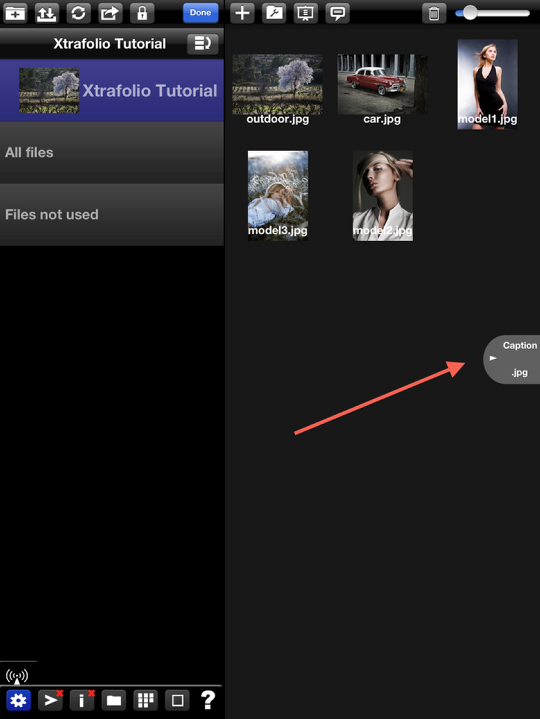
Here’s an added feature you can use while in this screen mode. Clicking on the gray tab that’s mid screen on the right side brings up two view modes. Clicking on “.jpg” brought up the file names of the images. Clicking on “caption” drops the file names and since I haven’t added any caption names, nothing is displayed.
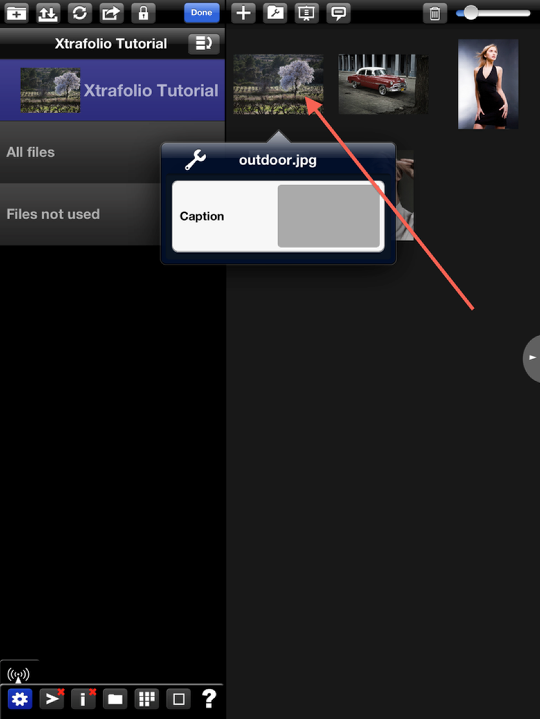
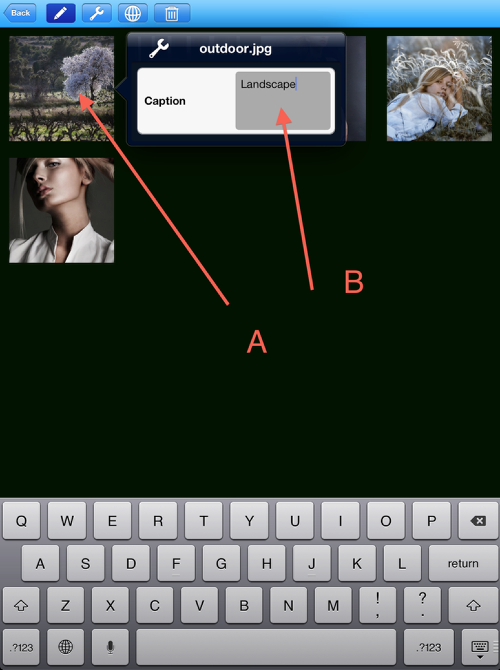
Okay…let’s add some captions! Click on one of the images and this pop-up menu will appear.
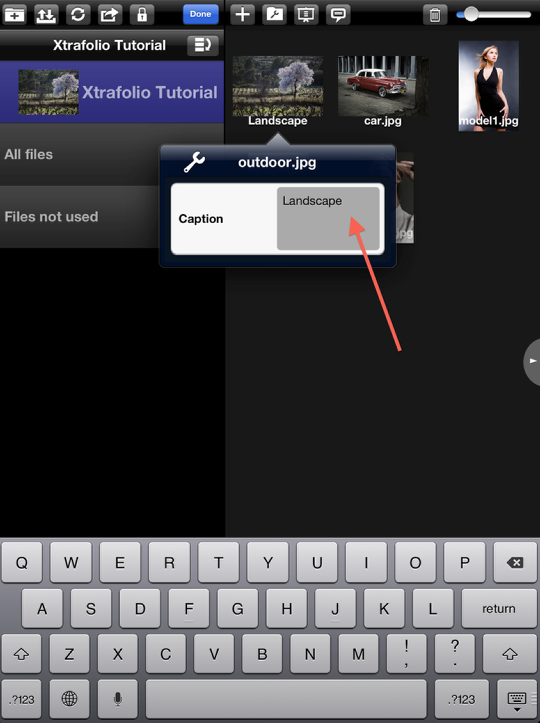
Next, click inside the gray Caption field. This will bring up your keyboard…and you can create your Caption. I used “Landscape” for this image. (Later, you’ll see where you can change the size, color, etc. of your captions.) To add captions to your other images, just do the same thing with each.
Let’s go back to that gray tab again. This time when I clicked on Caption, my new caption appears and the .jpg tag drops out. (As there are no other captions at this time…”Landscape” is all that you see!)
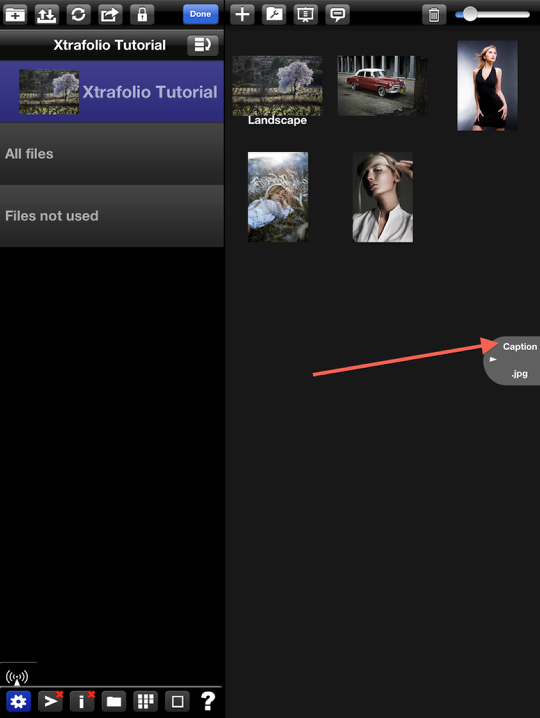
Likewise, clicking on “.jpg” brings the file names back. The “Landscape” caption I added to outdoor.jpg is still there but just not showing in this view.

Now that captions are added to some of the images, let’s make them show up in a Portfolio presentation.
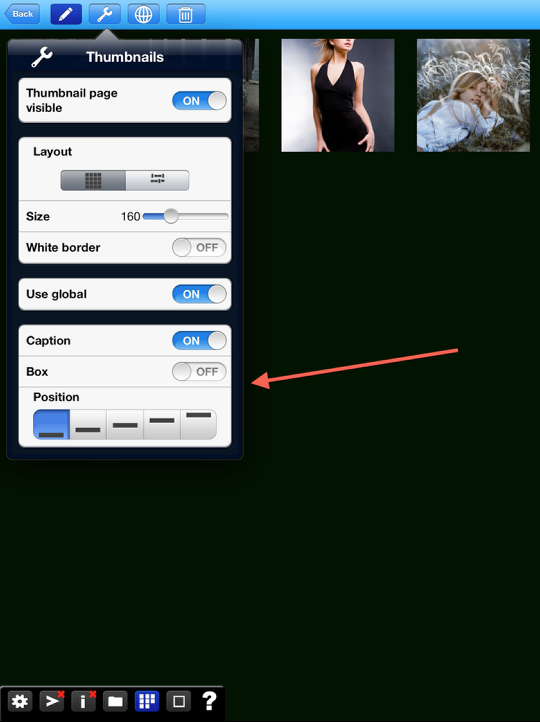
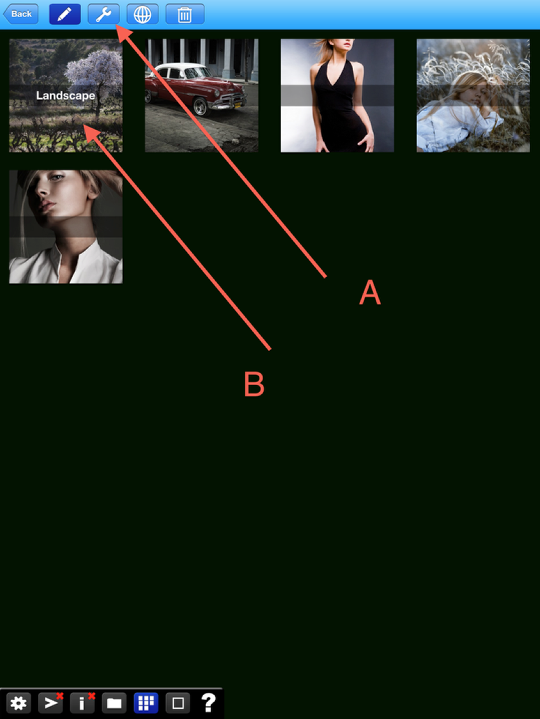
First, click on the Thumbnail icon (A). This will bring up a screen that just displays thumbnails of your images and the tool bar at the top of the screen.
Clicking on the Wrench icon (B) in this top tool bar will open this drop-down menu. In this menu you can change view settings for this page…and at the bottom of the menu is a Caption control (C) that is presently set to “Off”.
Sliding this to “On” brings up these controls: “Box” which will create a box around your caption and “Position” which lets you pick where the caption appears on an image.
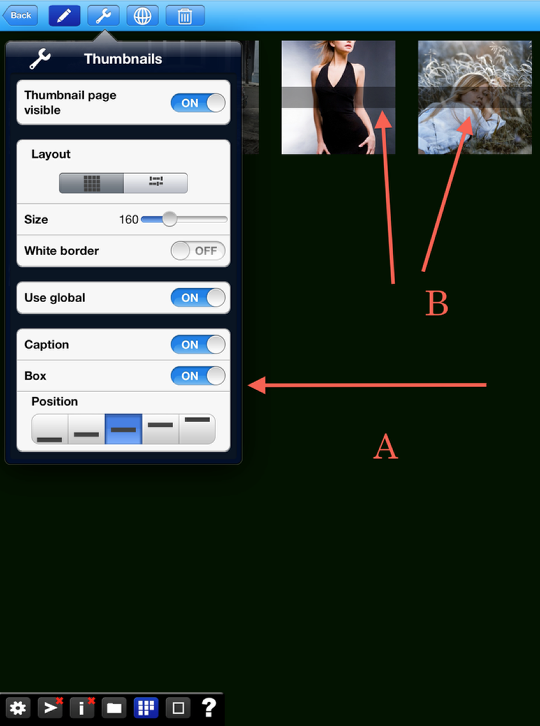
In this screenshot, I’ve turned “Box” on and picked the middle setting for “Position”. You can see the results of this in two images. (B)
When you tap one of the images you can also change the caption in this view. Click on the image (A), click in the gray Caption field (B)…and away you go! Touch the screen when you’re done to close this pop-up screen.
Here’s something else I learned working with this app. If the captions aren’t showing, as in (B), when in this screen mode, simply click on the Wrench icon (A) that will bring up its menu…and then touch the screen closing the menu. The captions should now be showing.
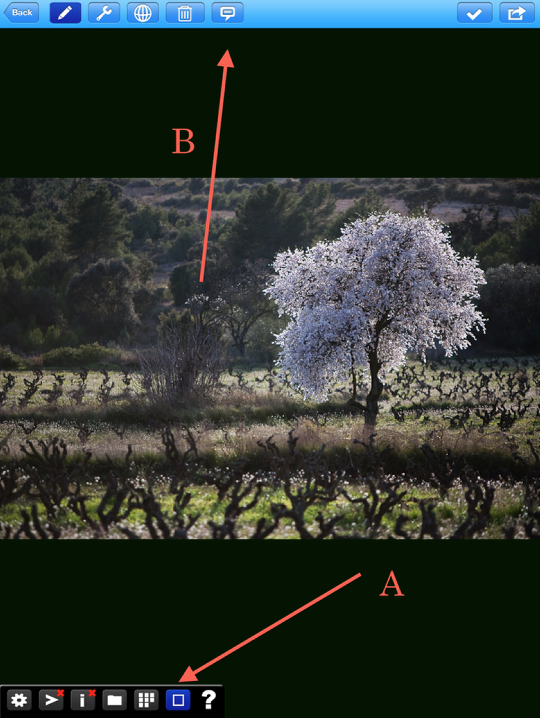
One last note on Captions and this time it’s when you’re in Slideshow mode. Click on the Slideshow icon (A). Your first image will come up in full screen view. (If you turn your iPad to Landscape mode the image will go full screen. I just prefer to work in Portrait mode when putting my screenshots together…)
Click on the Captions icon (B)….
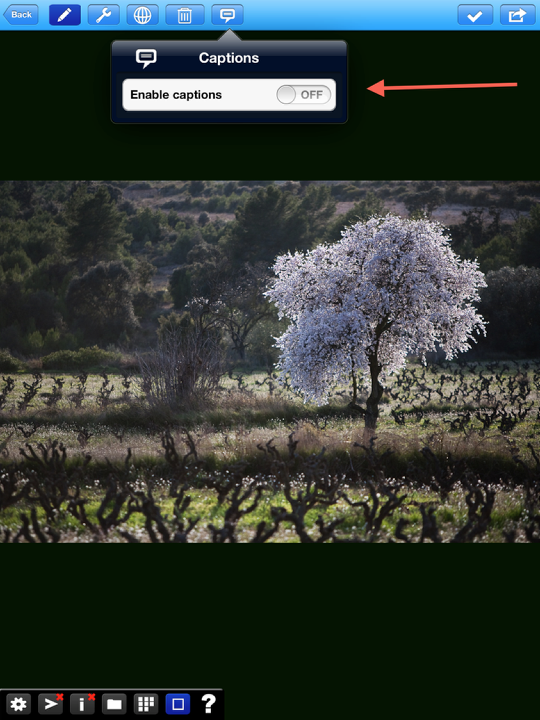
The same “Enable captions” menu will drop-down. See this button as a master switch to switch on or off all the captions in your portfolio. Perhaps you want a cleaner look for one client or the next!
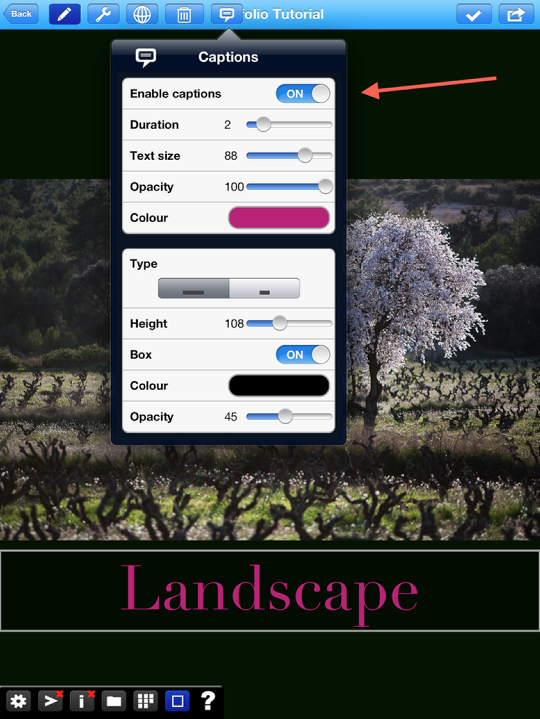
Enabling this feature brings up Caption controls that you can use to change how your captions will appear in your presentations. Starting at the top of the drop down menu with “Duration”, let’s discuss what each of these will do for you!
“Duration” establishes the time that your caption will show before fading out when its image first appears. The slider bar goes from 0-8 seconds. “Text size” sets the size of the caption text…7 to 120! “Opacity” sets the opacity of the text from 0% to 100%. “Colour” lets you pick the color of your caption text. Touching the color bar brings up a pop-up menu where you can use its color bar or key in a hex code for a certain color.
Moving down to the second menu, “Type”, the first control bar lets you pick between two sizes of boxes around your caption; full screen or just around the text.
“Height” establishes the height of this text box from 25 to 250. “Box” enables this box and “Colour” gives you the background color you want to show in the box. Finally, “Opacity” sets the opacity of this color. This is important if you have the caption floating over the image or using a different background color around your image.
This finishes up my look at the Captions. I hope this was helpful to you in getting your professional portfolio in Xtrafolio set up!
David Hayes
David is Head of Technical Tutorials here at theappwhisperer.com and this role adds to the many things David has done in his life…some of which he considers more significant than others. Yet, he feels all have made him the artist he is today. He’s been a cook at a truck stop, a janitor at a military base, worked in advertising, been a banker managing other people’s money, and an elementary school teacher. Trained as a photographer as an undergrad, he’s recently returned to these roots and now considers himself foremost a photographer and secondly a mixed media artist.You can find David’s work on many other popular websites including his own: http://www.clearerreflections.com.