iPhone Photography App Technical Tutorial – PhotoStation – Taking A Look At Layering
We have published many iPhone Photography app technical tutorials with PhotoStation, formerly known as AnyShape – Photo Editor here at theappwhisperer.com (TAW). If you have missed those, please go here.
This time our Head of Technical Tutorials, David Hayes takes us through the practice of Layering within PhotoStation, this is a new feature that was recently included in a new update.
PhotoStation retails for $0.99/£0.69 and you can download it here.
When PhotoStation first came out as AnyShape, it was a quite interesting app given its unique Bezler selection tool. My first articles focused on using this tool…. and I’ll have to say it took awhile to fully master this. Since then, renamed PhotoStation, this app keeps getting better and better. It’s been awhile since I looked at it and thought it would be a good time to discuss PhotoStation’s layering capability.
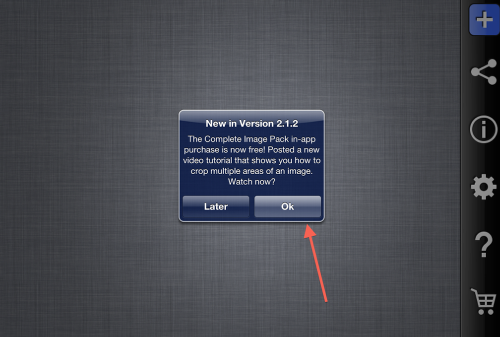
Opening the app after downloading its latest update, you’ll be greeted by this invitation. I suggest you take a look at this video before going on…particularly if you’re new to PhotoStation. (I won’t be going into any detail on how to use the
Bezler selection tool in this article so this video will help get you started.)
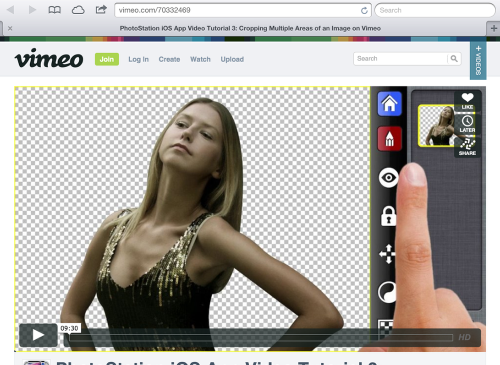
Clicking on the “OK” button will take you to this video on cropping multiple areas. Again, if you’re new to this app or need a refresher like I did, you’ll want to watch the other video tutorials.
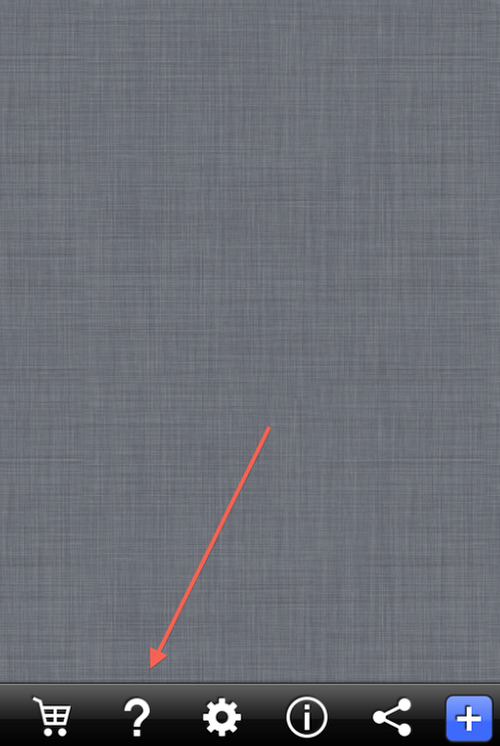
To get to these, go to the Home screen and click on the Question Mark icon. This will take you to…
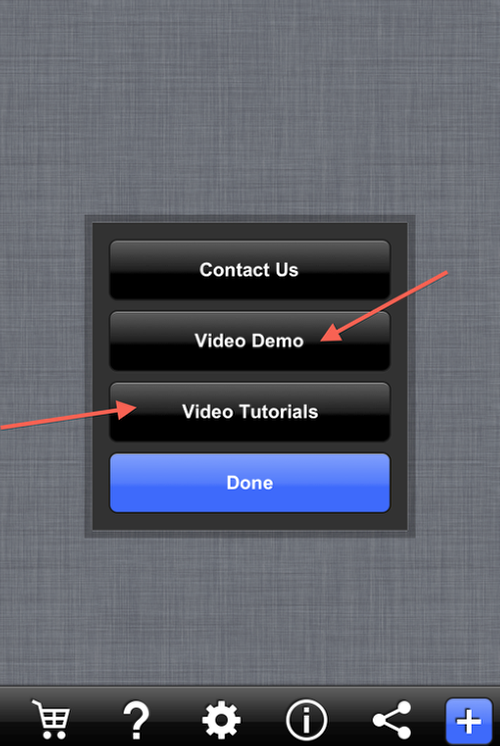
…this screen. Clicking on Video Demo will take you to a nice overview tutorial. Click on Video Tutorials and you’ll be taken to a menu of all their videos.
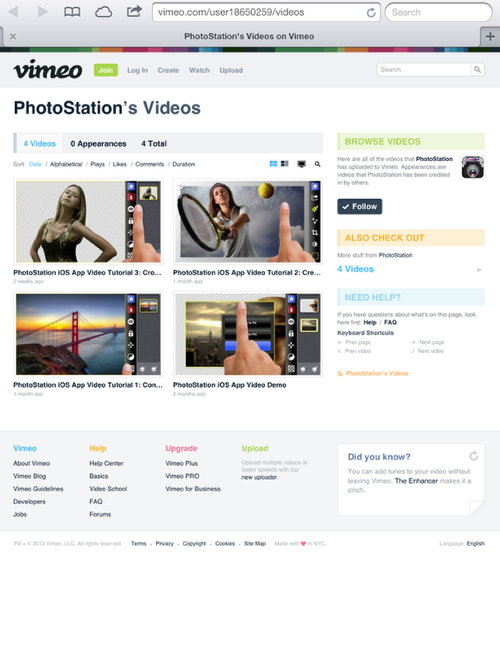
Spend time watching these. It will be worth you’re time!
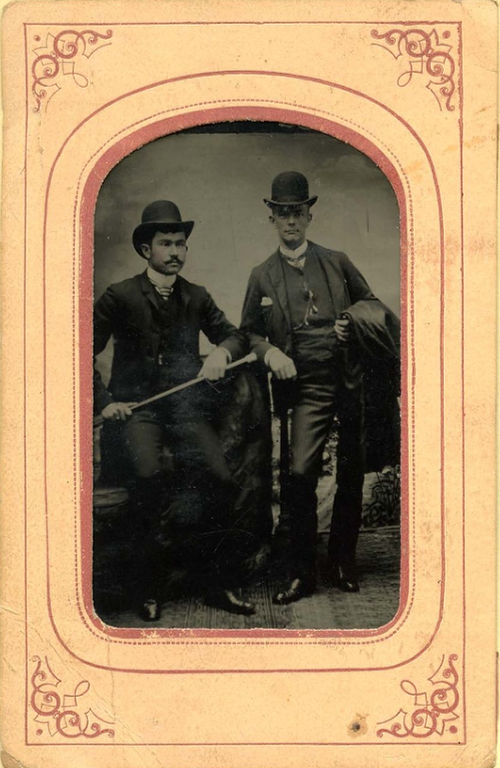
Time to get started! Searching for images to work with, I rediscovered a folder of vintage pics that I had scanned sometime ago from a family photo album belonging to my wife. Fun stuff!! While I find the two gentlemen fascinating…particularly their hats…it’s the frame I’m after. So let’s put PhotoStation to work!
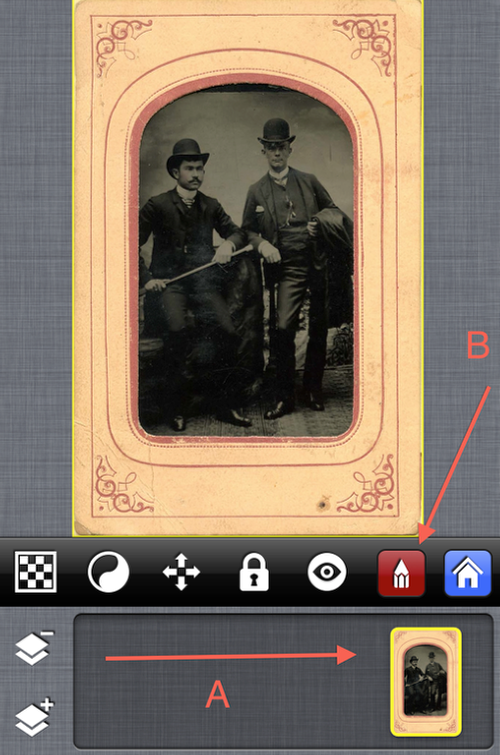
Bringing this image into the work screen, I clicked on the Pencil icon to start my edit process.
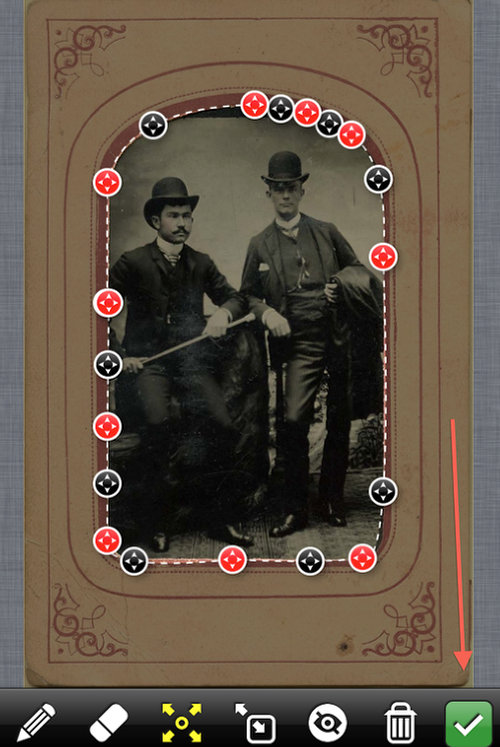
Using the Bezler selection tool, I highlighted the area I wanted to remove. (I’m glad I took time to watch the video tutorials, as there have been some great changes on how this tool works!) This all done, I clicked on the Check Mark icon to move on.
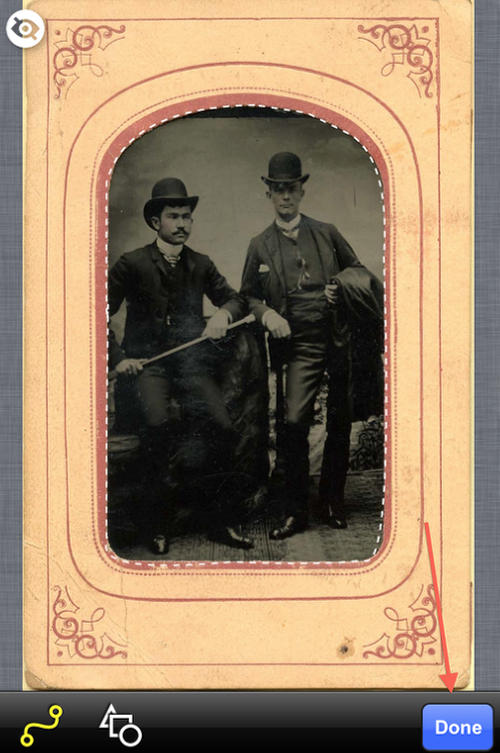
This screen opens showing me what will be cut…and gives you a chance to go back to make any changes. None were needed so I clicked on Done.
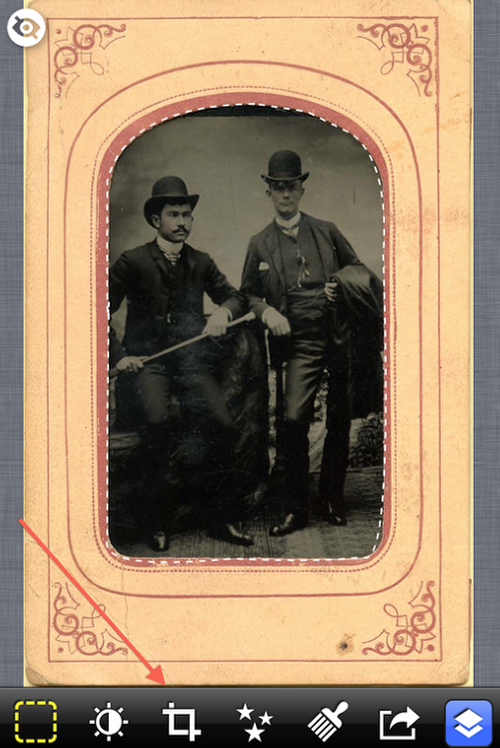
And…this screen appears that gives you several different options including Crop, which is the one I need to use at this point.
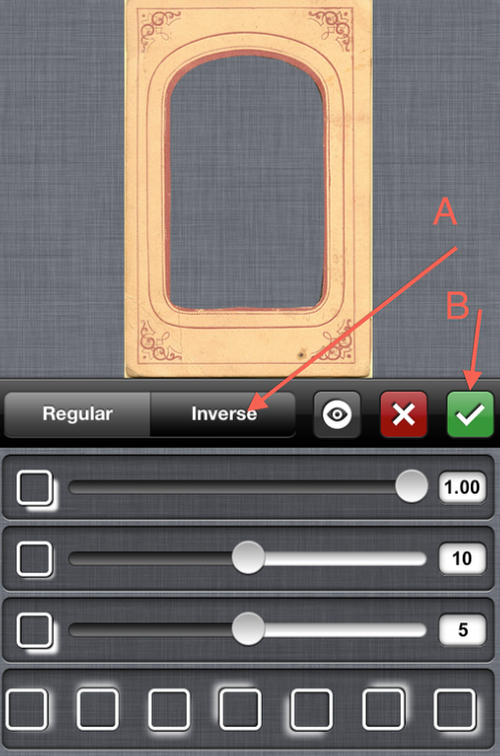
After clicking Crop, this screen comes up. This time I clicked on Inverse to bring up the frame without the gentlemen. (If I have left it on Regular, then just the gentlemen would be showing!).
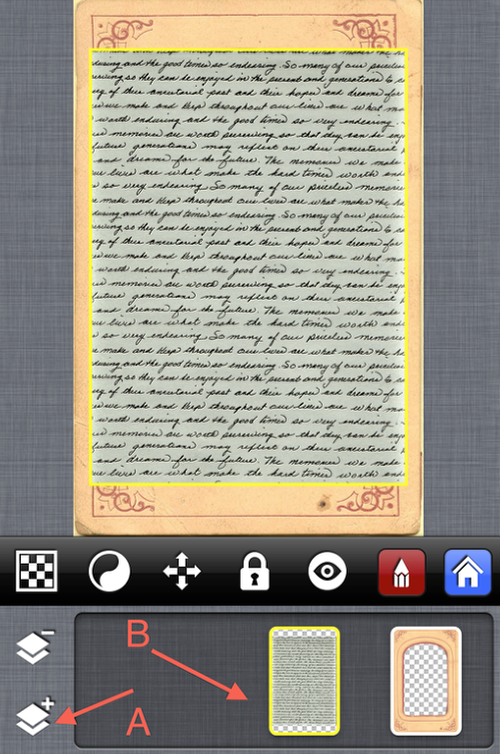
This element all done, it was time to bring in another. I first clicked on the Layer+ icon (A) that will bring up another screen that will let you chose where you want to source that image. (I don’t have the screen shot for this particular step but I’ll show it to you in another step! Sorry about that!!).
In this case, I went to my Background stock folder that I keep on my iPad and chose the one you see. (B) With this layer activated, I used the finger pinch method to fit the background within the general boundaries of the frame layer.
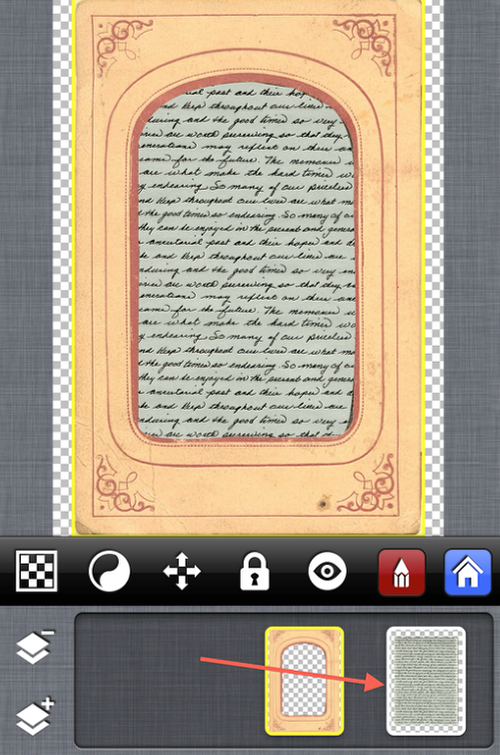
Going down to the Layer screen, I moved the background layer over to the right, which puts it behind the frame layer…and creates a nice background in the frame.
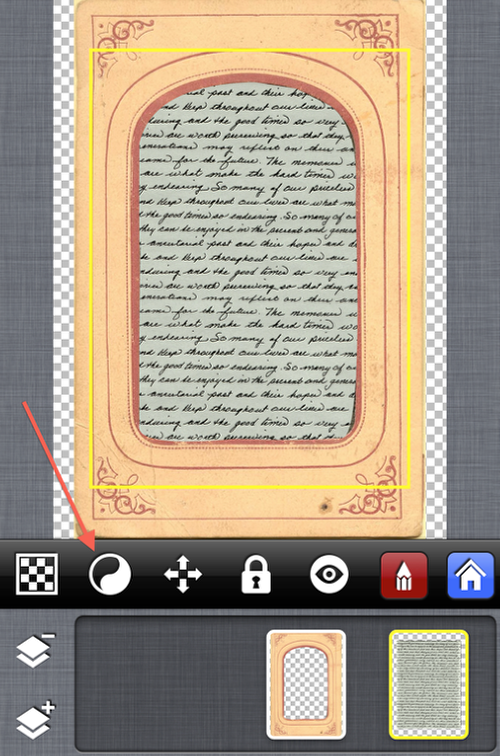
Keeping the background layer still active, I clicked on the yin/yang symbol to do a little adjusting to the blending mode.
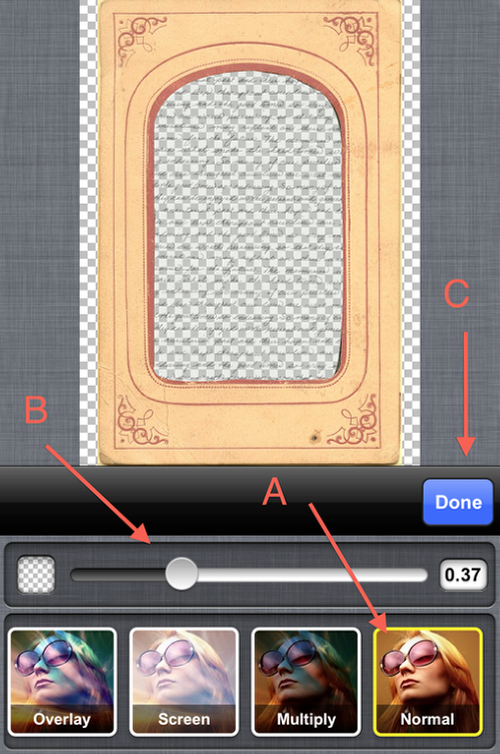
After trying out the different modes available, I decided to keep it on Normal (A) at 0.37 (B). Clicking Done (C) moves me to the next step.
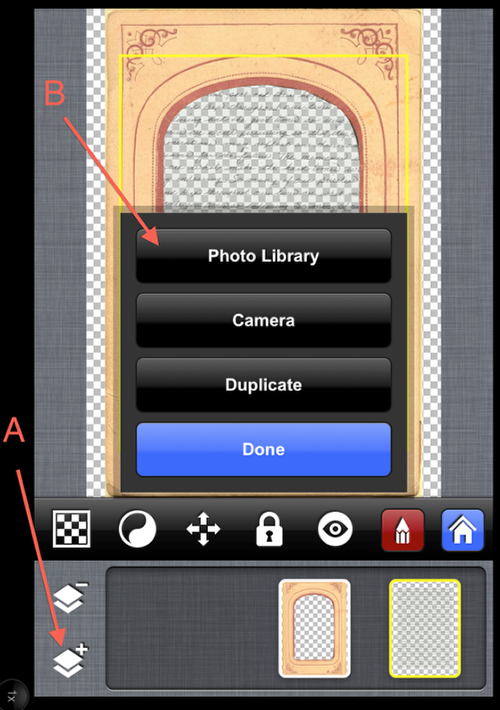
Okay! Here’s the screen shot I promised a bit earlier!! Time to add my third layer… so I first clicked on (A) which brought up the source screen I mentioned. I then clicked on Photo Library (B).
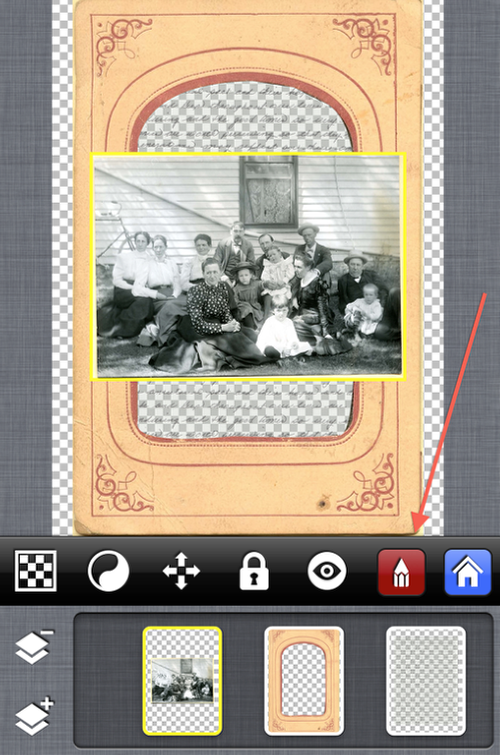
Using yet another scanned image from the family photo album, I was fascinated by the woman front and to the left. Of course I did take a minute to admire the hats! Wanting to pull her out of this family portrait, I clicked on the Pencil icon.
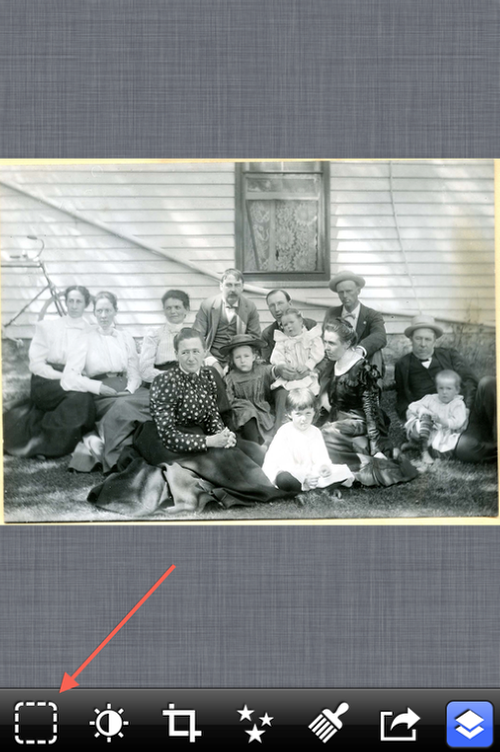
Clicked on the Drawing icon to open the Bezler tool panel…
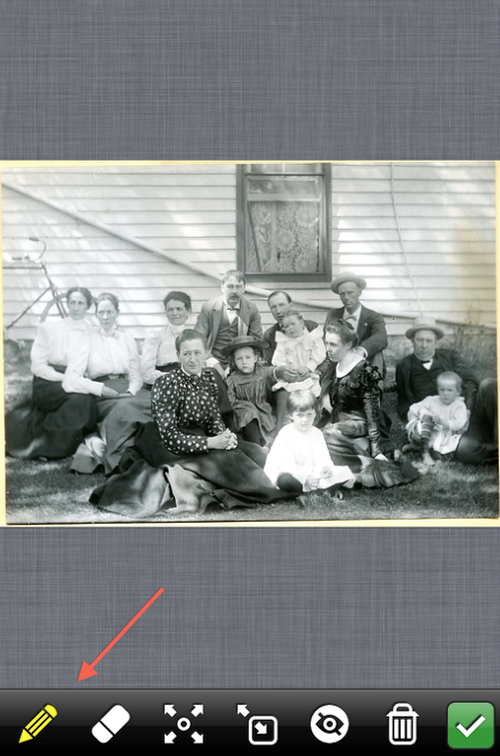
…and the Pencil icon to put down my selection points.
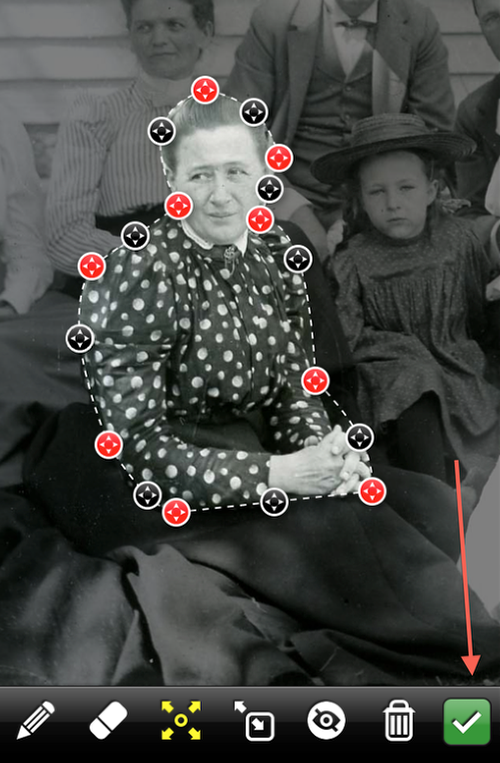
Putting down the points as before, I clicked on the Check Mark icon…
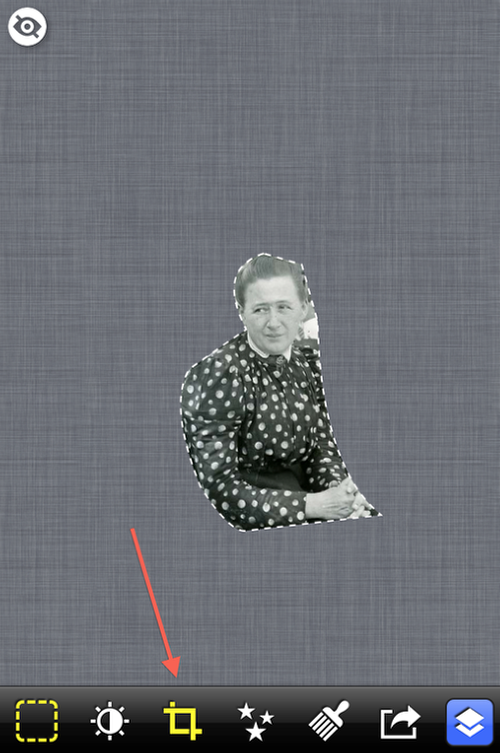
…then the Crop icon.
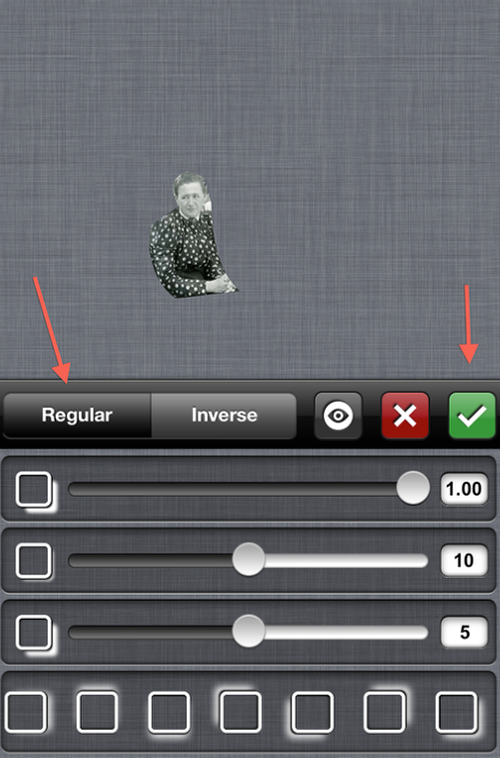
This time I kept it at Regular as I wanted to keep this fine lady. Clicking again on the Check Mark icon…
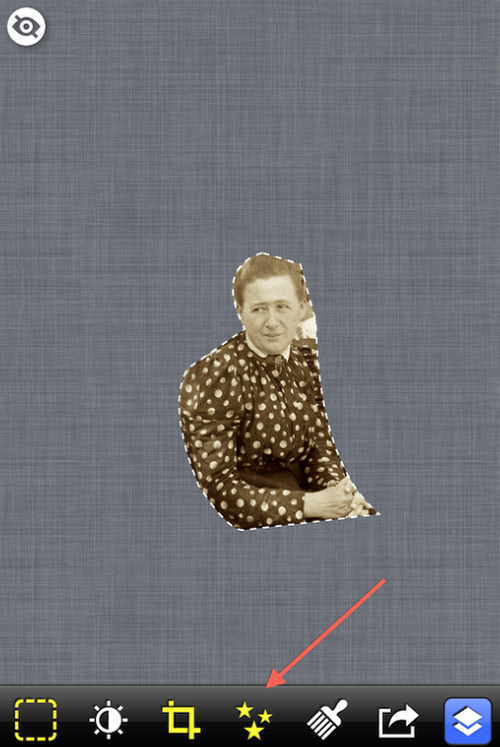
Okay…do me a favor while looking at this screenshot. Pretend the fine lady is still in black and white, not sepia. You see…I made her sepia before I made this screenshot.
In any case, to make her sepia, I clicked on the Stars icon…
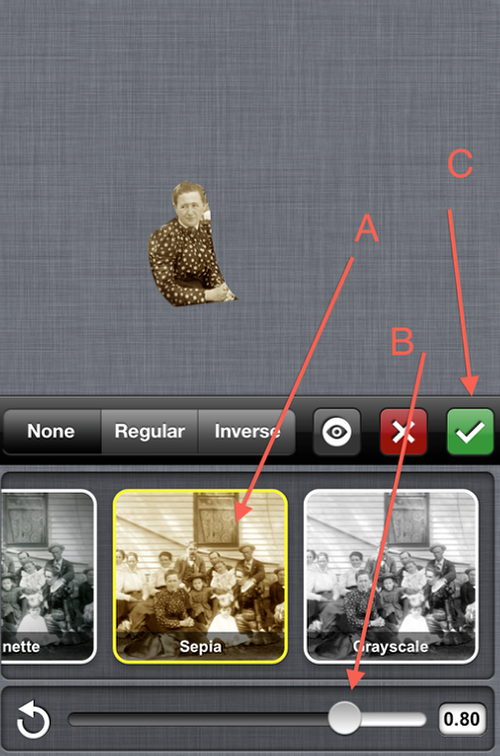
In the effects menu, I picked Sepia (A), adjusted to 0.80 (B), and then clicked on the Check Mark. (C).
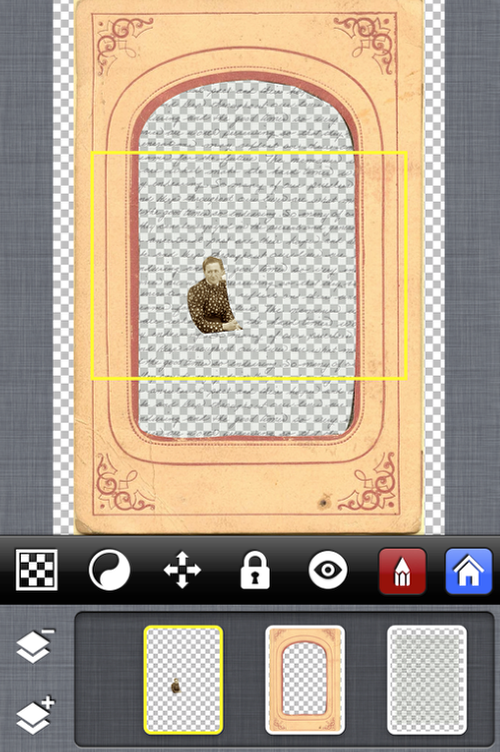
Here she is as my third layer…ready to be placed within the frame.
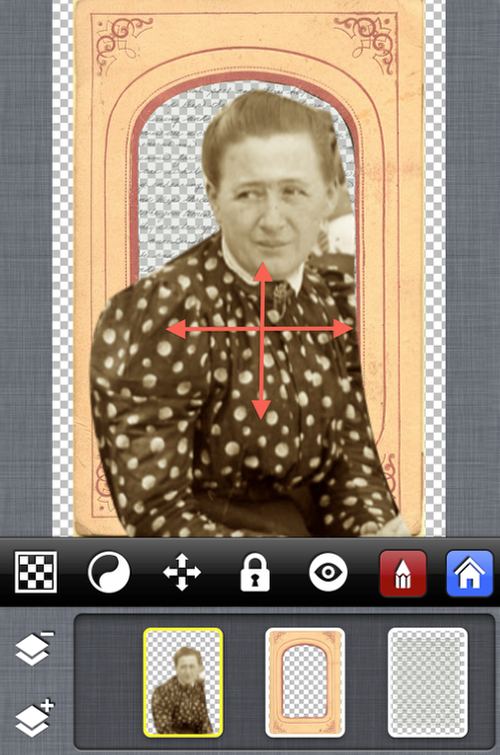
Using the same finger pinch methods as before, I positioned her within the frame.
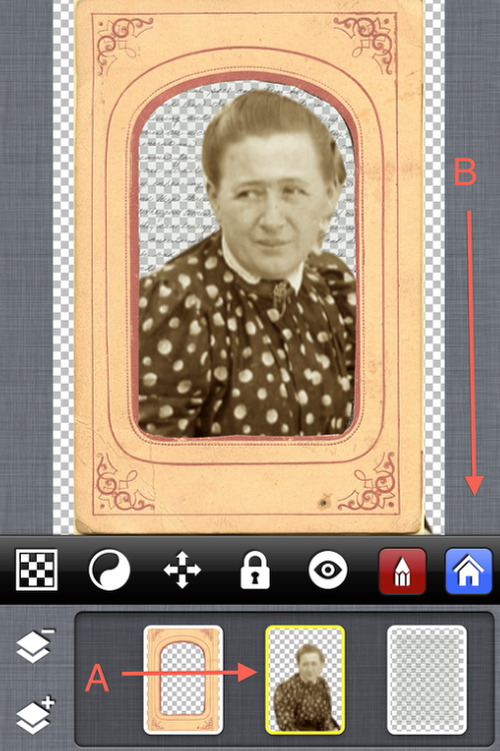
I then moved this layer to behind the frame layer but in front of the background layer. (A). I also did a little more tweaking of her position as before. I didn’t want to do any adjustments to the blend mode so I clicked on the Home icon (B).
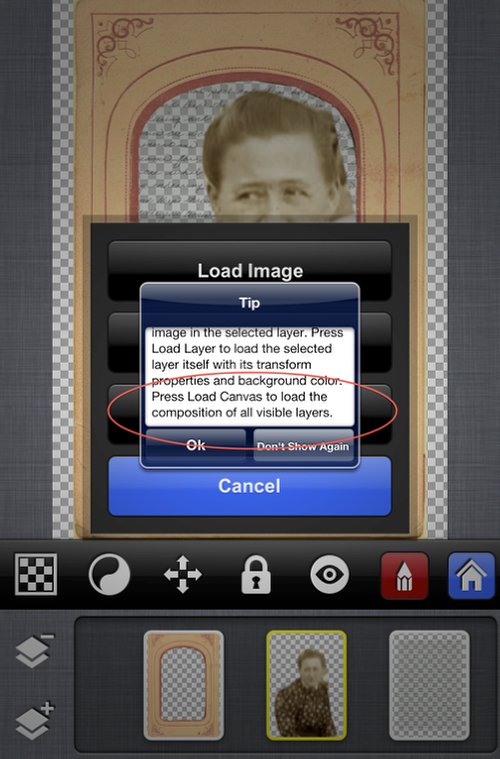
Something I haven’t been showing you are the Tips that come up with every different step…but I thought this one was something worth sharing. You’ll be asked in this screen what layer(s) you want to load for saving or sharing. As I wanted to load everything, I’ll pick Load Canvas.
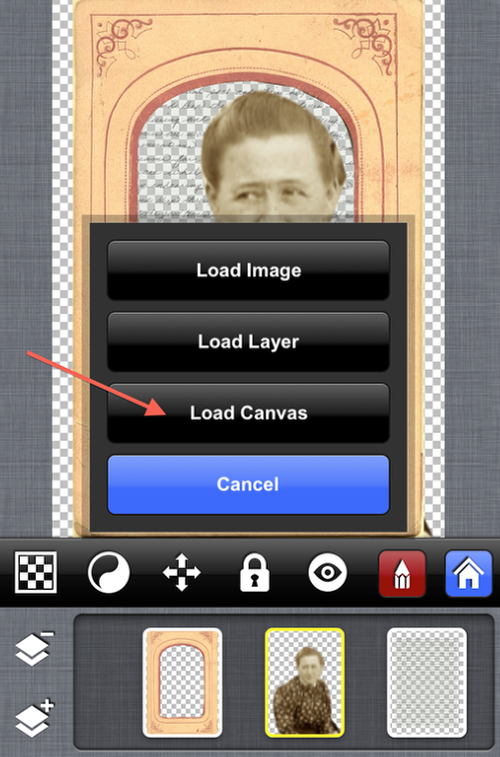
Which I did!
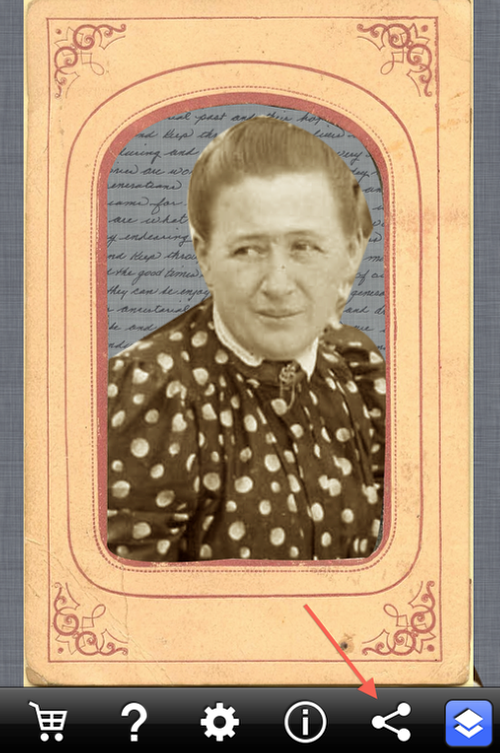
Clicking on the Save/Share icon…
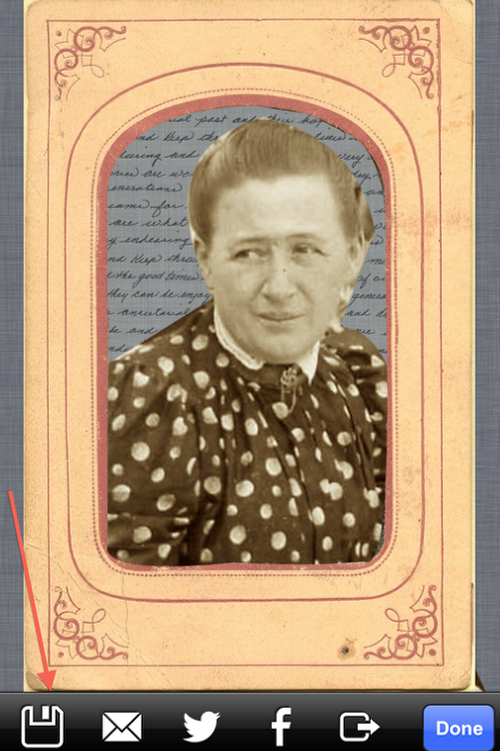
I then clicked on the Save icon…
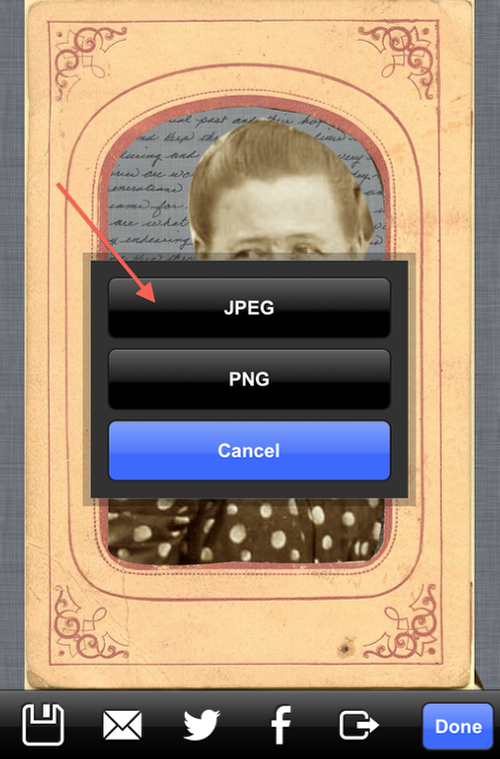
Finally, I picked JPEG and my image was saved to my Camera Roll.
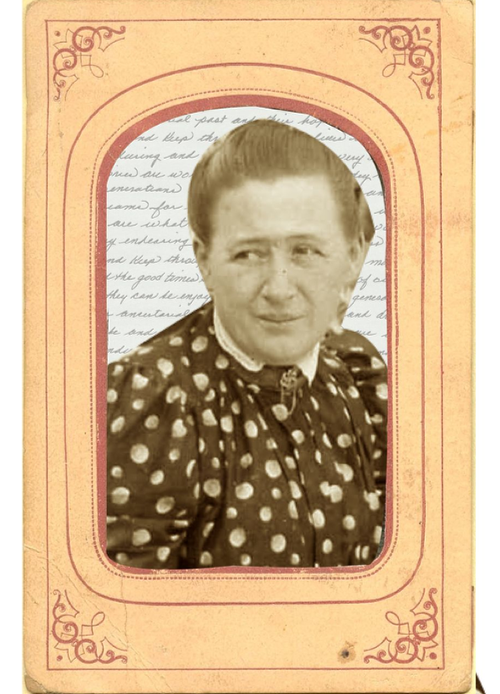
Here’s the final version!! Looking at this now I probably will go back and do a little adjusting to my editing/enhancements on the lady and perhaps on the background. The good thing with PhotoStation is that as long as you haven’t cleared your work, you can still go back and work on each layer.


7 Comments
James Mochan
Thanks for this tutorial!!
David
You’re welcome!
JQ Gaines
Another wonderful tutorial, David. I truly appreciate the time and effort you put into your column… thank you.
David
Thanks JQ! I do have fun putting them together!!!
David
Thanks JQ! I do appreciate it!!!
RegiB
Thanks for these in-depth tutorials. I really learn from the show and tell versions! Keep em up please! One of my favorites on the app whisperer.
David
Thanks so much RegiB! Your comment has made my day!!!