Technical Tutorial – iColorama 7a – ‘Exploring Release 3.7’ By Jerry Jobe
We’re delighted to publish Jerry Jobe’s latest Technical Tutorial on iColorama. Jerry is a fabulous tutorial editor and we’re so proud to share his latest, part 1 of 2, iColorama tutorial. In this tutorial Jerry takes a look at the latest update and demonstrates how to utilise these new features into your workflow, don’t miss this. Over to you Jerry (foreword by Joanne Carter).
"It isn’t easy keeping up with iColorama. As I write, release 3.7 was released two weeks ago. The developer. Teresa Garit, assures us that the next release should be ready to go to the App Store this week. And these aren’t cosmetic releases, tweaking the app to fix bugs or add a slider; they add multiple new features which expand the already impressive creative toolbox iColorama gives you.
Just take a look at the features included in release 3.7:
• Multibrush, allowing you to use several brushes at once;
• Photo brushes, allowing you to create your own brushes;
• Five new Deform presets;
• Eight new Tile presets, including one moved from the Deform function;
• Hue adjustment – an unadvertised, entirely new function.
Add to that several new brushes, and you end up with quite the jam-packed release. I had anticipated covering the entire release in one tutorial, but that’s just too much information at once. So anticipate tutorial 7b – son of Release 3.7, on a screen near you.
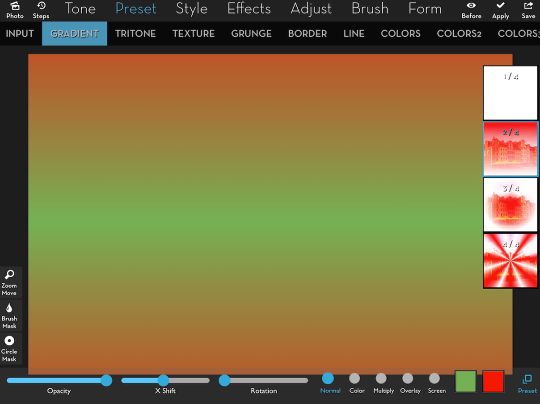
I’m going to start with a simple graphic to illustrate the use of the Multibrush. It’s a red-green gradient, created using Preset Gradient 2, with the X Shift slider moved to the right so the green is in the center rather than at the bottom.
From there, I choose Brush>Artist. As usual, it presents me with a blank canvas to "paint" onto. If I want to pint onto a different (saved) canvas, including using the original photo as my canvas, then I would tap the Background (Backg) button at the bottom of the screen. But notice that there is a new button at t the bottom of the screen, on the other side of the color picker. It’s labelled "Photo" and it’s used to load a photo brush. We’ll see that in use later; first, let’s take a look at Multibrush.
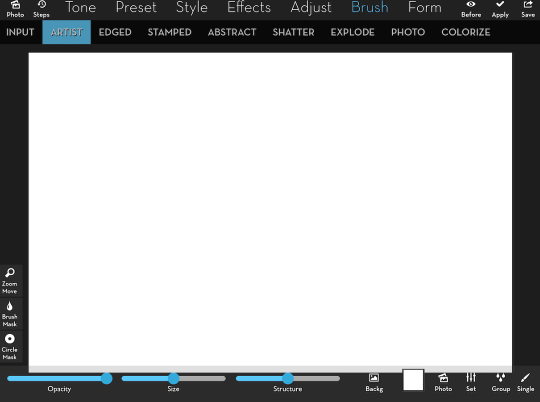
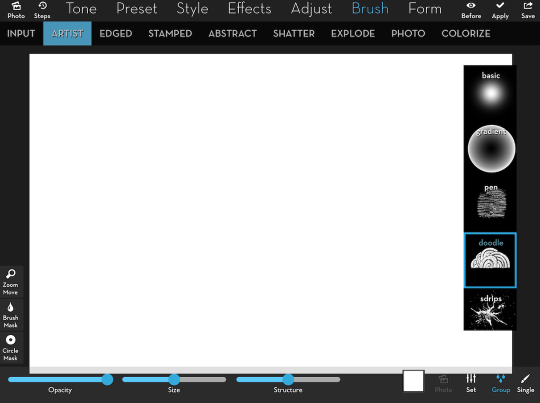
Multibrush rotates between all the brushes within a group as you make a stroke. It is activated by choosing a brush group under the Group button. In this case, I’m choosing the Doodle group. When I choose the Doodle group, two things happen. First, the Backg button disappears, since the ability to change the background is disabled when you begin painting. Second, the Photo button is grayed out. Using a photo as a brush is only enabled for a single brush – it will not work with Multibrush. If I went on to choose a single brush within the Doodle group, then the Photo button would be enabled.
But I don’t select a single brush. Instead I touch the screen left of center and make a slight move. Immediately I can see as several brushes are applied to the tiny stroke.
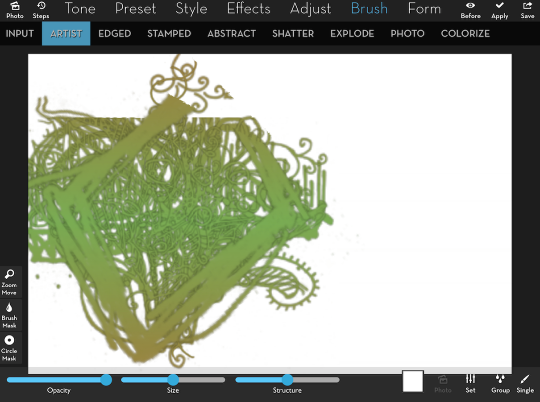
As I continue to tap around the screen, I can see different brushes are applied.
I want to use the Multibrush to fill in the entire screen, but first I’ll change some of the settings. I’ll crank up the Size Variation, the Lightness, and the Edge.

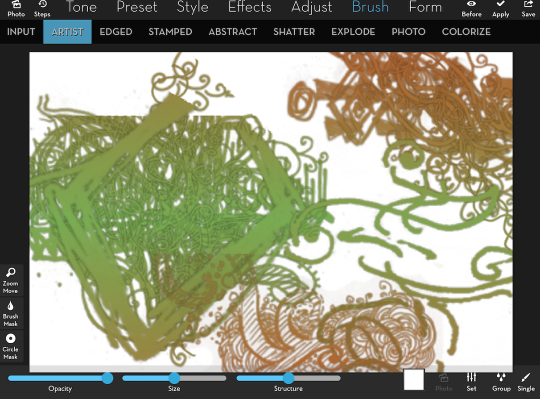
I paint in the entire screen. Because I turned the edge up to the maximum, you can see the individual brushes that are used.
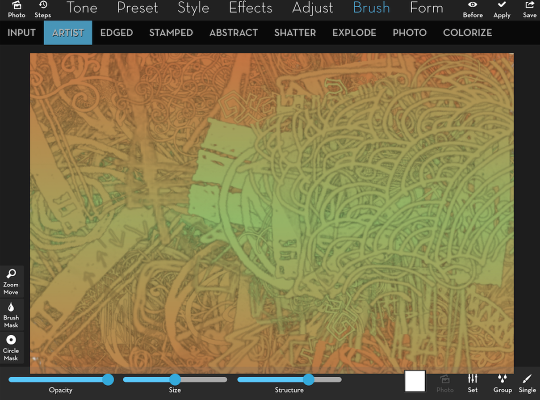
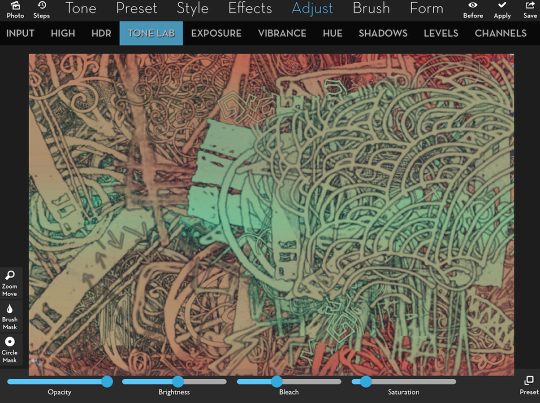
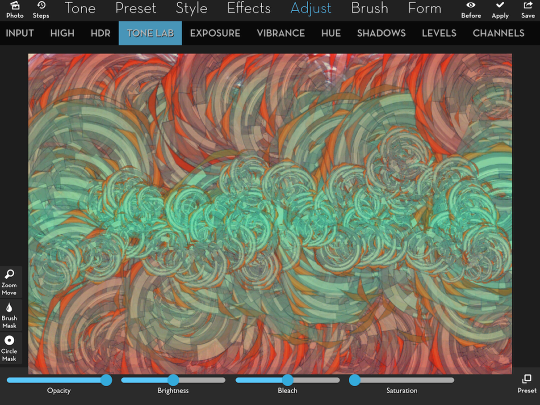
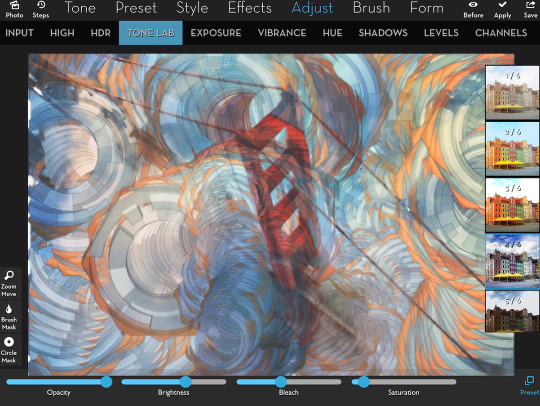
I like that, but in order to finish off the piece, I would like a little more contrast and color variation. One of the easiest ways is by using Adjust>Tone Lab 4. Normally I would not boost the Saturation when using ToneLab 4, but I did that here by moving the slider to the right.
So Multibrush is activated when you choose a Group of brushes without selecting a Single brush. It stays in effect until a Single brush is selected.
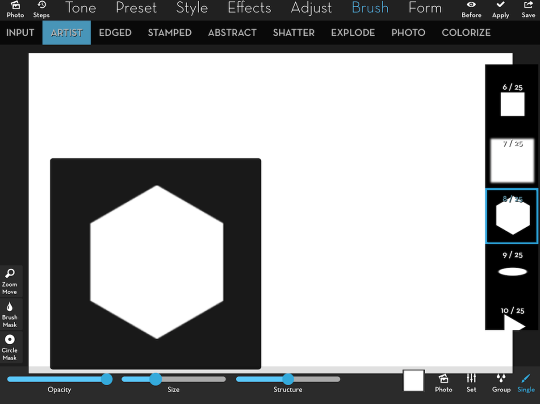
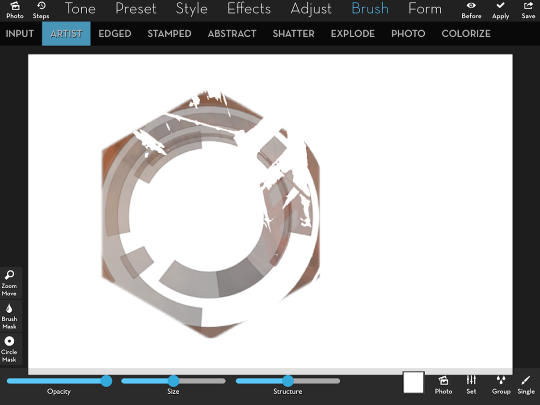
Now let’s take a look at Photo brushes. I’m going to start, once again, with the red-green gradient, covered with the white canvas in Brush>Artist. I have chosen a hexagonal brush under the Basic group. Notice how the Photo button is activated when I choose the single brush.

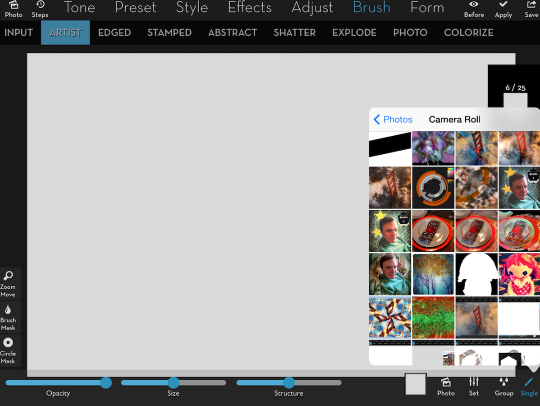
Tapping the Photo button brings up the Image Selector. You can choose an image from your Camera Roll, Photo Stream or any other album. I am selecting the image that is Row 2, Column 2. It’s an image created in an app called ArcMachine, and is a grouping of apps on a transparent background. (Arc Machine supports the creation of .PNG files, which can have transparent backgrounds. iColorama supports the use of .PNG files, but not the creation of them.)
Another hidden addition to iColorama release 3.7 is a thumbnail that indicates brush size. In the following screenshot you can see the thumbnail showing the size of the hexagonal brush when the Size slider is moved.
The image below shows what happened when I tapped once near the center, then increased the size and tapped once again. Using a .PNG file as a brush seems to lead to unpredictable consequences. The center of the arcs, transparent in the original, does not pick up the underlying image for painting. But the area outside the arcs, also transparent in the original, and here shown in the corners of the hexagon, do show paint. There is none of that confusion with normal .JPG files used as photo brushes, since there is no transparency.
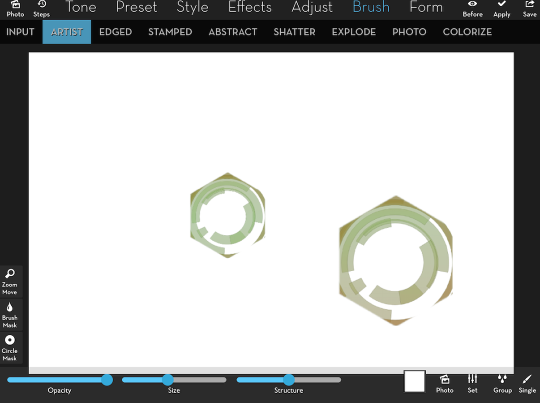
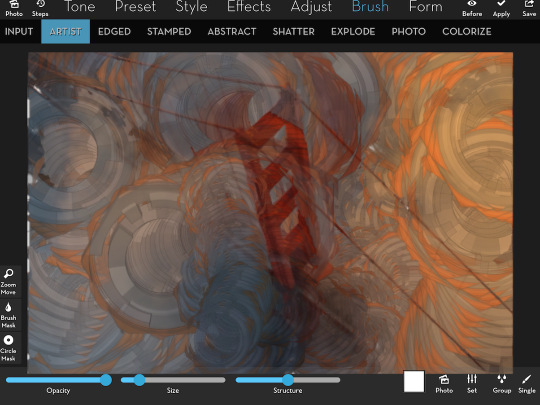
Below I’ve painted in the entire screen, then gone back and painted in the center with a brush decreased in size.
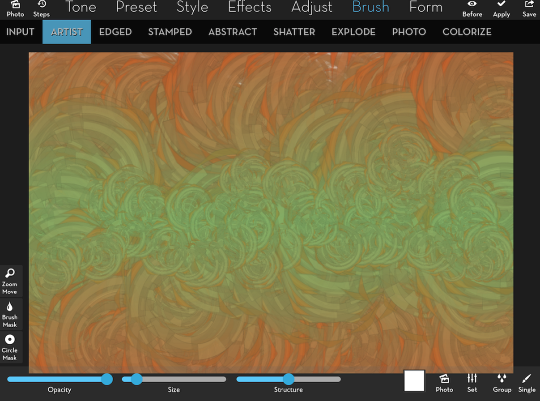
Once again I use Tone Lab 4 to boost the contrast, bringing out the individual brush strokes.
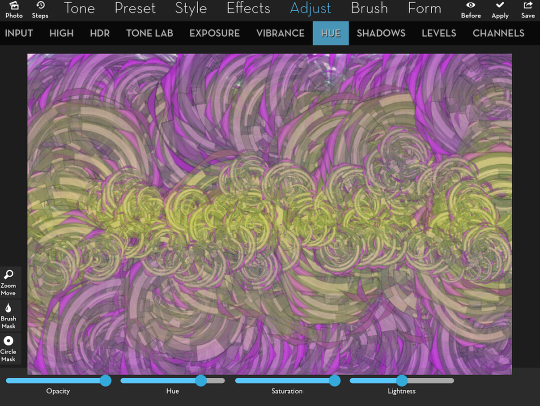
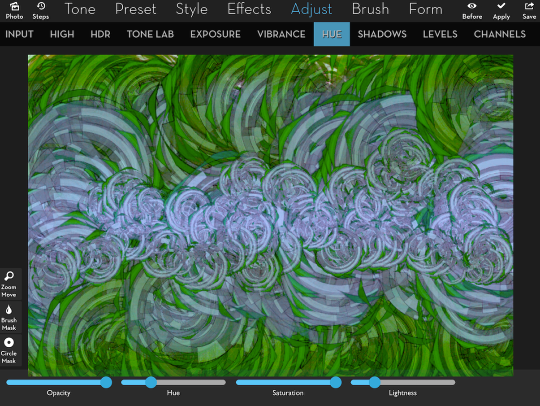
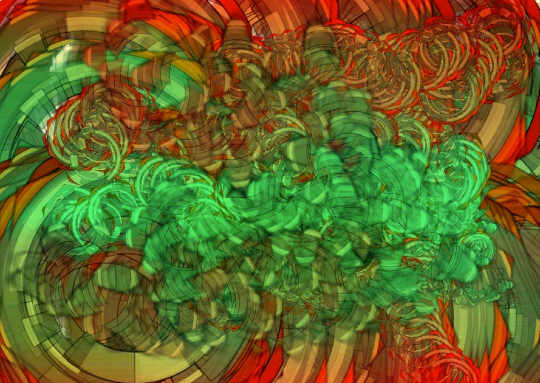
I want to take a minute here to discuss the new Hue feature, under the Adjust menu. In the image below I have tapped Adjust, then Hue. I then moved the Hue slider to the left. The result was a change of colors, to purple and yellow.
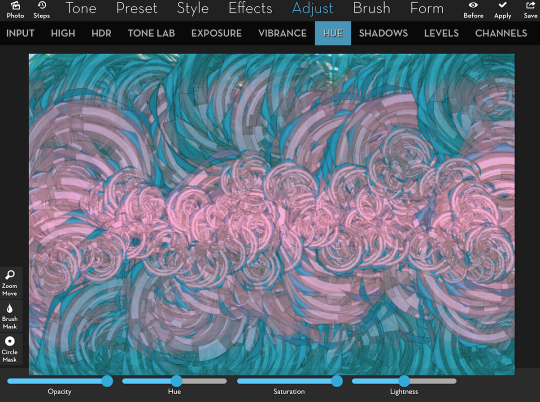
Another move of the Hue slider makes the image blue and pink.
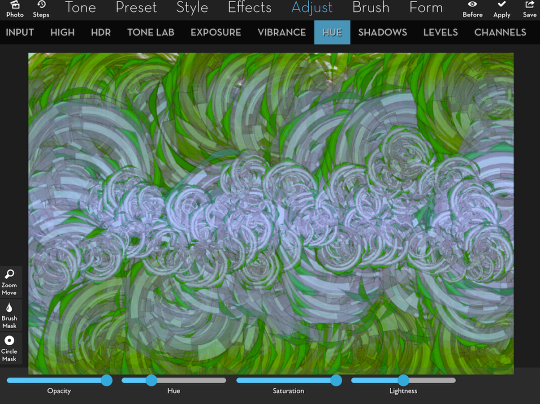
Yet another makes it green and blue.
The additional sliders are more subtle in their approach. Pulling the Saturation slider all the way to the left will remove all the color; however, pulling the Lightness slider almost all the way to the left, as I show below, does not make the image completely black.
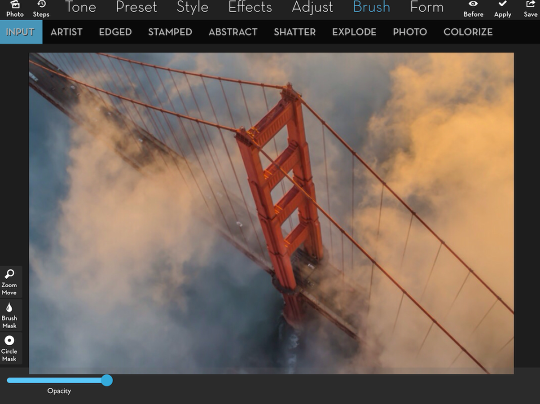
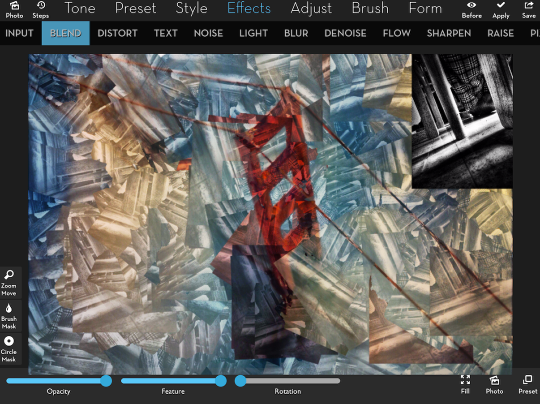
Now let’s return to Photo brushes. Instead of using a gradient as a basis for the Artist brushes, I’m going to use this bridge image.
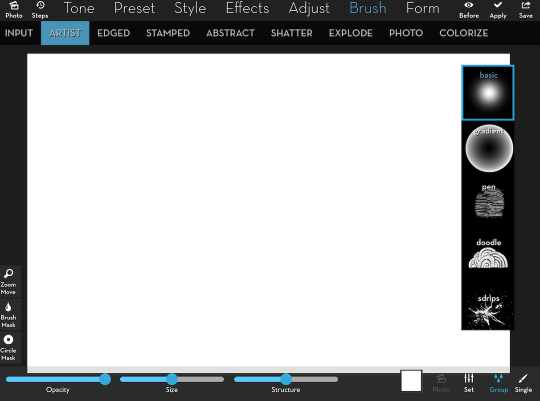
Once again, I tap Brush, then Artist, and the white canvas is presented. I choose the Basic group, and the Photo button is grayed out.
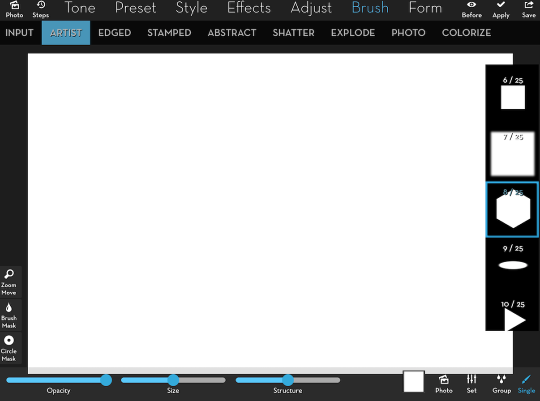
I choose the hexagon again, and the Photo button is enabled, allowing me to choose a photo.
I choose the arcs again, and make a single touch to the canvas. At this point, you can’t really tell, but the brush is bringing through the underlying image while still showing the image that is the brush.
By painting in the rest of the canvas, you can see both the underlying bridge image and the arc brush strokes.
A quick application of Adjust>Tone Lab 4 really brings out the brush strokes.
What does it look like to use an actual photo, rather than a shape, as your brush? Below I’ve changed the brush shape to square, and loaded a self-portrait with stars as my photo brush. I touched the canvas several times.
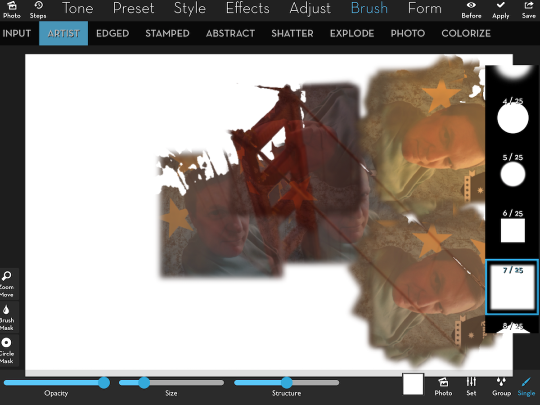
Below I’ve painted in a good bit of the canvas and applied Tone Lab 4.
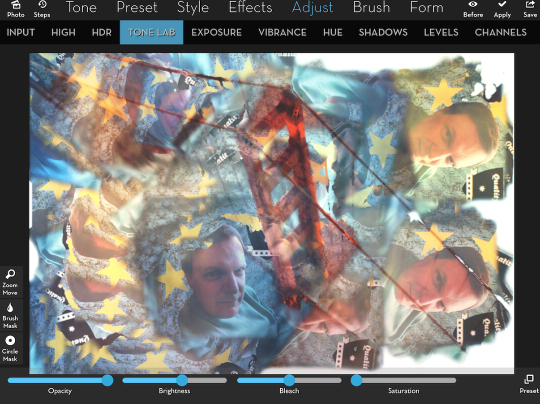
If you look closely, you’ll see that some of the color from the brush photo is applied to the underlying photo. Above, the yellow stars still show as yellow even when applied to blue water. In order to not affect the color, you might wish to use a B&W photo as your brush. Below, I’ve used the photo of table legs shown at the upper right as my brush. The contrast in the brush makes for a strong effect on the bridge photo.
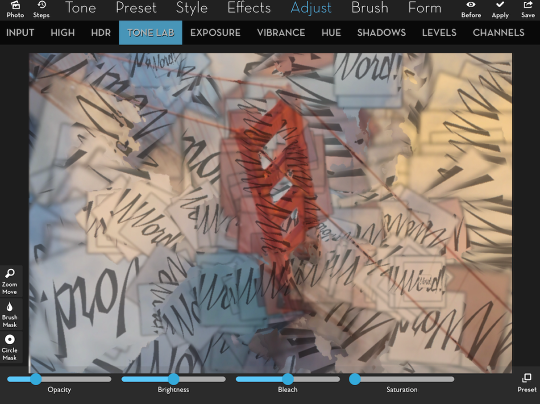
You can even use words as brushes! I created a square image with a white background and the black text "Word!" in iColorama, then imported it as my brush.
For abstracts, collages or other, new kinds of art, the Multibrush and Photo brush options (as well as the Hue function) are tremendously useful. As always, I hope that walking you through these features will help spark you creatively, and help you find more ways to incorporate them into your workflow. Be sure to come back for iColorama tutorial 7b, when I continue my discussion of Multibrush and Photo brushes (they’re not just used for Artist brushes) and cover the new Deform and Tile presets. Until then, enjoy!
Jerry Jobe
Never content with just scratching the surface of what an app can do, Jerry Jobe decided to pass on what he learned about imaging apps to others. He’s constantly trying to figure out just what tools other artists have used, and trying to incorporate them into his own work, in an attempt to find his style. He’s written tutorials on over 145 apps so far, which you can find (along with his Song of the Day entries) at http://enthusiasmnoted.wordpress.com/ He lives near Atlanta, Georgia, where he also finds a creative outlet in acting and directing in community theater.
You May Also Like
Mobile Photography & Art – ‘Intimate Interview’ with Lou Ann Sanford Donahue from Salt Lake City, Utah, United States

Mobile Photography – Instagram TAKEOVER with @iphoneartgirl Meri Walker and @dleibo – David Leibowitz – Day 11 The story so far…