Creative iOS Photography App Tutorial – Another World….. Getting Creative with Image Blender by David Hayes
We’re delighted to publish our latest creative iOS Photography App Tutorial by David Hayes, this time David takes a closer look at the uber popular app, Image Blender and comes up with a great ‘work around’ that you may not be aware of regarding layering. Don’t miss this, over to you David), foreword by Joanne Carter.
If you’re one of the few that haven’t picked up Image Blender yet, then you can do so here. It retails for $2.99/£1.99/download.
“One of my all time favorite apps is Image Blender by Johan Andersson. While there are many apps out there that one can use for layering and blending, none of them beat out Blender for its easy-to-use interface. And…while you can only blend two layers at once in this app, there are work-arounds that I use allow me to create the digital pieces I want. In this article, I want to show you how I did one such image, “Another World”.
I’m going to start my “build” with this digital background that I created sometime ago and keep in my background folder. This will be my base image.
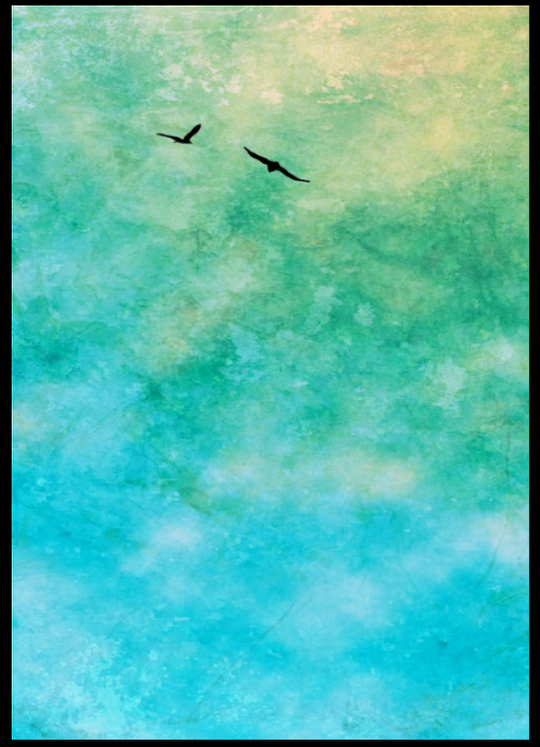
The top layer will be this digital background…again from my background folder.

So…to start things off, I opened Blender and clicking on the lower left box, brought in my base layer.
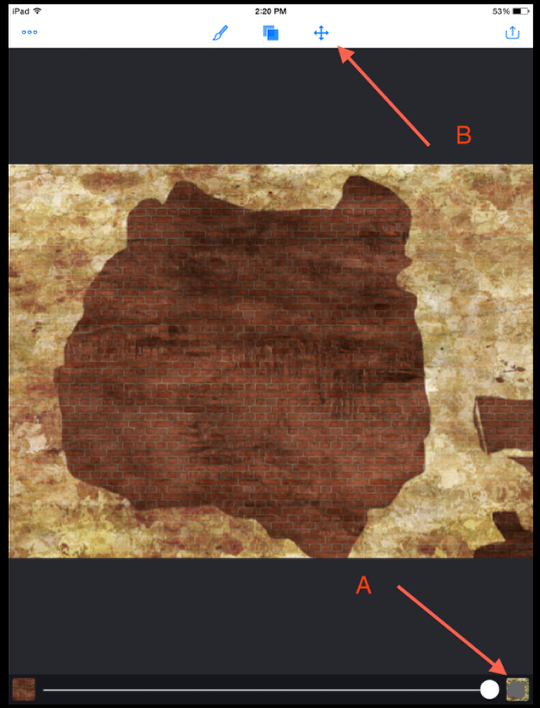
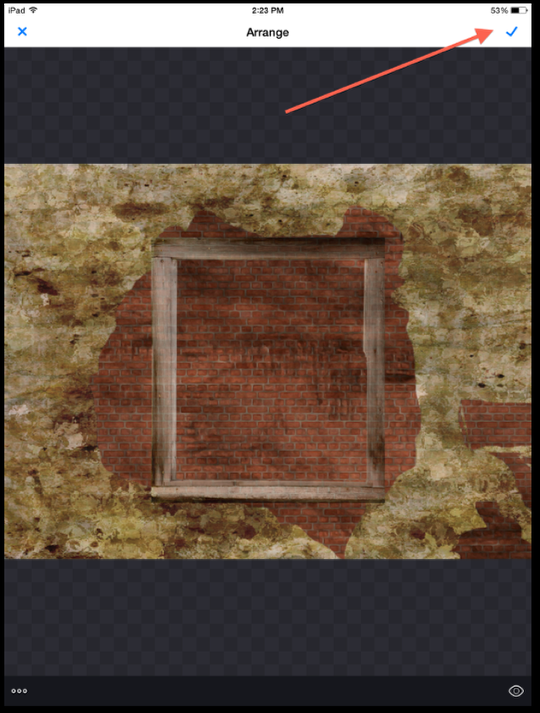
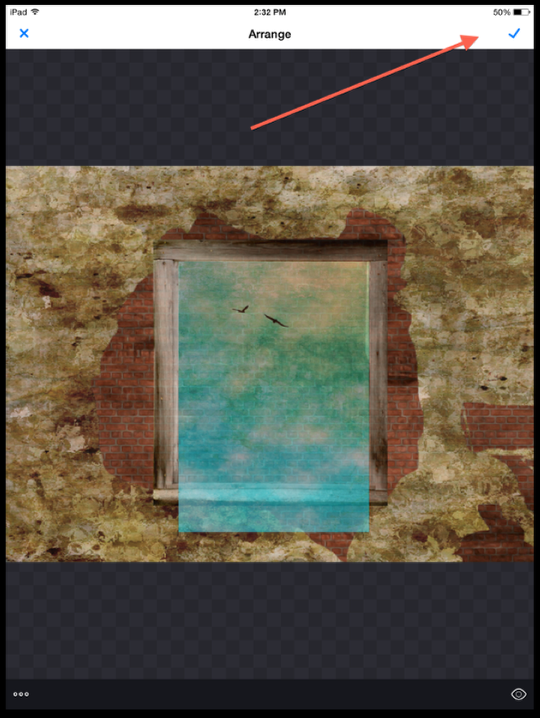
I then clicked on the lower right box and brought in the top layer. My two layers on board, I clicked on the “Arrange” icon to tighten up the position of my top layer to the base layer.
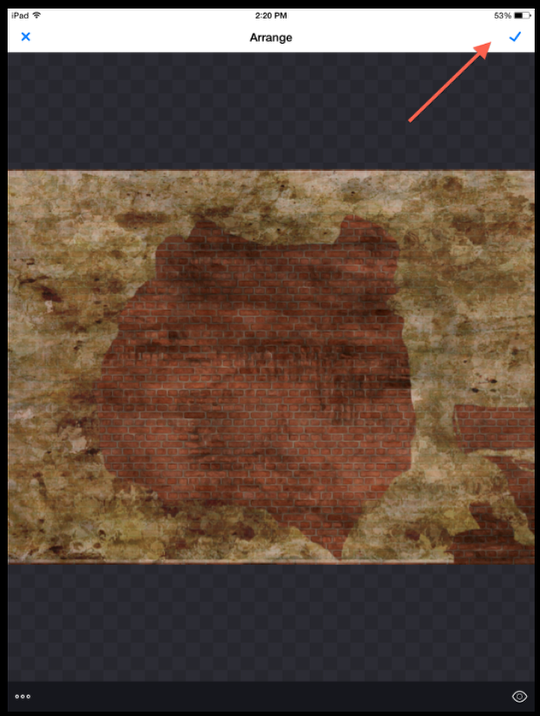
Using pinch-and-spread finger controls, I arranged this layer to my liking and then clicked on the Check Mark to put this into place.
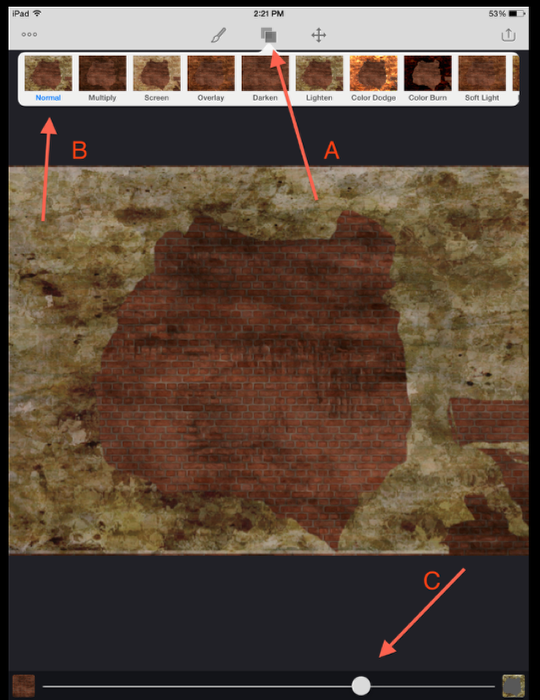
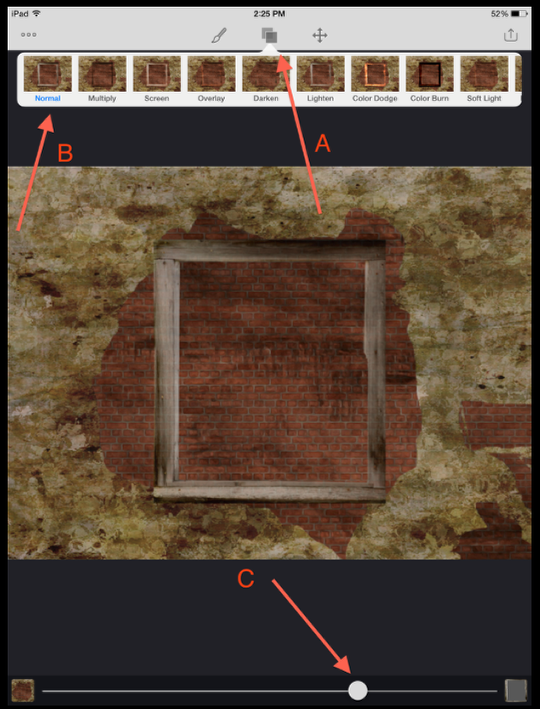
Next up, blending the two layers. Clicking on the Blend Mode icon (A) I then tried out several different blend modes before deciding on “Normal”. I adjusted the opacity using the lower slider bar (C) and clicked on the icon to finish this up.
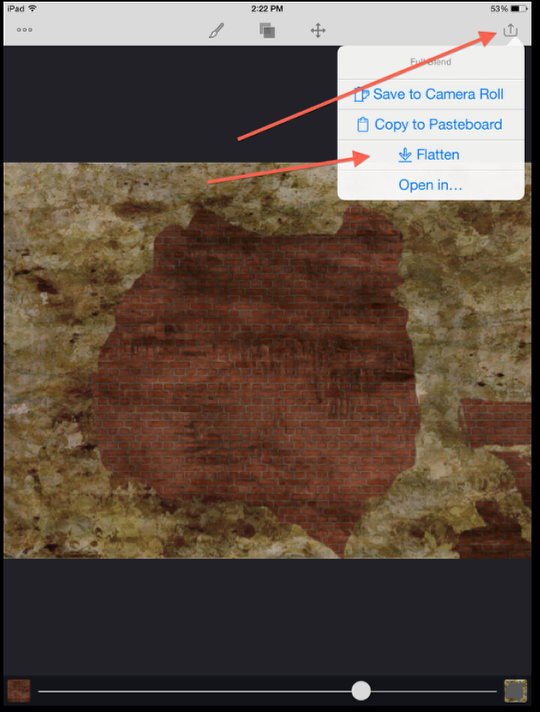
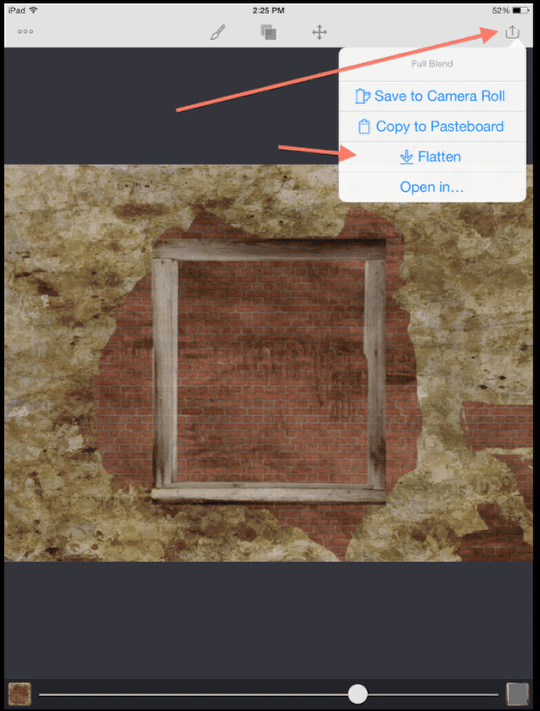
With these two layers in place, it’s time to “Flatten” them so I can add more layers! I clicked on icon in the top right corner opening this menu. Clicking on “Flatten” will do so to these layers and reopen this image in the lower left box as your base image. (I also have made it a habit to Save to my camera roll as well as a back-up…but I’m like that…)

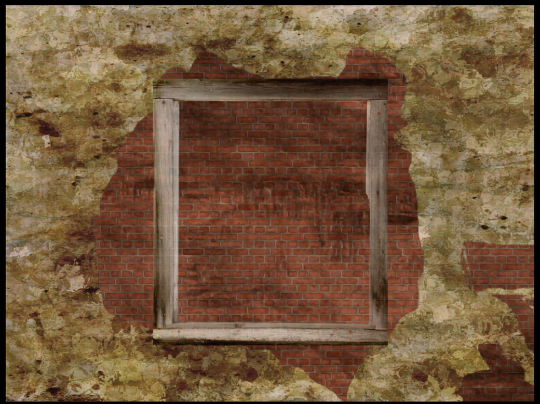
Using the same work flow as before, I loaded in a window frame layer into (A) and then activated the “Arrange” mode (B) to position this layer on my newly created base layer.
I quickly moved the frame to rest in the center of my “wall” and clicked on the Check Mark to put it into place.
I then went to Blend Mode…and once again used “Normal” mode (B)…and adjusted the opacity (C).
Using the same sequence as before, I flattened these layers…and moved on to my third and final layer.
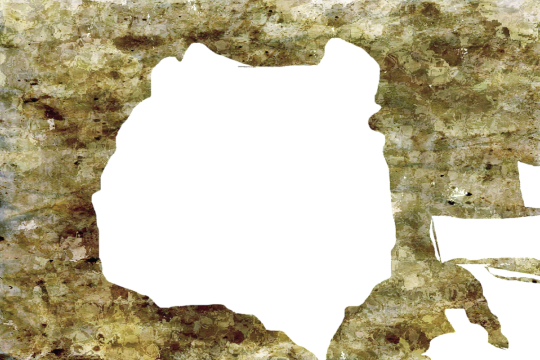
Here’s what this image looks like at this point.
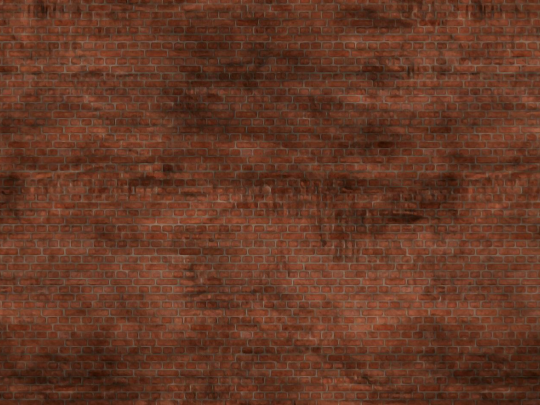
I’m going to use this layer I created in Distressed FX for this project.
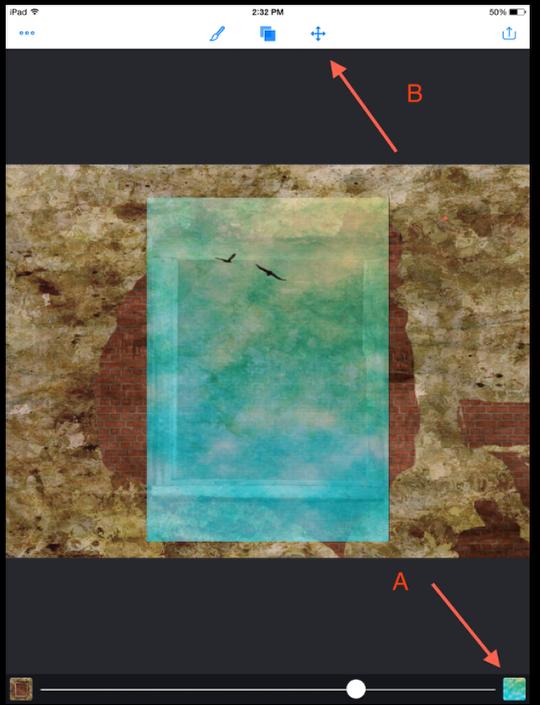
Loading this image (A), I went to “Arrange” (B) to re-position this layer.
I was able to position the layer so most of it fit within the window frame and then clicked on the Check Mark to put it into place.
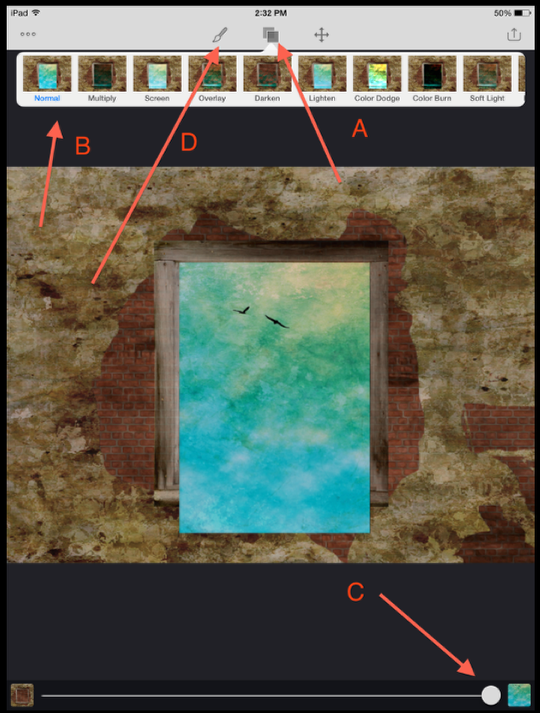
Wanting to totally cover the brick wall behind it, I used the “Normal” blending mode at full opacity. Since there were parts of this layer that needed to be “trimmed”, I then activated the “Mask Mode” (D).
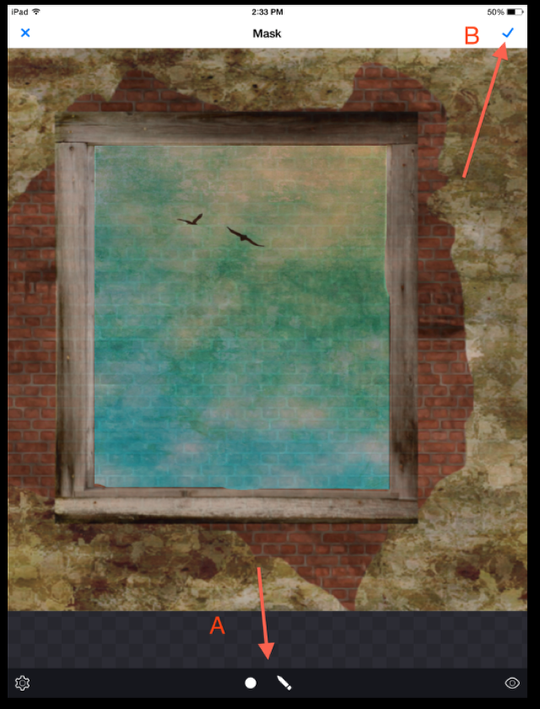
Using Blender’s masking tools (A) I was able to mask out the parts of this layer that needed trimming. As with the other modes, clicking on (B) put this work into place.
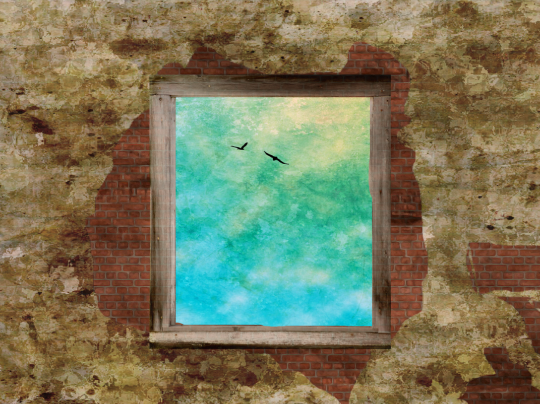
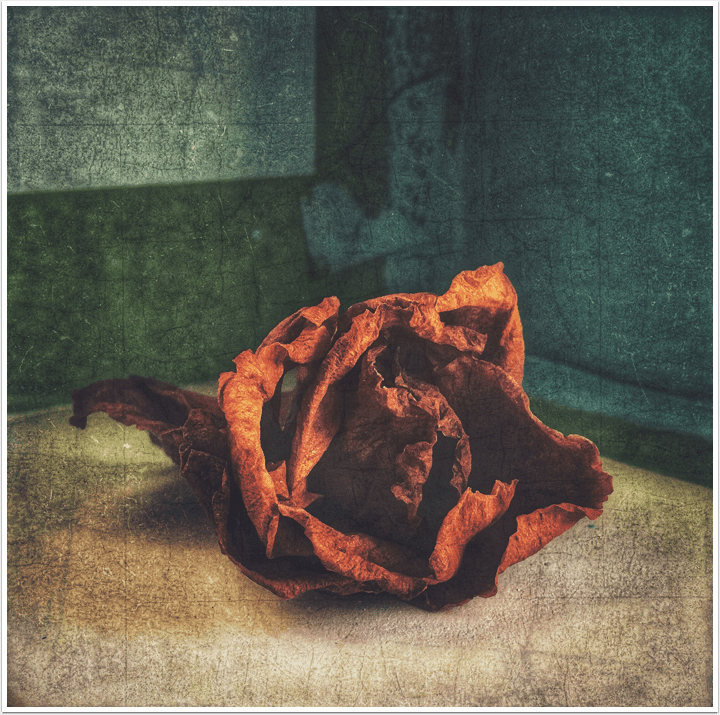
And here is where this image stands. I say this because at this point I would leave Image Blender to use other apps to “enhance” what I’ve created so far. This will happen later. Most likely I will bring this project back into Blender for more layering so keep your eye on my photo streams for the final image!
David Hayes
David is Head of Technical Tutorials here at theappwhisperer.com and this role adds to the many things David has done in his life…some of which he considers more significant than others. Yet, he feels all have made him the artist he is today. He’s been a cook at a truck stop, a janitor at a military base, worked in advertising, been a banker managing other people’s money, and an elementary school teacher. Trained as a photographer as an undergrad, he’s recently returned to these roots and now considers himself foremost a photographer and secondly a mixed media artist.You can find David’s work on many other popular websites including his own: http://www.clearerreflections.com.