
iPhone Photography Tutorial ‘Enlight’ – A First Look with Jerry Jobe at TheAppWhisperer
After teaching about iOS photography and art apps for over two years, I have encountered a community of like-minded “App Whores” (as they are called within some forums) who love to pick up new apps. These people want to know: is the new app fun? Powerful? Is it easy to use, or can you barely determine how to load or save images? Does it reduce resolution upon saving?
I love to get right in there and find out about new apps. I usually don’t write about them, though, unless they are limited in scope. I prefer to give my readers an in-depth look at an app and its capabilities. But this week’s app, Enlight (by Lightricks, makers of Facetune), has generated so much buzz and so many questions that I thought it might be valuable to take a quick overview.
Let’s get one concern out of the way immediately. Enlight is only available for the iPhone, not on the iPad. This does not mean that you can download the iPhone version on your iPad and use it at “2X” size as you are able with so many other apps. This app is actually disabled from running at all on the iPad. This seems to be a new trick of the App Store, and it is not a trick that is appreciated. Some of us find it extremely difficult to use the smaller screen of the iPhone for editing, and need our apps to run on the iPad. Lightricks have passed the word around that an iPad version on the way; it seems to be poised to be a separate app (like Facetune), with a separate price tag.
Which brings us to the second question about Enlight: price. The “special” price for the launch of Enlight is $3.99/£2.99. That is double the price of most apps, and since it’s an introductory price, it will probably go up. Four dollars is not much in the grand scheme of things – but we have gotten used to apps priced at half that rate, so it seems higher than it actually is. The user is therefore immediately put into the position of declaring, “This had better be really good if I’m going to spend twice as much!”
Is it really good? Let’s take a look.

The following screen shot did not appear the first time I used the app, but it did the second. It tells me that Enlight saved the last session, which means I can go back into that session, complete with undos. I can actually return to a previous state on a previous edit. Enlight, by default, saves the last 10 sessions. This can be changed on the setting screen.
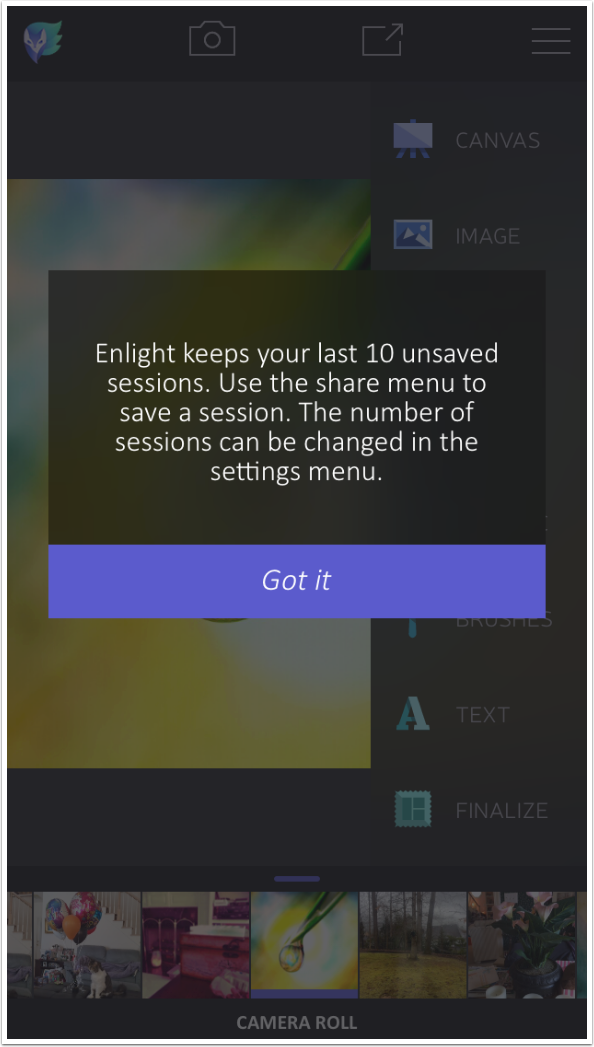
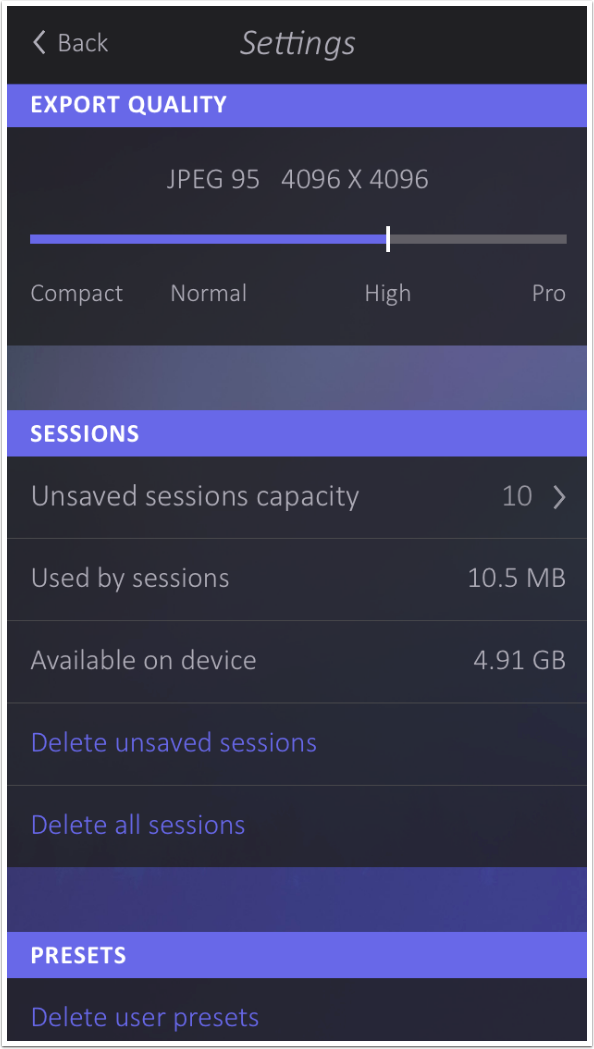
The Settings screen is shown below. As you can see, the app does not reduce the size of the output, which is good news. The app will save ten unsaved sessions, at a cost of disc space. I already have 10MB used in sessions. I can delete that disc space right there within the app, if it starts eating up more space than I can spare.
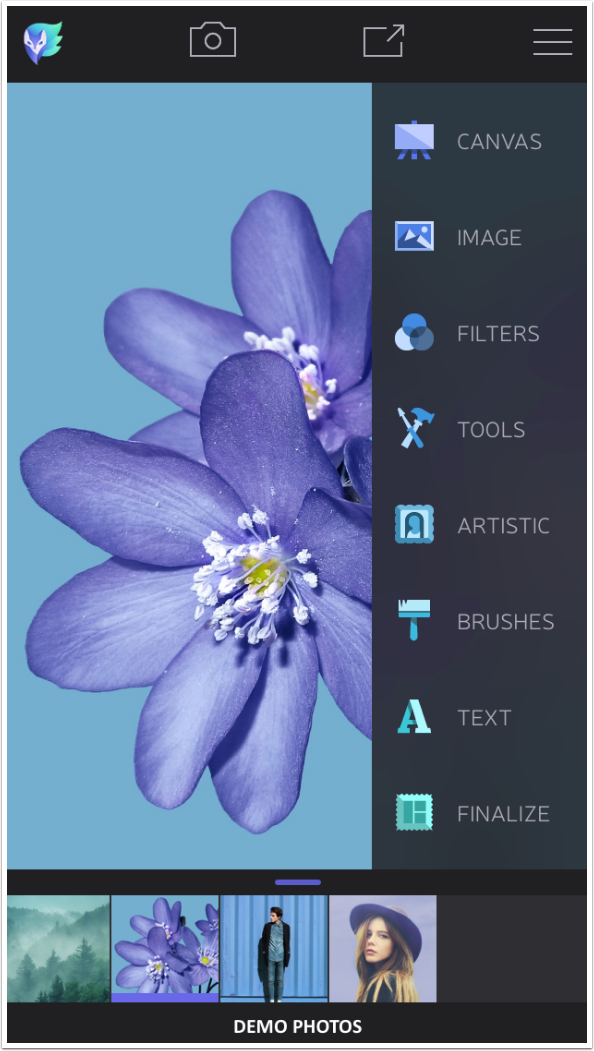
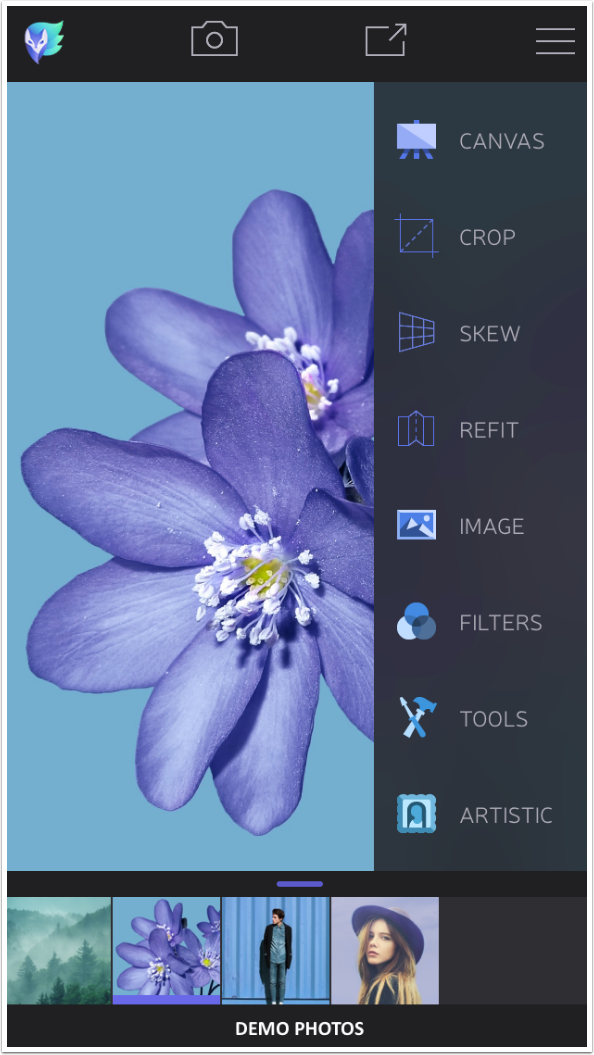
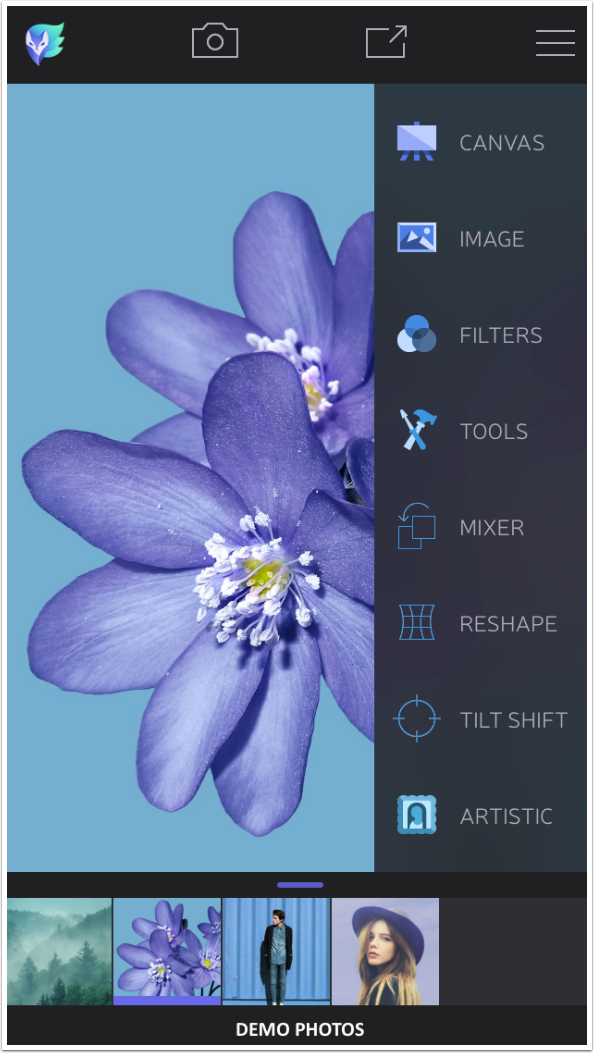
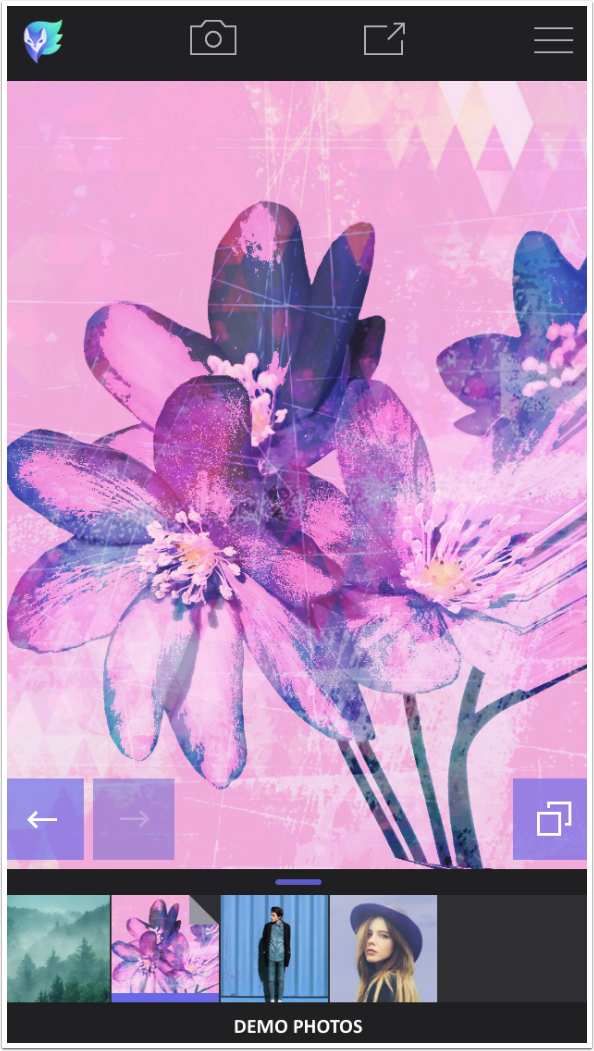
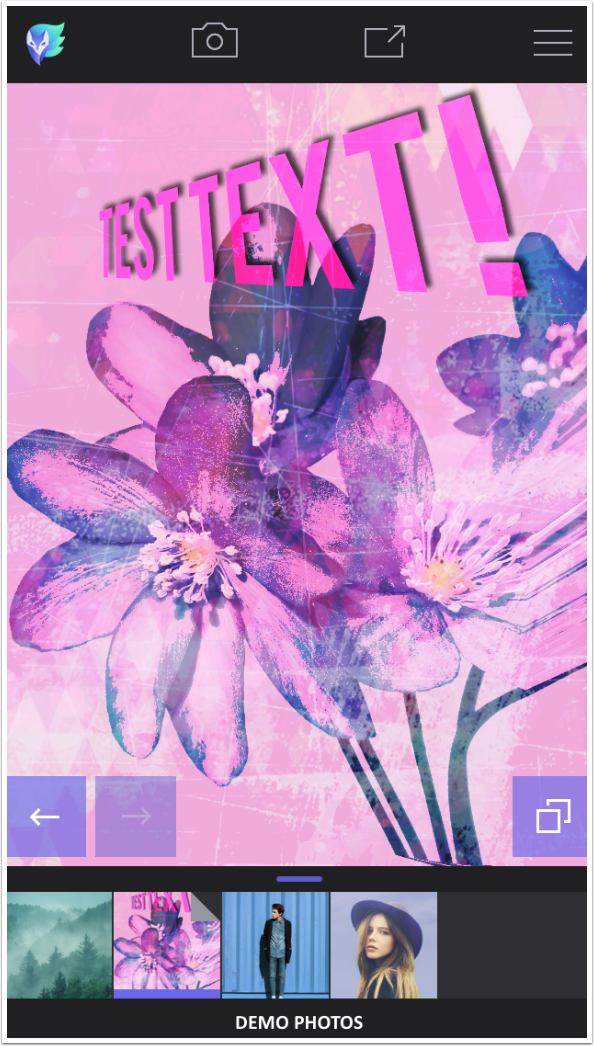
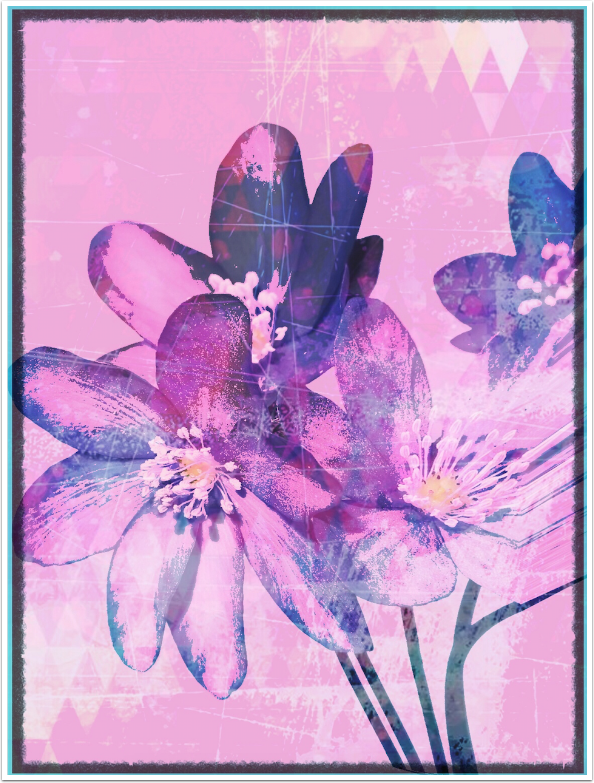
There are four buttons at the top of the workspace. The “fox” is the comprehensive help and the Settings screen. The Camera loads images and the arrow box saves/shares images. The last button, the three lines, shows/hides the side menu, which contains the available categories of effects. At the bottom, before I choose an effect, are the possible sources for an image to adjust. Swiping up on the bar above the images will allow me to choose between albums. In addition to the camera library or the previous sessions, Enlight provides you with some Demo Photos to experiment with. This flower is one of those demo photos.
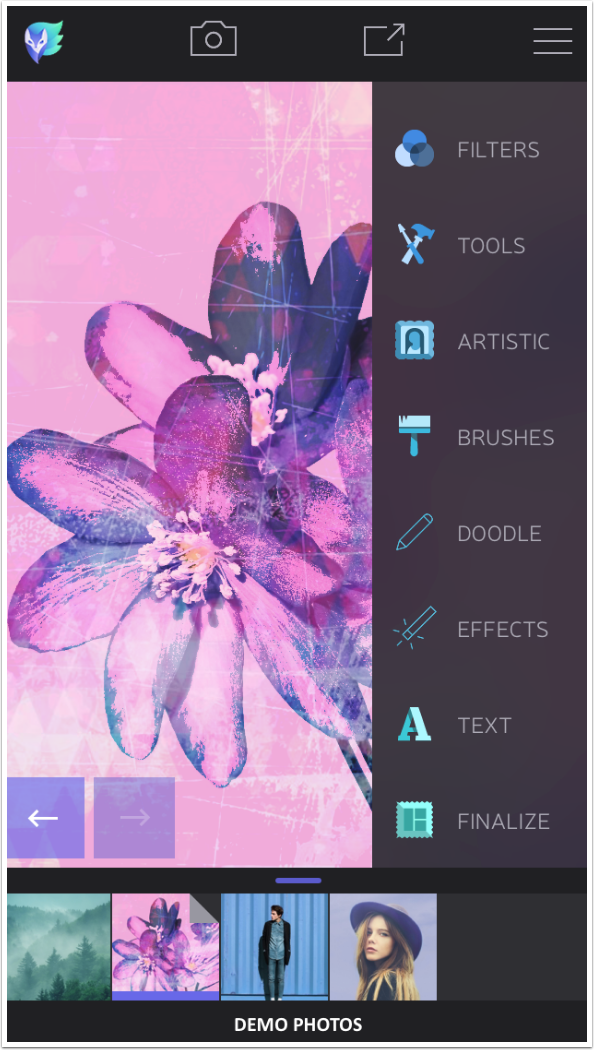
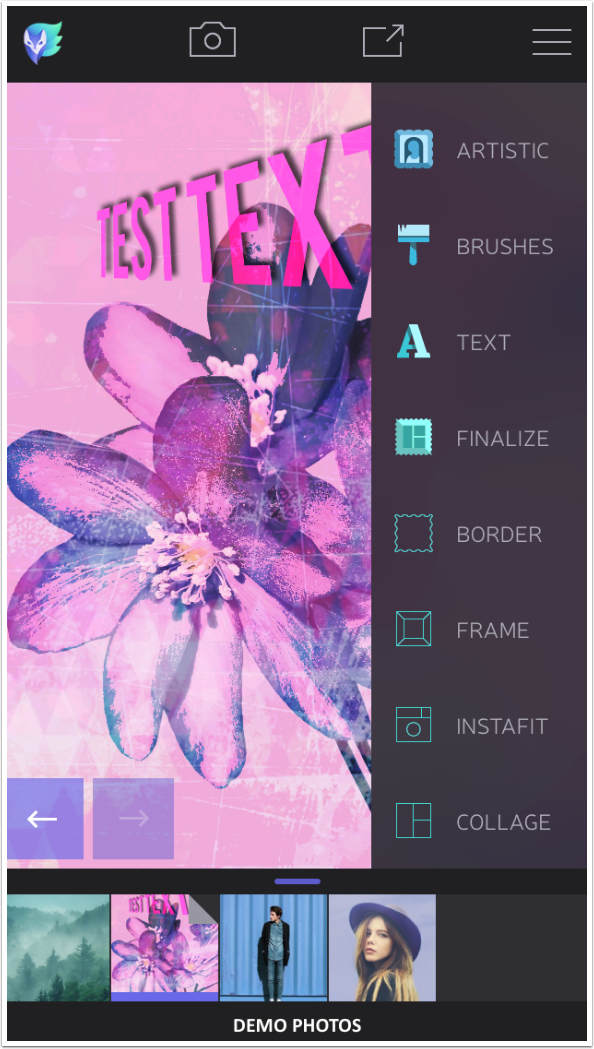
Tapping any of the categories in the side menu will cause the category to expand, showing you the options within the category. I’ve tapped Canvas and the options Crop, Skew and Refit appear. For those who look at a new app and ask what it will do that is not done in other apps, the question is answered in the Refit option.
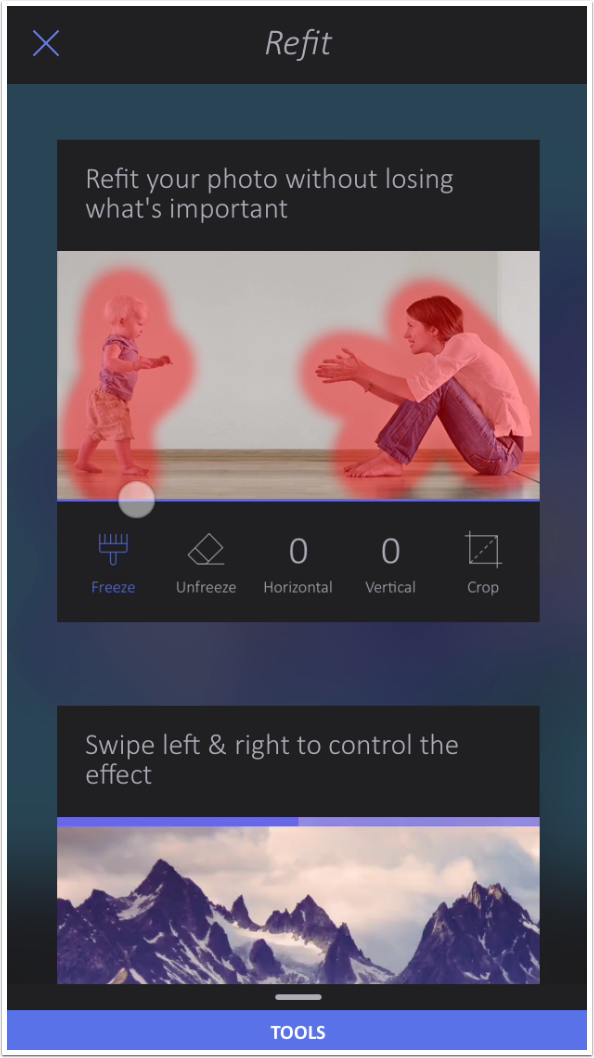
The first time you select an option, a help screen will appear that will walk you through using that option. Below is the help screen for Refit.
Refit is an option that is not performed in many other iOS apps. As a matter of fact, I’ve only covered one that does: Liquid Scale. Liquid Scale, however, has not been updated in five years and will no longer save images – so that hardly counts. Refit will allow you to “freeze” parts of an image, then squeeze the remainder. In the help image, the child and mother are frozen, and then the sides of the image are squeezed in, compressing the space in between the figures without compressing the mother and child.
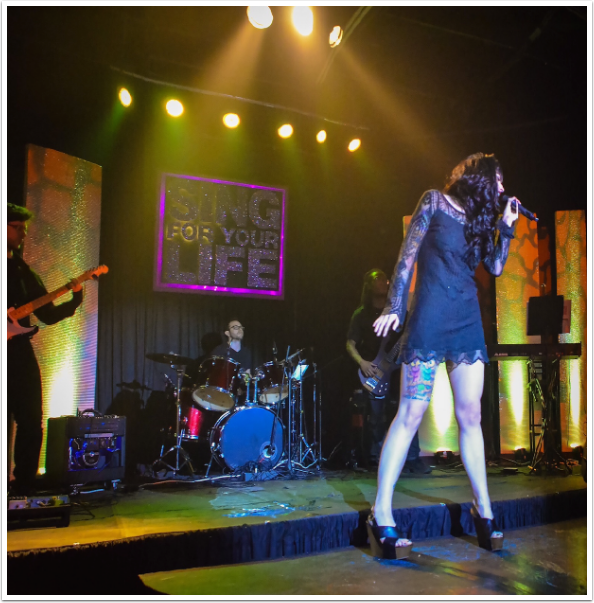
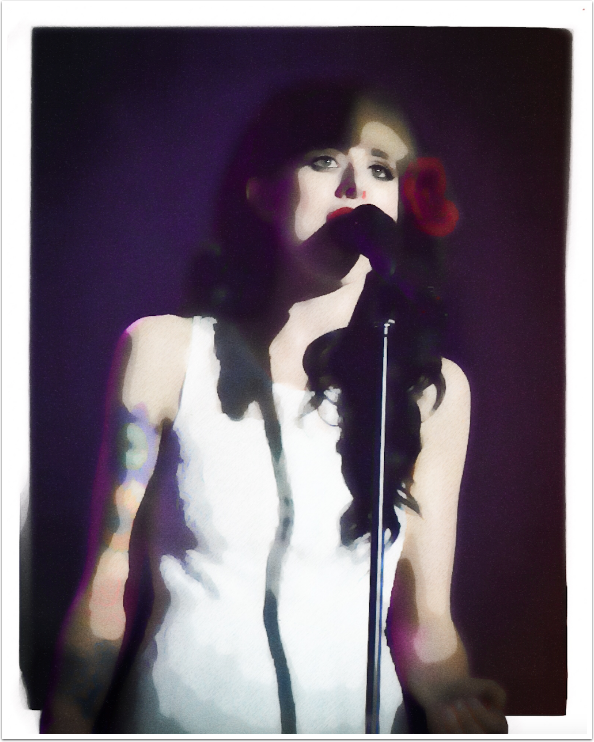
Below is a sample image before Refit. I freeze the singer, drummer and guitarist.

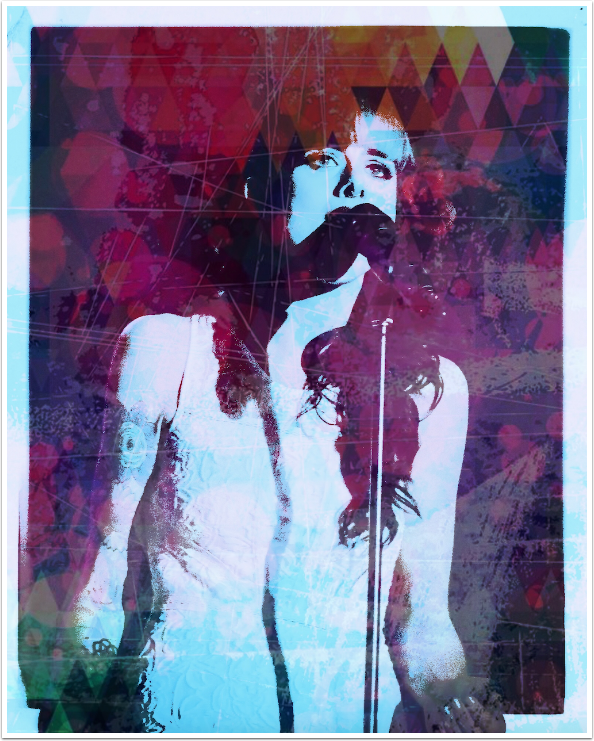
Below you’ll see the result, and that I didn’t paint in the singer’s microphone hand in well enough. Pay particular attention to the right side of the picture and the guitarist’s amplifier, since that is where most of the compression took place. I probably overdid the squeezing, because it will eventually squeeze the frozen figures if you squeeze hard enough.
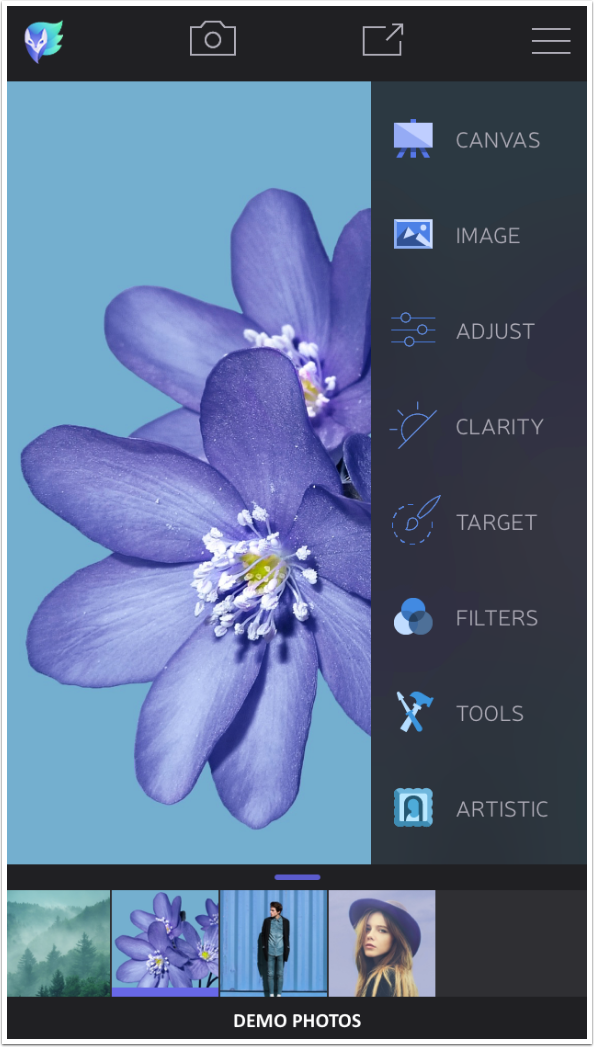
The next category, Image, contains options for Adjust, Clarity and Targeted adjustments. Targeted adjustments work like Selective Adjustments in Snapseed, selecting an area to be adjusted by color.
The Filters category gives you the options Analog, B&W and Duotone. Duotone allows you to choose both colors in the duotone.

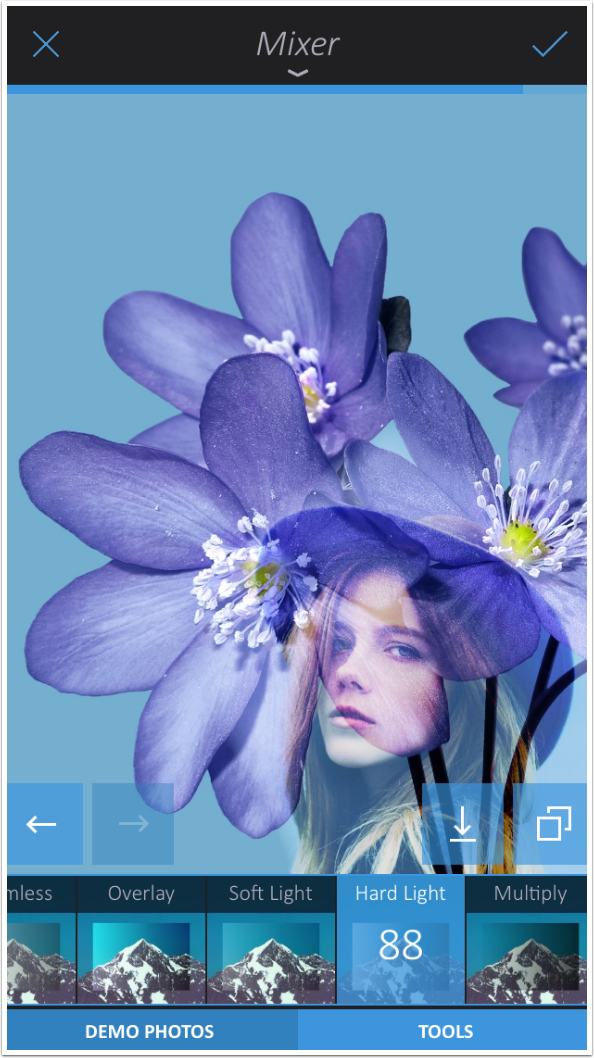
The Tools category offers the options Mixer, Reshape (or Warp) and Tilt Shift.
The Mixer option allows you to choose another image to blend, pick a blend mode and opacity, and mask the top image. The Mixer is not as robust as specialized blending apps like Union or Image Blender, or even as robust as iColorama, Leonardo or Photoshop Touch, but it will do in a pinch.
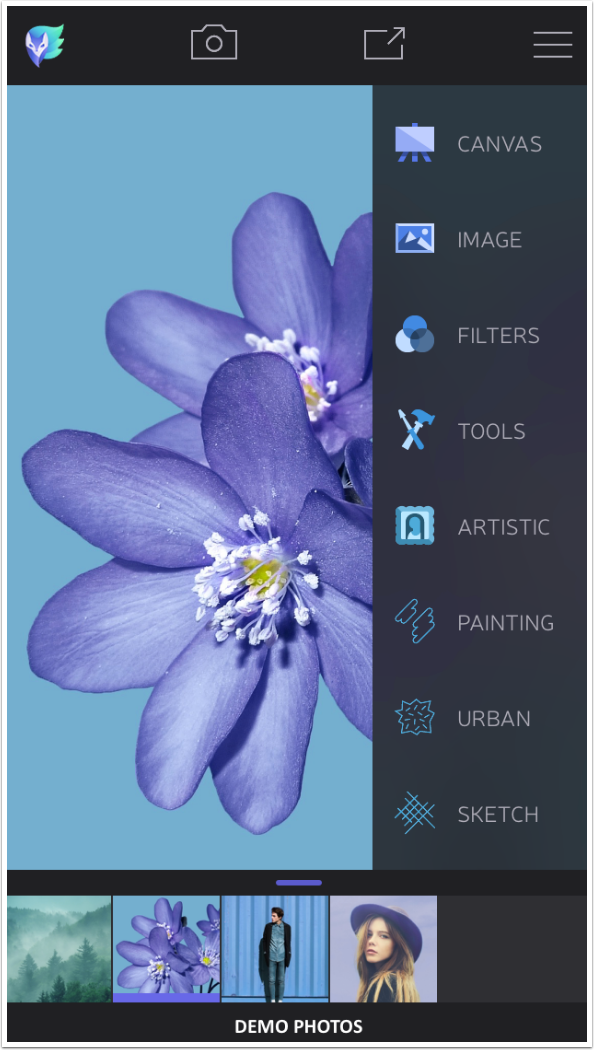
The Artistic category offers many very nice modifications in the options Painting, Urban and Sketch.
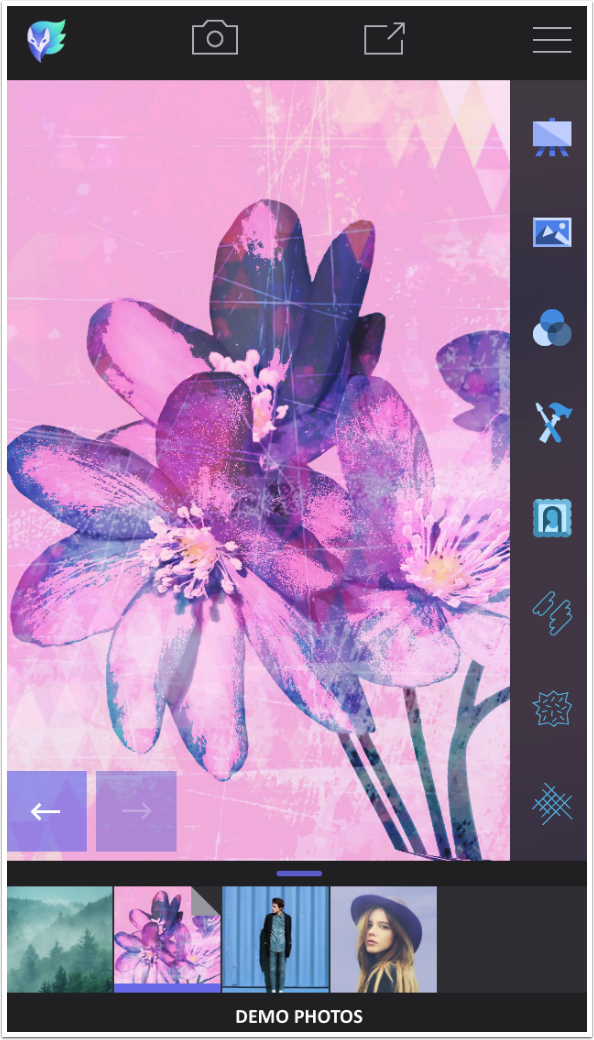
Below I’ve chosen an Urban preset after doing some work with Reshape. In order to see more of the image and less of the side menu, I’ve swiped the menu to the right.
You can hide the side menu entirely by tapping the three bars on the top right. The double square at the bottom right of the image is the “original” button, allowing you to see the image as it was before any changes were made.
Any option can be masked. Below I’ve masked out part of a Sketch preset to reveal the flower underneath. The masking brush, or Wipe, works similarly to a magic wand tool, in that it recognizes the changes in color as you touch the screen. This made the masking easier as I approached the edges of the petals.

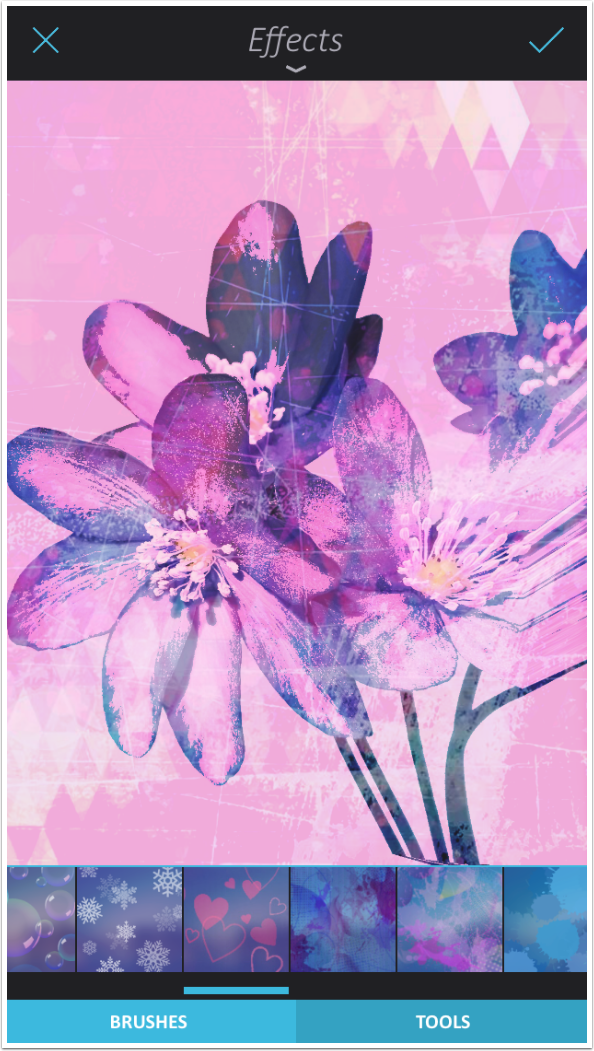
The Brushes category has two options: Doodle and Effects.
There are fifteen Effects brushes. These are for brushing on top of the image, and do mot smear, smudge or pixilate the image as some brushes in Repix do.
The Text options are Type, Decals and Meme.
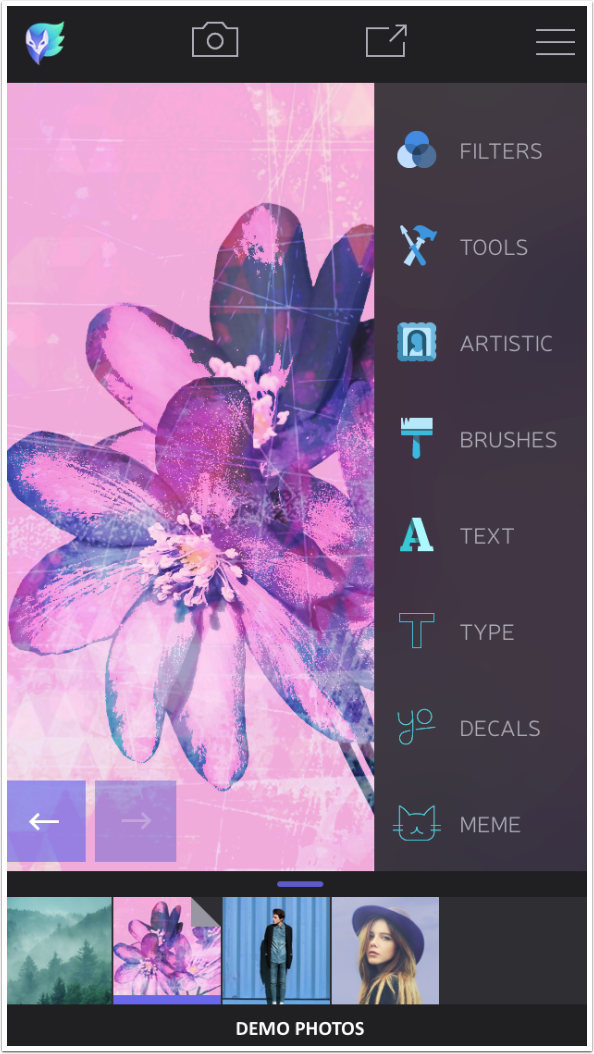
There are over 30 fonts available within Enlight.
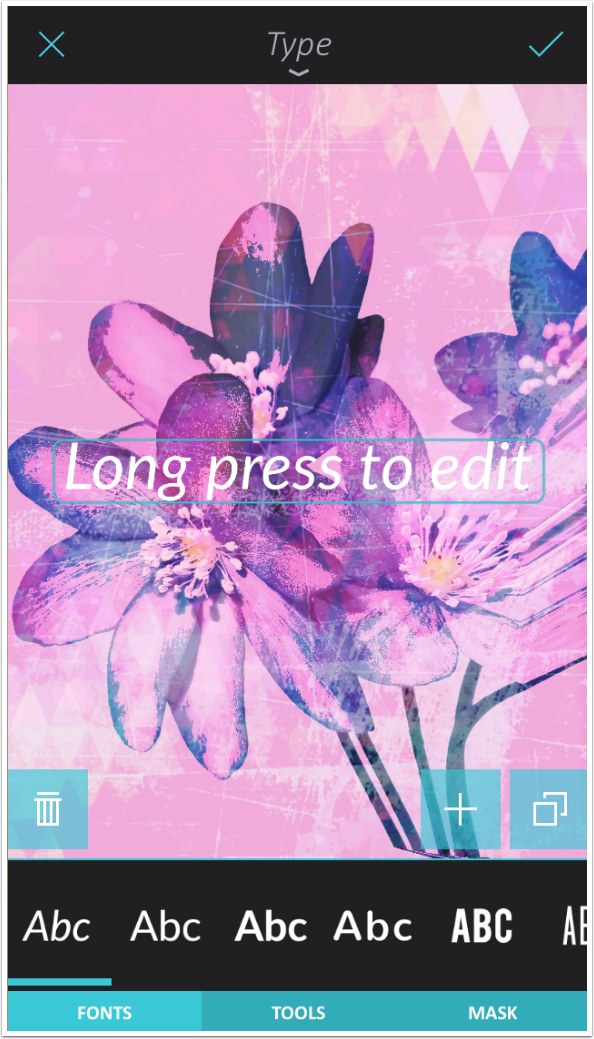
When choosing a color, you are presented with a palette of colors. But if you swipe up on the blue bar above the palette, you get a full-fledged color picker, allowing you to choose from millions of colors. Also, notice at the bottom right that you have the option to Transform Type and Decals.
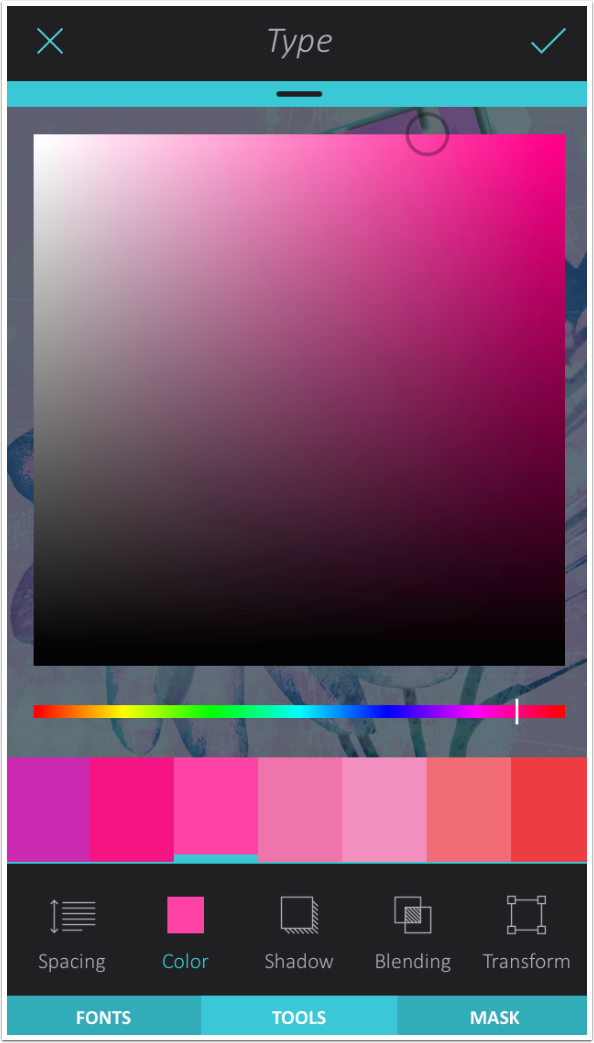
Transform allows you to skew the text in a way that most type editor apps do not allow. It will not, however, allow you to curve type.
The last category is Finalize, which includes Border, Frame, Instafit (similar to Squaready) and Collage (similar to Diptic).
When your image is complete, you can save it to the Camera Roll. You can also save the session semi-permanently (until you delete it).

Here’s my finished image. I added a border before saving.
One thing I must emphasize about Enlight is how customizable the looks are. It is not merely an app to slap on a filter or a sticker. The looks are able to be changed enough that it should be a long time before viewers can automatically say “that’s an Enlight image”. Here’s an image using a Painting preset that was masked out over the eyes, and a Border that was masked away at the bottom.
And here’s the same image using an Urban preset.
So is Enlight worth getting now, in its infancy? Should you wait for an iPad version? Are you going to be clobbered with paying for both? (Probably yes.)
I can’t tell you whether it is worth it for you. I can say that the Refit and the Type Transform are two tools that make it worth it for me. I will probably pay for a second version when it becomes available. But then, I buy a LOT of apps.
I hope this first look has been valuable to you, even if I did not cover Enlight in my usual depth. Until next time, enjoy!
Jerry Jobe
Never content with just scratching the surface of what an app can do, Jerry Jobe decided to pass on what he learned about imaging apps to others. He’s constantly trying to figure out just what tools other artists have used, and trying to incorporate them into his own work, in an attempt to find his style. He’s written tutorials on over 145 apps so far, which you can find (along with his Song of the Day entries) at http://enthusiasmnoted.wordpress.com/ He lives near Atlanta, Georgia, where he also finds a creative outlet in acting and directing in community theater.

8 Comments
Brian
I photograph with my iPhone and develop with an iPad, so not not having an iPad version is a deal breaker. I’ll wait to see if they have an iPad version soon.
Jim
I too use my iphone extensively for photography and then develop on the Ipad. I did go ahead and spring for the iphone version of Enlight. I will probably spring for the Ipad version as well.
Wonder if that is the movement away from universal apps (buy once usable on all IOS devices?
Carolyn Hall Young
Thanks, Jerry. This is a great introduction to what looks like a very interesting app. I am hoping it will become universal, because I only edit on my iPad.
Carolyn Hall Young
I meant to follow this, so I am back!
Diana
This seems like a very well developed app. It could become very popular amongst photo editing enthusiasts. I think the price is fair for this app because it does include a lot of quality features not found on similar apps.
Emad
Can you add stickers and call out bubbles PicsArt? Can you do the healing effect like Snapseed?
Emad
Can you add stickers and call out bubbles like PicsArt? Can you do the healing effect like Snapseed?
Jerry Jobe
Healing effect: yes. There is a healing brush and a patch tool. Stickers? No, although there is an Effects brush that works like Repix.