
Mobile Photography Tutorial – Hipstamatic 300 Part 2: No longer A Toy Camera
We are delighted to publish Jerry Jobe’s latest mobile photograph tutorial for our reading and viewing pleasure. This week we have published Part 2 of Jobe’s two-part series on Hipstamatic 300. If you missed Part 1, please go here. Read Jobe’s thoughts as he puts it through its paces (foreword by Joanne Carter).
Hipstamatic is free (there are in-app purchases) and you can download it here.
“Last time I discussed the new release of Hipstamatic, and how it changed the app dramatically. I mentioned that the bug fix release, 301, still left Hipstamatic with multiple crashes. I mentioned that the new “pro mode” camera, while adding new features, did not allow for multiple exposure and software flashes. I also told you that the classic camera works pretty much the same as the old Hipstamatic, and that if you were a shooter rather than an editor, you were still accommodated by release 300.
In the past week, a hue and cry has arisen slamming the new release. I realize that some people are having more trouble with the new Hipstamatic than I am. Some report being unable to save any image, edited or captured. Some report crashes while capturing an image. I can certainly understand the frustration these users experience, and add my voice to their call to clean up the bugs.
But there’s another group who I don’t understand. For years, ever since I first started using Hipstamatic, there have been requests to allow for non-square images, to allow for changing the lens and film after capture, to get rid of the unnecessary gallery that consumed so much space on your device. This release grants all those requests, while allowing for the same experience as “classic” Hipstamatic. So why are there calls to trash all that and return to the old Hipstamatic?
I applaud Hipstamatic’s decision to remake their app according to user requests, and according to the changing market of iPhoneography apps. Adding new Hipstapaks on a monthly basis was not enough to keep this mostly static app relevant in the volatile market. But I do agree that it should have been tested even more thoroughly before release, given that I can rarely work in the app for more than 10 minutes without a crash.
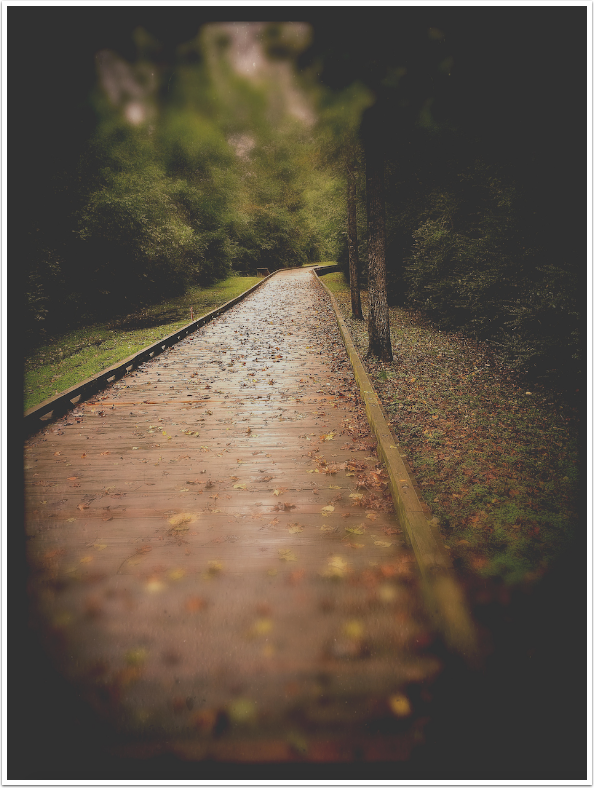
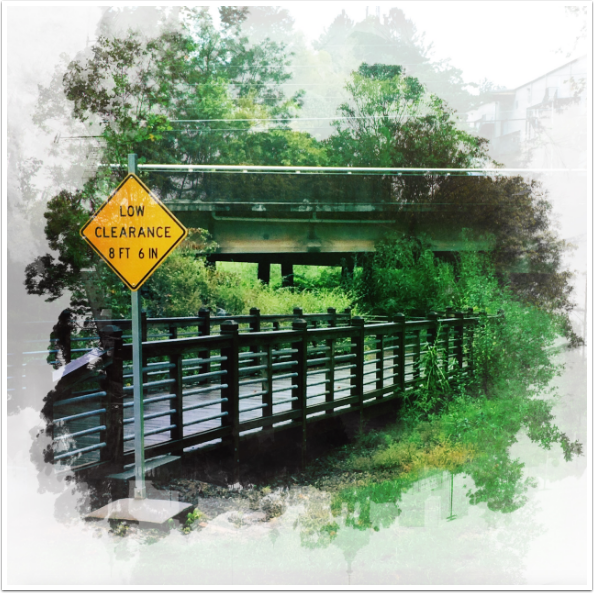
Now, let’s move on to the editing tools. I’m going to be working on the image below. As you can see by the text immediately below the image, I shot this with my 5S (native camera), outside Hipstamatic. Hipstamatic distinguishes whether I shot it with the native camera, 645 Pro, PureShot, Blux or any other camera replacement app. I brought it in from the Camera Roll, not the Gallery; Hipstamatic no longer has its own gallery”.
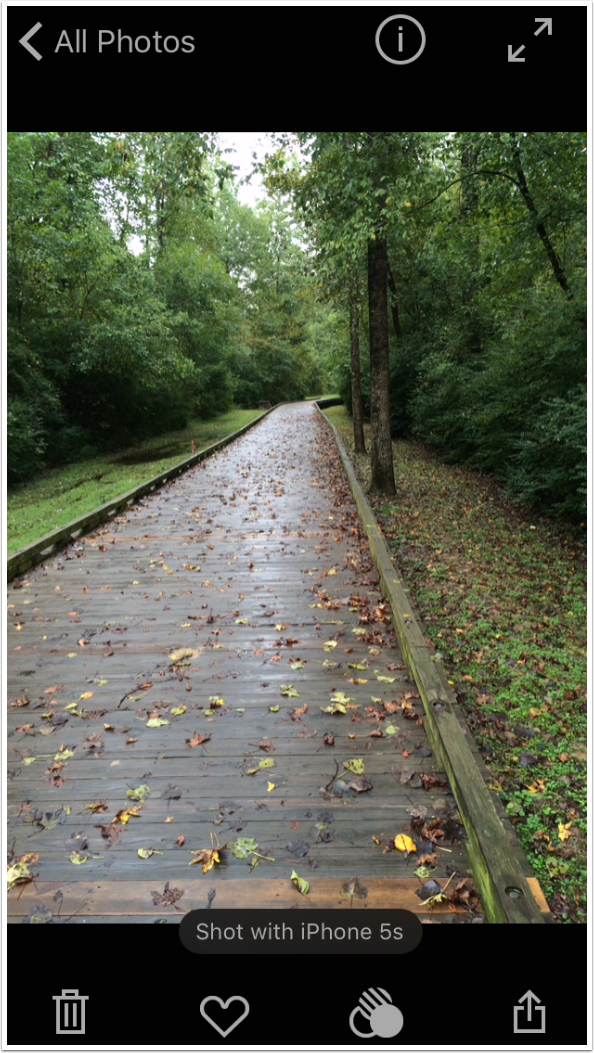
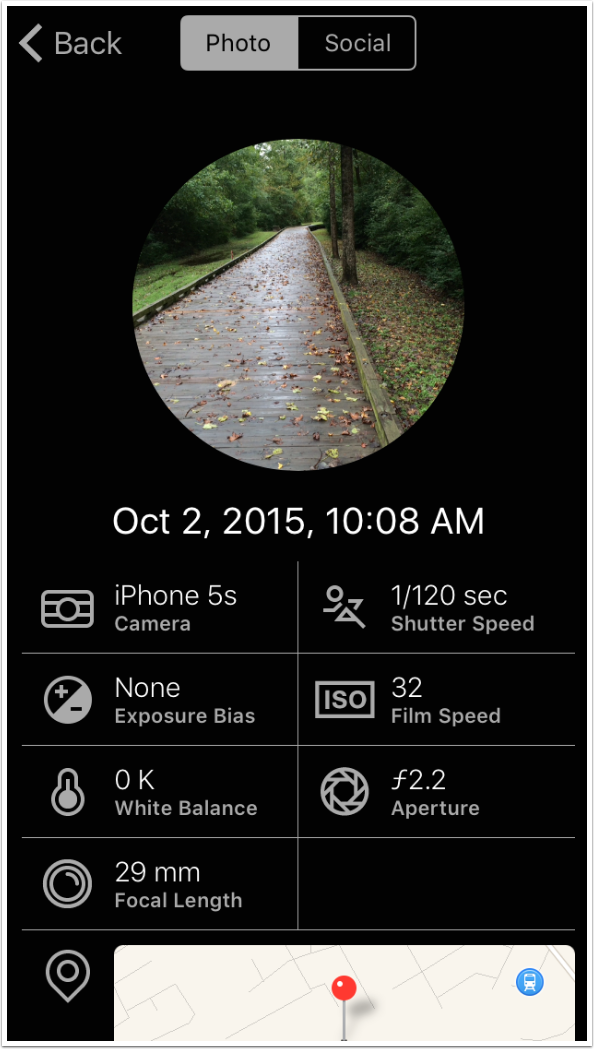
Tapping the Information button at the top of the screen brings up a lot of information about the image, including when and where it was taken.
Tapping social allows you to see if you’ve shared the image through Hipstamatic to social networks such as Facebook or Twitter. I haven’t shared this image.

Tapping the filter-circles icon at the bottom of the screen starts you on your editing process. You can use a favorite, or save a new favorite by tapping the New… button. This new favorite will incorporate any changes you have made in the editing suite. You should not tap that before editing, since that will establish a duplicate favorite.
You can use a favorite as a starting point for your editing. Just scroll the thumbnails sideways until you find an appropriate favorite. I’m choosing Music.

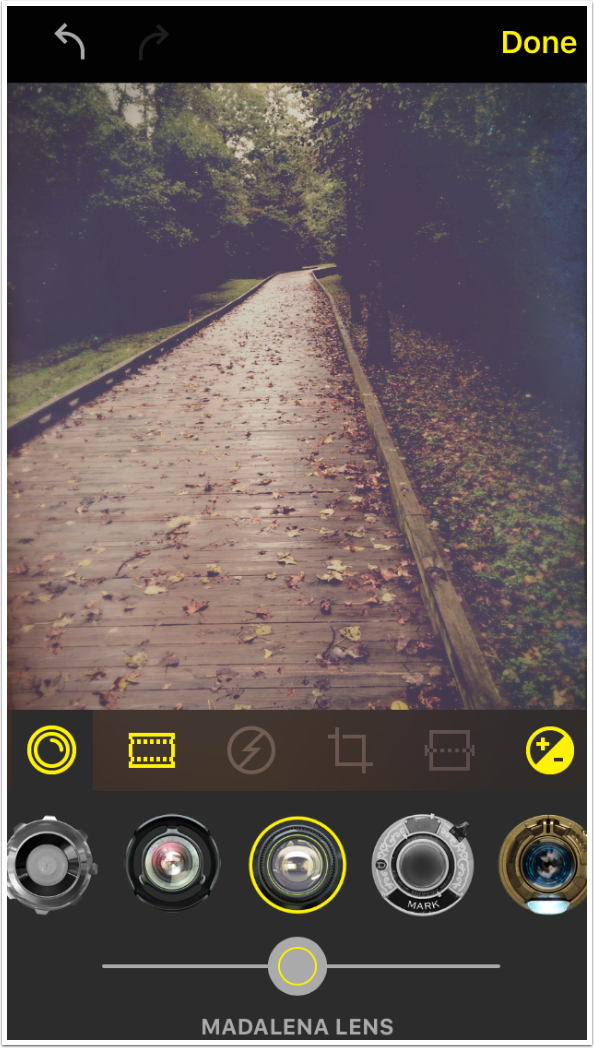
Tapping the Sliders icon to the right of the bar above the thumbnails takes you into the editor. Those tools that have been modified in the creation of the favorite will be highlighted with yellow. Lenses are the first tool shown. You can see in the screenshot below that the Madalena lens is used in the Music favorite.
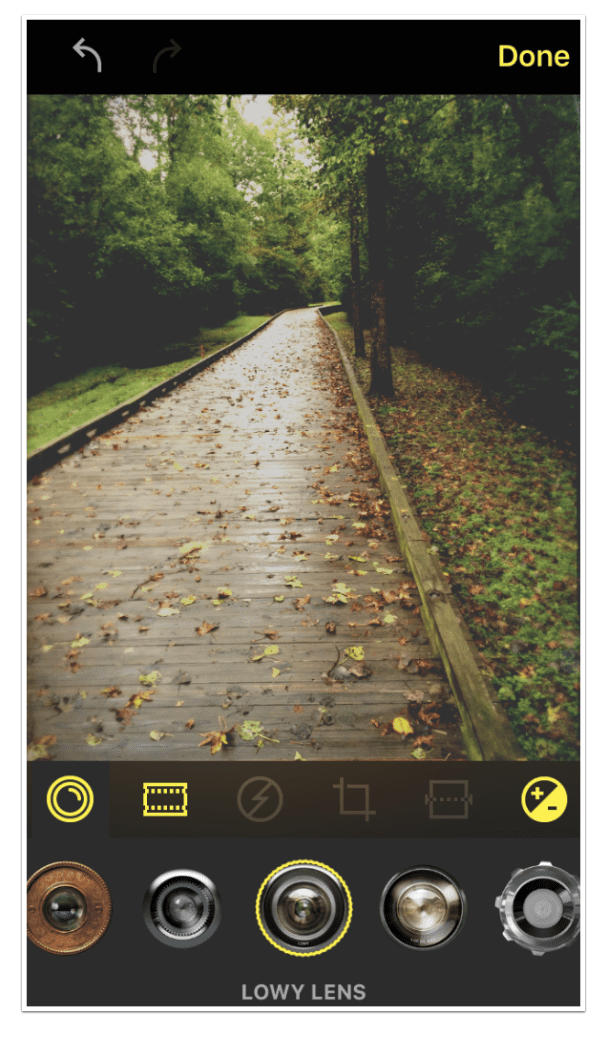
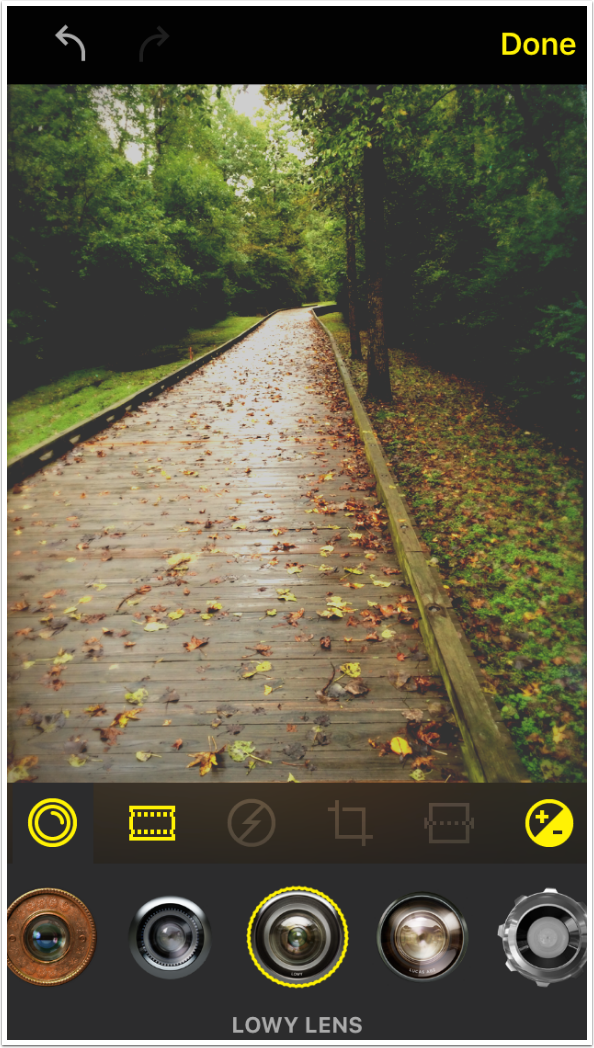
You can revisit part one to see the effect of the slider on the lens and film you choose. Some lenses and films have no slider. The Lowy lens, shown below, is one of those.
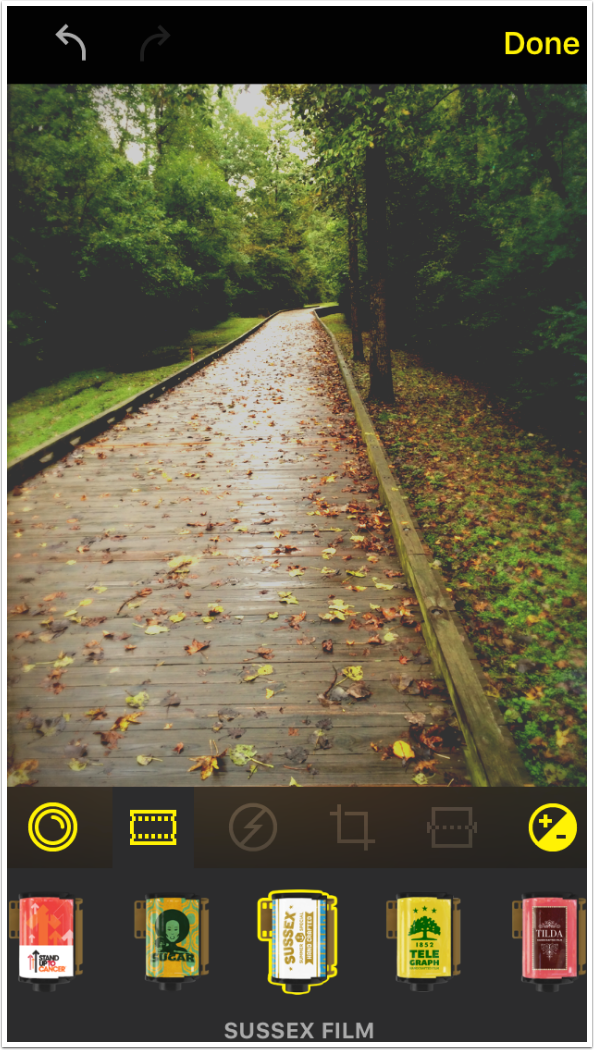
The next tool is the choice of Film. Sussex, used in the Music Favorite, has no slider.
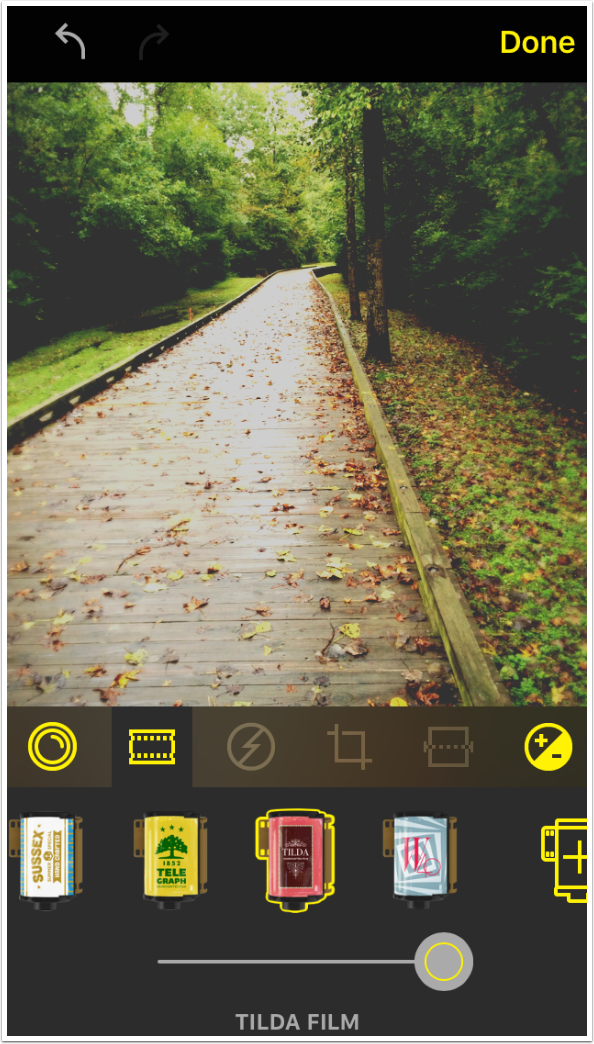
Tilda, shown below, does have a slider.
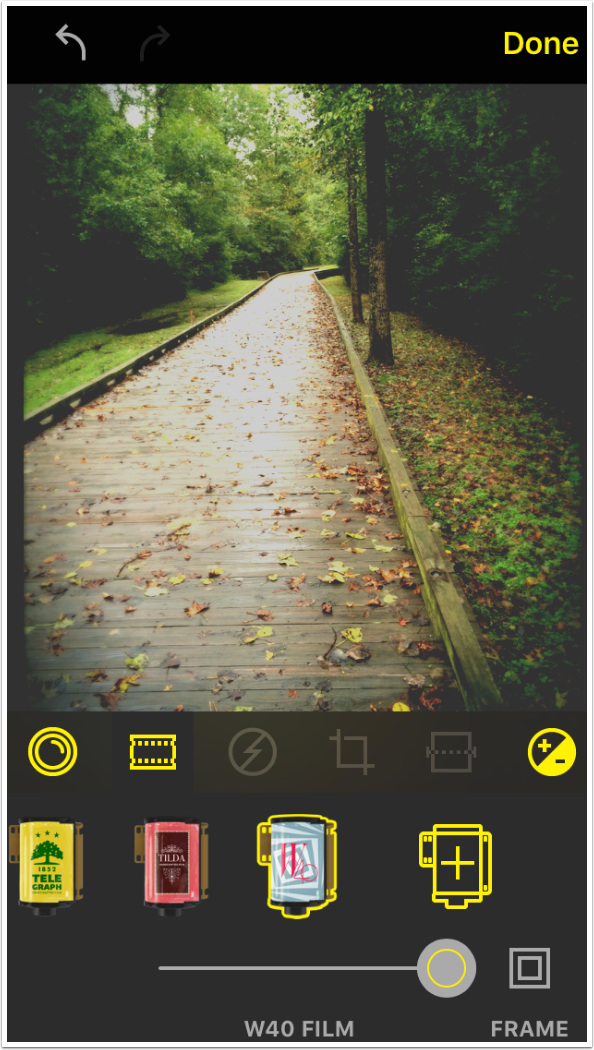
Some of the films have a frame. Some of these “framed films” allow you to shut the frames off, such as the one shown below, W40. (Others, such as the Blanko series and the Ina’s series, require you to keep the frame.)
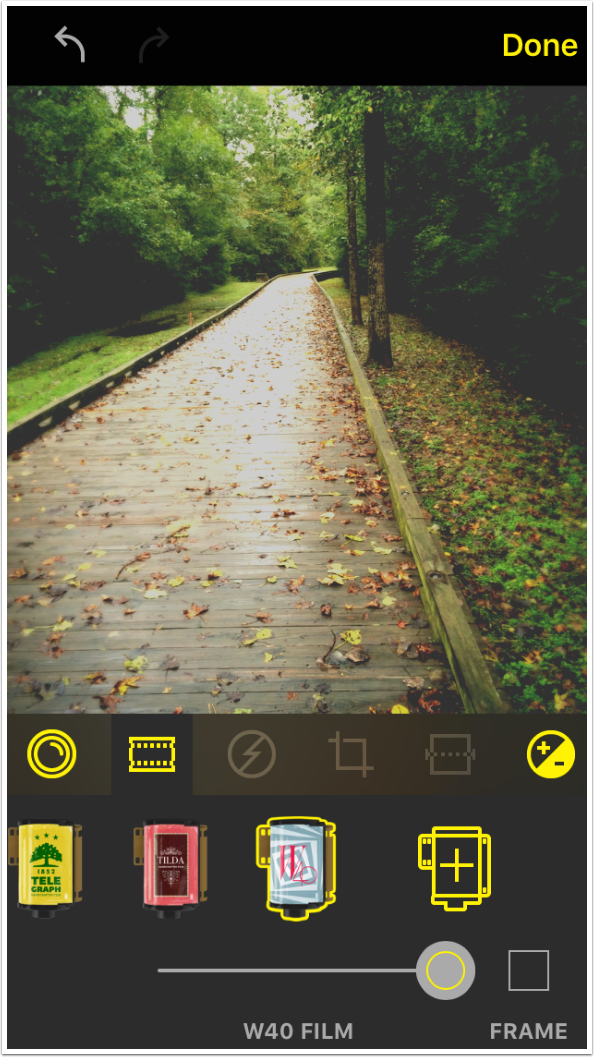
Below I’ve switched off the W40 frame.
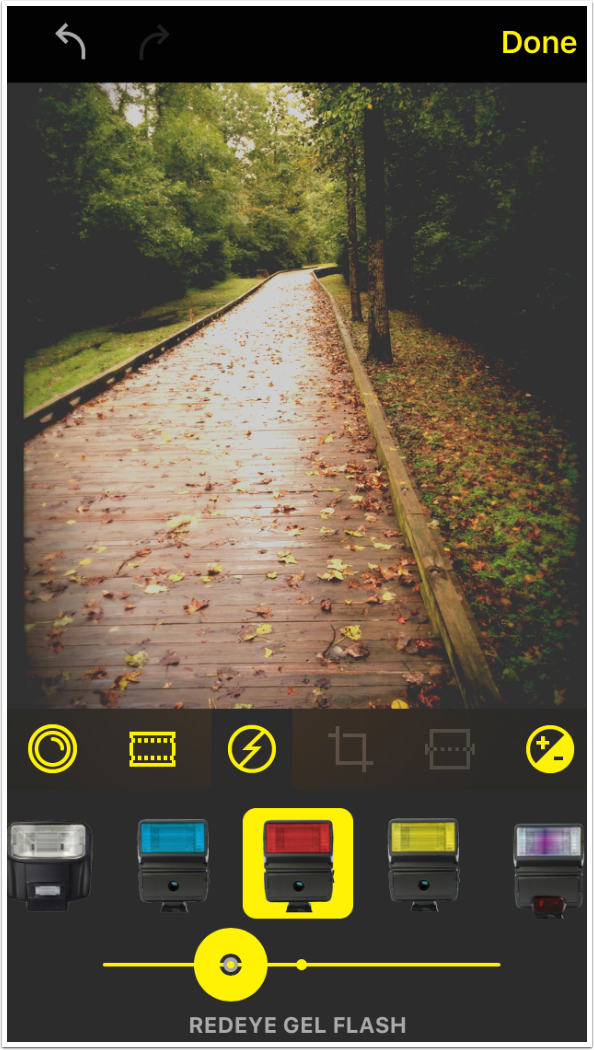
The next tool is the software flash. You can control the choice of flash used and the strength, using the slider.
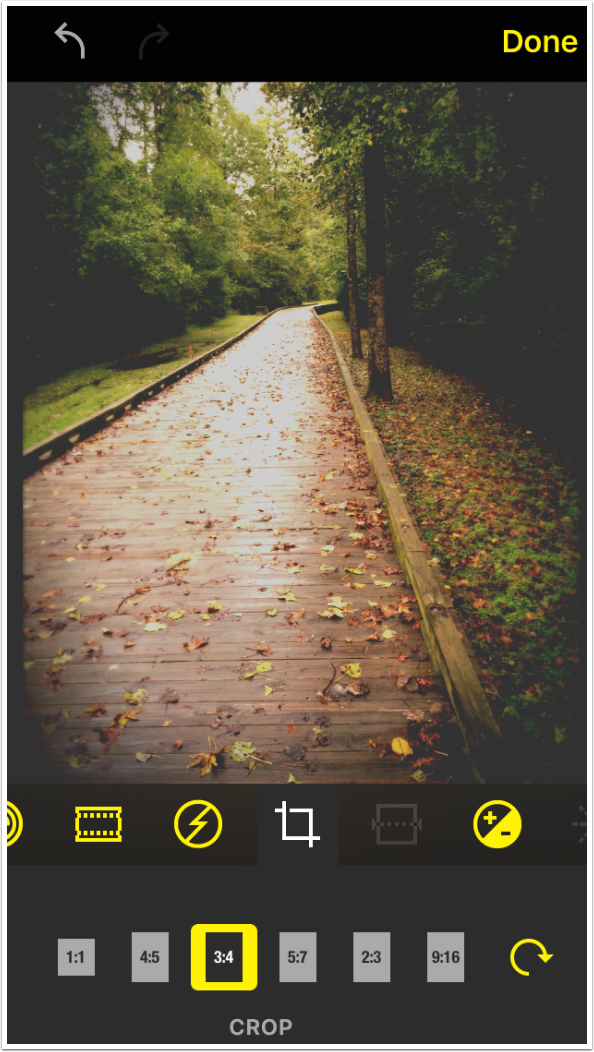
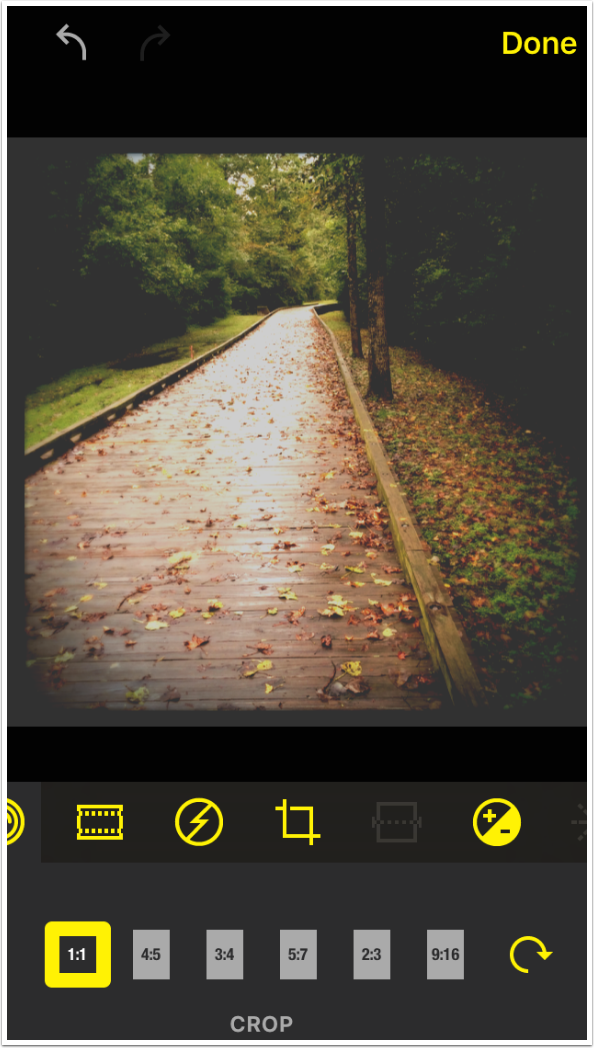
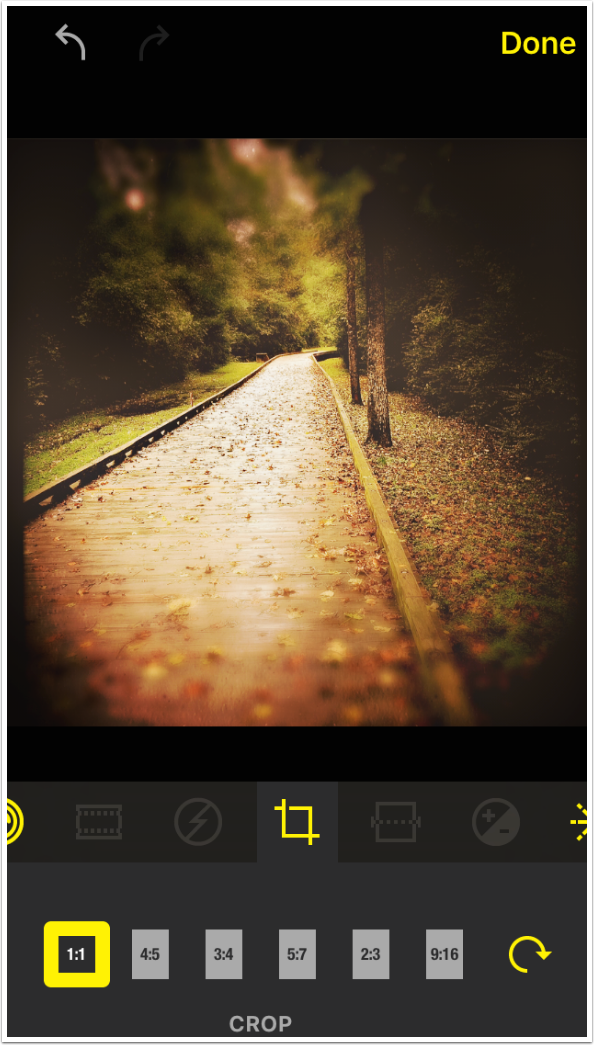
The next tool is Crop, which has a quirk. It allows for several different aspect ratios, but they are tied to the format in which the image was captured. The test image was captured in portrait mode, so the crop ratios available are portrait ratios, with the height larger than the width (9:16, for example). You cannot change a portrait image to a landscape image, or vice versa.
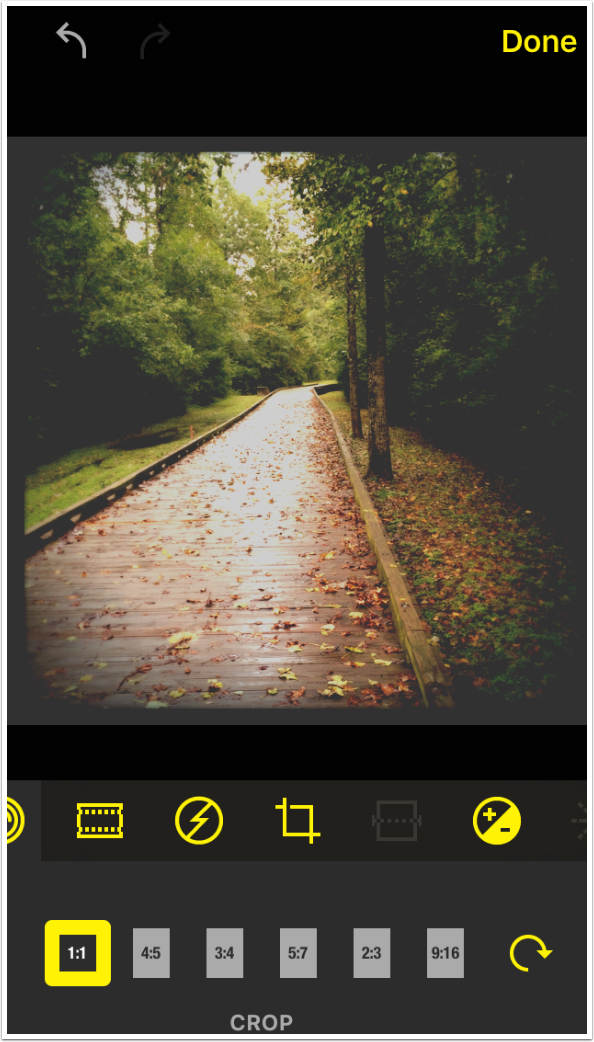
I chose the square, or 1:1 ratio.
While using the Crop tool, it is possible to move the image around within the crop square as shown below.
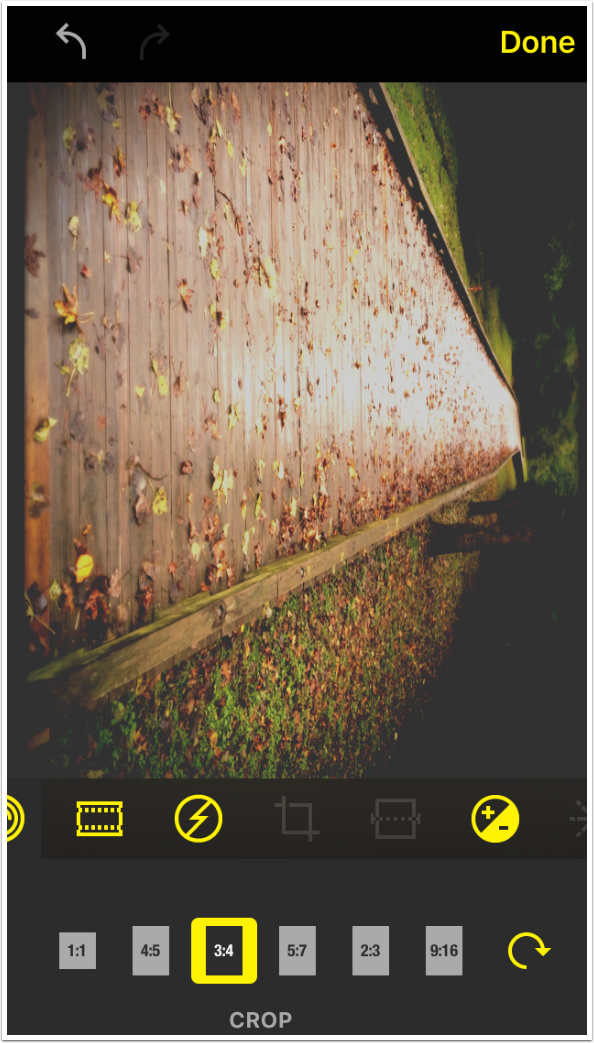
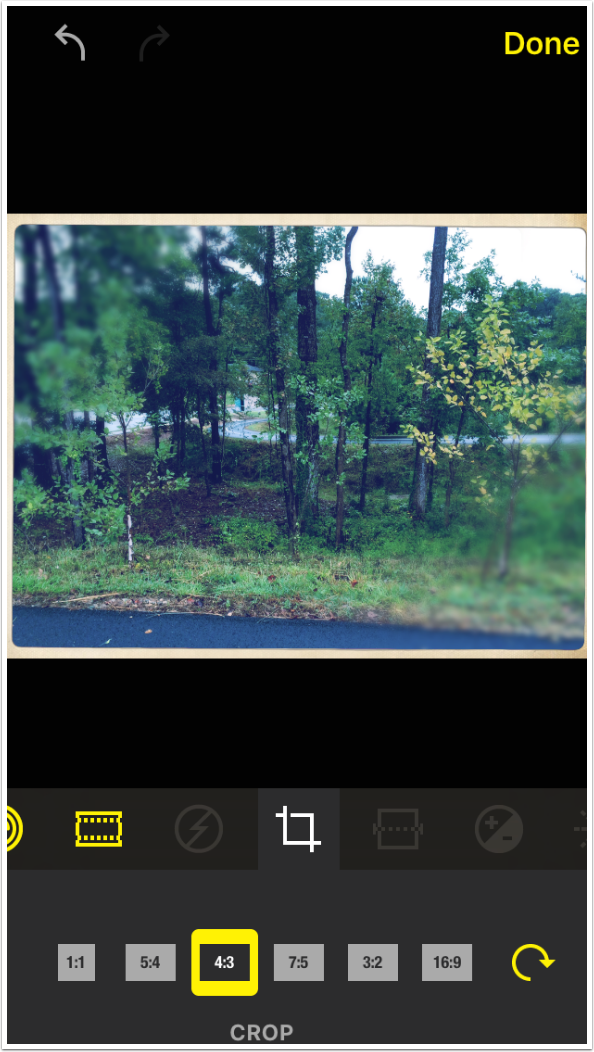
You might think that the Rotation button would allow you to change the orientation of the crop box, allowing me to have a 4:3 instead of a 3:4. Instead, it rotates the image and stretches it into the chosen crop, as shown below. I feel that’s an error; let’s see if that is changed in future releases.
Tapping the Crop icon after the changes returns the image to its original crop. All the tools work that way – tapping the icon reverts the changes.
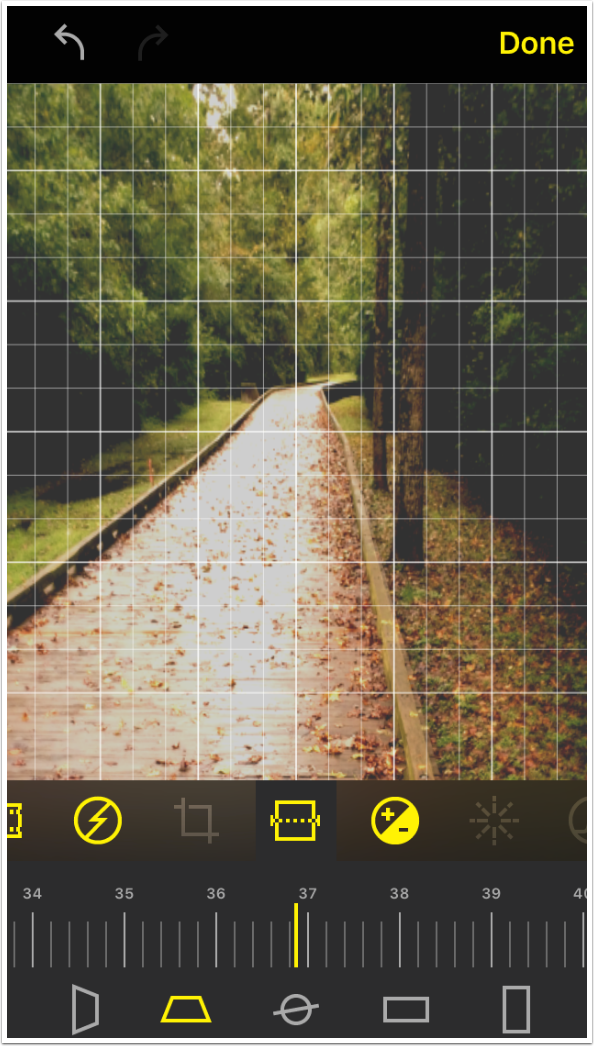
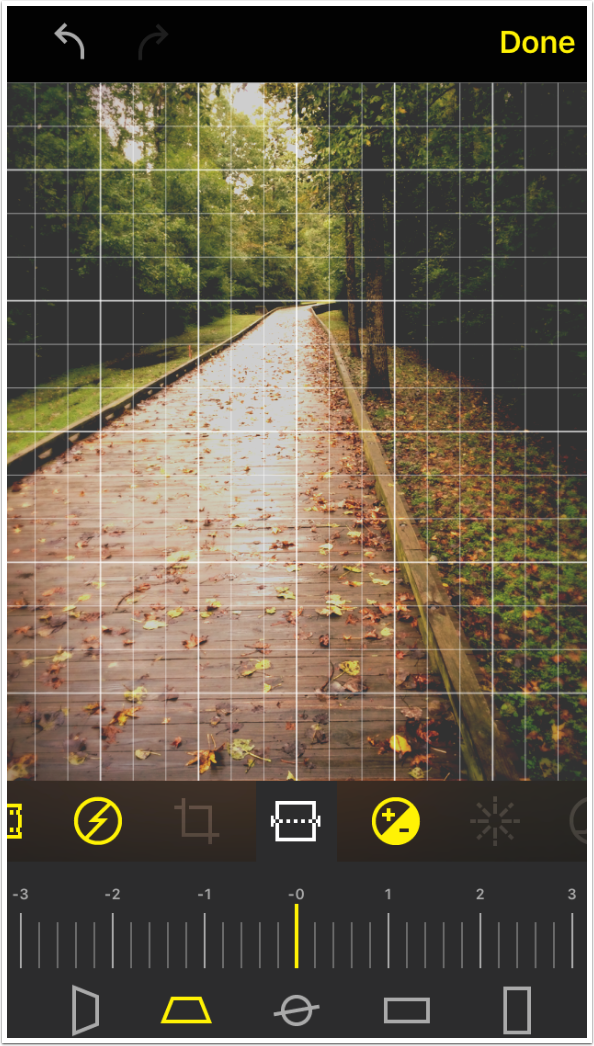
The next tool is Straighten. There are five types of Straighten, selected through the use of the five icons at the bottom: Vertical Perspective, Horizontal Perspective, Straighten, Horizontal Correction and Vertical Correction. Moving the dial in either direction will apply the Straighten option chosen. A slight bit of Straighten, shown below, makes the tree trunk vertical.

You can really make some radical changes with the Straighten tool. Below is an extreme Horizontal Perspective adjustment.
Tapping the Straighten icon resets all five types of Straighten at once. I would have to go back in and redo my Straighten after resetting the Horizontal Perspective.
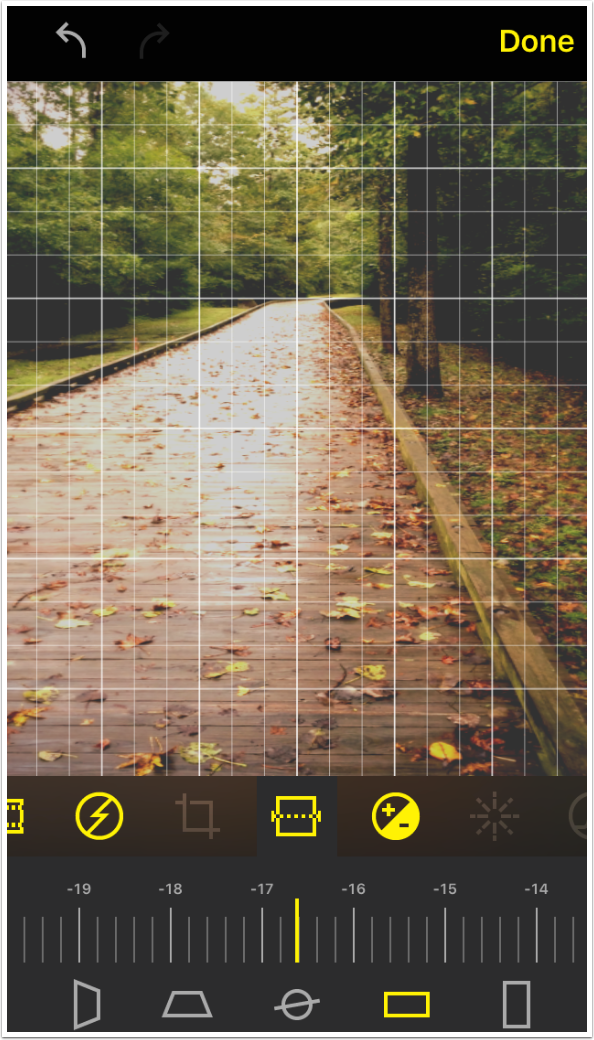
Here’s an extreme amount of Horizontal Correction.
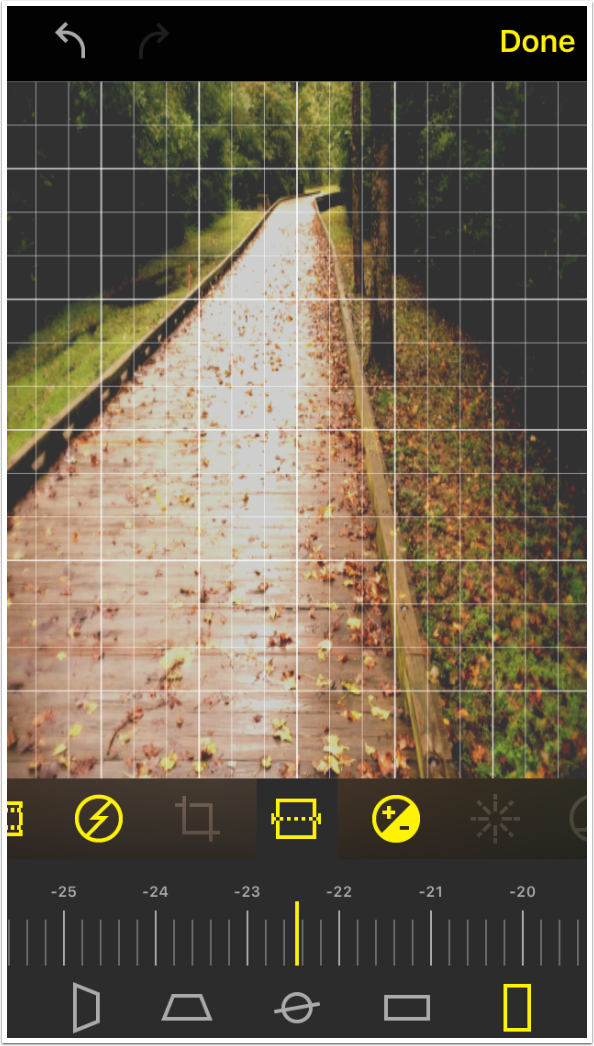
And a major amount of Vertical Correction.
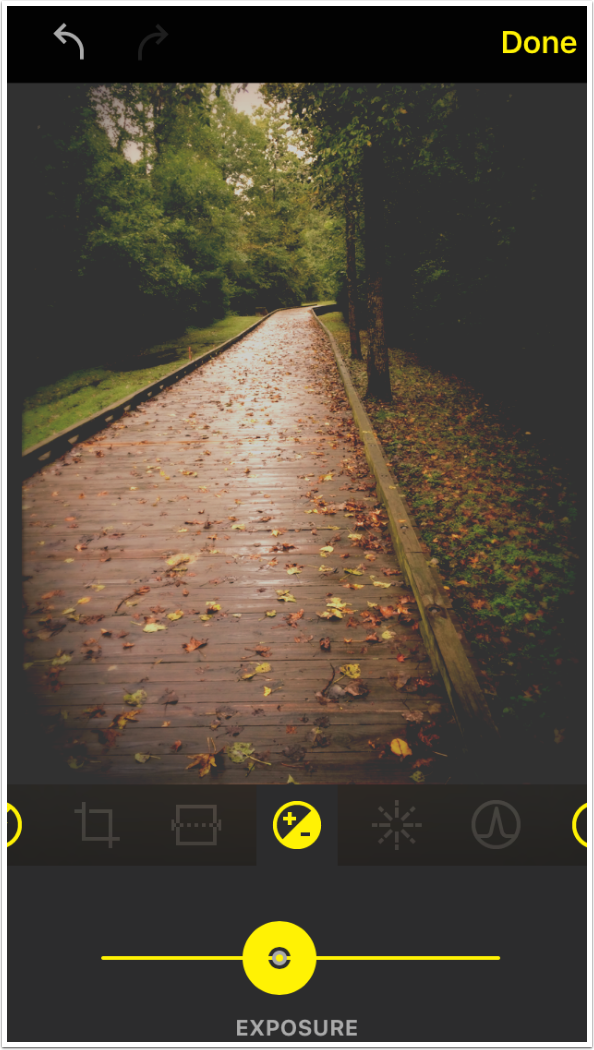
Exposure is the next tool. It’s pretty straightforward, but is very sensitive. I lowered the exposure about two tenths of a stop so that the shine on the boards wasn’t a blown-out highlight.
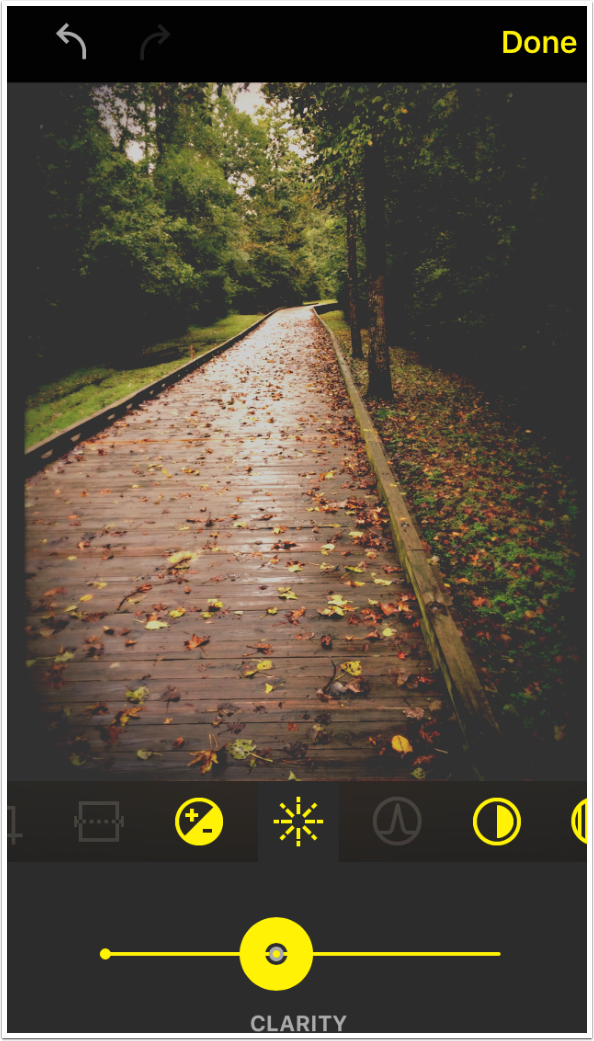
The next two tools, Clarity and Definition, correspond roughly to the Structure and Sharpening tools in Snapseed. Clarity sharpens edges, and Definition sharpens everything. The Music favorite already contained a Clarity adjustment, as shown below.
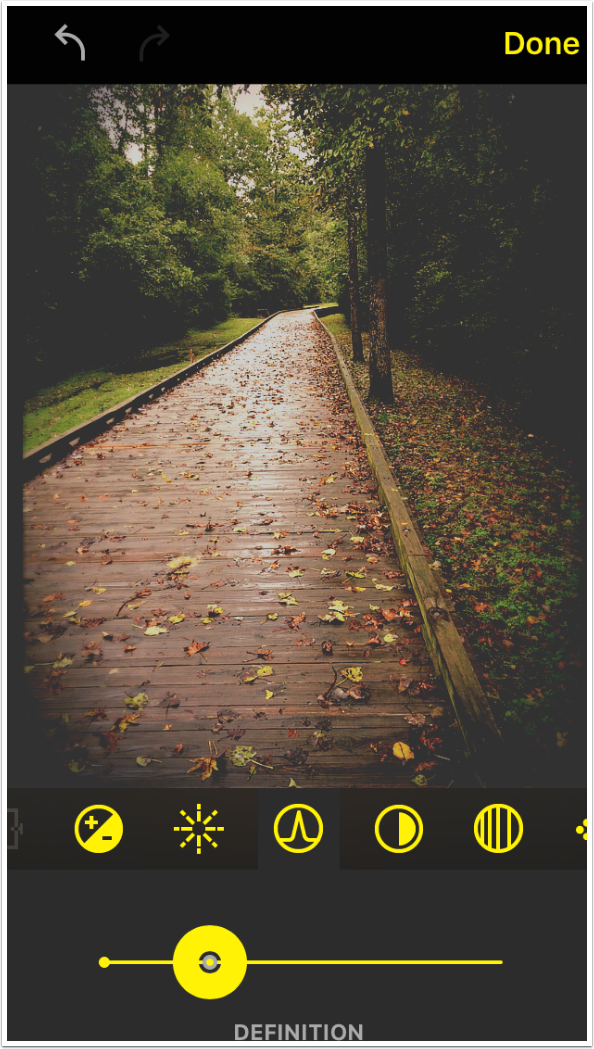
I added a bit of Definition.
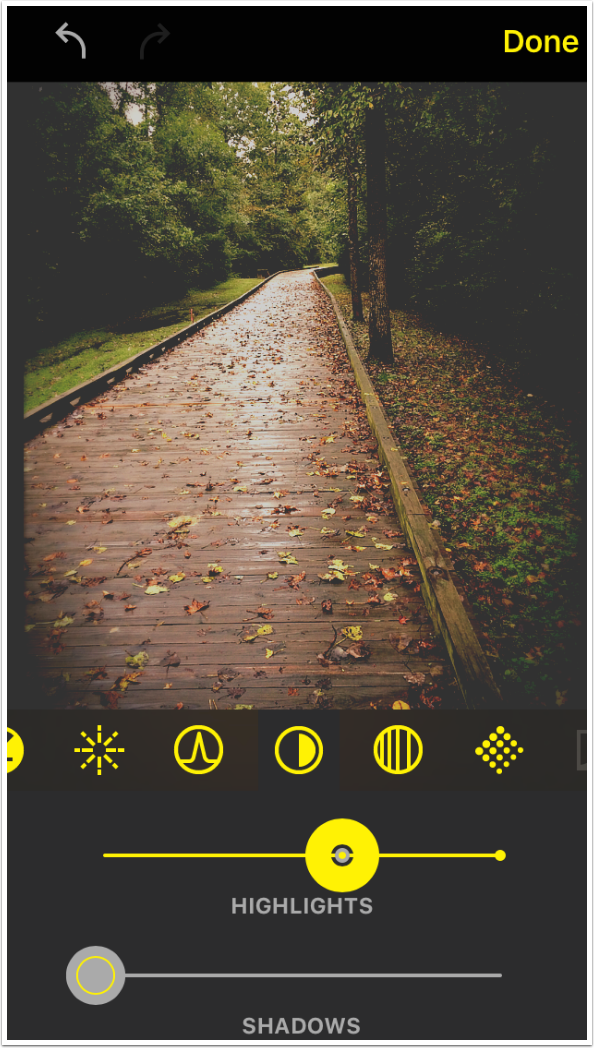
Highlight and Shadow controls allow you to “see into” the brightest and darkest areas of your image. The Highlight slider darkens the brightest areas, and Shadows lightens those obscure dark areas.
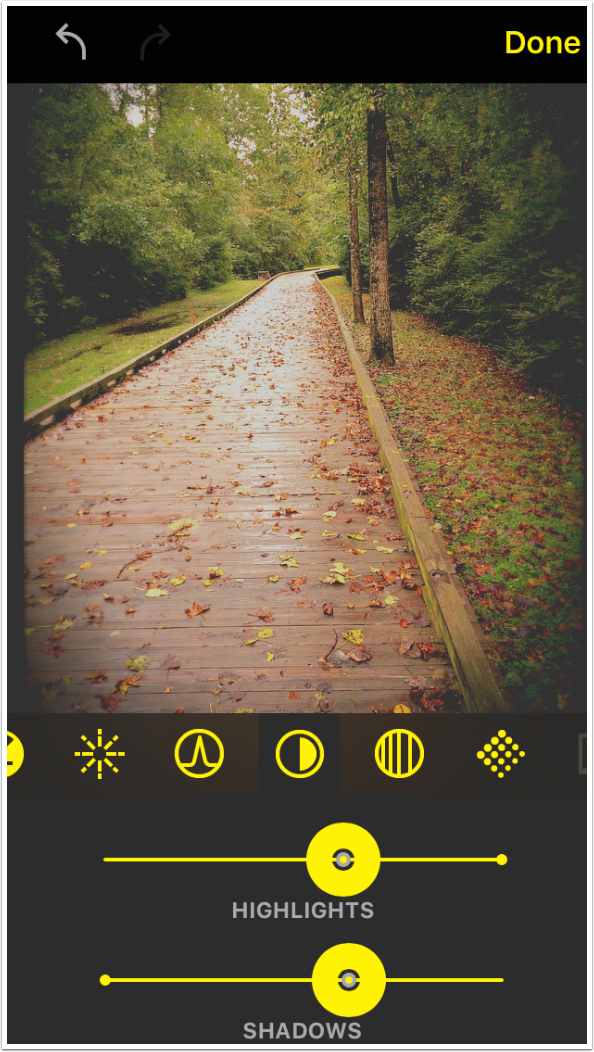
Below you can see that raising the Shadows slider allows me to see into the trees on the right.
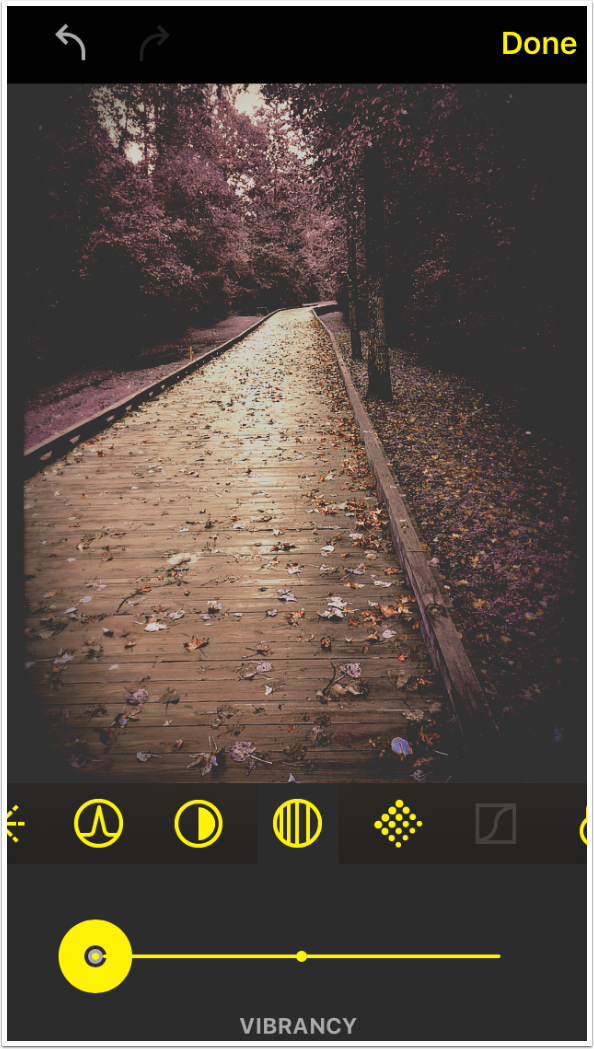
There is no separate Saturation or Hue tool in Hipstamatic (although moving the slider on the Film tool will sometimes work on the saturation of the image). Instead there is a Vibrancy tool. Moving it all the way to the right will still not remove all the color from an image.
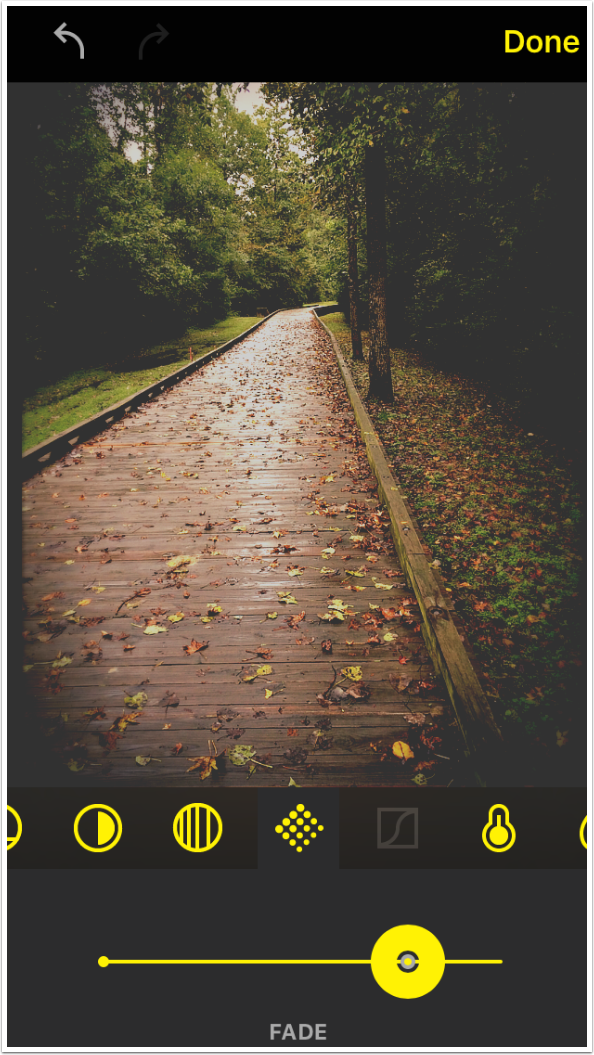
Next is Fade, which gives a “washed-out” feeling to the image by lowering the contrast.
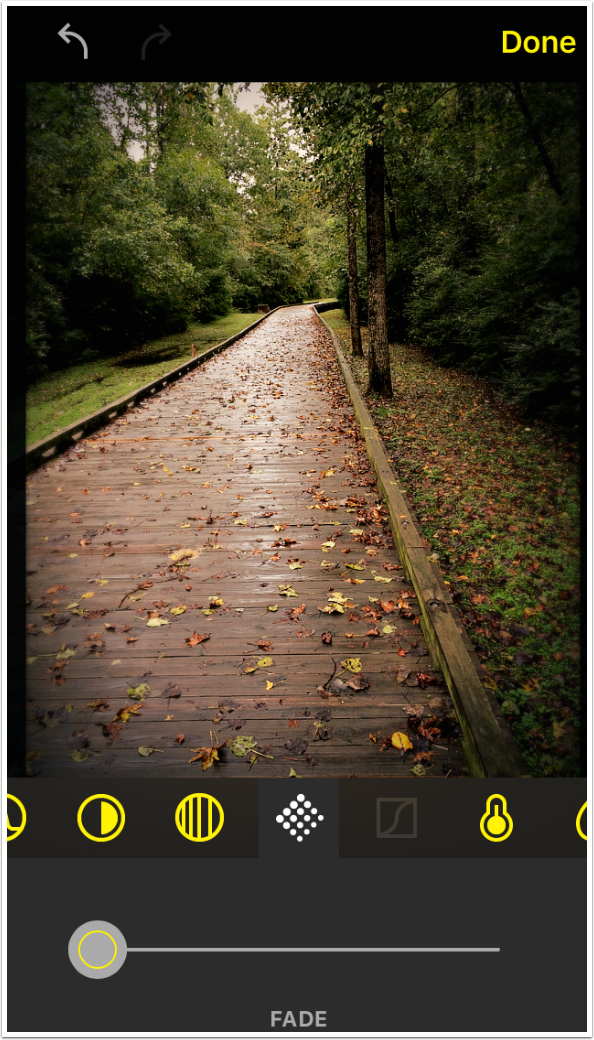
Note the difference when I remove the Fade.
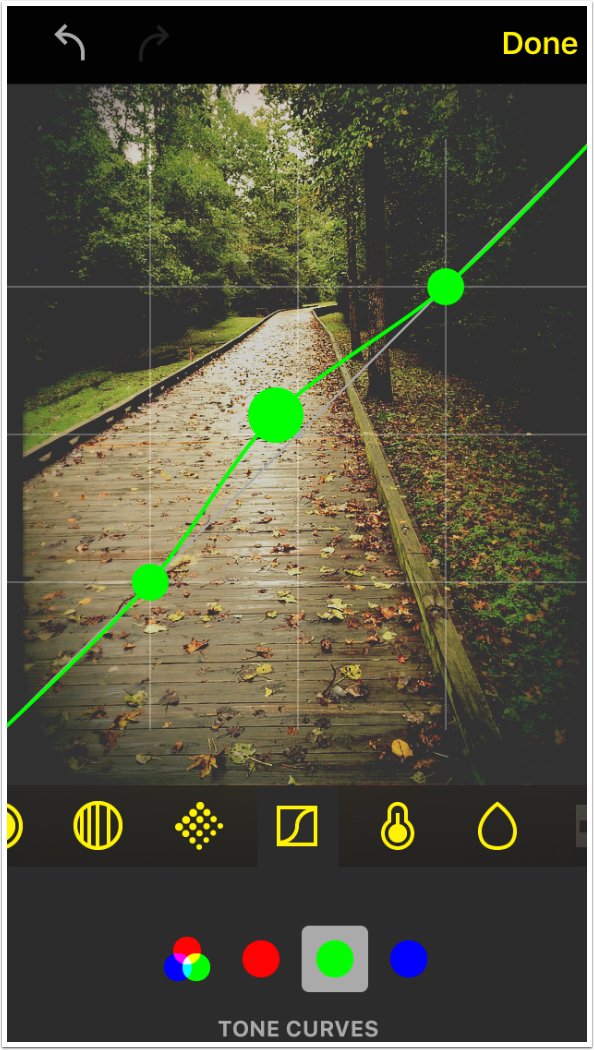
Hipstamatic gives you a full set of Curves controls. You can adjust the luminosity curve (by default) or change the Red, Blue or Green channels individually. You are limited to the three dots along the curve, and cannot add other points.
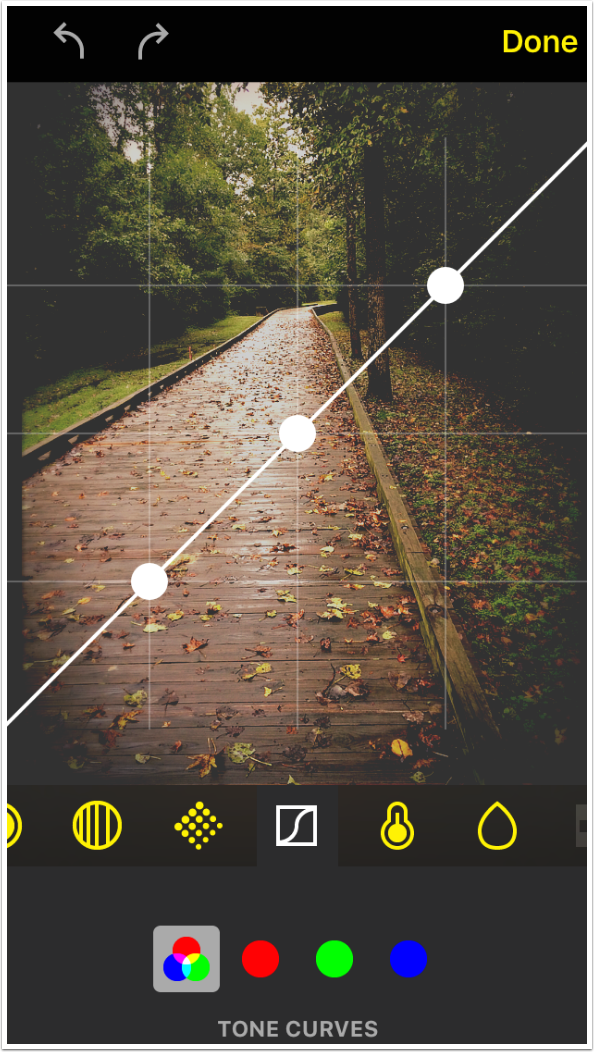
Below I increased the greens in the midtones by dragging a single point on the Green curve upward.
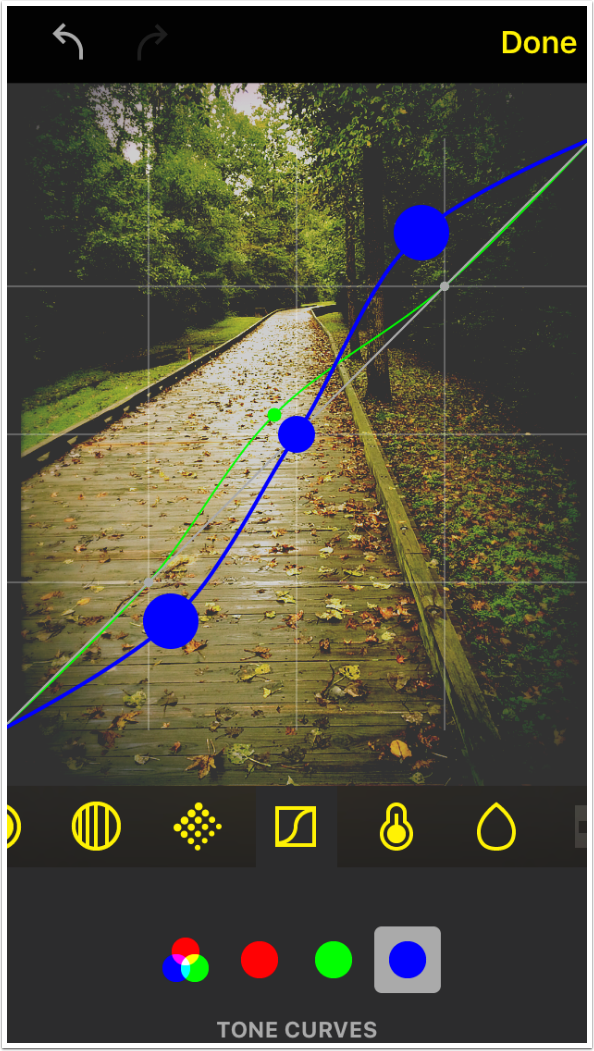
I increased the Blue curve in the highlights and decreased it in the shadows. This makes the Shadows yellower. (I don’t actually like these changes, so before leaving Curves, I reset them all by tapping the Curves icon.)
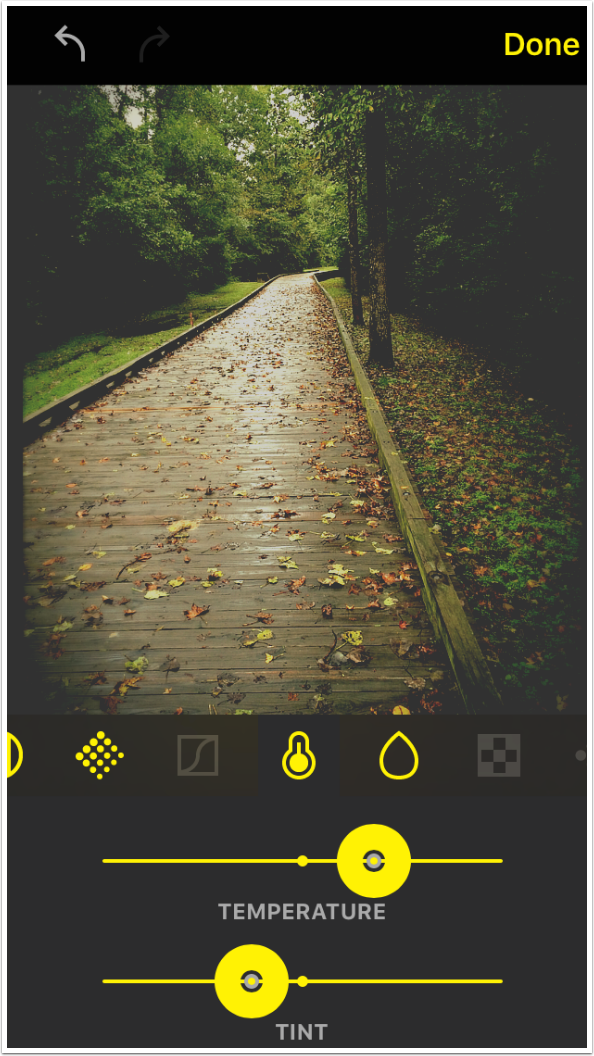
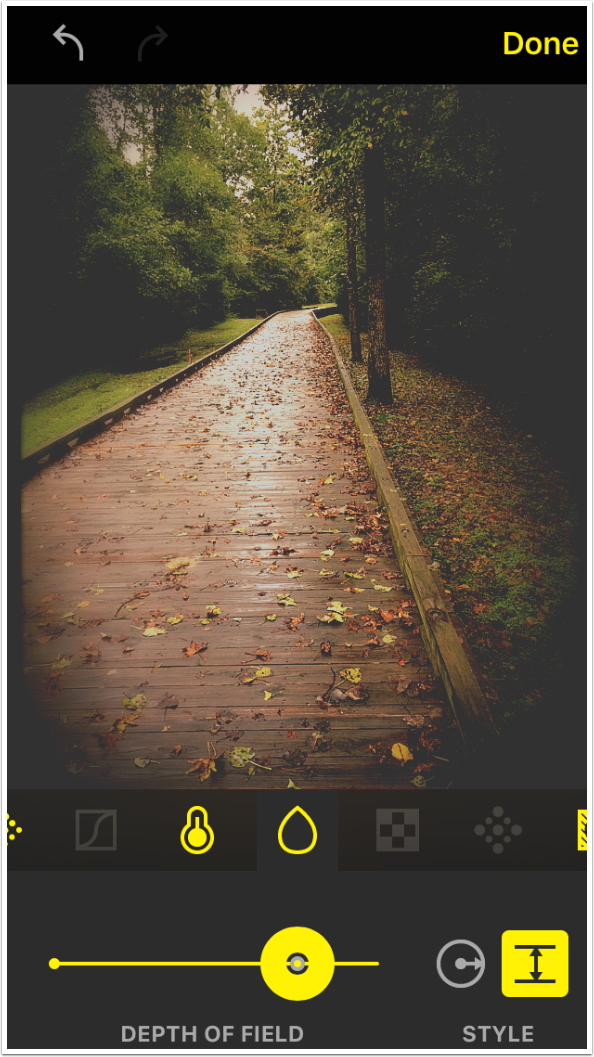
Temperature, indicated by a thermometer icon, is the next tool. There are two sliders, one for temperature and the other for tint. The temperature slider runs from blue (cool) to the left to yellow (warm) on the right. The adjustment below warms up the image.

The tint slider runs from green on the left to magenta on the right.
Depth of Field imparts blur to portions of the image to simulate parts of your image being out of focus due to distance from the camera. Some of the lenses give some blur to your images anyway. This blurring is controlled bt the Depth of Field tool.
The amount of blur is controlled by the very sensitive slider. The shape of the in-focus area can be either a circle or a line, depending on which button you select.
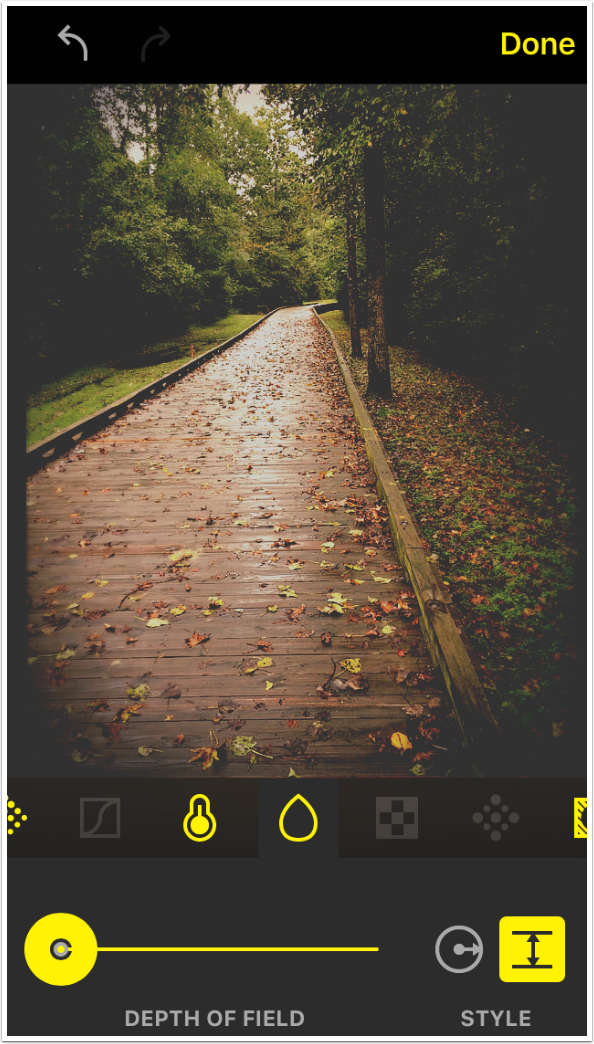
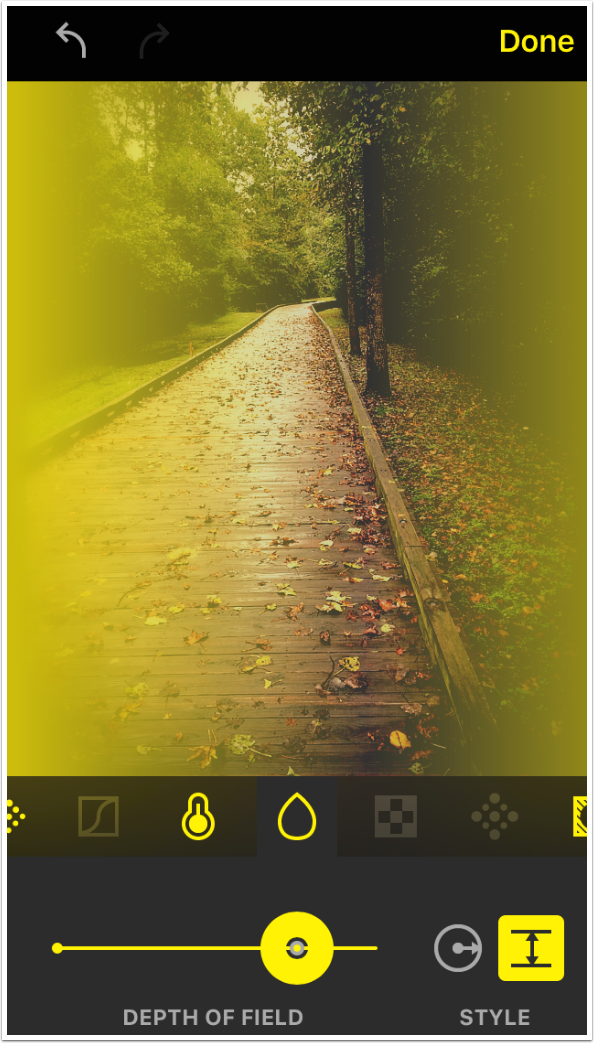
I really raised the Depth of Field slider below, yet I’m not seeing much of a change. What’s happening?
By pinching and dragging on the image, you can change the placement and orientation of the in-focus area. The yellow overlay that appears shows us that the blur is there; it’s just that the line is vertical and spread out, meaning the blur only applies to the left and right edges.
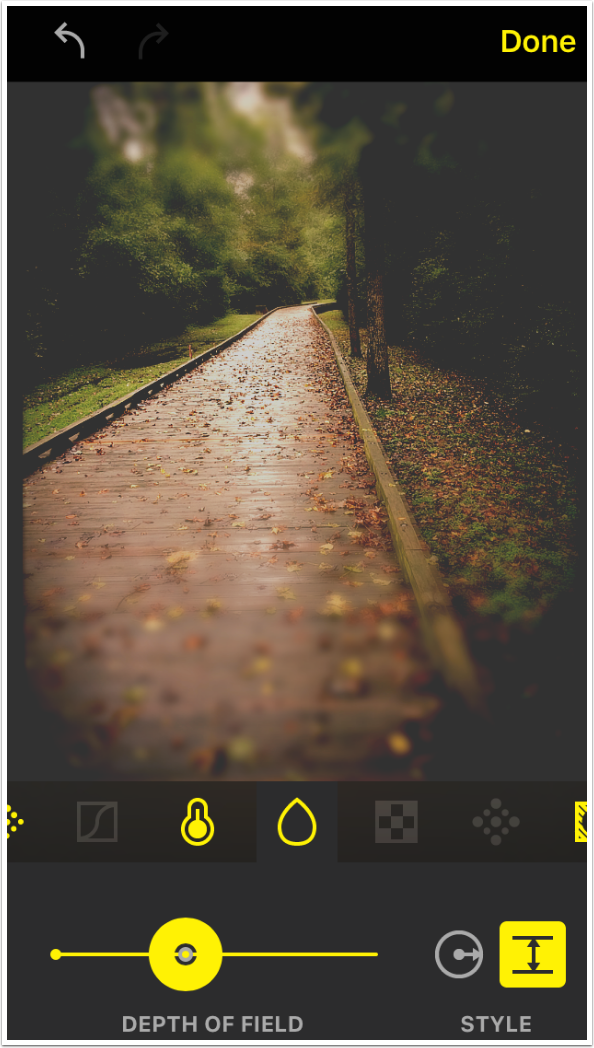
I rotated and squeezed the blur overlay, and below you’ll see that even though I moved the slider to half the value it was before, the effect is still very strong.
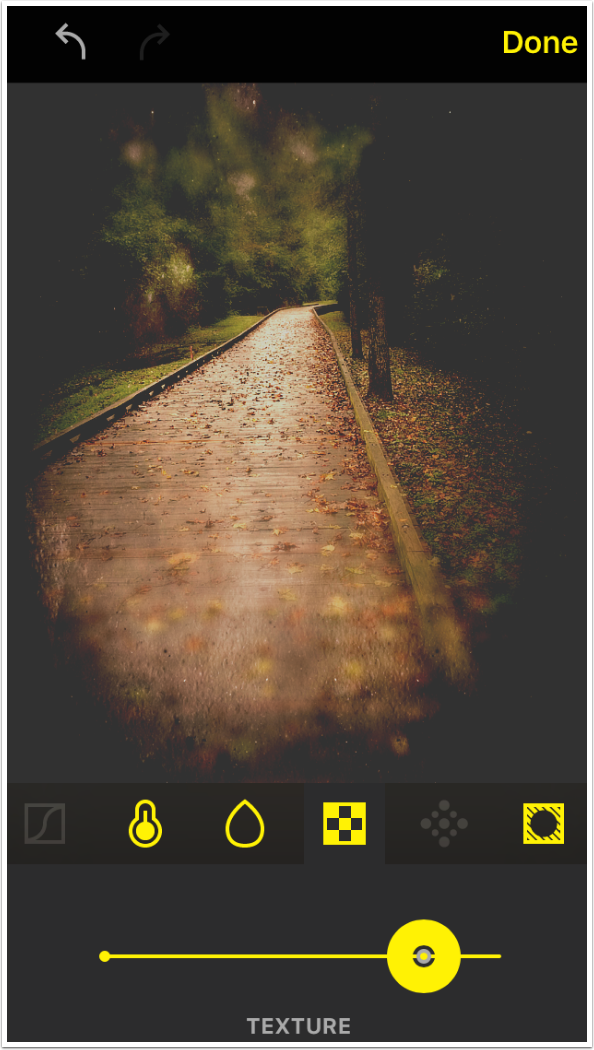
Next is Texture. The texture applied is based on the film used, so you can’t control the type of texture here. All you can adjust is the strength, by moving the slider.
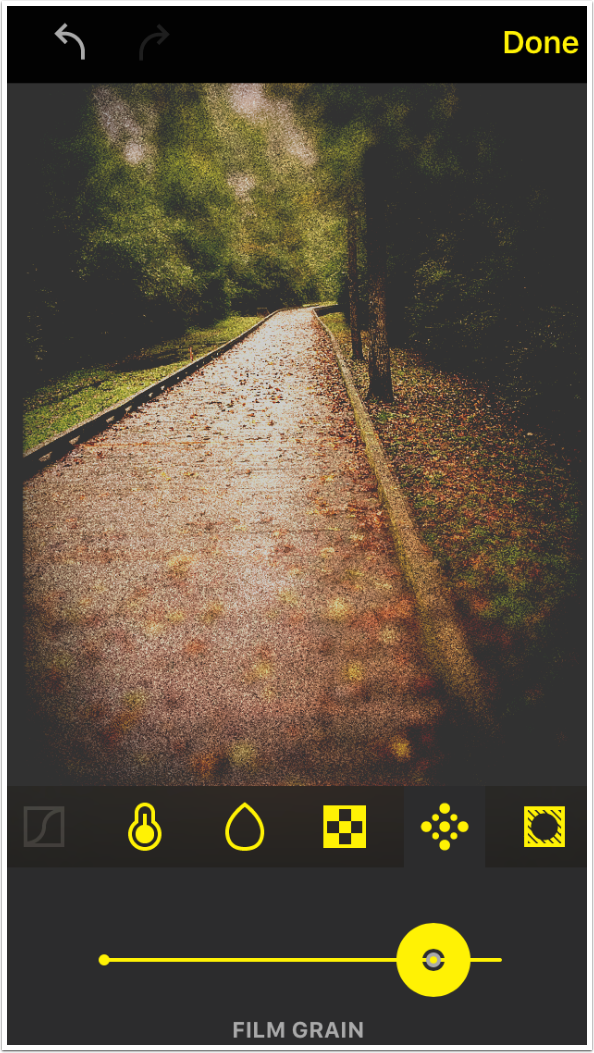
Film Grain is available in Hipstamatic. Graininess is never something I work to achieve in my images, so let me just say it is there and adjustable with the use of the slider.
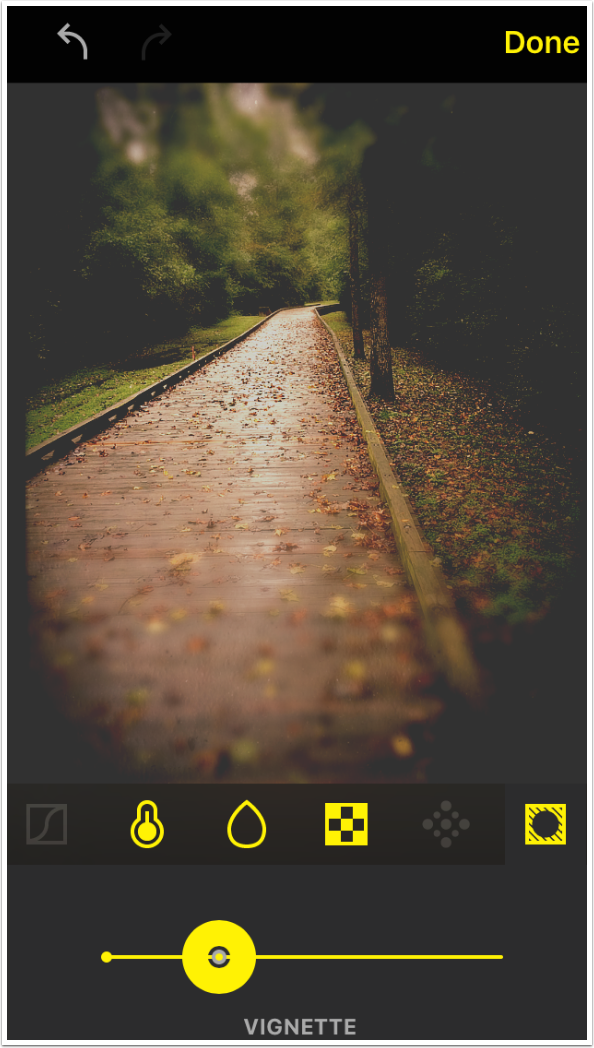
The final control is Vignette. It is solely a dark vignette; white vignettes are not available. Strength is adjustable with the slider, but size is not.
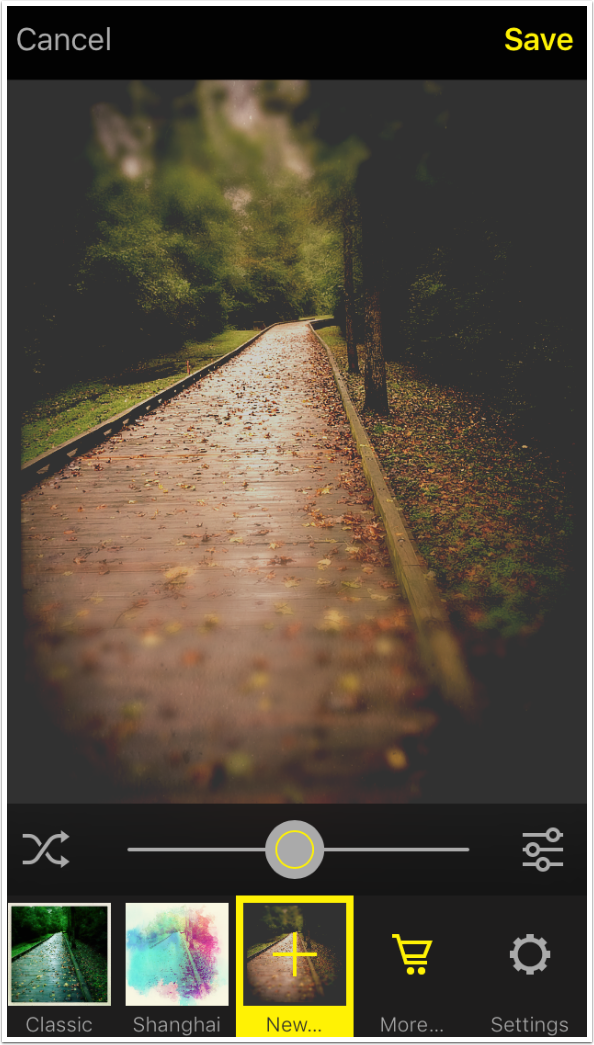
Once you are finished with your edits, tap Done to return to the Favorites screen. You can save all your edits as a Favorite with the New… button. I want to just save this image, so I tap Save at the upper right.
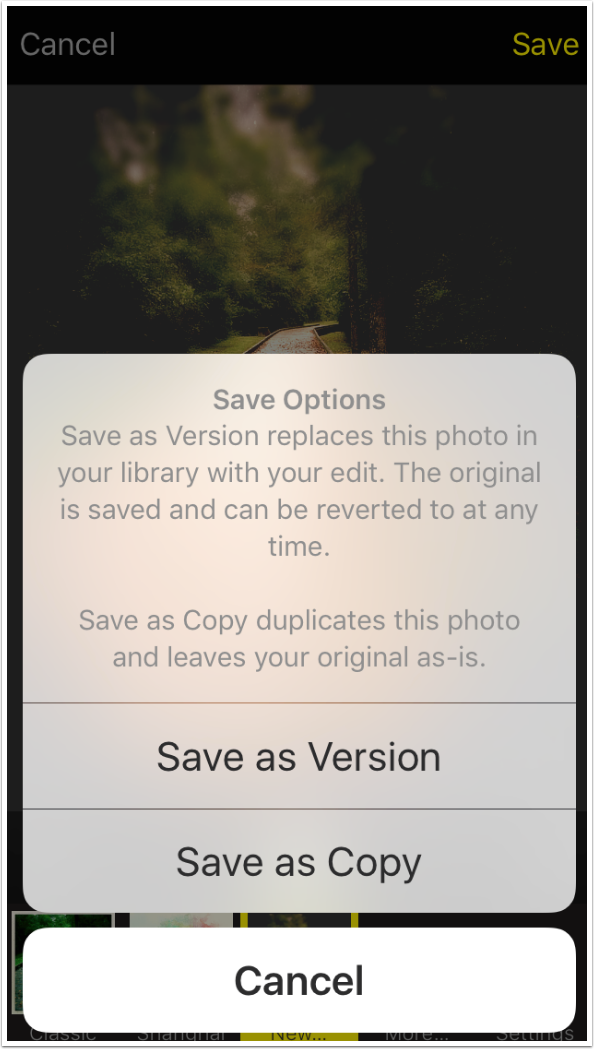
Last time I said that saving a copy of the original with the edits does not work. Thanks to some advice I received online, I found that changing the Save setting (in the Settings app) from “Save as Copy for New Edits” to “Always Ask” produces the dialog box seen below. Choosing Save as Copy from this box leaves the original intact and saves an edited copy as well. This edited copy will move through Dropbox and Photo Stream in the normal way.
Here is my finished image.
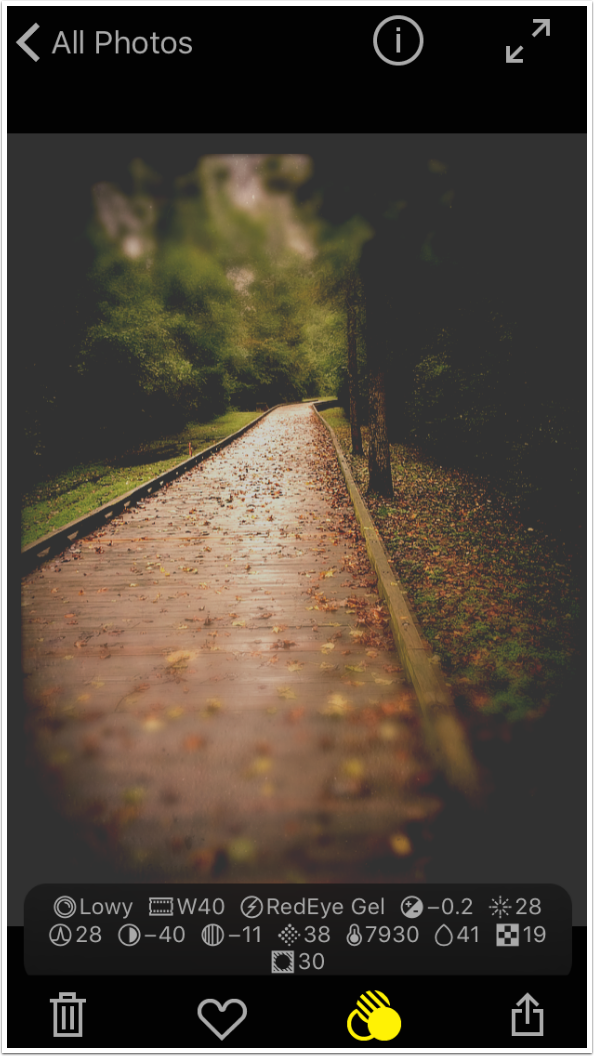
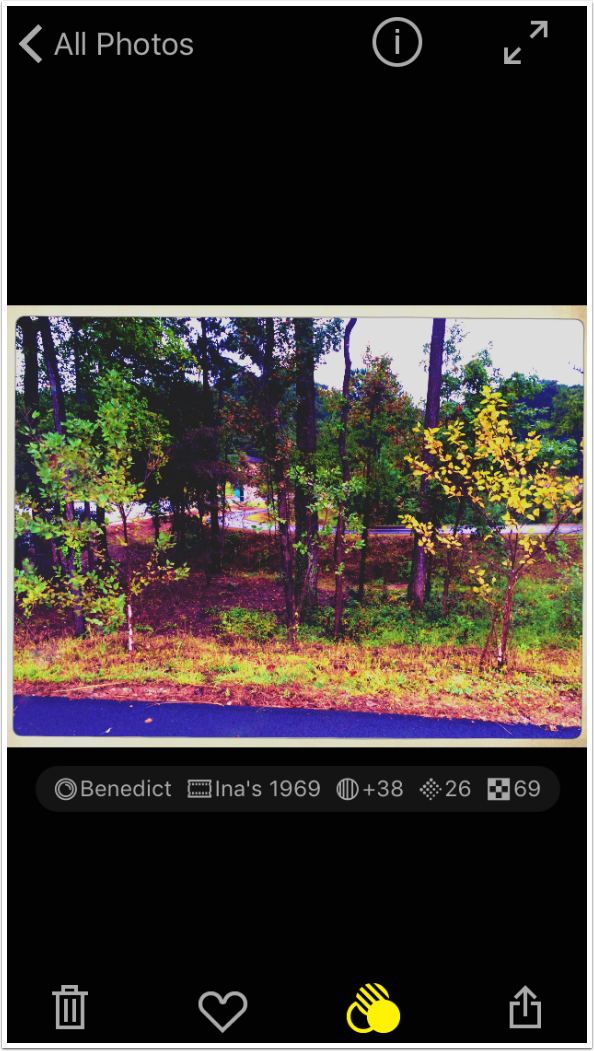
Returning to Hipstamatic, we see that the text box shows all the settings we changed. Lowy lens, W40 film, Red Eye Gel flash, and changes to Exposure, Clarity, Definition, Highlights, Vibrancy, Fade, Temperature, Depth of Field, Texture and Vignette.
If I press the edit button now, I will be editing the edited copy. The new edits will not apply to the original, but on top of the previous edits. For example, the W40 film frame that was added in our edit session would remain in place, and a crop would chop off part of the frame. A new texture would not replace the already added texture, but would be added on top of it. If you wish to make several edited versions of the same original, you will have to go back and reload the original each time.
Below is an example of what I just said. I took the W40 version back through editing and cropped it to a square. The W40 frame is cropped off of the top and bottom, but remains on the sides.
As I said in the previous instalment, images captured in Hipstamatic are saved in full frame, regardless of the fact that you captured them with the classic camera in square format. That means that when they are edited, you can expand the crop and bring in information you did not see in the original square photo.
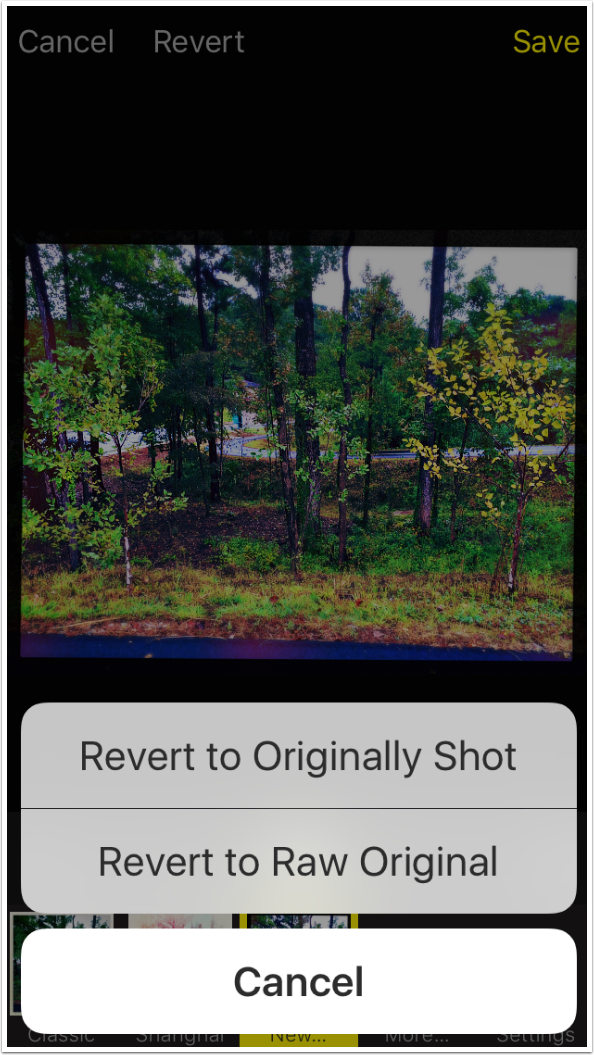
With Hipstamatic-captured images, you will see an extra button on the Favorites screen: Revert. Choosing this button brings up a dialog that allows you to revert to how it was originally shot (square, with a lens/film combination) or as the RAW original. I will often prefer to see everything that’s available to me from the capture, and start from scratch on selection of lens and film. I choose Revert to Raw Original.
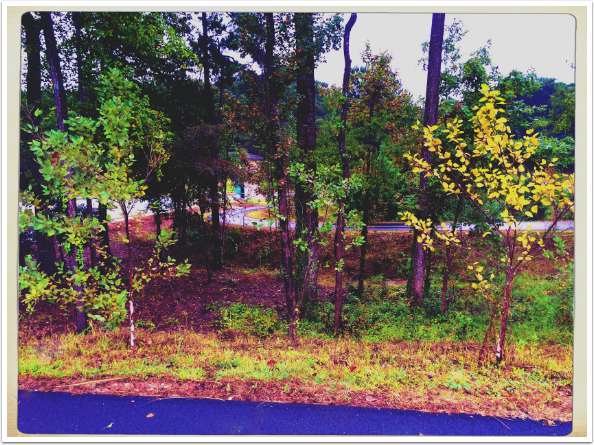
The following screen shows the changes I eventually made to this image. I saved as copy, to allow me to go back to the original again later.
It’s a bit garish, and could use a reduction in Vibrancy.
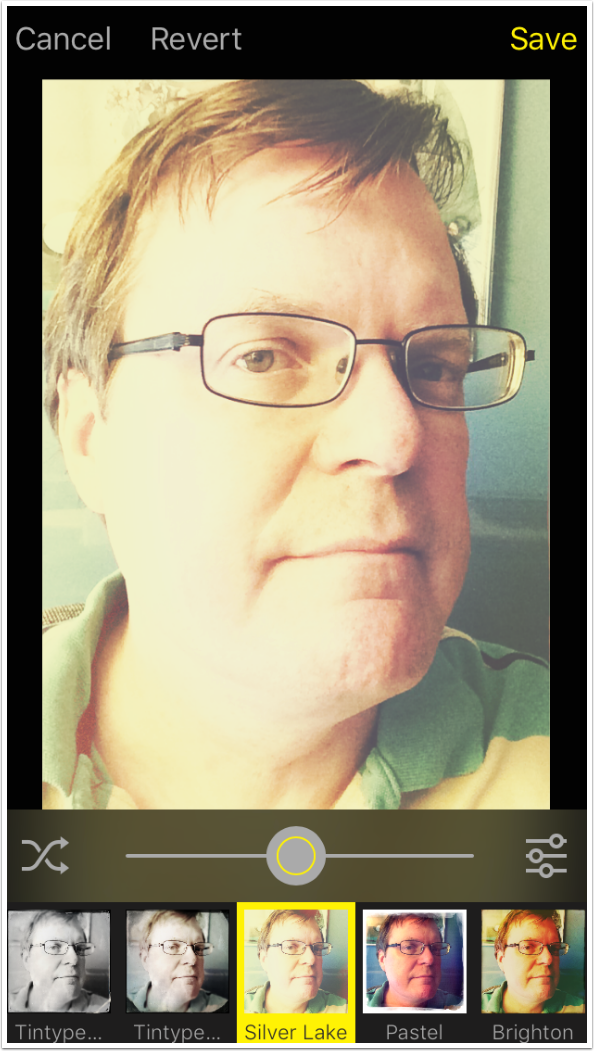
Next is a selfie, captured with the front camera (available in the pro mode camera). It was captured with the SilverLake combo.
I wanted to show you two things about this. First of all, the Info button for a Hipstamatic shot contains, in addition to the when and where and camera information, all the info about the lens (Mabel), film (Dixie) and other edits.

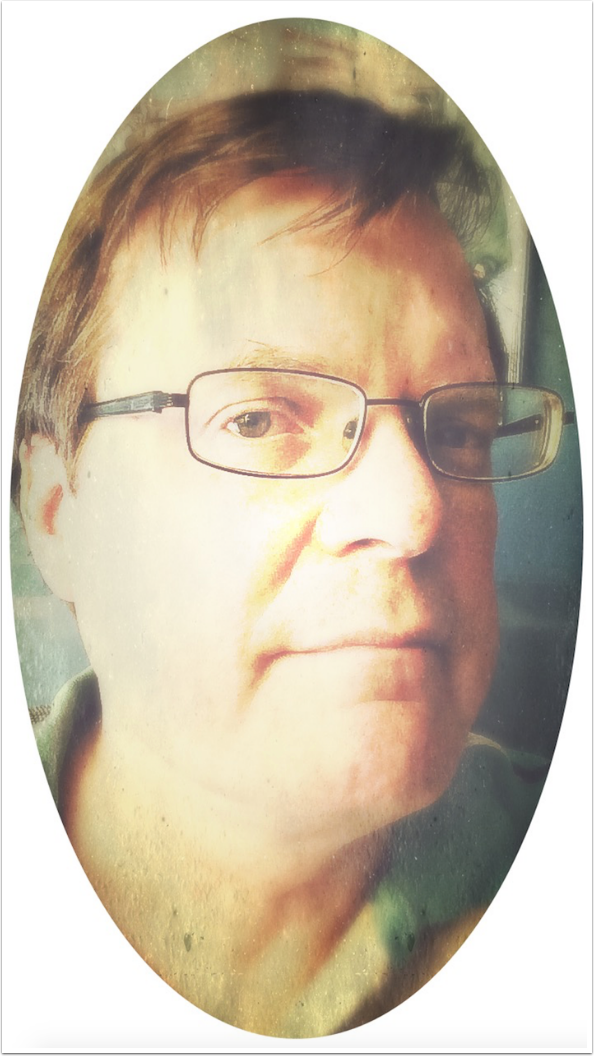
The other thing I wanted to show you is a peculiarity of the film OG. As you may know, in a square format, OG film has a circular frame. That would be useless in a rectangular format, since all of the image that falls outside the circle would be covered. So Hipstamatic makes it an oval instead.
My conclusion from last time still stands: I’m happy with the way that Hipstamatic changed to meet the demands of the users and the marketplace, which requires so much from photographic apps. Some of the methods of implementing those changes are not as easy and transparent as I’d like them to be. The app was rushed to market without making sure that some major bugs were ironed out. That makes my recommendation a qualified one.
You should also look at the 300 release in the context of Hipstamatic’s other editing app, Oggl. Their first attempt at editing was limited to lens and film, and forced a square crop. It has that ridiculous social network attached. And, just like 300, it crashed repeatedly at inception. Hipstamatic 300 is leaps and bounds beyond the capabilities of Oggl. Oggl eventually became a steady app, and Hipstamatic will be one once again. We just have to survive the growing pains.
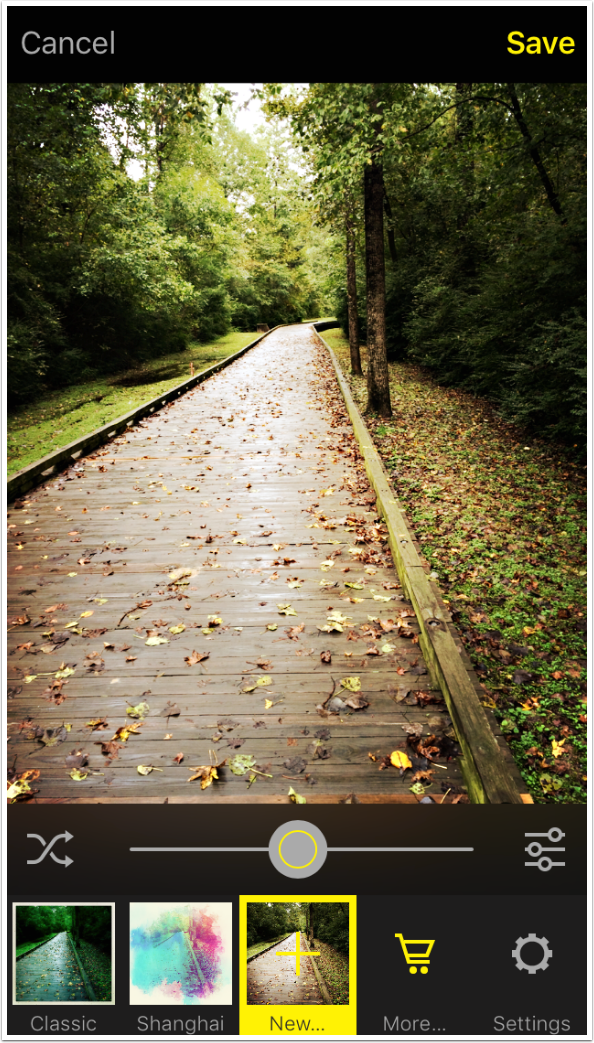
I leave you with the above edit of a shot I showed you last time. It uses the new(ish) Shanghai Hipstapak. Until next time, enjoy!
TheAppWhisperer has always had a dual mission: to promote the most talented mobile artists of the day and to support ambitious, inquisitive viewers the world over. As the years passTheAppWhisperer has gained readers and viewers and found new venues for that exchange.
All this work thrives with the support of our community.
Please consider making a donation to TheAppWhisperer as this New Year commences because your support helps protect our independence and it means we can keep delivering the promotion of mobile artists thats open for everyone around the world. Every contribution, however big or small, is so valuable for our future.
Jerry Jobe
Never content with just scratching the surface of what an app can do, Jerry Jobe decided to pass on what he learned about imaging apps to others. He’s constantly trying to figure out just what tools other artists have used, and trying to incorporate them into his own work, in an attempt to find his style. He’s written tutorials on over 145 apps so far, which you can find (along with his Song of the Day entries) at http://enthusiasmnoted.wordpress.com/ He lives near Atlanta, Georgia, where he also finds a creative outlet in acting and directing in community theater.

3 Comments
Enrique Estrada
Great tutorial Jerry unfortunately I am one of the many with problems regarding the update 301 with the 4S. About the editing I only have 9 options : lens,film,flash,crop,definition, depth of field,texture,grain and vignette. All the other you used are non existing or I don’t know to access to them. If there is a way please enlighten me!
Enrique
Jerry Jobe
Do you see the icons for the other tools? The thermometer for temperature, the starburst for clarity, the “S” for curves? If you do see them, does nothing happen when you tap them?
I don’t have direct access to the folks at Hipstamatic; I’m struggling through bugs just like everyone. But I haven’t had any problem, nor heard any talk about a problem, with non-working tools.
Peggy Braun
Thanks for a nice clear well organized review of the app.