
iOS Photography Tutorial – ‘Point-and-shoot Slayer: 645 PRO Mk II’ by Jerry Jobe
We’re delighted to publish Jerry Jobe’s latest technical photography tutorial today, this time with one of our favorite image capturing apps, 645 PRO Mk II by the Jag.gr studios. Jerry really puts it through it paces and gives a great overview for those who are not familiar with this app, (foreword by Joanne Carter).
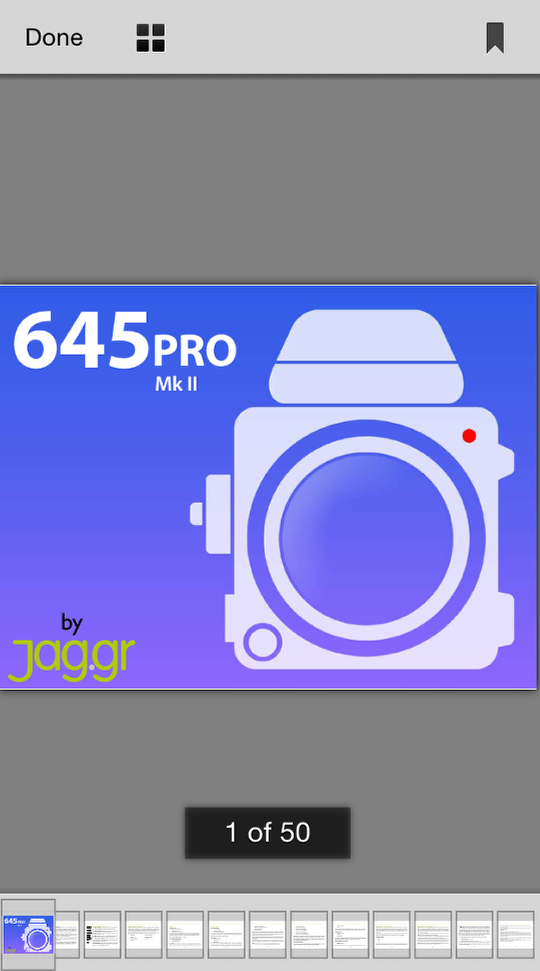
645 PRO Mk II retails for $3.99/£2.49 and you can download it here
“If you’ve read anything about the business of photography in the past couple of years, you’ve seen that small, inexpensive point-and-shoot cameras are dropping rapidly in sales. Why? Because most of us have a very capable camera in our pockets at all times: our phone. A number of apps have sprung up to expand the capability of the native phone, and 645 PRO Mk II (and its sister app, the not-quite-so-capable PureShot) is at the top of the heap.
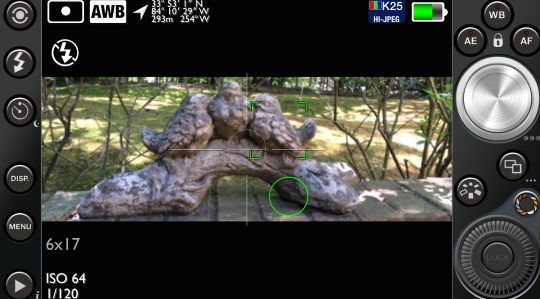
The screen shot below is the title page of the 50-page manual that is included with the app and is accessed through the menu. Any app that requires a 50-page manual is complicated. I am going to brush across the surface of most of the features of 645 PRO, but you should be sure to read the manual, just as you should for any camera. (Believe me, I’m just as guilty as the next person of trying to work a camera and then, in frustration, resorting to the manual.)
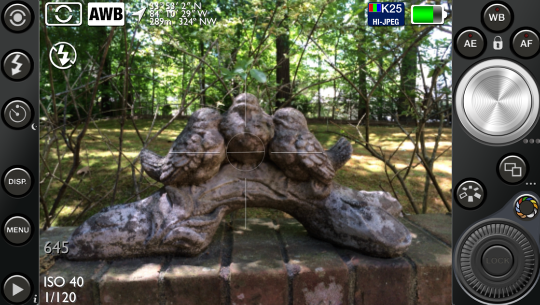
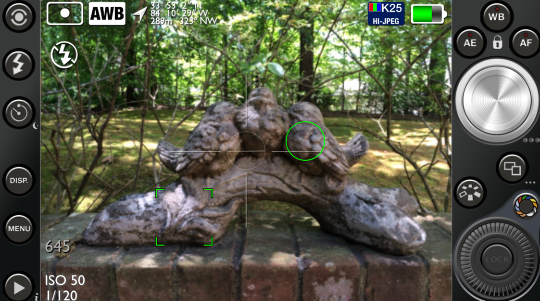
Below you’ll see the “back” of the camera, as shown in the app. This is not a camera for selfies, so you will see no capability of using the front-facing camera. On the left you will see buttons for metering mode, Flash, timer mode, Display, Menu and looking at the pictures you’ve taken in the Camera Roll. At the top right are three buttons for locking: White Balance, Exposure and Focus. The large silver button is the shutter release. The next button is for format choice; the one portraying a “carousel” is for film choice; and the multi-colored circle is for filter choice (which has a wheel for adjusting the strength of the filter). On the viewfinder itself you see indicators of the various settings. You can choose to turn those on or off by tapping the display button; I don’t mind seeing the current settings, but you might prefer a clear viewfinder.
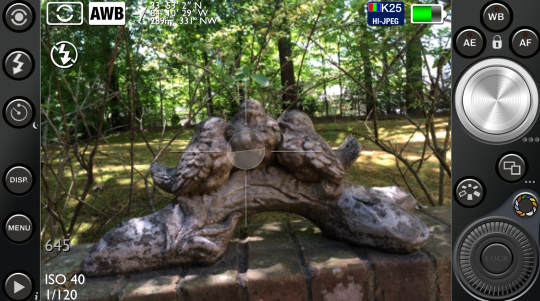
The app has a built-in level; if your camera is not in line with the horizon, then the bottom half of the inner circle will be grayed-out, as shown below.
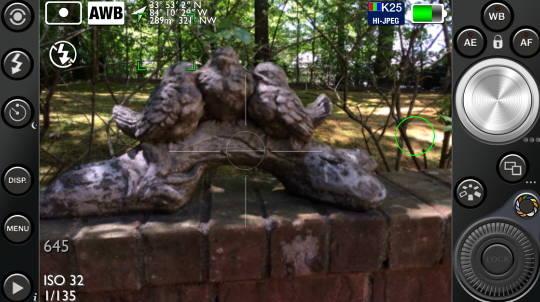
Unlike the built-in camera, 645 Pro allows you to separate the focus and exposure points. First you have to change the metering mode by tapping the top left button. This changes the indicator at the top left from a double arc (overall exposure metering) to a dot (spot metering). A green circle appears in the center, which can then be moved to the proper exposure point in your viewfinder. Adjusting the focus point is done by tapping the proper focal point in your image; a green square appears to indicate the focal point.
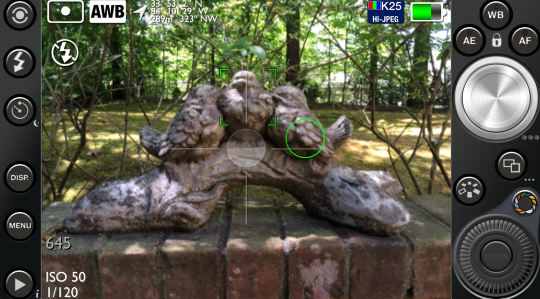
Below I’ve changed the focal point
And in the next screenshot I’ve changed the exposure point to a dapple of sunlight on the ground, which darkened the image.
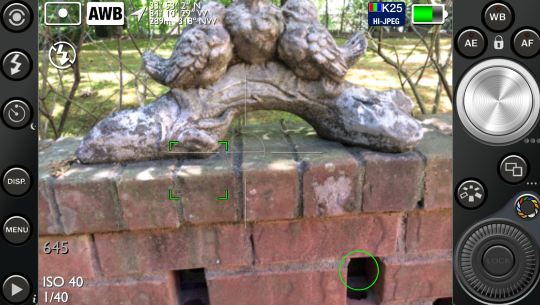
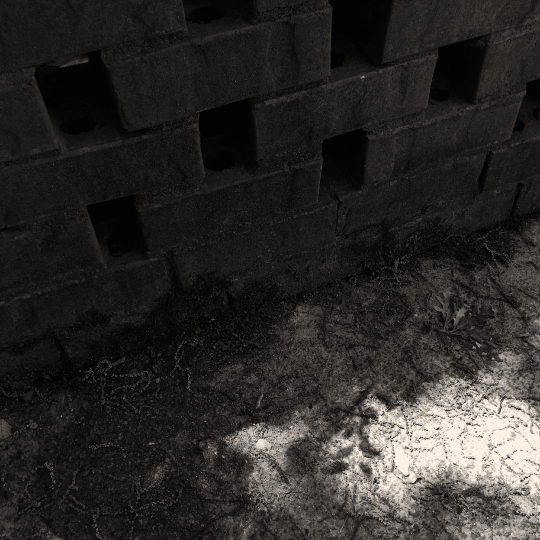
Just to drive the point home, I’ve moved the exposure point to a shaded area in the bricks below.
Much can be achieved using spot metering. In the example below, the exposure point was set to deep shadow, and the highlights are blown-out.
And here’s the same picture, with the exposure point on the highlight. It’s now difficult to see into the shadows.
Let’s skip over to the format mode button, which is just below the shutter button on the right. When the button is tapped, a rotating set of options is displayed on the viewfinder; with the center option being the one in current use. The default mode is 645, or 6×4.5, or 4×3. All the options start with 6, so 2×3 becomes 6×9, and 1×1 becomes 6×6.

Below you’ll see an example of the panoramic format, 6×17.
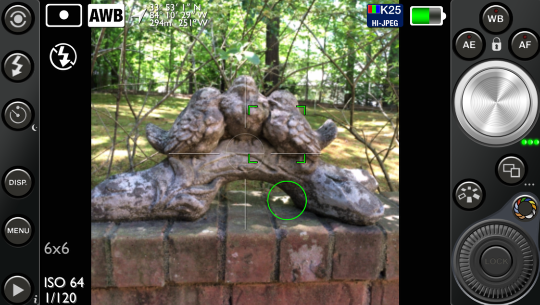
Here’s a square format. You’ll see the format setting displayed on the viewfinder about 3/4s of the way down on the left side.
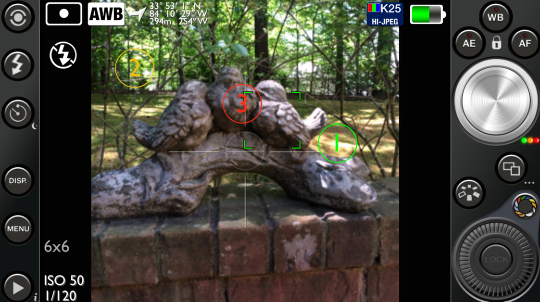
Also, notice the three green dots just below the shutter button. That indicates I’m in burst mode, which is turned on by tapping and holding the format mode button.
The burst mode can be three shots using the same exposure (indicated by three green dots) or bracketed exposure (indicated by green, orange and red dots). If you choose bracketed exposure, you are given three numbered circles on the viewfinder to set three separate exposure points.
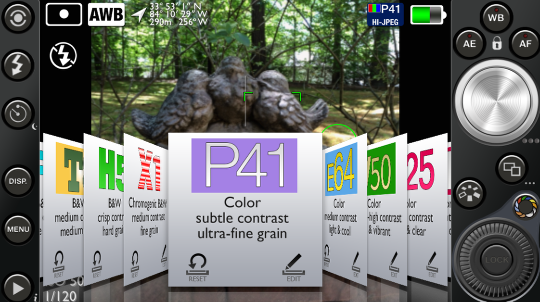
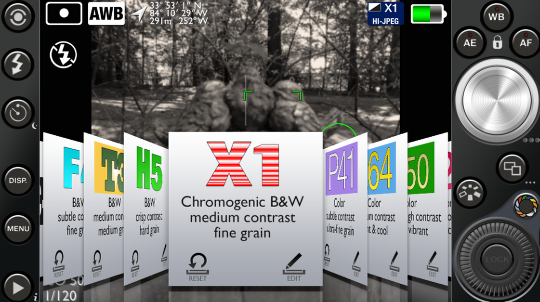
By tapping the “carousel” button, you are provided a number of film choices: four B&W, five color and three custom. You can see descriptions of the various films in the User Guide, page 38.
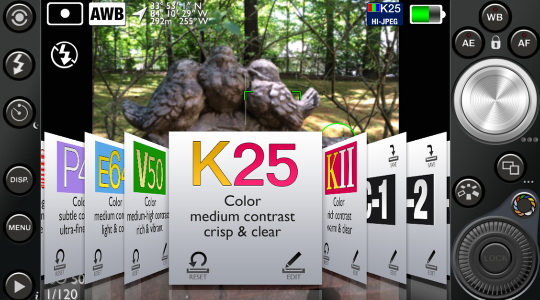
You can see the effect of the different films by looking at the viewfinder.
Below I’ve chosen a B&W film and the viewfinder reflects that.
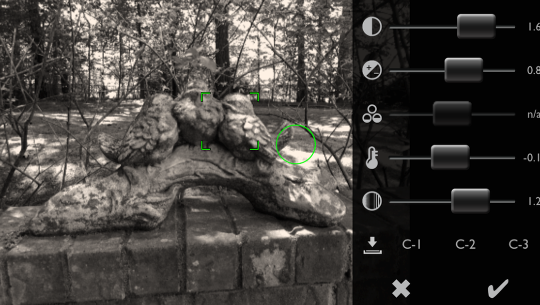
There are two buttons on the film square itself: Reset and Edit. If you touch Edit, you are taken to a screen which allows you to change the Contrast, Exposure, Saturation (Color Film only), White Balance, and Sharpness. Once you’ve made the adjustments, you can save the new look, or assign it to C-1, C-2 or C-3, the custom film selections. You can save any number of new filters and later load them to the Custom film selections.
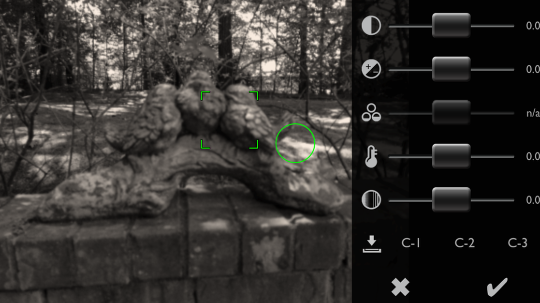
Below I’ve increased the Contrast, Exposure and Sharpness.
Next let’s take a look at the filters, accessed through the multi-color circle button. When a filter in in use, that shows up in the bottom center of the viewfinder (Green 41% in the screenshot below). The strength is adjusted by the dark gray wheel below the filter button.
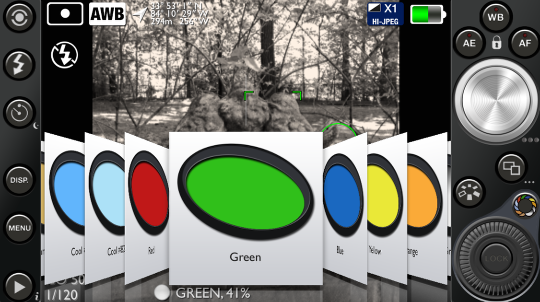
Filters are especially useful with B&W films. A Green filter will brighten the green in your image. Let’s see a comparison. Below you see a green filter at 100%.

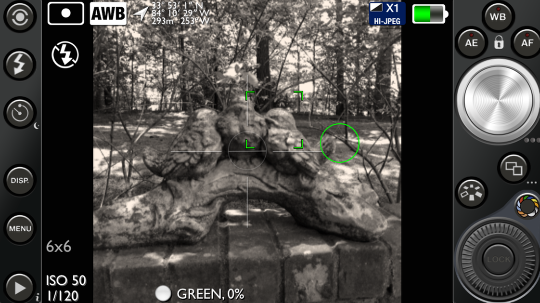
Compare that to the image below, where the green filter is at 0%.
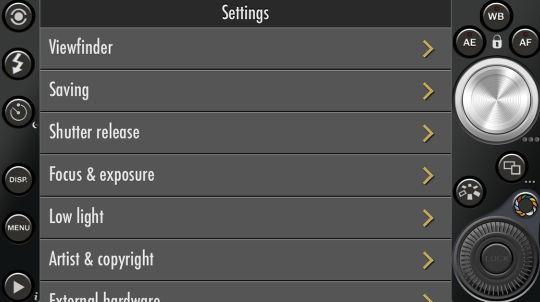
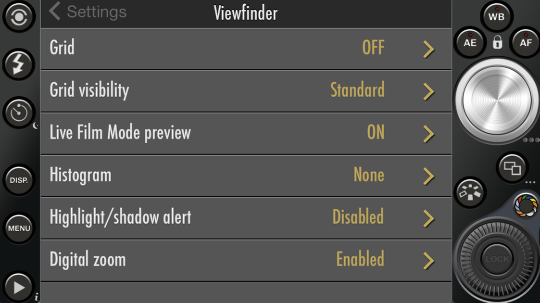
As with point-and-shoot digital cameras, there is a multi-level menu system that allows you to change most of the settings of the camera. It’s accessed by tapping the menu button on the left. At the top level of the menu these settings are grouped, allowing you to drill down to the particular setting you wish to change. (Scrolling down at this top level allows you access to the User Guide, or manual.)
Below I’ve tapped the Viewfinder option on the main menu, and you can see that you can change the Grid, Grid Visibility, Histogram, Highlight/Shadow alert and other options.
I changed the Grid, Grid Visibility and Highlight/Shadow alert settings, as seen below.
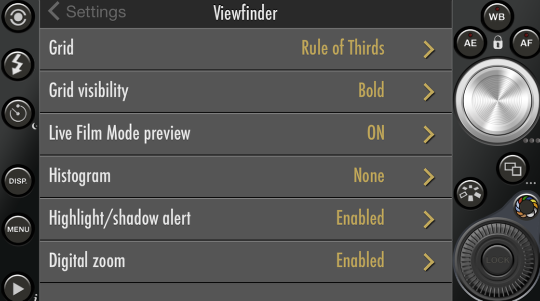
Looking at the viewfinder now shows a bold rule-of thirds grid, and bright green on the darkest shadows in the image. These shadows still show detail, so I find the bright green to be distracting while not really telling me anything. I recommend leaving the Highlight/Shadow alert off.
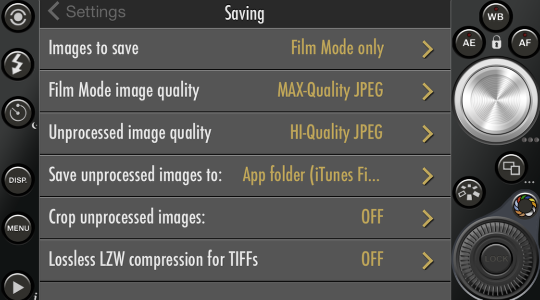
Saving allows for a lot of options including saving the image both with and without the film and filters applied. If you’re one of those people who likes to save multiple versions of the same captured image, you’re in luck! However, I just want to save the image using the film I’ve chosen.

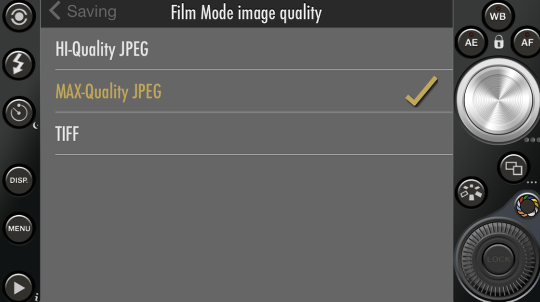
I have decided to save the photos in Max, rather than Hi-quality JPEG. I drill down and select it. Notice that TIFF is also an option. Many high-level editors will accept TIFF files, but most post-processing apps will not. Make sure yours does before choosing the TIFF option.
When I tap the Back arrow, then the change in settings takes effect.
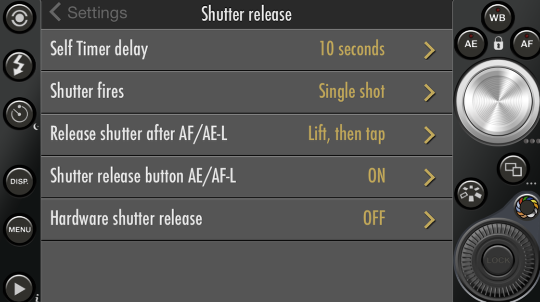
Here are the Shutter Release settings. As you can see, there’s a lot that’s customizable in 645 Pro.
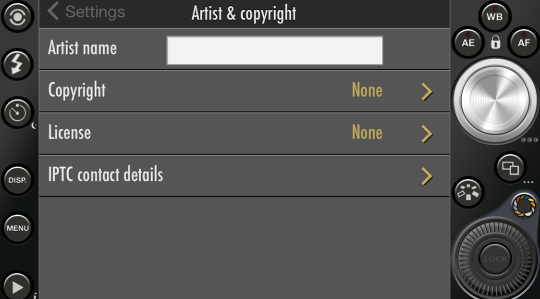
You can also control the information that’s loaded to the EXIF data. Your images can be tagged with your name and copyright info as you snap the picture. Cool!
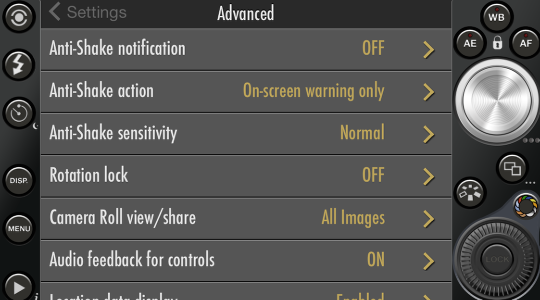
Advanced settings include Anti-Shake controls, useful for someone like me who can’t seem to hold still.
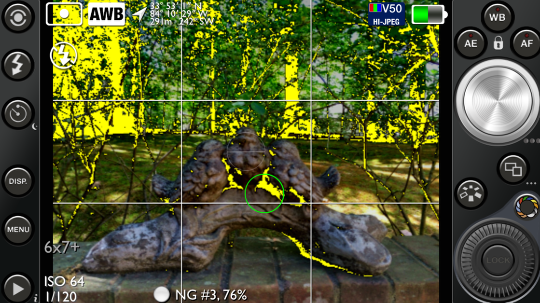
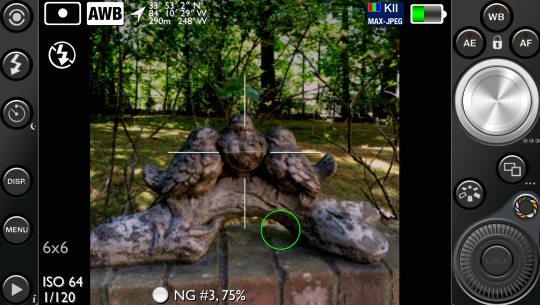
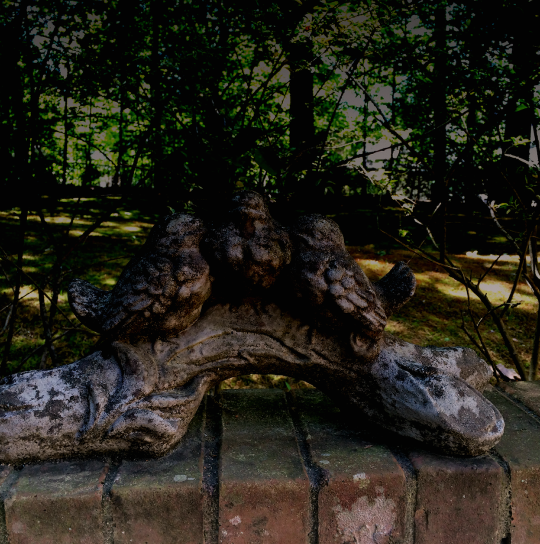
I’d like to wrap up with a discussion of the Neutral Gradient filters included in the filters area. NG filters can be useful to darken a sky, and keep it from being blown out. The viewfinder, however, does not accurately show the effect of an NG filter. Below I’ve got the NG #3 filter at 75%, and it looks OK in the viewfinder.
Here’s the result, though, which shows a much more intense NG effect.
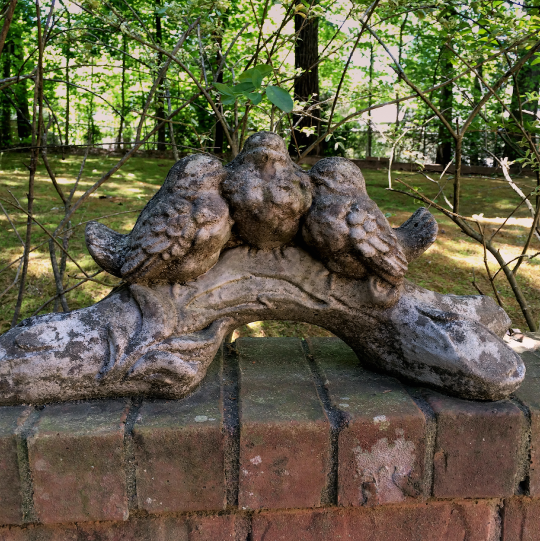
By dialing the filter back to 17%, I get a much more useful effect.
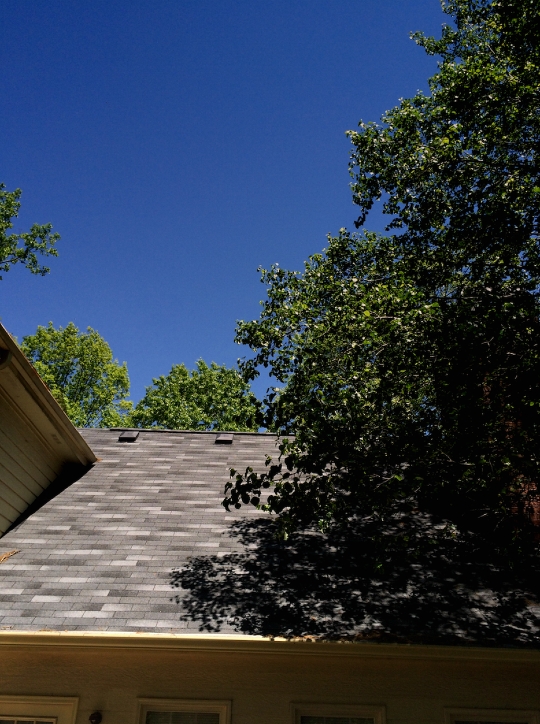
Here is an image with sky using the NG filter. It’s very useful when used properly.
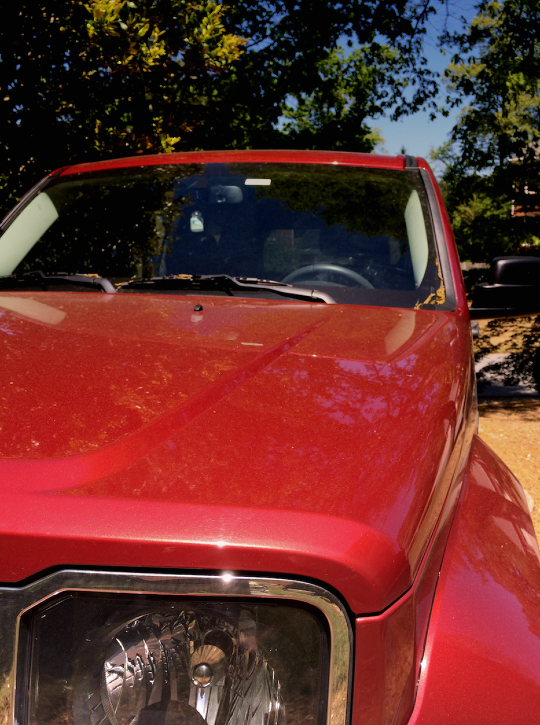
Do not confuse an NG filter with a polarizing filter. The NG filter will darken the glare, which you can see in the photo below over the steering wheel – it will not eliminate it like a polarizing filter would. (Wouldn’t it be great to have a software-based polarizing filter? As far as I know, you have to have an actual glass polarizer.)
Here’s a nice image that uses the high-contrast B&W film. This also illustrates that the finished image as captured will show more focus than the viewfinder. Don’t worry that the viewfinder image looks soft after you’ve set the focal point – the captured image is in focus.
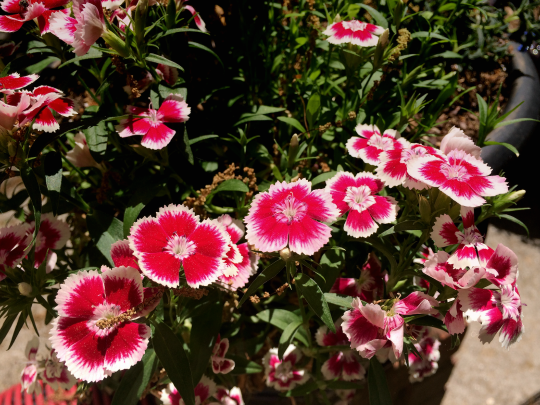
In order to get a good final image, the starting capture has to be as high-quality as you can create. 645 Pro Mk II is great at making sure you get the best capture you can with your iPhone. We’ll end by showing you what I mean with this capture from 645 Pro of some flowers.
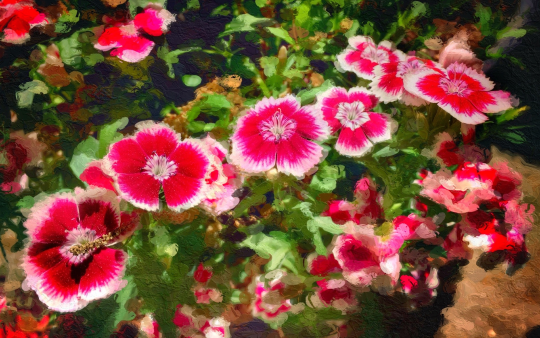
I then took it through Snapseed, created a version in Glaze, then blended and enhanced the two versions in iColorama. Enjoy!
Jerry Jobe
Never content with just scratching the surface of what an app can do, Jerry Jobe decided to pass on what he learned about imaging apps to others. He’s constantly trying to figure out just what tools other artists have used, and trying to incorporate them into his own work, in an attempt to find his style. He’s written tutorials on over 145 apps so far, which you can find (along with his Song of the Day entries) at http://enthusiasmnoted.wordpress.com/ He lives near Atlanta, Georgia, where he also finds a creative outlet in acting and directing in community theater.


2 Comments
RegiB
Thanks for the tutorial. I’m just starting to try 645 pro. I mainly use camera+ but want to try the color filters and higher saving option so I really appreciate this. Your tutorials are always easy to follow and thorough.
José Freitas
Great tutorial. I’ve never uses the app but now I will try it.