
iOS Photography App Tutorial – Imaengine – Illustrating your images – by Jerry Jobe
We are delighted to publish this comprehensive iOS Photography App Tutorial on a wonderful app, that you may not be aware of, Imaengine. Jerry Jobe puts it through its paces, don’t miss this. (Foreword by Joanne Carter).
Imaengine is free and you can download it here
“Is there a perfect app out there? An app that does everything it’s supposed to do, easily and quickly, yet fully adjustable by the user who wants more? No, I don’t think there is. There always seems to be something that doesn’t work quite right on your device.
So if I can’t have perfect, I’ll settle for fun. Apps that are full of different looks, and that spark creativity in different ways. That’s why I love Imaengine Vector Camera, by Luis Rivas, the app I’ll be covering today. As I take images through the different presets, I get ideas of how they can be used. Perhaps not just as they are, but combined with the original versions or other presets within Imaengine.
As the name implies, Imaengine creates vector output. Vector output can be “blown up” to any size, because the output is not pixels, but a mathematical description of the points and lines that make up the image. Increase the distance between the endpoints of all the lines in the image, and you’ve got a larger image, without having to turn one pixel into four. Increasing the pixels gives you jagged or blurred output, while changing the length of a line does not.
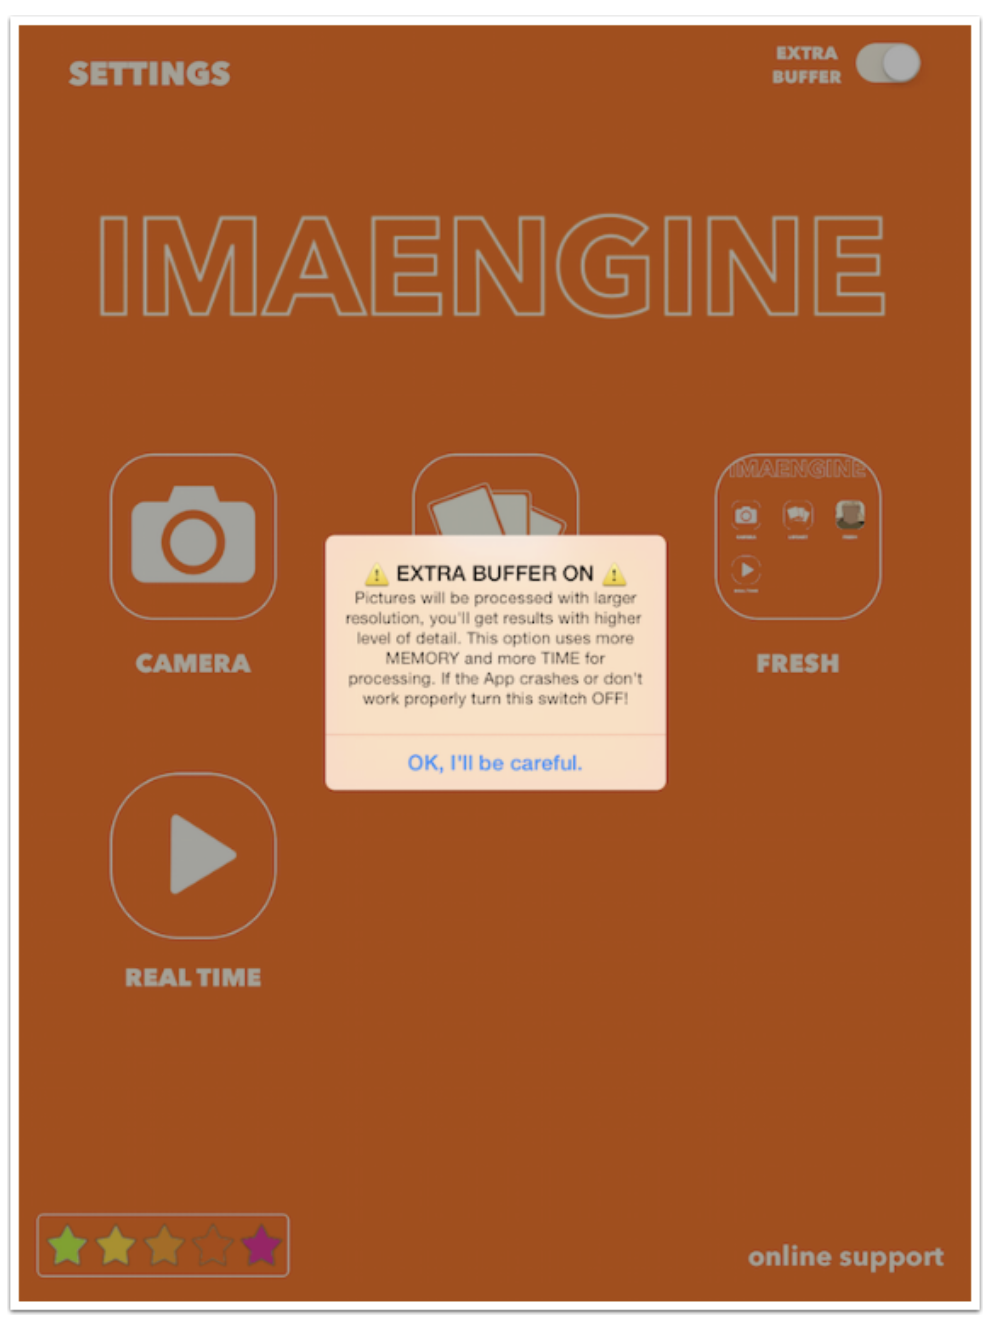
If you have math anxiety, however, fear not, because knowledge of how vector graphics are created is not necessary in order to have a lot of fun with Imaengine. Below you’ll see the opening splash screen. You’ve got four big buttons to get an input image into Imaengine. Camera and Real Time use the device’s camera, while Library gives you access to the Photo Library and Fresh is a quick way to get the most recent image on the Camera Roll.

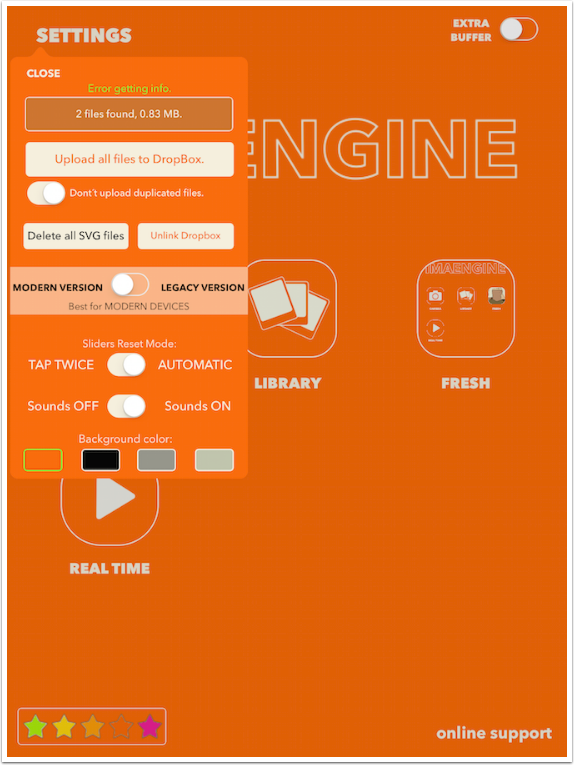
If you tap on Settings at the upper left, you’ll get your first introduction to working with vector files. They are saved in a format called SVG, and this format is not readable into other apps that use JPG, PNG or TIFF files (pixel-based formats). It can be read into illustration programs, such as Adobe Illustrator on the desktop or iDraw or Skribl apps on the iPad or iPhone. SVG files will not show up in your Photo Library, and must use another method, such as iTunes or Dropbox, to get moved around and used by those other programs. I do not use those vector programs on a regular basis, and have not been able to get this interface to work correctly. The top half of the Settings tells me I have two SVG files that are ready to be sent to Dropbox, and that duplicates will not be uploaded, but I have not been able to make them upload, so I can click on the Delete All button and free up the space used by them.
Older devices will need to use less efficient methodologies to create the vector graphics. Rather than making the app useless for these older devices, Imaengine offers a “Legacy” version that will work just fine.
The Sliders Reset mode is set to Automatic, which means that if you make adjustments to a preset, those adjustments will be reset the next time you use the same preset. “Tap Twice” makes those adjustments “sticky”, and the adjustments will reappear when you return to the preset; tapping twice on the image will restore the preset to the default values.
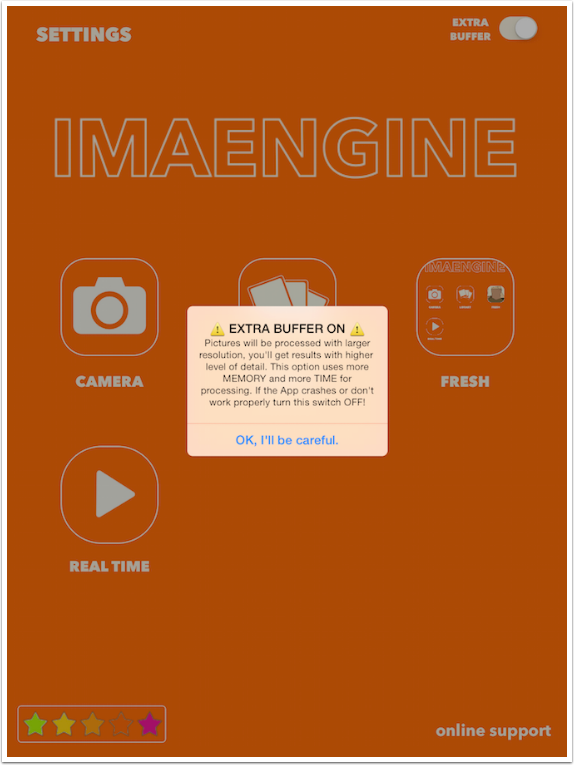
The Extra Buffer makes the program work at a higher resolution on newer devices. I would recommend turning that on and testing if your device can use the extra space.
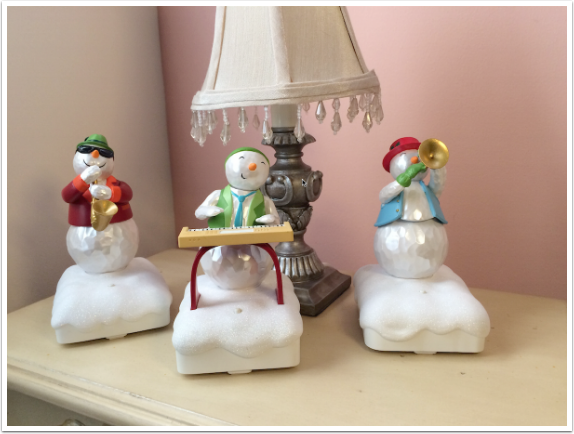
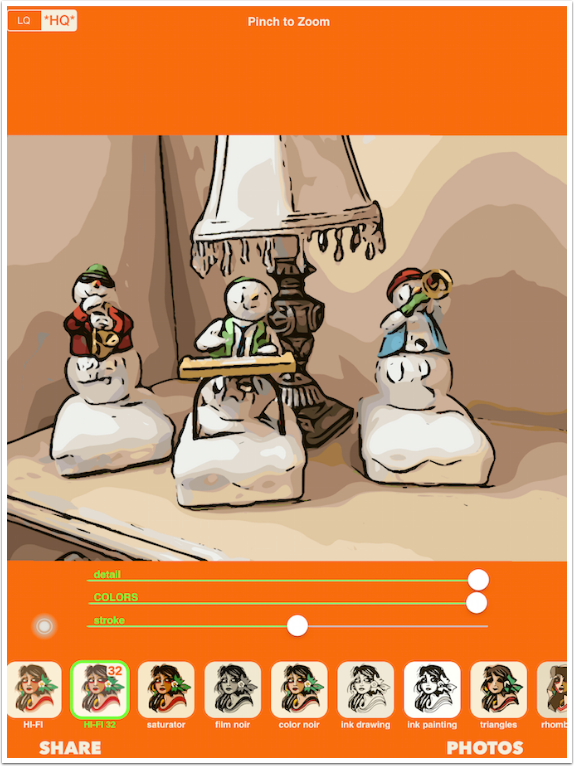
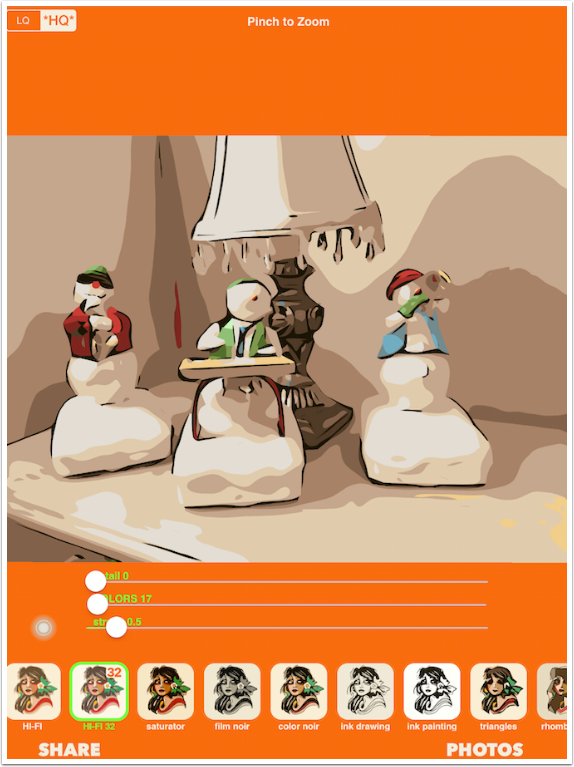
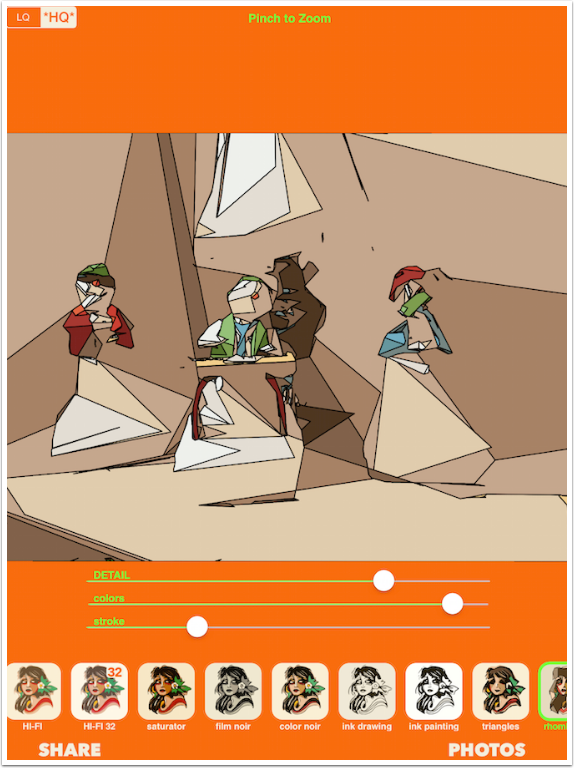
Below is the image we’ll be using for this tutorial. It’s a little set of musical snowman decorations with a little lamp.
The workspace has two buttons at the bottom: Share to save the image or send it elsewhere, and Photos to get a new image back at the main screen. Above those two buttons are thumbnails of the presets, scrollable horizontally. Above the thumbnails are the various sliders, which change depending on the preset.
The first two presets are Hi-Fi and Hi-Fi 32. The presets designated as “32” are of higher quality, and should generally be used if possible.
Take notice of the wall behind the figures. Vector graphics do not accomplish subtle gradients well. They break the image into areas and assign a single color to the entire area. The more areas you have (detail) and the more colors available (colors), the finer the precision will be – but there will never be a smooth transition between tones.
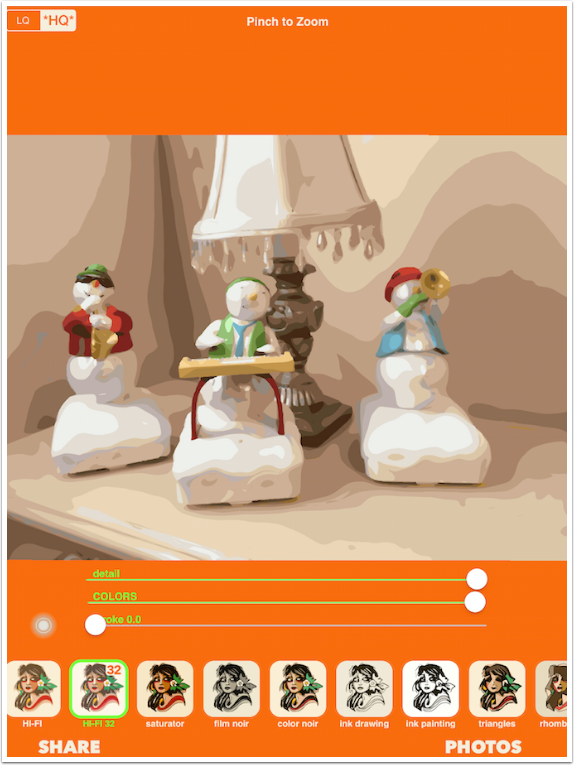
The Stroke slider controls the black lines between color areas. Below I’ve taken them down to zero (no stroke).
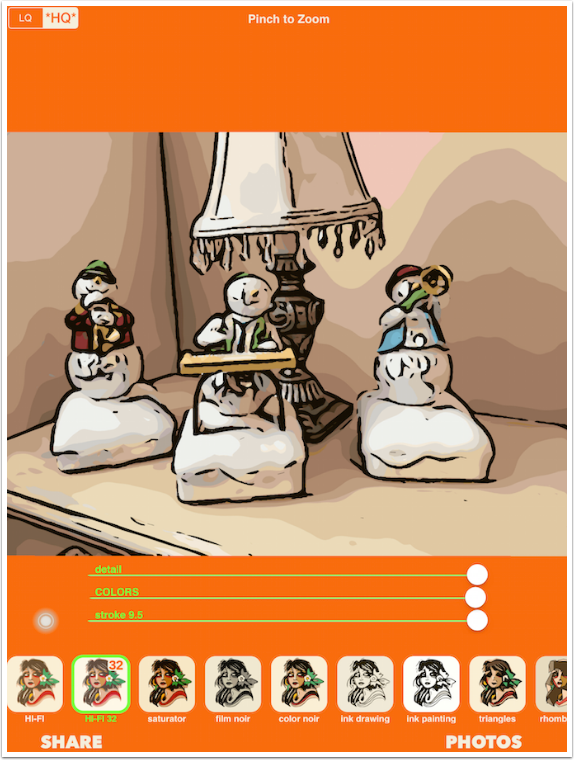
You can also have a very heavy stroke.
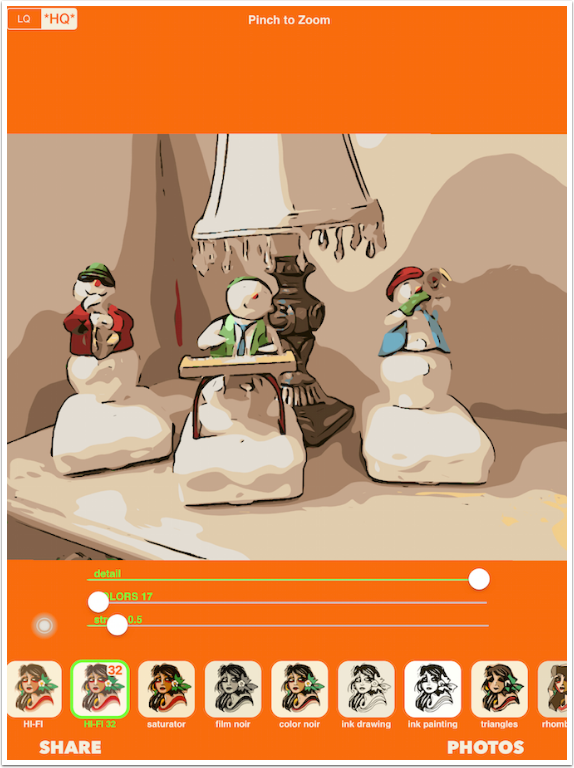
As I said, if you lower the number of colors, you lower the number of areas Imaengine divides the image into. Below I’ve made the strokes almost nonexistent and lowered the number of colors to 17, the lowest setting possible.
Lowering detail decreases the number of areas also, as seen below.
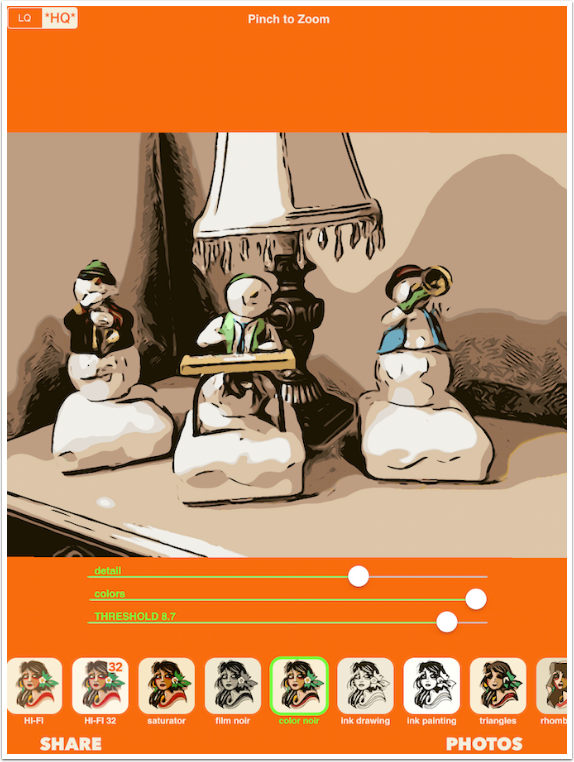
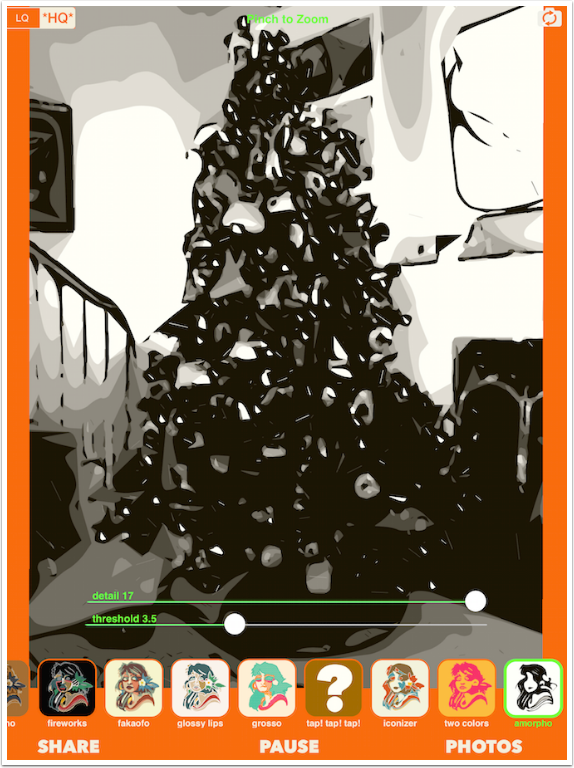
As the preset changes, some of the sliders change. Below I’ve chosen Color Noir. Instead of a Stroke slider, there is a threshold slider. Threshold will add large areas of black to your image. Look at the lamp and at the corner between the walls.
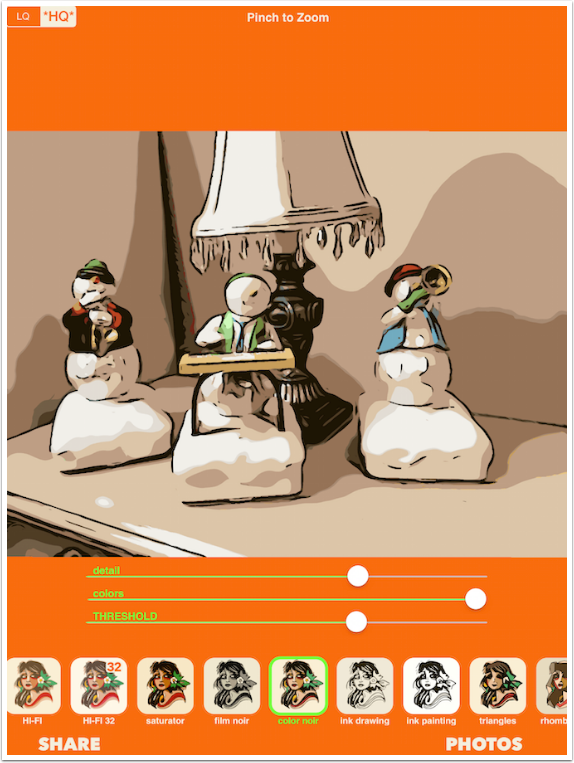
As the Threshold increases, more black is added.
Some presets do not have color areas. When using the Ink Drawing preset (shown below), the Background slider controls the brightness of the “paper”.

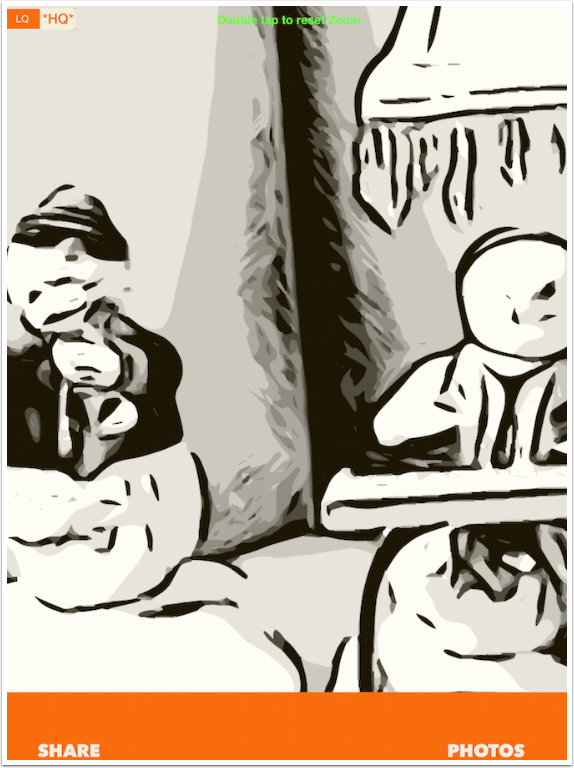
If you want a closer look at your image, just pinch to zoom. The presets and the sliders disappear, and you cannot change the look while the image is zoomed in. Just double-tap, as explained at the top of the screen to reset the image and bring back the controls.
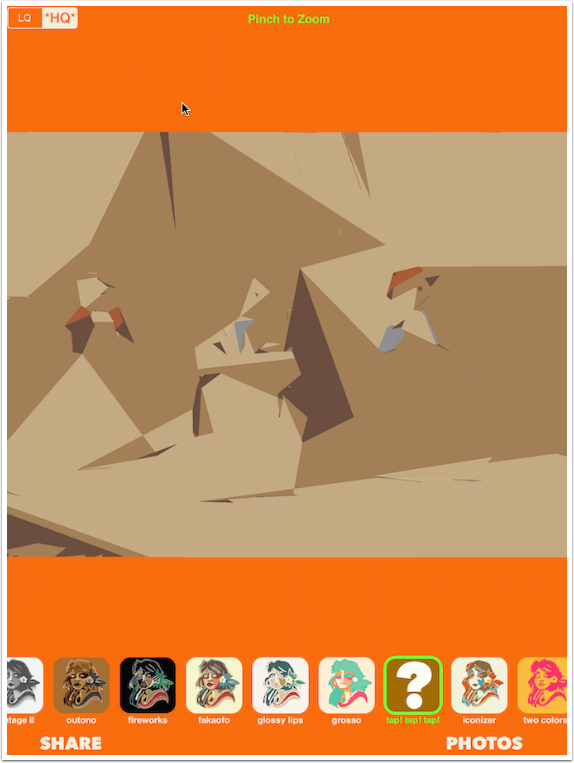
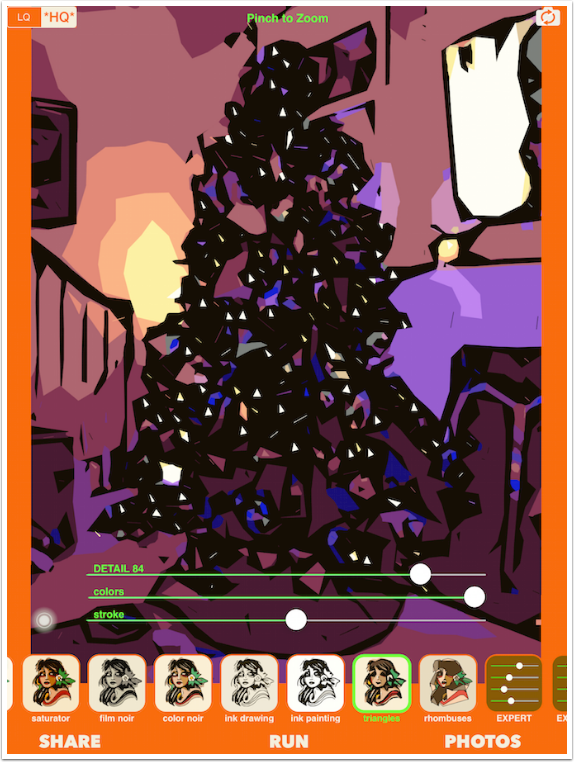
Some of the presets play with the shape of the color areas, dividing them into shapes such as triangles or rhomboids (four-sided figures). These are some of my favorite presets – you can achieve a real Picasso-like effect.
Relatively minor changes to the Detail slider can make real differences in the image.

I thought I’d change it up here a bit and show you some results here in the middle of the tutorial, to help keep you interested. In the image below, I used iColorama to change the background rhombuses to blue, then masked in the original snowman figures. With the snowmen still masked, I added a white circular border and then a slightly larger circle of blue.

I used the same mask in iColorama to mask a blue rhombuses background with snowmen processed with triangles. I masked in the text as well.

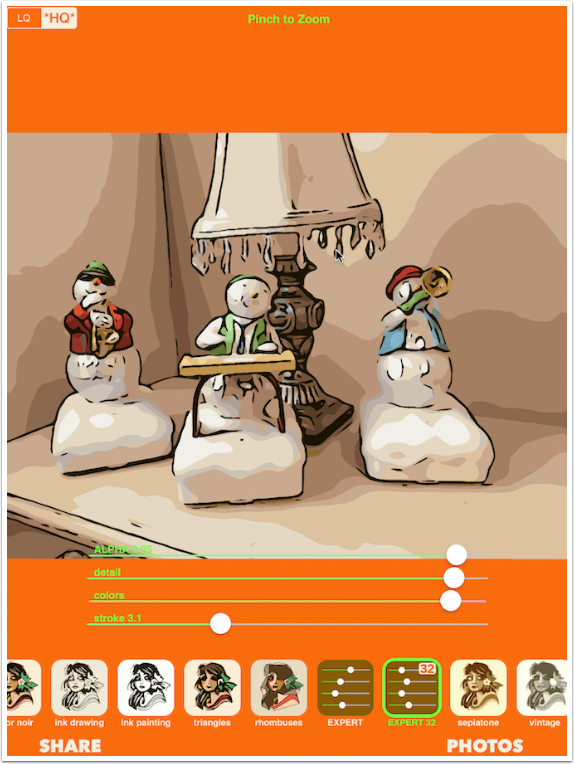
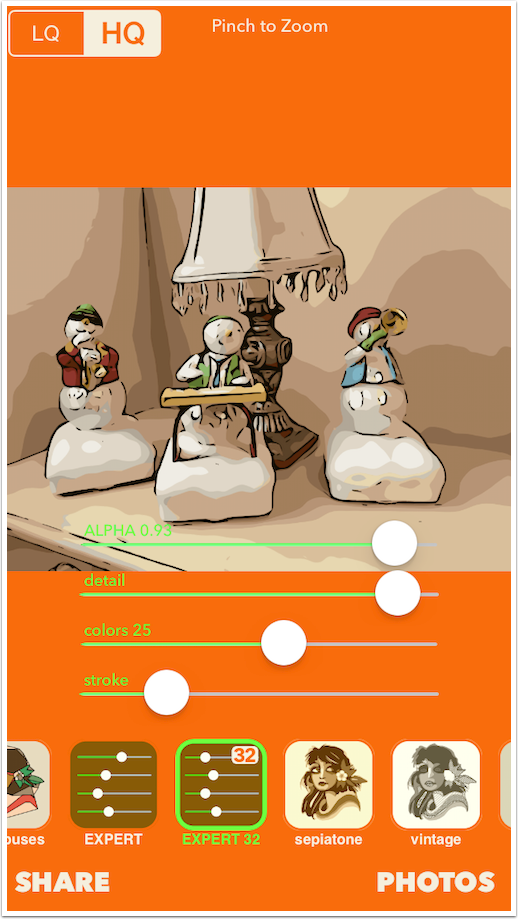
Let’s return to Imaengine to look at some more presets. The Expert setting adds an Alpha slider to the mix, which controls the contrast in the image.
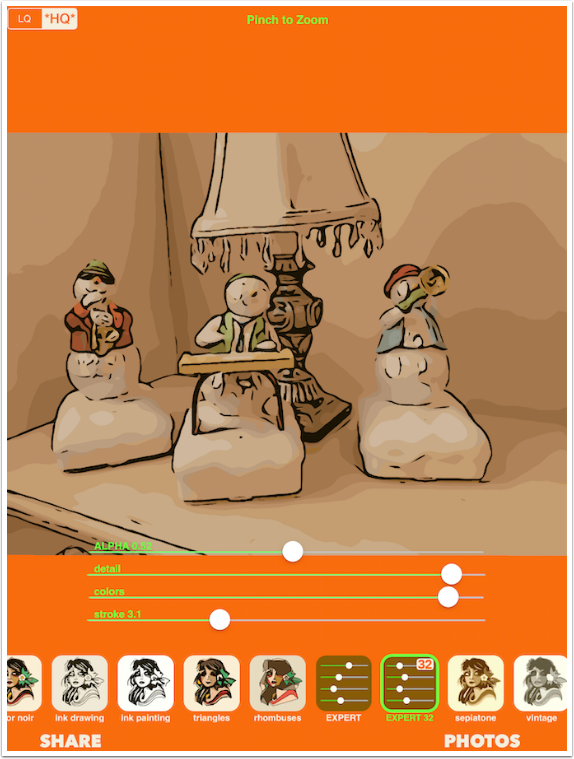
I happen to like a higher Alpha value, as shown below.
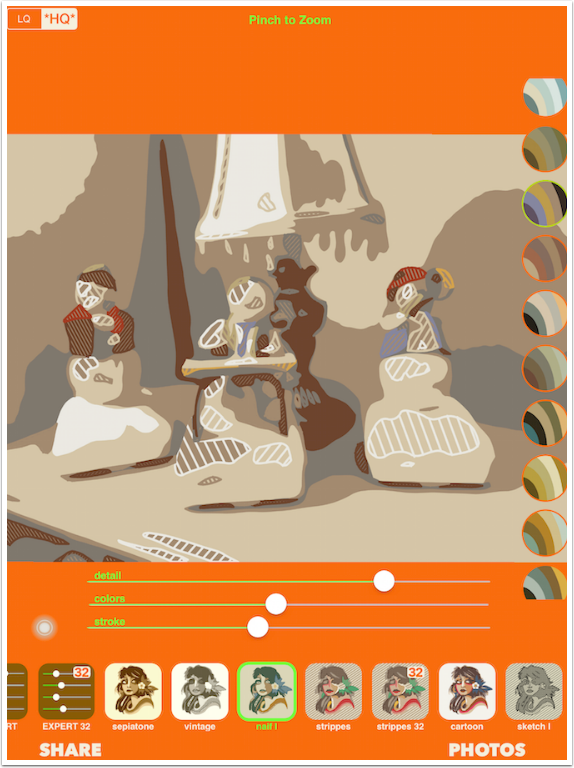
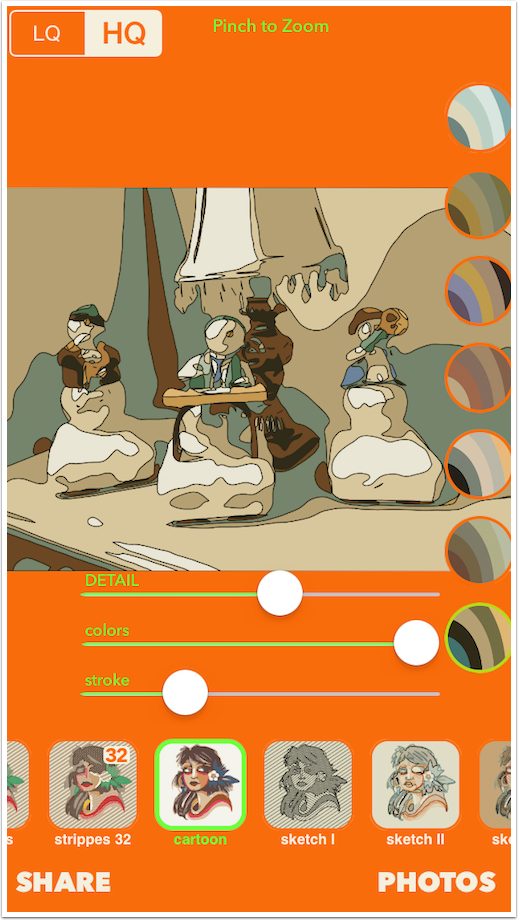
Some of the presets introduce stripes into the color areas, like Naif I, shown below. I’m not a big fan of that effect, and avoid those presets. But some striped presets and some without stripes give you palettes to recolor your image. Those palettes are in a vertical scrolling bar at the right of the workspace.
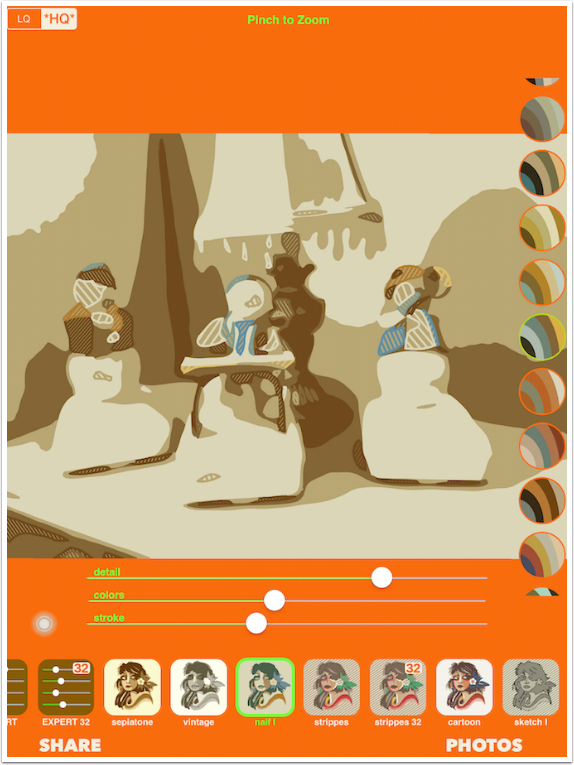
Just select a new palette to change the colors.
The preset with the large question mark called “tap! tap! tap!” is a randomizer.
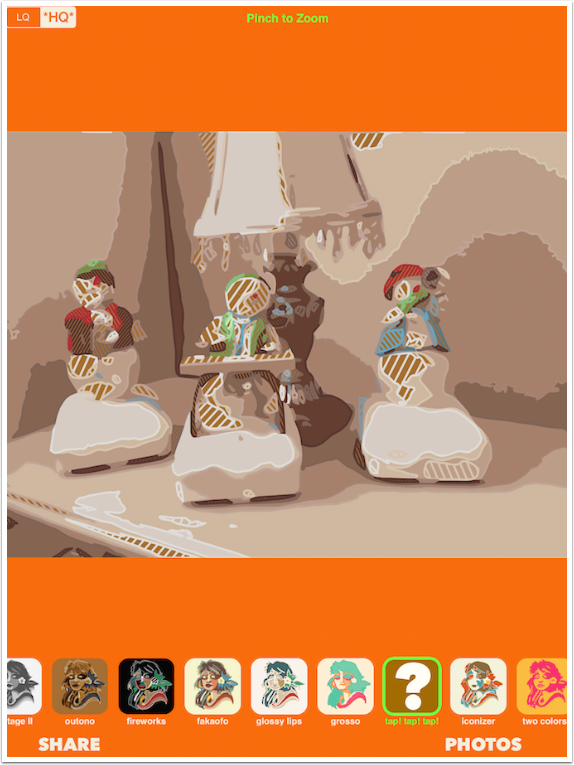
The randomizer does not have any sliders. To change the look again, you just tap the question mark again.
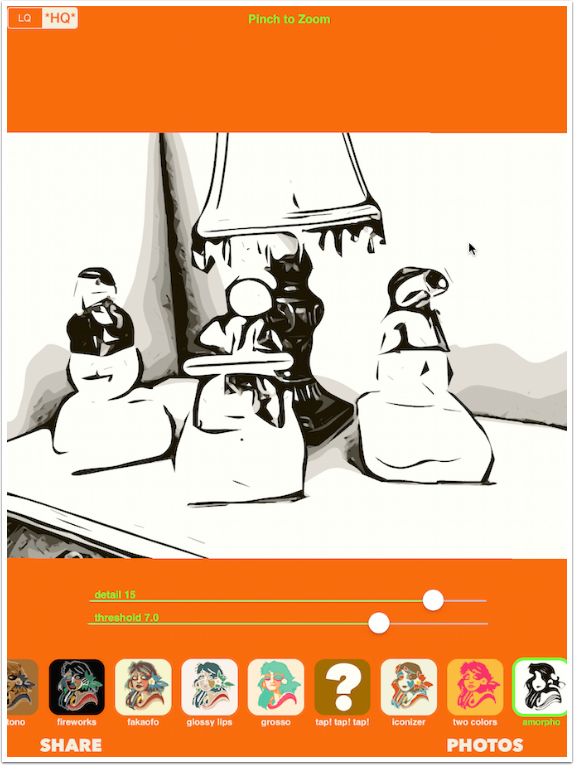
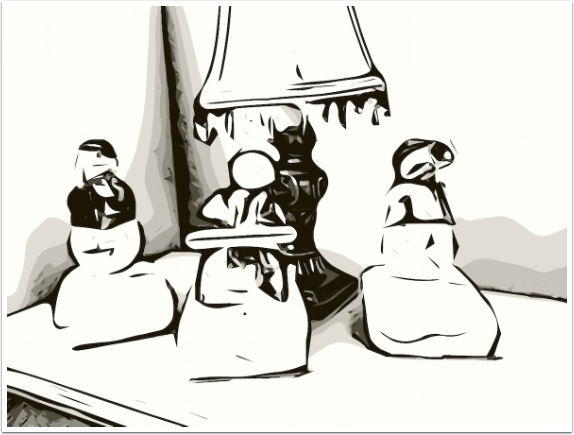
Another favorite preset of mine is the last, Amorpho. It produces an ink drawing that only roughly conforms to the lines in the original image.
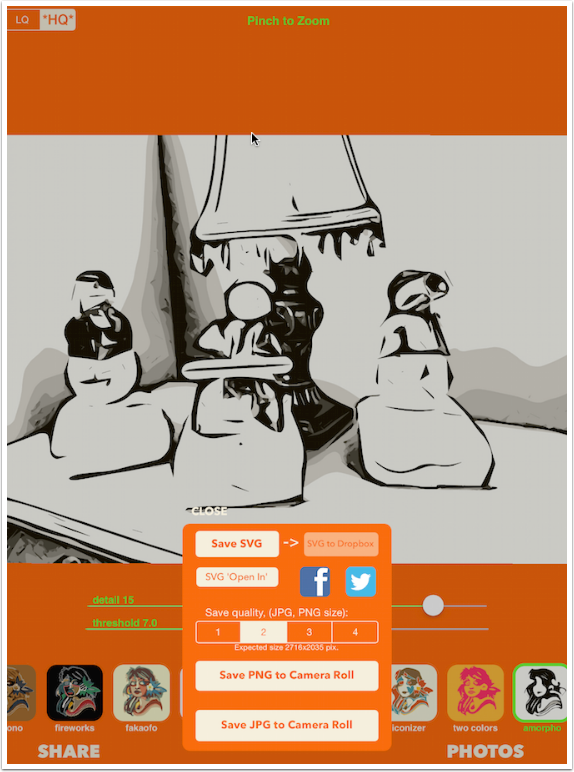
I decide to save that Amorpho version, and tap the Share button at the bottom left. A dialog box appears, and at the top are options for saving an SVG file and sending it to Dropbox or to another program. The Facebook and Twitter options will send a JPG image rather than a vector SVG.
As an aside, the app makes a startling noise when saving; you may want to go back and turn the sound off in the settings.
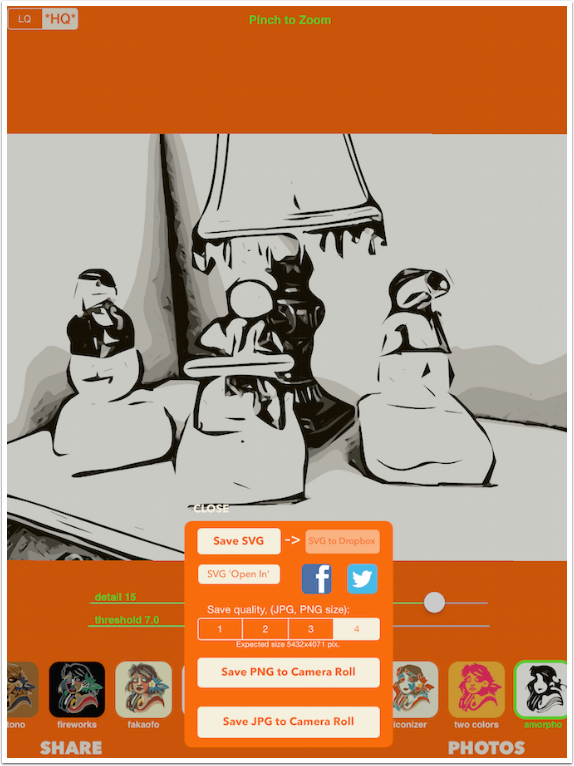
Because Imaengine redraws from the original image, you can save a larger file than the original with no problem. You have four buttons to choose the size of the JPG or PNG image to your Camera Roll. Even the #2 setting is a fairly large image.
Using button #4 will save the image at an astounding 5432×4071. Many other apps will not process an image that large, so be careful when choosing your save size.
Here’s my saved Amorpho version. I like the ink lines, the shading, and the almost-abstract roughness that makes the snowmen almost unrecognizable.
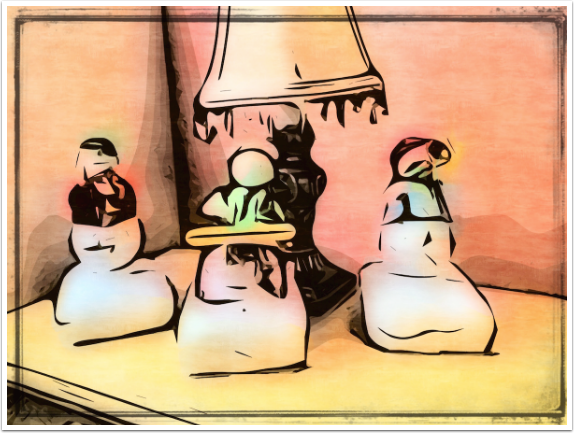
I blurred the original and boosted the saturation to combine it with the Amorpho, adding some color.
Imaengine is called a vector camera, so let’s take a look at how it earns that name. The Camera option on the main screen sends you to the device’s native camera, and you process the results as shown above. But the RealTime option shows you the resulting vector image through your viewfinder. Below is a screenshot from the RealTime camera. The image moves around in the viewfinder as you set your shot; it is truly Real Time. The Pause button acts as the shutter, capturing the image as it is at that instant.
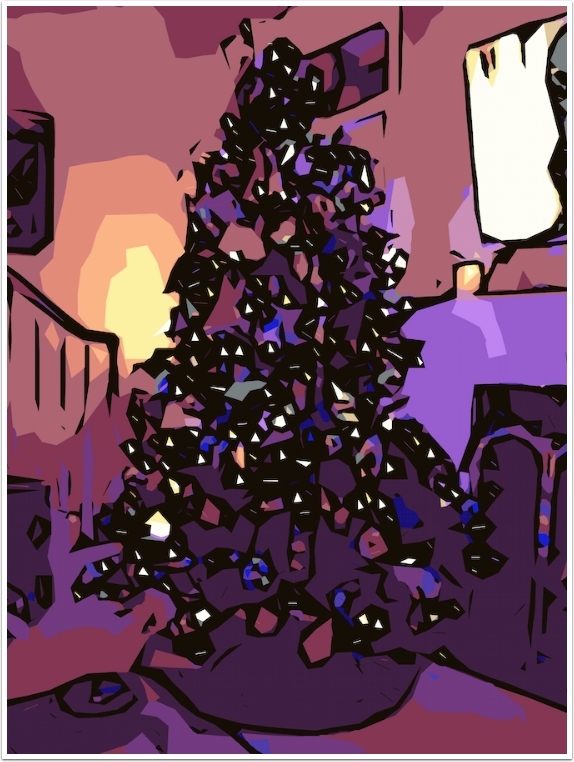
After hitting Pause, you can change the preset and sliders on the captured image. I changed the preset to Triangles below. At this point I can save the image, or, if I’m unhappy with the capture, I can tap Run and return to capture mode. Nothing will be saved if I return to Run mode without saving.
What a swinging Christmas tree!
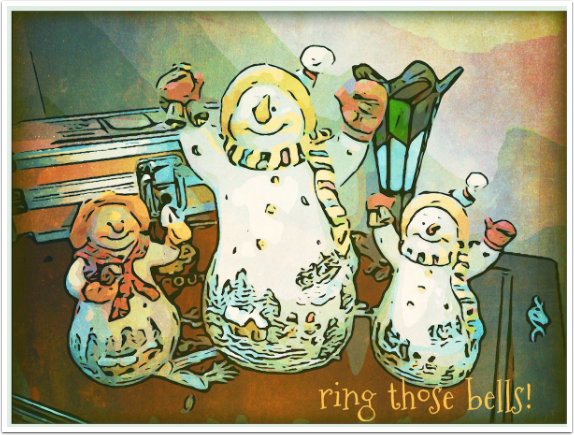
Here’s another set of decorations, run through Hi-Fi 32 and then enhanced with iColorama and Stackables.
I’ve been showing the iPad version, but the iPhone version is identical. Below you can see that the slider buttons are larger, overlapping further into the image, but all the same controls are in all the same places.
Even the palette swatches still line up along the right of the workspace.
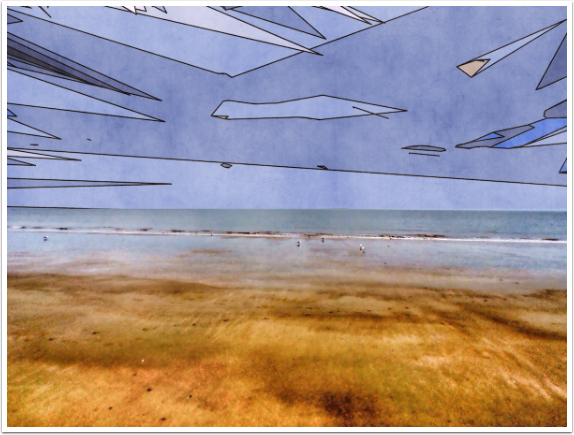
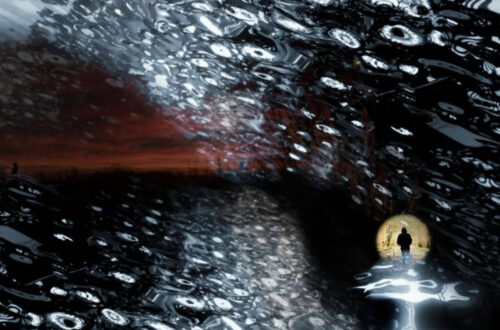
I find I really like the combination of standard pixel graphics and vector graphics. Below is a blended version, with an HDR version of sand and water with an angular vector sky.
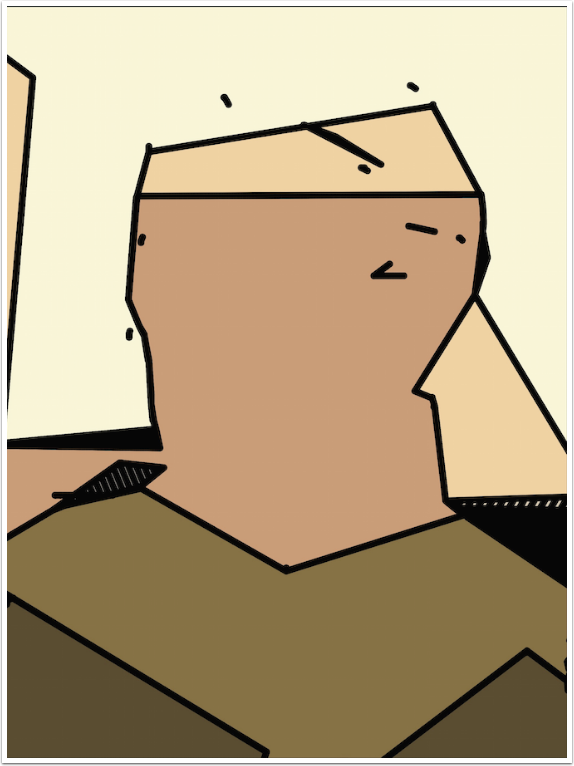
My final example may be my favorite. It’s a selfie, but even my own mother wouldn’t recognize me.
Imaengine may be hard to say, but it’s a nice app well worth the couple of bucks to make it ad-free. If you work with vector images, it would be worth the effort to get the SVG interface to other programs working. Since I work only with pixel-based images, I don’t find the fact that I can’t get the interface to work a drawback; it’s only a minor irritation because I can’t really explain it to you.
Overall, I recommend it. It’s a lot of fun. Next time, I plan to cover Imaengine’s sister app, Aerograph. Until then, enjoy!
Please help us…
TheAppWhisperer has always had a dual mission: to promote the most talented mobile artists of the day and to support ambitious, inquisitive viewers the world over. As the years pass TheAppWhisperer has gained readers and viewers and found new venues for that exchange. All this work thrives with the support of our community.
Please consider making a donation to TheAppWhisperer as this New Year commences because your support helps protect our independence and it means we can keep delivering the promotion of mobile artists that’s open for everyone around the world. Every contribution, however big or small, is so valuable for our future.
Jerry Jobe
Never content with just scratching the surface of what an app can do, Jerry Jobe decided to pass on what he learned about imaging apps to others. He’s constantly trying to figure out just what tools other artists have used, and trying to incorporate them into his own work, in an attempt to find his style. He’s written tutorials on over 145 apps so far, which you can find (along with his Song of the Day entries) at http://enthusiasmnoted.wordpress.com/ He lives near Atlanta, Georgia, where he also finds a creative outlet in acting and directing in community theater.


5 Comments
Martin Duerr
Thanks for that Jerry!
Astra
Thankyou … just downloaded the app and the sister app … both look awesome! … thanks for the introduction
Linda
love all your tutorials Jerry! Btw Aerograph is free as is the in-app purchase.
Laurence Zankowski
Joanne,
Jerry,
This is one of my favorite apps, the go to app when things get stale. When it first came out, was shocked that it did what it did, in face of all of those filter apps. I have hundreds of images that , though not of display/ share quality, are reference to the mysteries of exploration/ iteration of ideas. I love this app. Reduction to just shape form color, could also open doors to a deeper mystery, the primal language of pure symbol.
If this comment is floating off in to LA LA land sorry. I just feel a strong connection to how we might be perceiving imagery at its purest form with out the abstraction of everyday life, currently being experienced by unabated image / photo making and sharing.
Be well,
Laurence
Jelly Beans
Great tutorial, Jerry! Merry Christmas!