Mobile Photography/Art Tutorial – RipPix: Tear your Art to Shreds
We are delighted to publish Jerry Jobe’s latest mobile photography/art tutorial for our reading and viewing pleasure. This week Jobe takes a look at the new mobile photography/art app, RipPix by JixiPix Software. Read his thoughts as he puts it through its paces (foreword by Joanne Carter).
RipPix retails for $0.99/£0.79 and you can download it here
“This week I cover the 110th app since I started writing about iPhoneography apps back in November 2012. That’s quite a few; but with the large number of new apps arriving almost daily, I’m barely able to scratch the surface.
One app that I’ve been meaning to cover is Modern Grunge, by Appnotix. It has some nice textures, which it added to the ability to “rip” away part of an image it borrowed from its sister app, Ripped from Reality (the fourth app I covered). Modern Grunge has not been updated for a while, and I was beginning to wonder if it would become another abandoned app, like at least a third of the apps I cover.
Imagine my surprise when I saw that JixiPix released a new app, RipPix, that duplicates the capability of Modern Grunge while adding in a few extra perks. According to Tina Rice, who writes on iPhoneography over at Combo Apps, Appnotix was bought out by JixiPix. Modern Grunge and Ripped from Reality are being abandoned, and are replaced by RipPix.
RipPix is a universal app, running on both iPad and iPhone. The iPhone version runs only in portrait mode, while the iPad version runs in both portrait and landscape. The iPad version even has two splash images – which one you see depends on how your iPad is turned. The image below is the iPad landscape splash screen; the remainder of the screenshots in this tutorial are done in portrait mode on the iPad”.

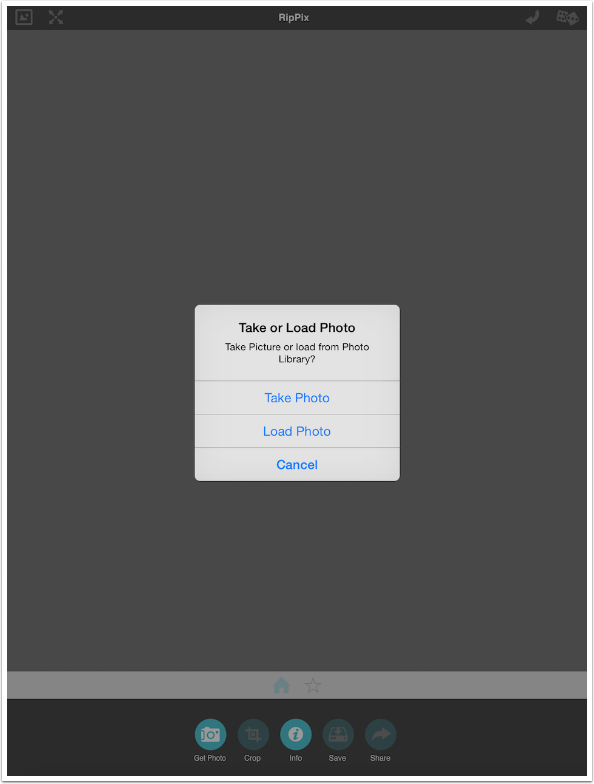
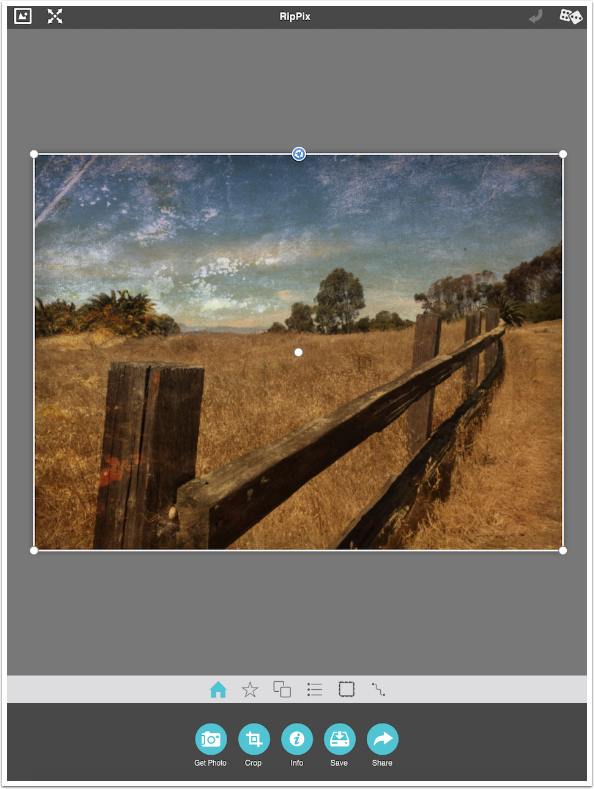
The user interface is similar to the updated interface in other JixiPix apps. There are a few buttons at the top, a large gray workspace, a white band that has a series of menu buttons, and another gray band with controls based on the menu selections. Since the Home button is selected from the menu, the controls available at this point are Get Photo and Info.

Get Photo allows you to take a photo using the camera or load a photo from your libraries. As always, I recommend using images taken outside the app.
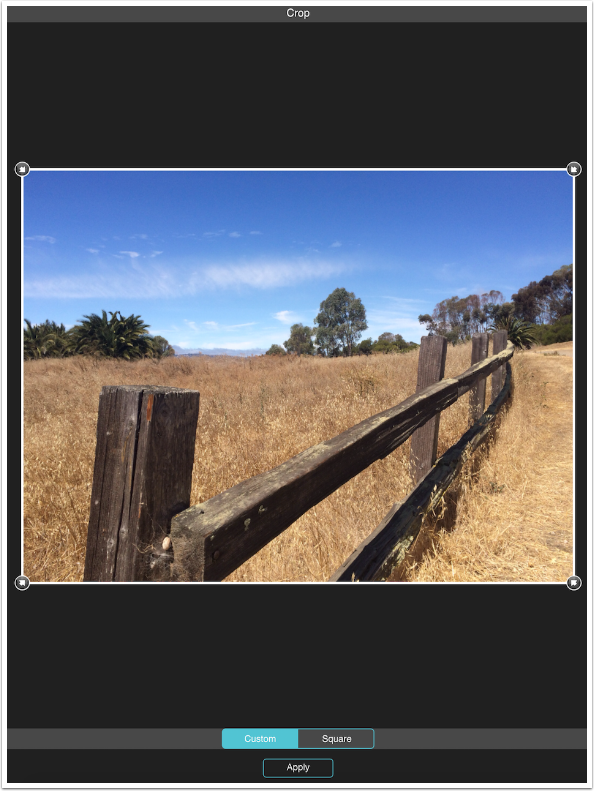
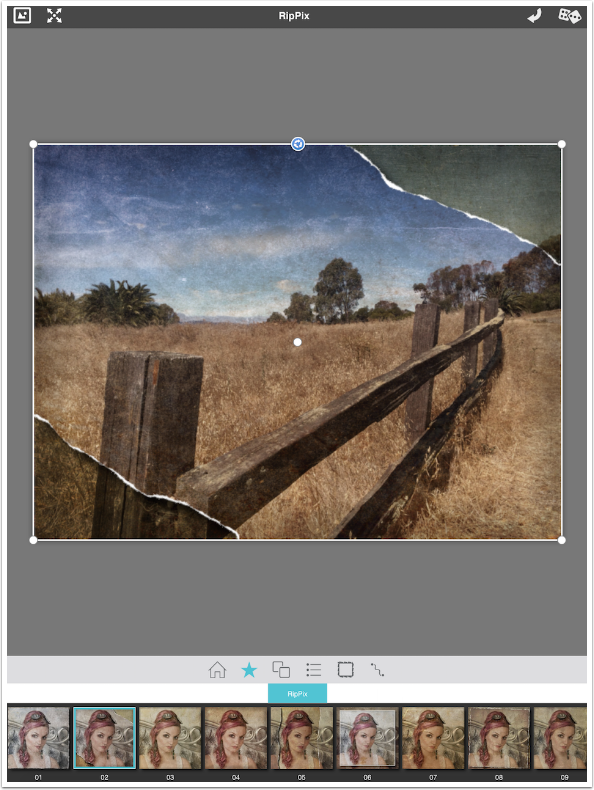
In the screenshot below, I’ve loaded an image of a fence. Now all the menu items appear in the white bar, and all the controls for the Home button are available, including Crop and Info.
The Crop feature is rudimentary, allowing either freeform or square crop.
The Info button pulls up the help page through the browser. In other words, as with most JixiPix apps, help is not available unless you have an internet connection.
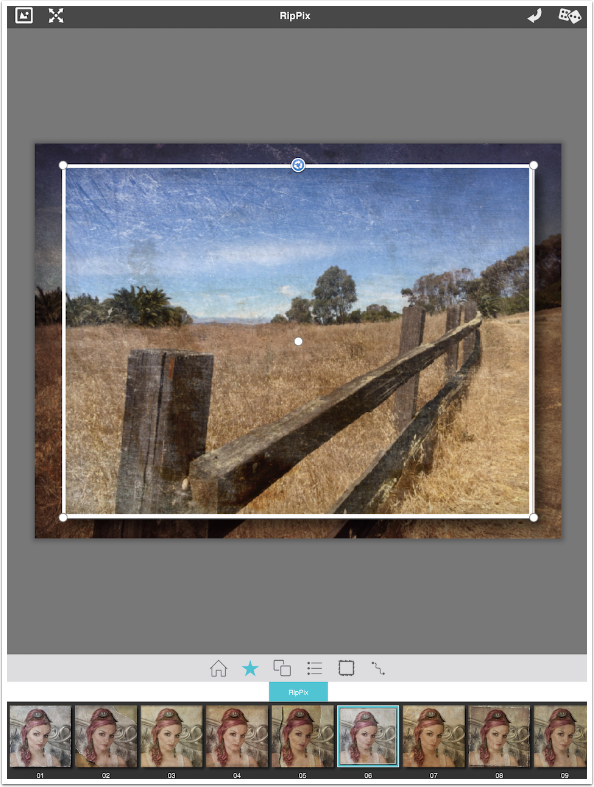
The Star button on the menu is for Presets. RipPix has 20 presets included. I’ve chosen preset 06 to show you that RipPix actually loads two copies of the same image as foreground and background. Not only can you “rip away” part of the foreground to show the background, but you can move and resize the foreground.
Presets are a combination of the textures and tones you assign to both the foreground and background, as well as the rip contours and type. In this example, the foreground was not ripped at all, just made smaller. The edge of the foreground has a border rather than a ripped or cut edge.
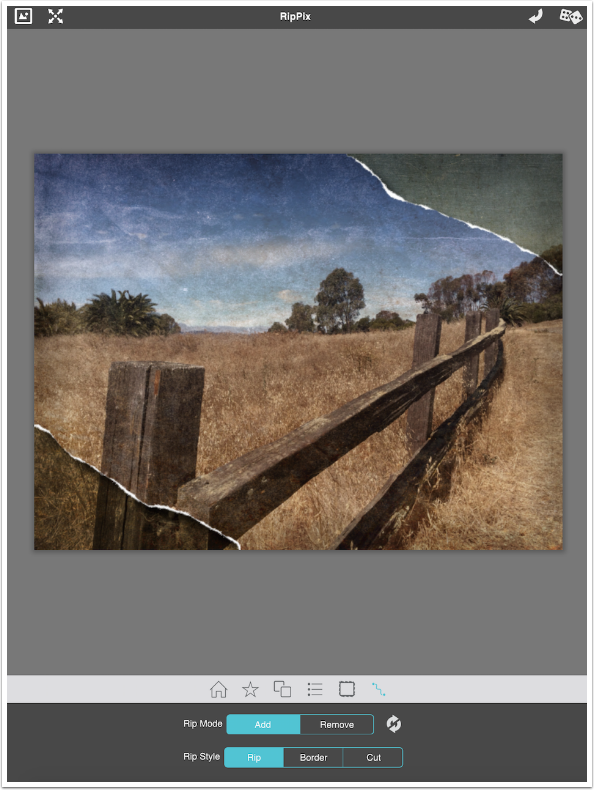
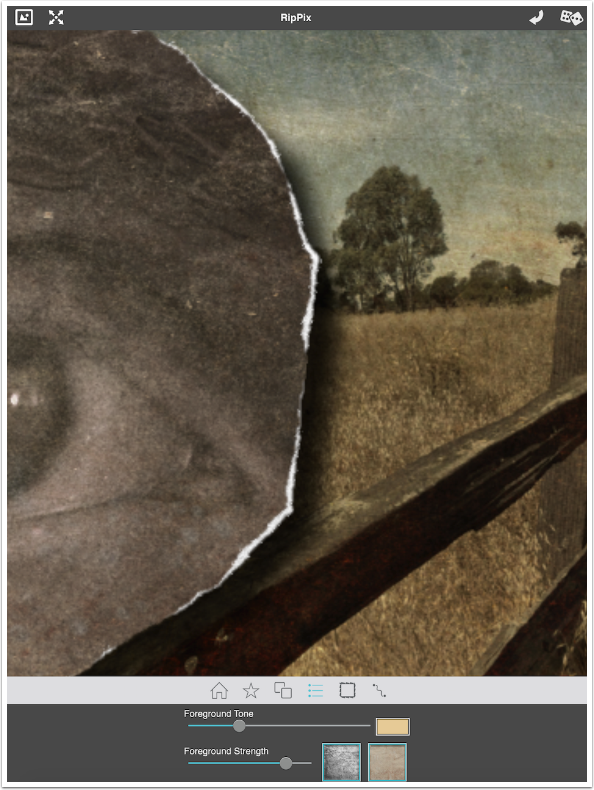
Below I switched to preset 02, which serves as a good starting point for where I’m going with this image. The foreground is ripped away from the lower left and upper right corners.
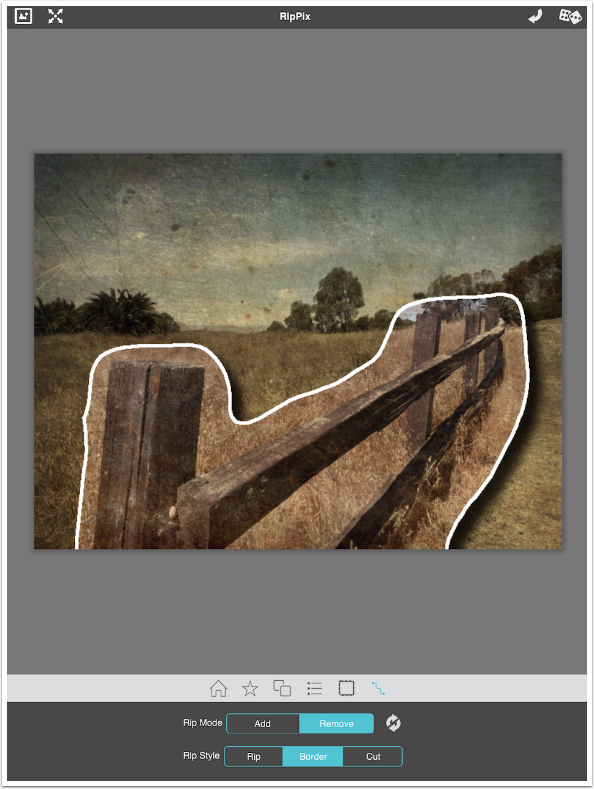
The next thing I want to do is change the rip, so I tap the “wavy line” icon at the right end of the menu. Down in the controls area, you are allowed to change the Rip Mode to Add or Remove, and the Rip Style to Rip, Border or Cut.
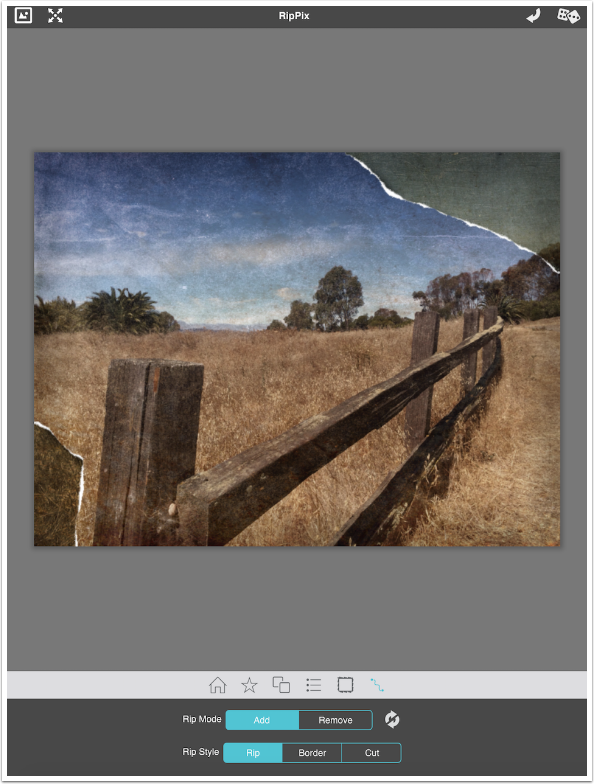
The Add Rip Mode works differently depending on whether you are starting fresh or not. When starting without a rip in place, any shape drawn will keep the foreground within the shape, and rip away any part of the foreground outside the shape.
In this case, I already have rips in place due to the preset. I want to add the base of the leftmost fence post. I draw around the base of the post, and that part of the foreground is added back to the image
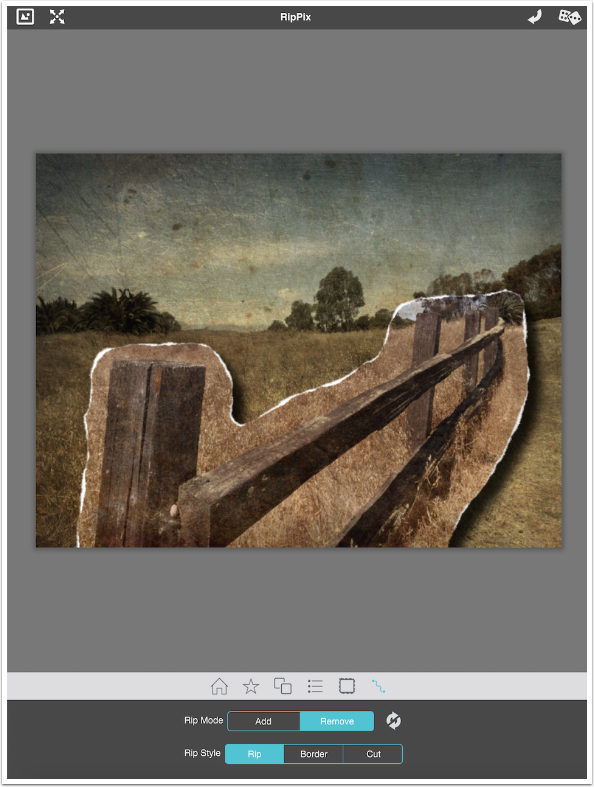
I switch the Rip Mode to Remove, and draw around the parts of the foreground I wish to remove. If I make a mistake, then I can Undo using the circular double arrows icon next to Add/Remove.
Changing the Rip Style to Border gives a thick white border around the foreground. With no control over width or color, I find this setting worse than useless.
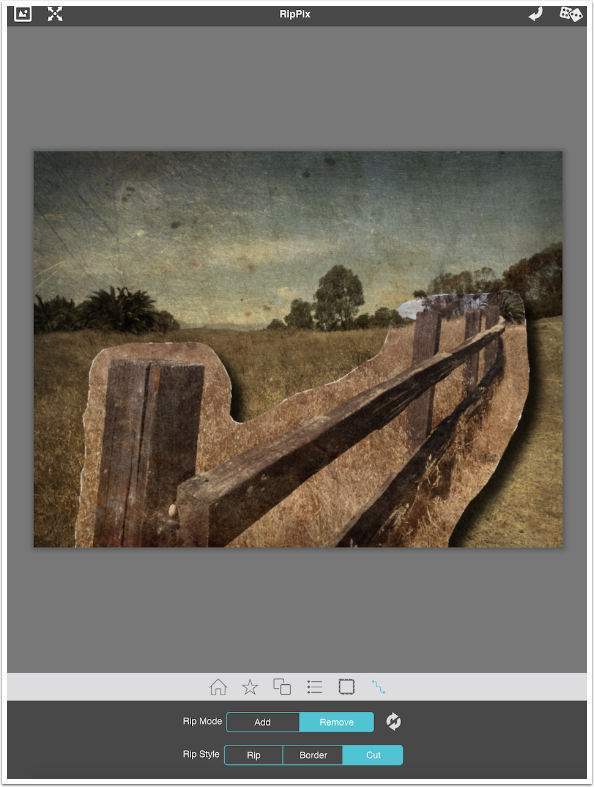
The Cut style has just a hint of the white edges, since cut paper doesn’t show the paper fibers like a rip does.
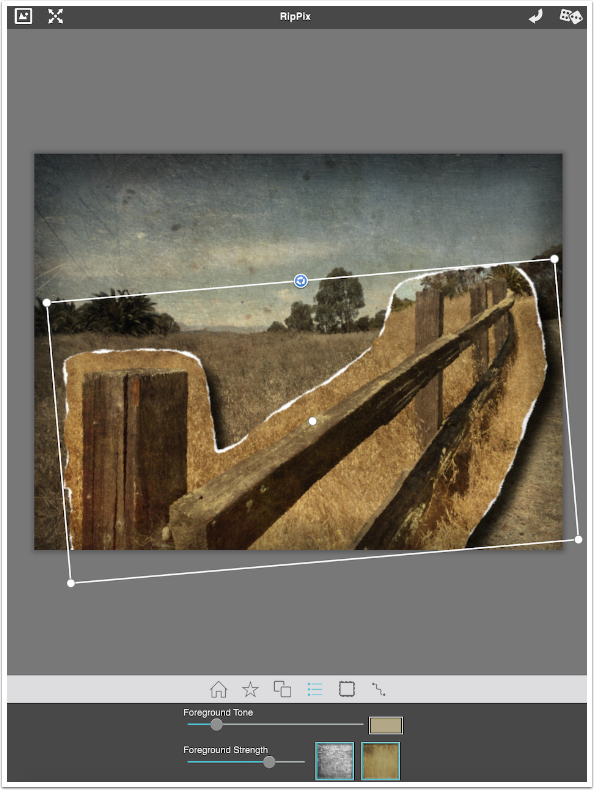
Tapping the dots/lines icon that looks like a list (the Grunge icon) will take you to the Grunge/Tone control. When you switch away from the Rip menu item, a box appears around the foreground. Whenever that box is present, you can change the position, size and rotation of the foreground by using the corner handles on the box.
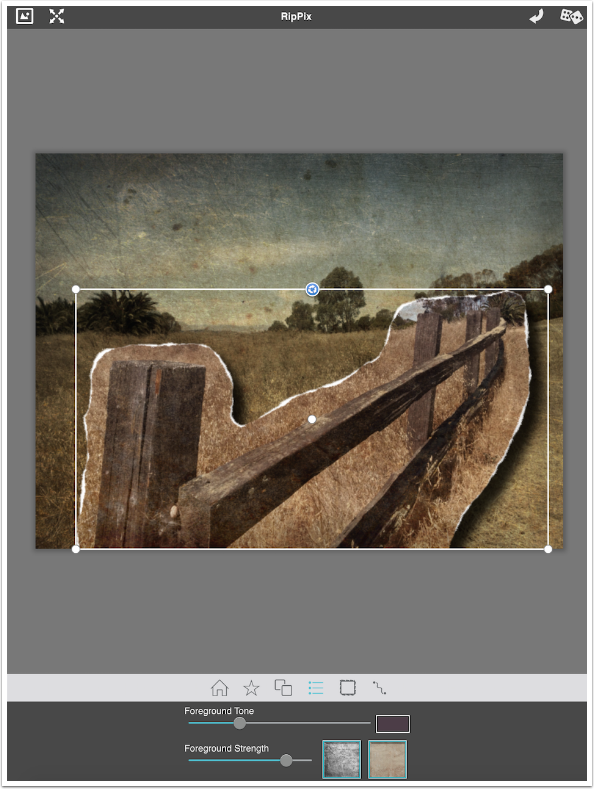
The Foreground Tone, or Tint, modifies the color of the foreground. Tapping the color thumbnail pulls up a color picker.

Many of the presets make the foreground too dark. This is a function of a dark color being chosen for the Foreground Tone. Choose a lighter color and the foreground will not be as murky.
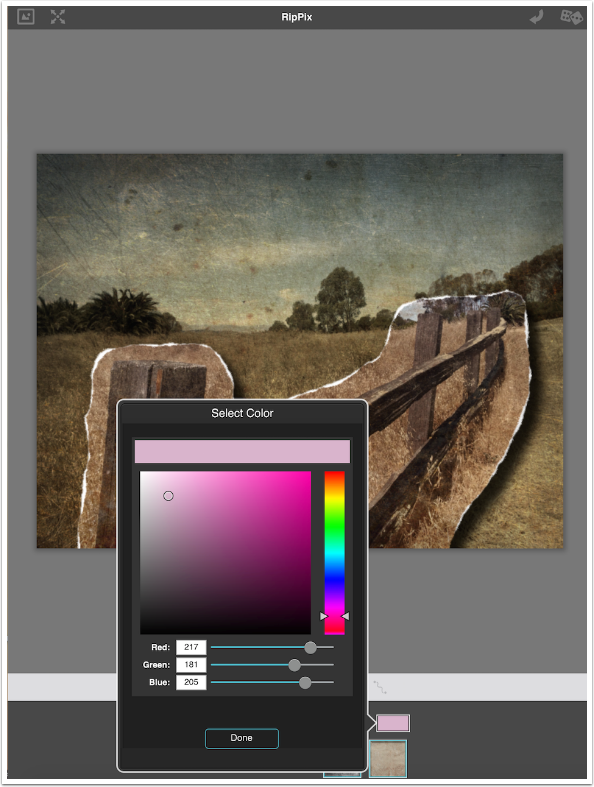
The Tone is not applied real-time. You have to tap Done in the color picker for the new Tone to apply.
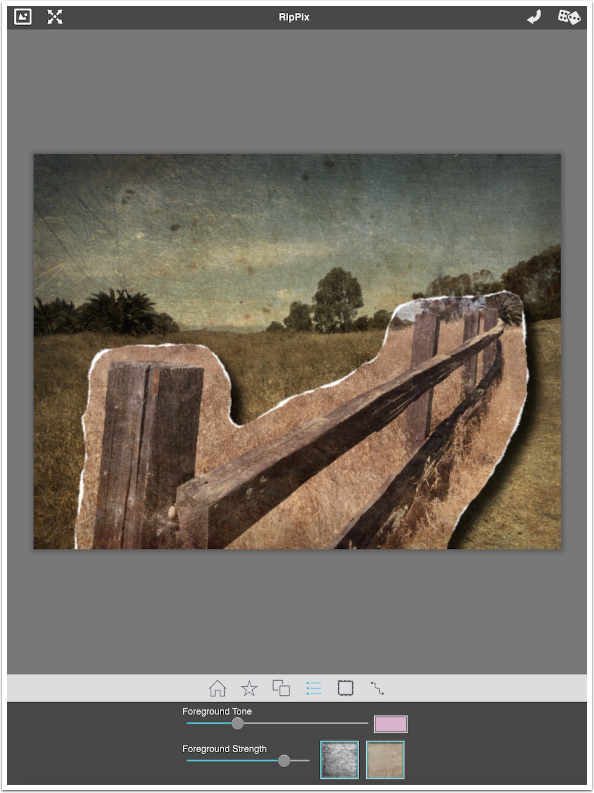
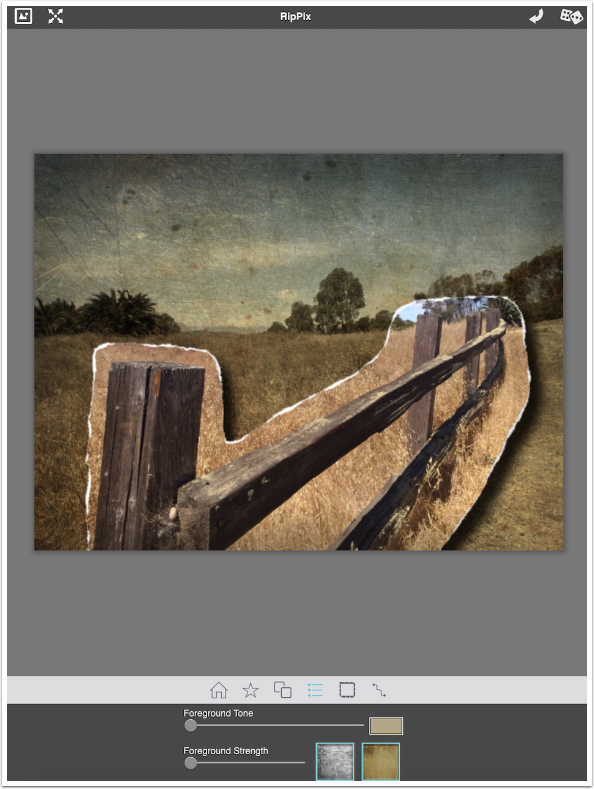
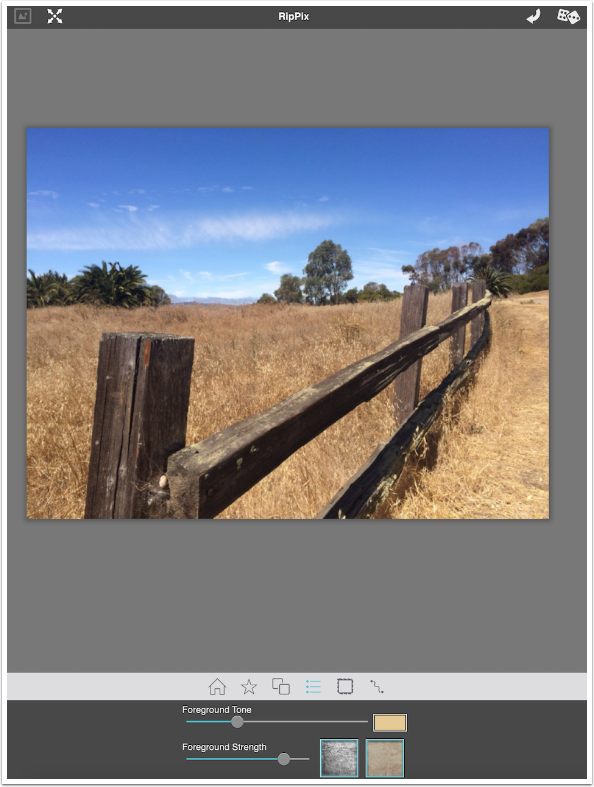
Below, changing the color to gold and bringing the Foreground Tone slider up gives a strong sepia tone to the foreground.
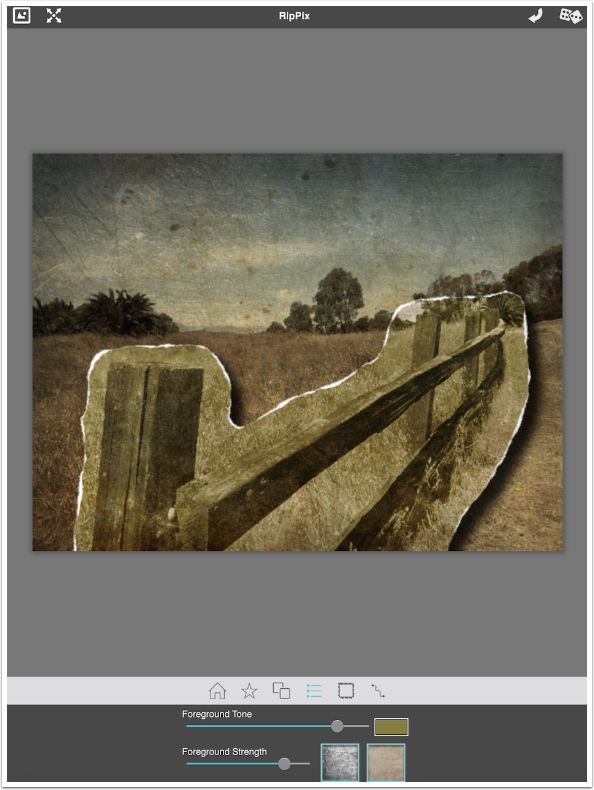
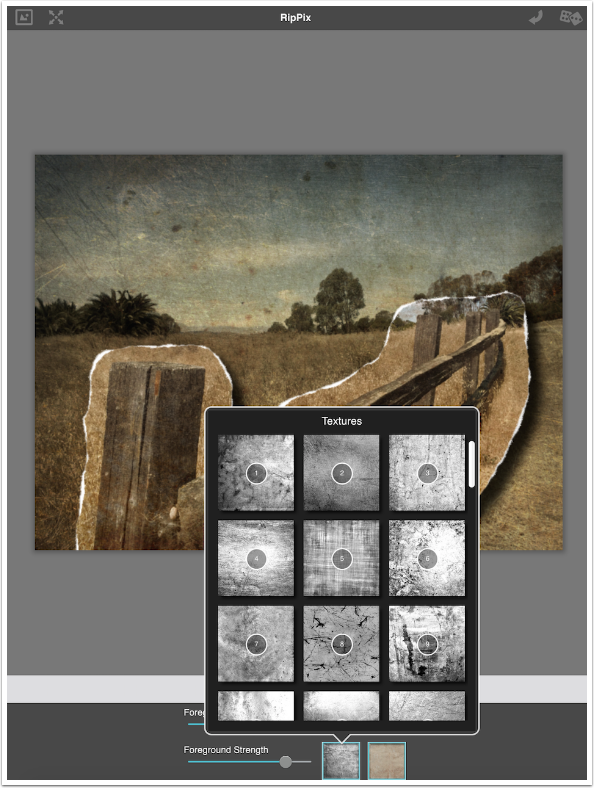
The Foreground Strength slider controls the amount of grunge applied. Grunge is a mixture of two qualities that cannot be controlled individually: Texture and Paper. RipPix has 55 Textures, all of them black and white. They are inverted before applying; dark marks seen in the texture thumbnails will lighten the image.
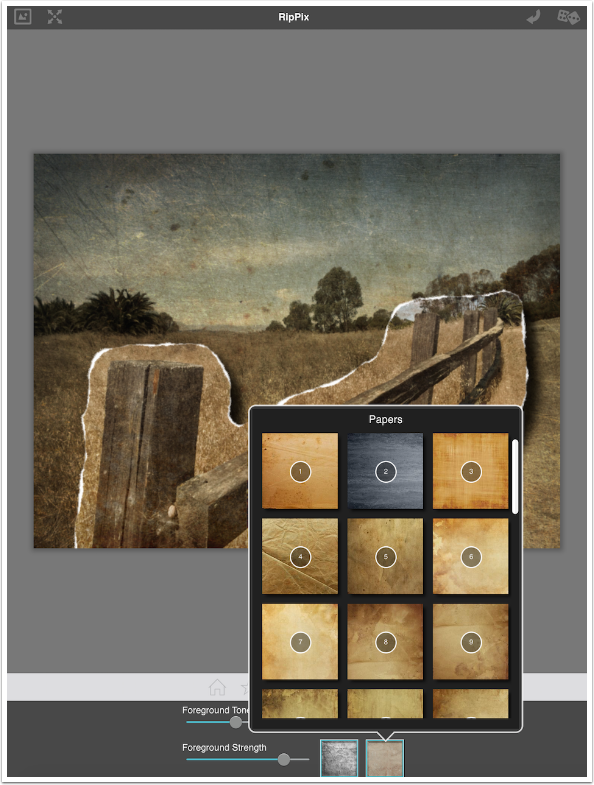
There are 34 Paper textures. These will impart color to the image, and sometimes the struggle between Tone and Paper color can be…interesting.
Of course, you can move both Tone and Strength sliders all the way to the left to show the original image with no grunge added.
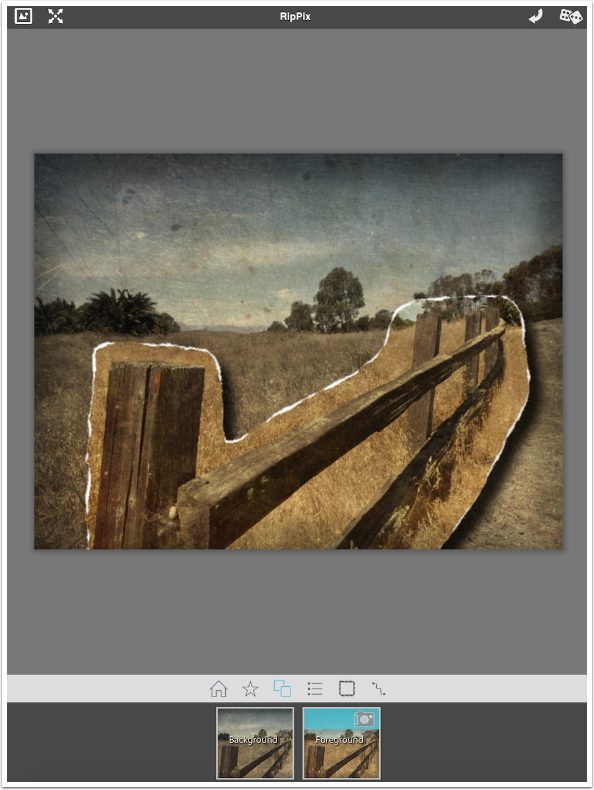
The double square menu item is called Adjust, and it allows you to choose between the foreground and background images.
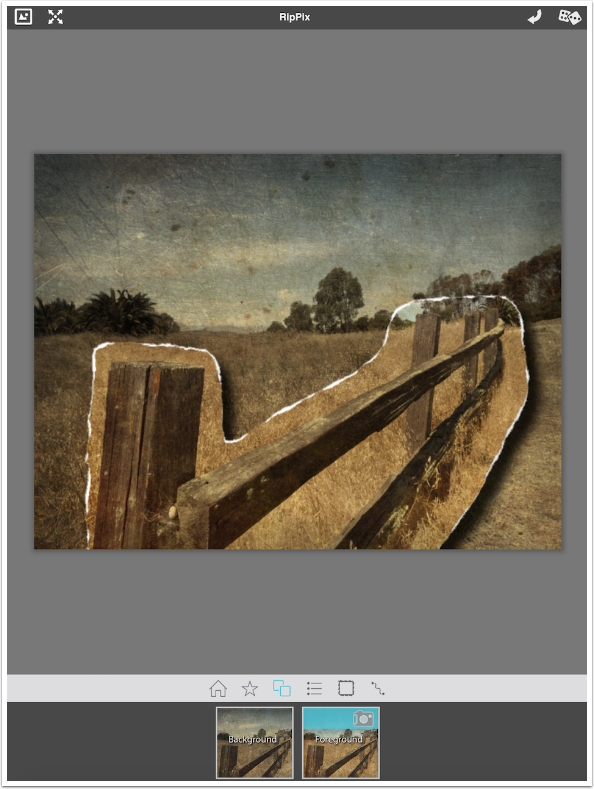
Below I’ve tapped the Background, and the blue bar tells me it is selected.
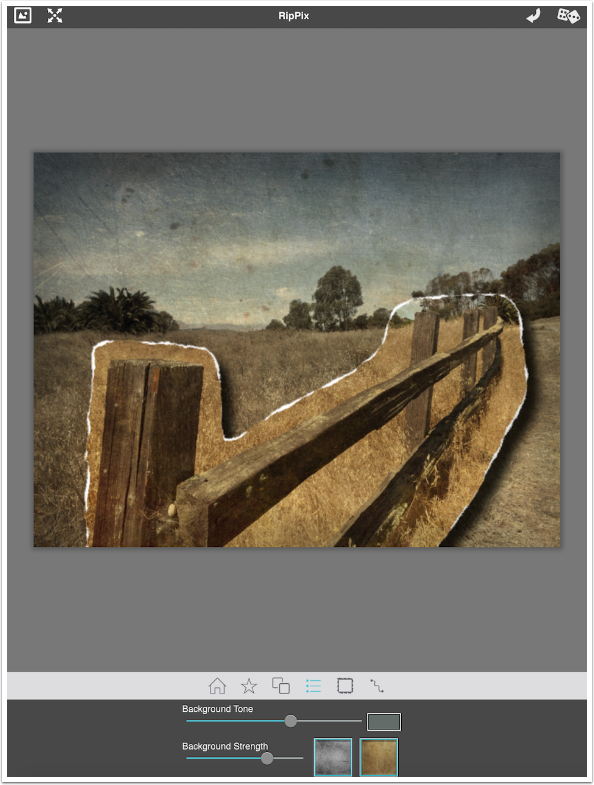
Now when you return to Grunge, the Tone and Strength sliders apply to the Background, not the Foreground. I have reduced the Strength slider, lessening the amount of grunge added to the background.
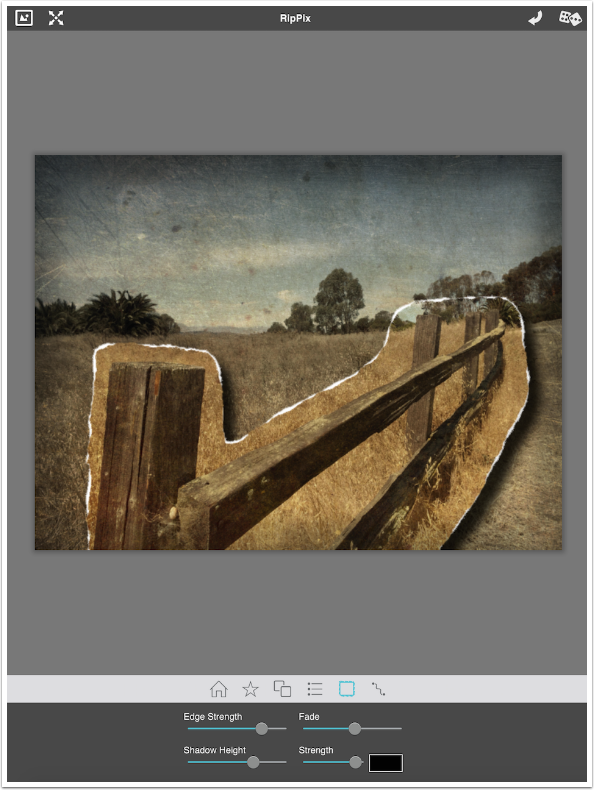
The Edge icon is the single square with the ragged edge. Edge has two sets of controls. The first two, Edge Strength and Fade, deal equally with background and foreground. If the foreground overlaps the edge of the entire image, as it does here, then the vignette is applied to the foreground image as well. The Edge Strength controls the opacity of the vignette, while the Fade slider controls how far into the image the vignette reaches.
The Shadow Height, Strength (opacity) and Color are fairly self-explanatory. Shadows always go to the right and down; there is no control for placing the light source and thus moving the shadow.
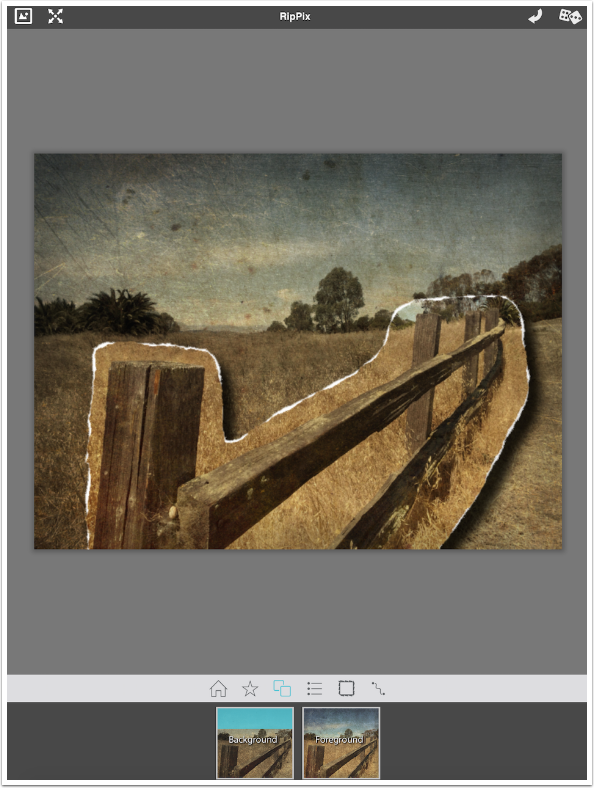
As I said earlier, it’s possible to resize and reposition the foreground using the handles on the box outlining the foreground. Below I’ve increased the size of the fence and rotated it.
Up to now, we’ve been using the same image in foreground and background. RipPix, however, gives you the ability to change your foreground image so that you can combine two images. I return to the Adjust icon and tap the Foreground thumbnail. I see a camera icon on the blue bar that indicates the foreground is selected. Tapping that allows you to take an image or load one from your library.
Warning: if you’re using the iPad version, you should tap in the gray workspace area around your image before tapping the Camera icon. This will ensure that the Transform box will not be visible when choosing a new foreground image. Every time I tried to load a new image while the bounding box surrounded the foreground, RipPix crashed and I had to start over. This bug does not seem to appear in the iPhone version.
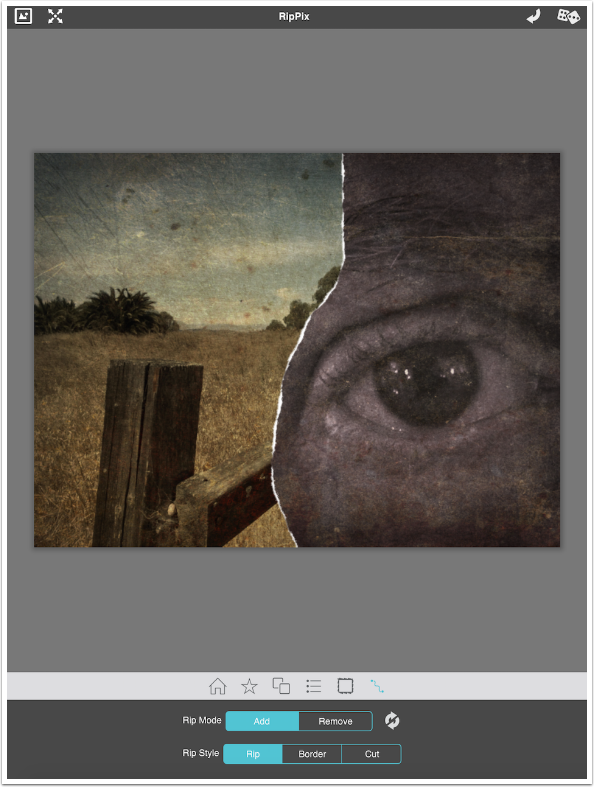
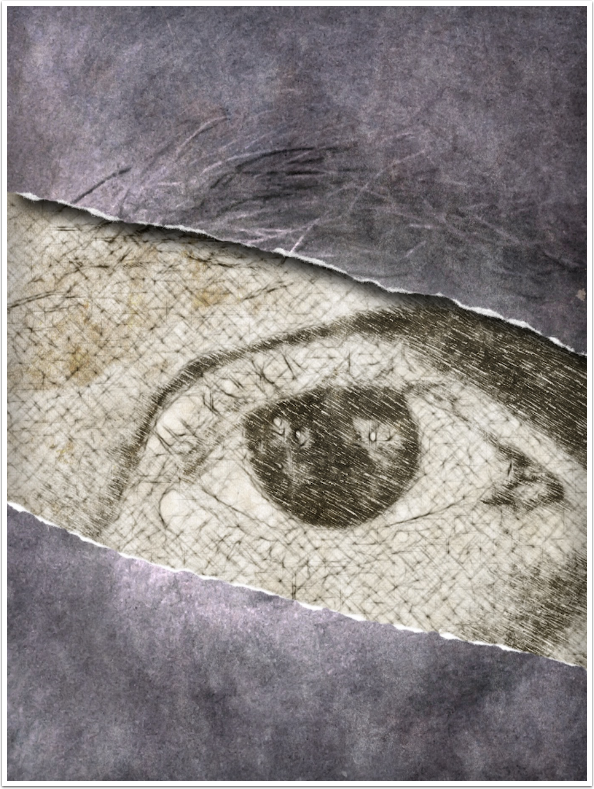
I changed the foreground to a monochrome image of my eye.
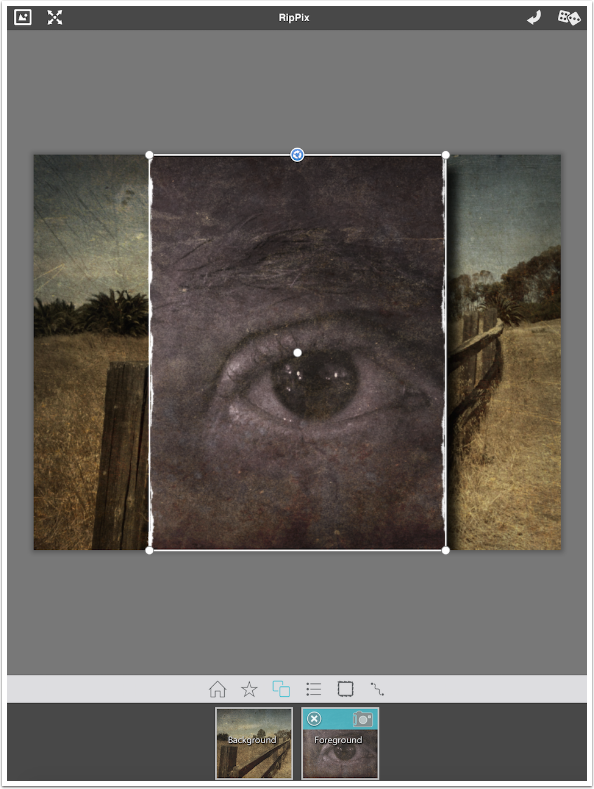
Using the bounding box, I moved the eye to the right side of the image and made it larger. Then I went to the Rip section and “tore away” part of the edge. There’s no depth to this image because the shadow goes down and to the right, and therefore can’t be seen in this image.
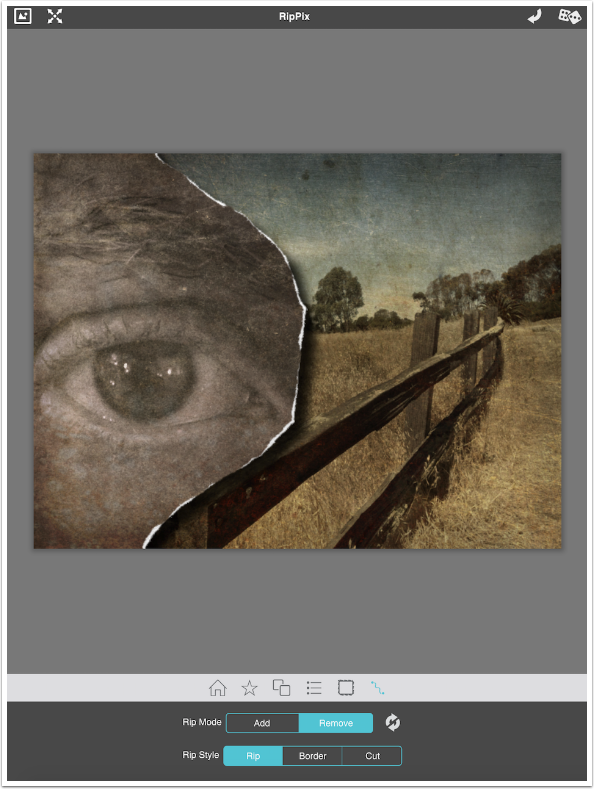
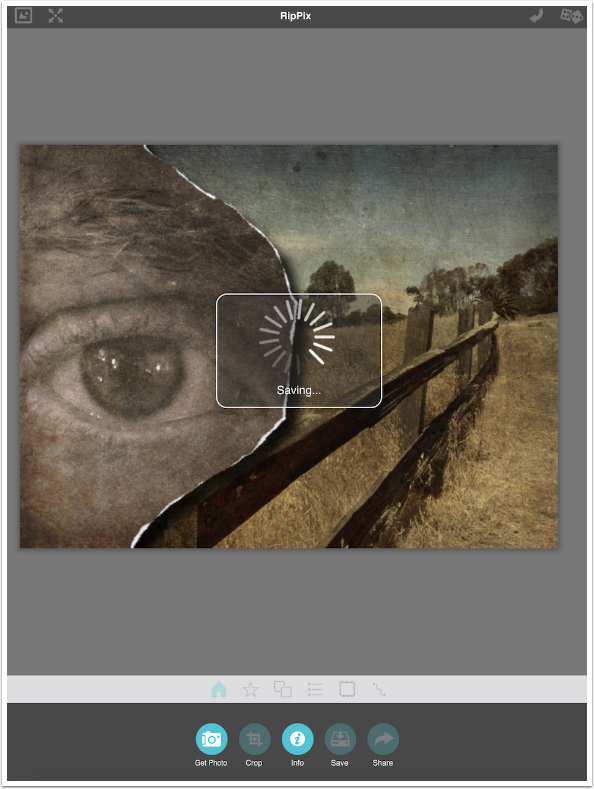
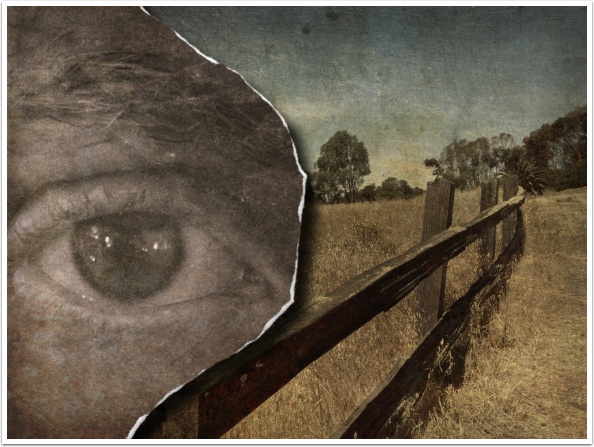
I used the undo button to restore the ripped away portions, then moved the eye to the left side. I used the Rip function to eliminate parts of the eye image on its right side. I also changed the Foreground Tone to a light brown to lighten the eye.
We haven’t discussed the buttons at the top of the workspace. The button at the upper left shows you the original background as long as you hold it.
The next button expands the image to full size. You use a two-fingered pinch to restore the image until it fits into the workspace. Other buttons at the top are an Undo which works on any transformations you make to the foreground, and a Random button which changes the grunge on Foreground and Background.
When you are ready to save your work, tap the Home menu icon, then tap the Save button. Currently the Save process takes quite a long time, but I’m sure JixiPix is looking into tuning that process
Here’s my finished image, which is pretty nifty.
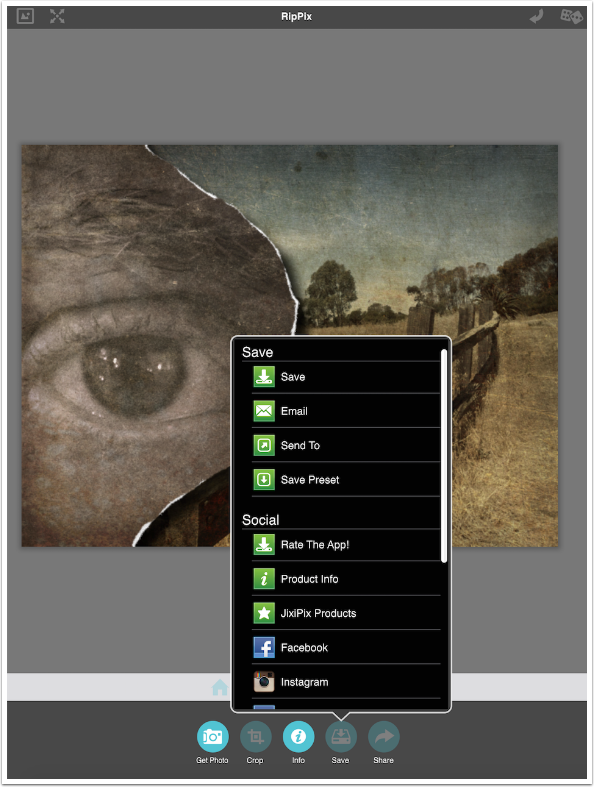
Tapping the Save icon saves the image directly to the Camera Roll; Tapping the Share icon gives you other options as well, including saving your modified settings as a preset.
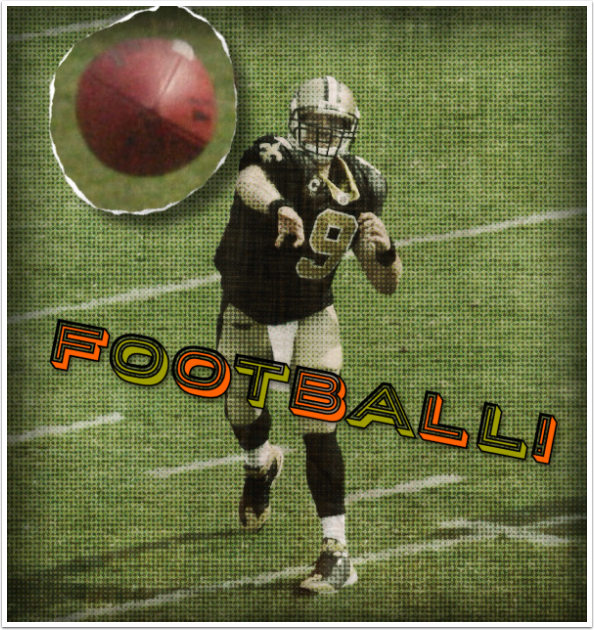
The ability to use two images gives you quite a bit of latitude. In the image below, I took the original through iColorama to give it a half-tone look, then added text in Phonto. That was my background. I used the original as my foreground, cutting away everything but the football, and removed all grunge from the foreground after resizing.
Ripped from Reality, the other abandoned app, allowed you to create a sketch version of the image that would serve as the foreground or background. RipPix does not offer a sketch version, only grunge. So I created a sketch version in iColorama and used it as my background, with the original as my foreground.
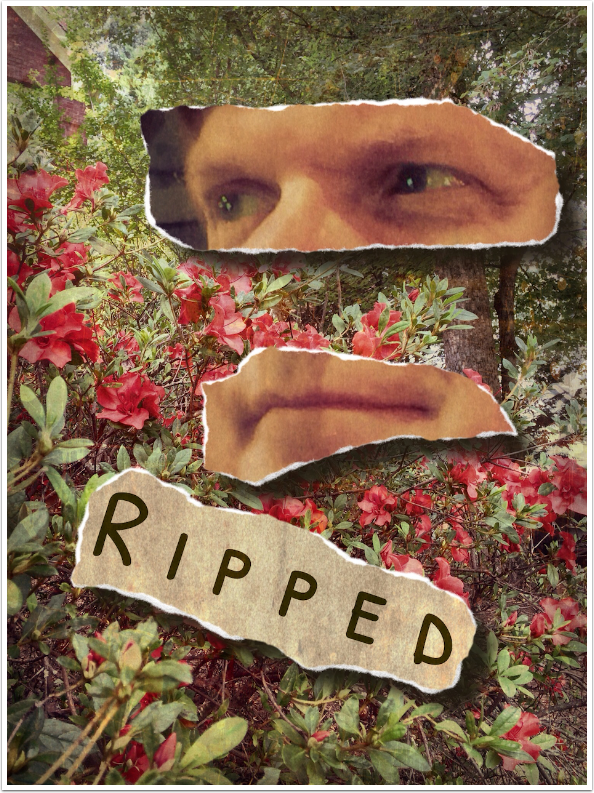
Recursive app jumping, or saving an image and then returning to the app to use the saved image as the background, allowed me to create this final image. I typed the word “Ripped” onto a white background in Phonto and saved it. Then I used a flower image as my background and a selfie as the foreground, tearing away all but the eyes and the mouth. I saved that version, then brought it back in as my background. I moved the Tone and Strength sliders for the Background all the way to the left, as I did not want the background changed at all. I removed the Edge Strength and Fade as well. Then I brought in my “Ripped image” as the foreground, allowing RipPix to grunge the green text on white. I could repeat that any number of times to add new torn elements.
Bottom line: there’s a lot to recommend in RipPix. It’s a pretty good texturing app all by itself – just don’t rip the foreground, and the foreground texture applies to the entire image. I like the ripped and cut edges, and they look good in traditional collages.
Personally, I would look for three improvements. One, allow for separate opacity control of Texture and Paper. Two, allow for shadow repositioning. Three, if RipPix keeps the Border setting, allow for color and width adjustments.
Then there are the inevitable bugs that need to be squashed out of a first release. In addition to the crash I mentioned above, RipPix for the iPad discards all work if you swap to another app. While creating the screenshots for this tutorial, I swapped out to the Camera Roll to confirm I’d gotten a shot. When I swapped back to RipPix, I had to start over from the beginning, loading the fence original. This is a bug in memory handling somewhere.
Overall, I recommend it. I liked the two predecessor apps, Modern Grunge and Ripped from Reality, and it’s good to know that JixiPix, who keeps up with their apps, will continue to improve RipPix. Until next time, enjoy!
TheAppWhisperer has always had a dual mission: to promote the most talented mobile artists of the day and to support ambitious, inquisitive viewers the world over. As the years passTheAppWhisperer has gained readers and viewers and found new venues for that exchange.
All this work thrives with the support of our community.
Please consider making a donation to TheAppWhisperer as this New Year commences because your support helps protect our independence and it means we can keep delivering the promotion of mobile artists thats open for everyone around the world. Every contribution, however big or small, is so valuable for our future.
Jerry Jobe
Never content with just scratching the surface of what an app can do, Jerry Jobe decided to pass on what he learned about imaging apps to others. He’s constantly trying to figure out just what tools other artists have used, and trying to incorporate them into his own work, in an attempt to find his style. He’s written tutorials on over 145 apps so far, which you can find (along with his Song of the Day entries) at http://enthusiasmnoted.wordpress.com/ He lives near Atlanta, Georgia, where he also finds a creative outlet in acting and directing in community theater.