
Mobile Photography / Art Tutorial – Dreamscope: A Dream Delayed
We are delighted to publish Jerry Jobe’s latest mobile photography/art tutorial for our reading and viewing pleasure. This time Jobe takes a look at the app Dreamscope and it’s not all favourable. Read his thoughts as he puts it through its paces (foreword by Joanne Carter). Take it away Jerry…
Dreamscope is free and you can download it here.
“Some photo and art apps are processing-intensive, requiring multiple steps to achieve a look. This processing can eat up your battery life. A large portion of a developer’s time can be spent trying to maximize the efficiency of that processing, since nobody wants their device to be in a waiting mode, unable to process anything. Some apps will solve the problem by doing the processing elsewhere: the photo and preset are uploaded, the processing is done on a remote machine, and the results are downloaded. The advantage of this method is that waiting for the processing to be done becomes a background task, so you can flip to another app and browse the web or check emails in the interim. The disadvantage is that file sizes are usually reduced because of the upload/download, and the length of the delay can discourage free experimentation.
I reviewed one such app a couple of years ago: PhotoFunia. For PhotoFunia, the upload, processing, and download functions are quick enough that you can sit and watch them: usually about 20 seconds at the top end. Today’s app, Dreamscope, is in an entirely different realm: the process takes a minimum of three minutes. Three minutes is a lifetime in digital art processing (although I’ve heard other apps in this class can take ten minutes or more). So the question becomes, are the Dreamscope results worth the wait? Let’s take a look”.

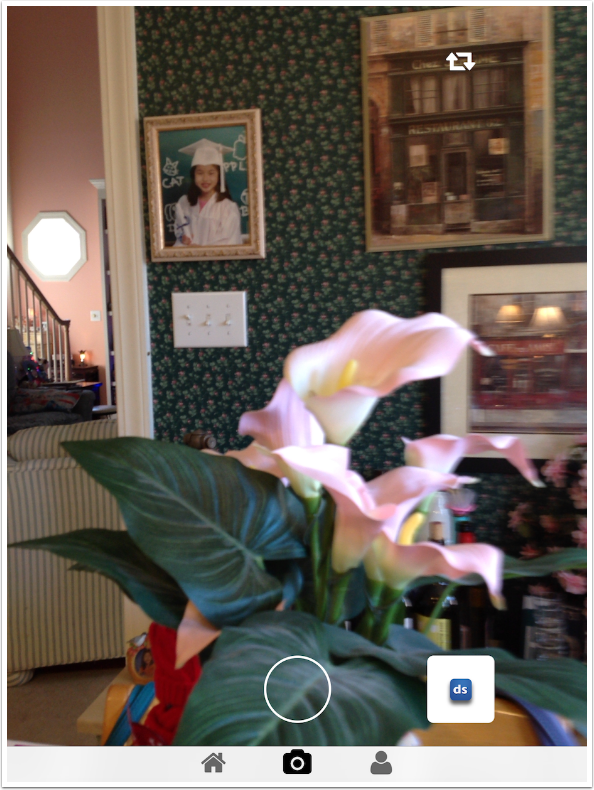
Dreamscope’s interface is simple. When you enter the app, the Camera is activated. You can choose to capture an image or load one from your photo library, accessed through the small square thumbnail at the bottom right (currently occupied by the Dreamscope logo). I have seen evidence of a bug that hides the Photo Library thumbnail; I hope that Dreamscope is able to squash that bug.
At the bottom are three buttons: Home, Camera and “Me”. The screen shown is the Camera screen.
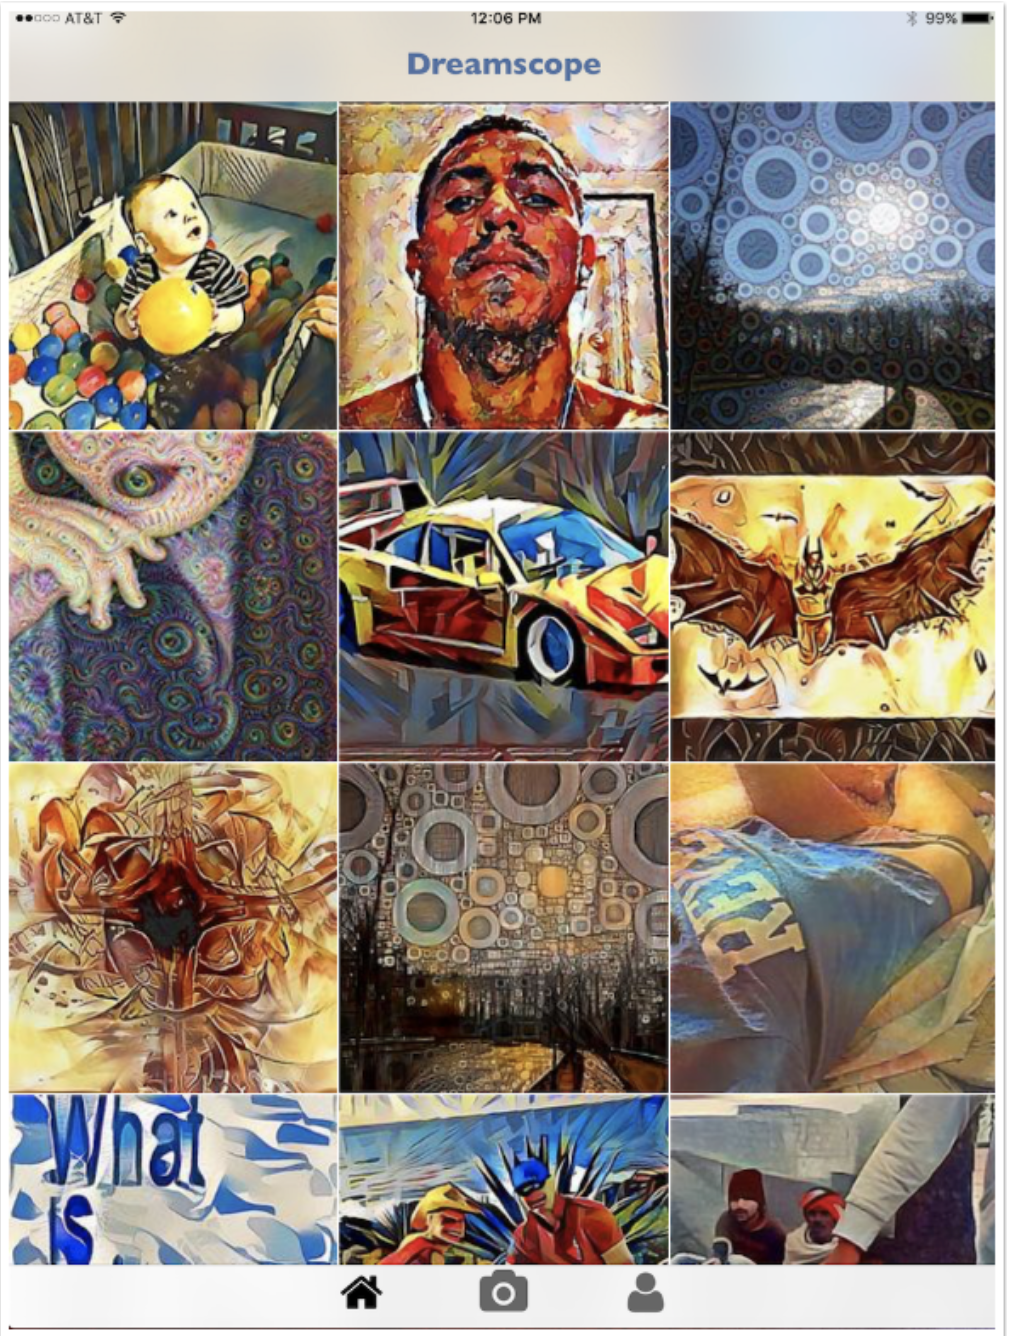
Dreamscope is set up to be somewhat of a social network, a place to share your creations. When you first open Dreamscope, you are asked to create a user ID and sign in. Every image you upload and process is eligible to be seen by everyone on the network. (I’ll show you how to turn that off on individual images in a moment.) The Home button takes you to the network Gallery, which contains all the images that users have processed through Dreamscope, most recent first. There is no way to search for a particular user, or even know what users are on the network. This seems to be less of a social network and more of a way to grab unattributed images.
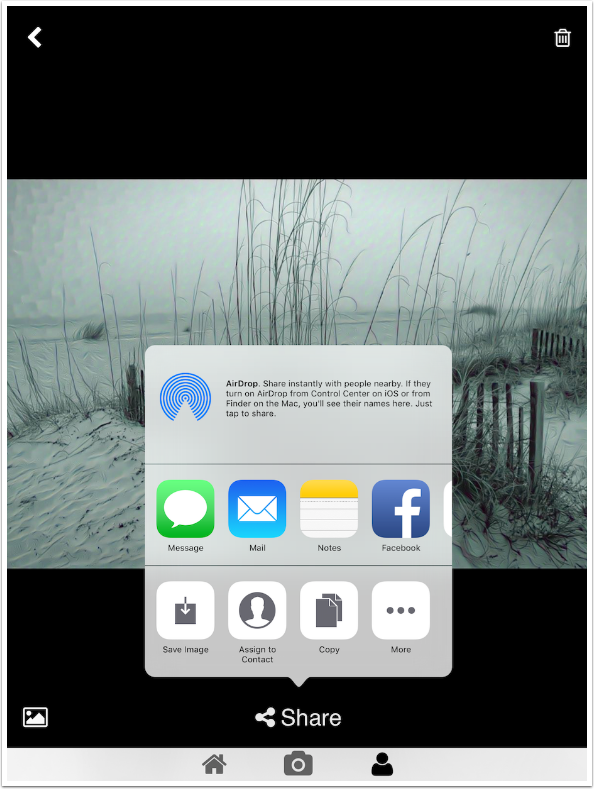
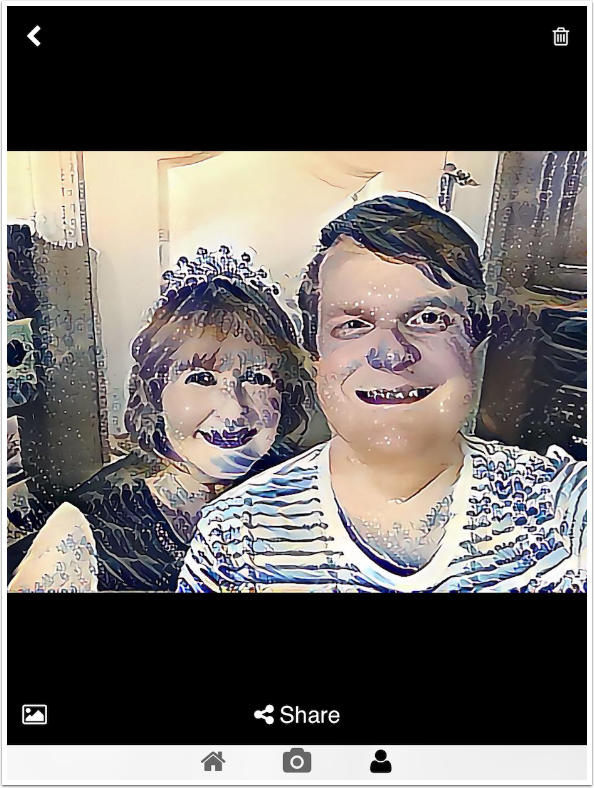
Tapping a thumbnail shows you the entire image, as shown below. Tapping the user name at the top of the screen shows you all of that user’s images. Notice the Share button at the bottom. There is nothing that prevents other users from saving your images, shared on the network, to their own device. For that reason, I recommend that you share your images to the Dreamscope network sparingly, if at all.
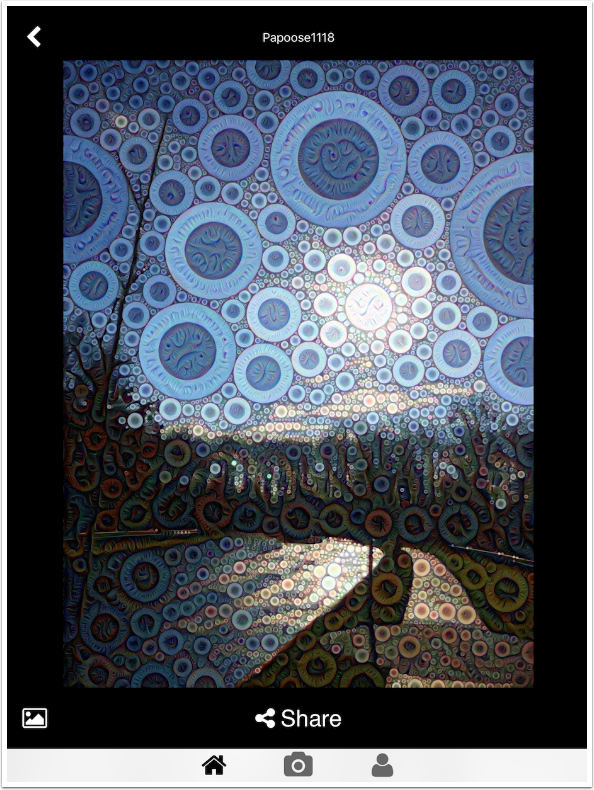
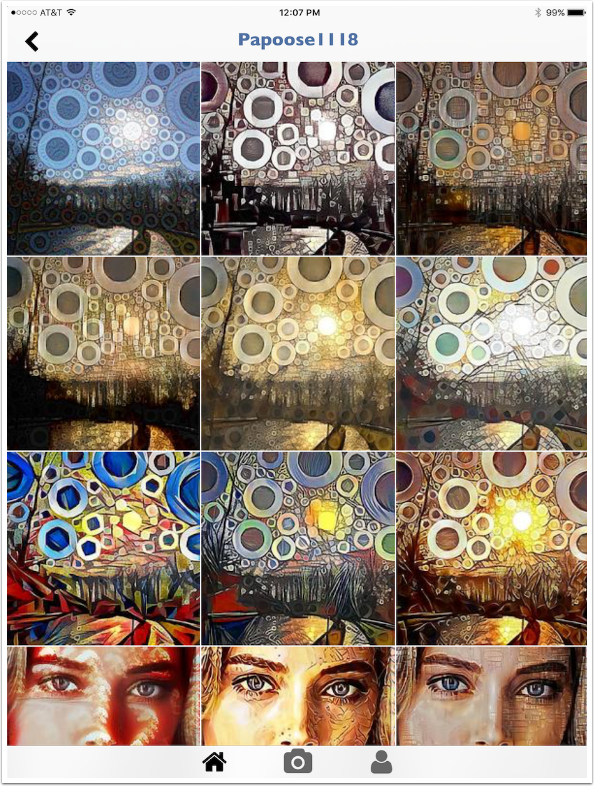
Here is Papoose1118’s group of shared images. Most users are using the same image over and over again with different filters. You can tell, therefore, that they are not being careful with sharing. In fact, they may not even be aware that their images are being shown to others on a network.
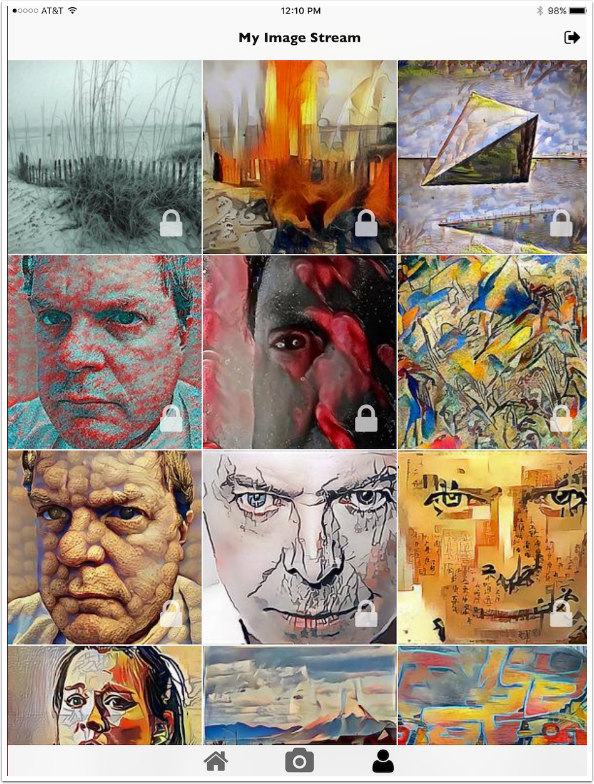
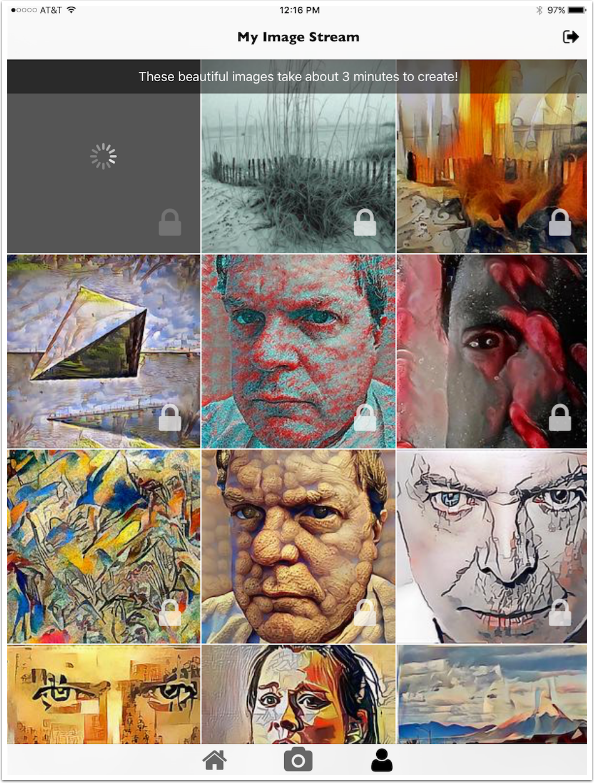
If you tap the “person”, or “Me” button, you are taken to your own Image Stream. These are the images that are downloaded back to your own device after processing. They may be shared to the network, or hidden from the network. The lock that you see on each of these thumbnails indicates that these images are private. A Globe would indicate that your image has been shared, or has gone global.
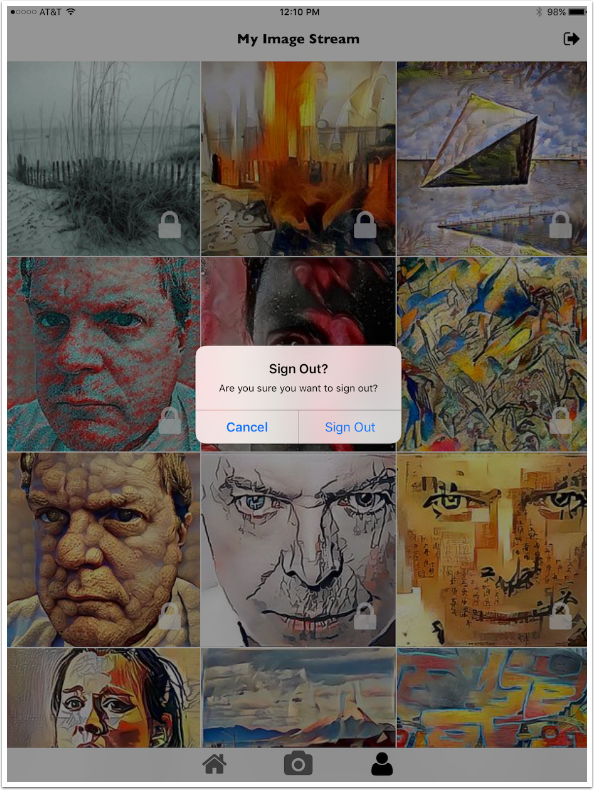
Tapping the right arrow at the top right prompts you to sign out of the network. You can’t process without being part of the network, so you should remain signed in.
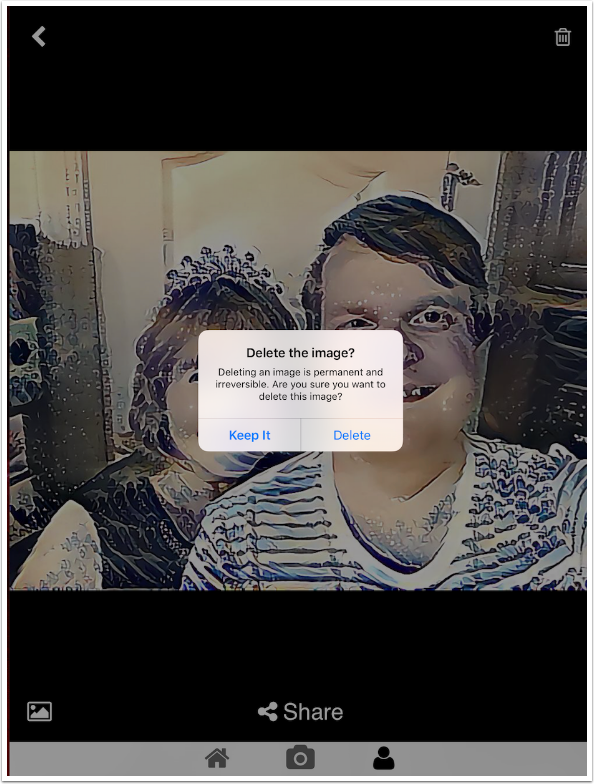
These images are in an internal gallery, saved as part of the app. In order to move them to the Photo Library, you have to tap the Share button at the bottom. Periodically, you should delete images from the internal gallery. There is no group delete, so you have to use the trash can icon at the upper right on individual images.
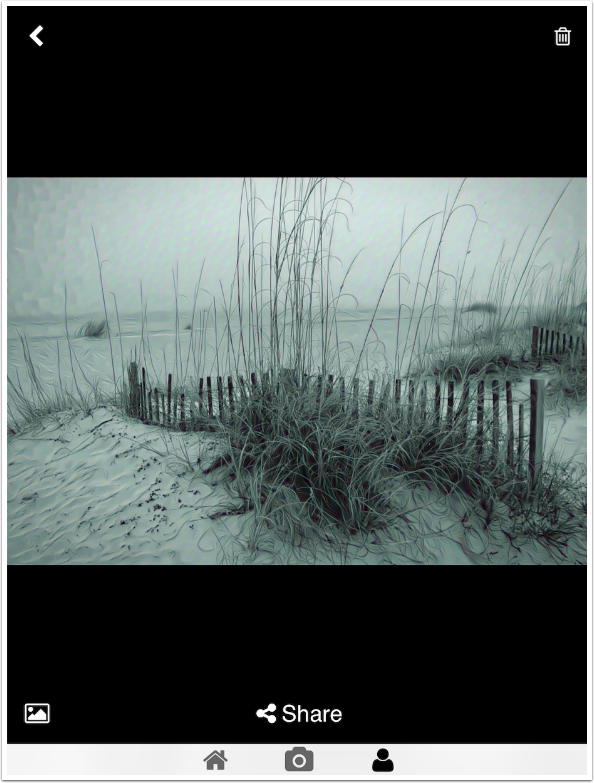
The Share dialog is the standard iOS dialog.
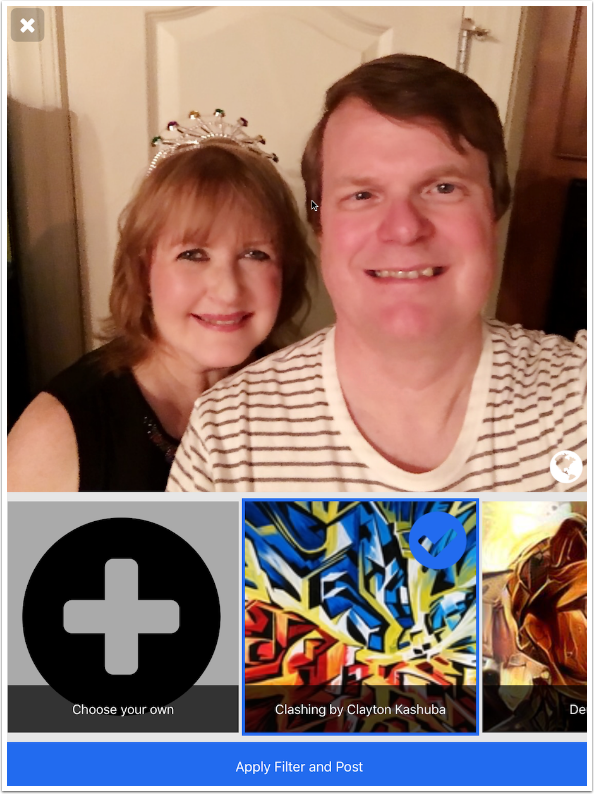
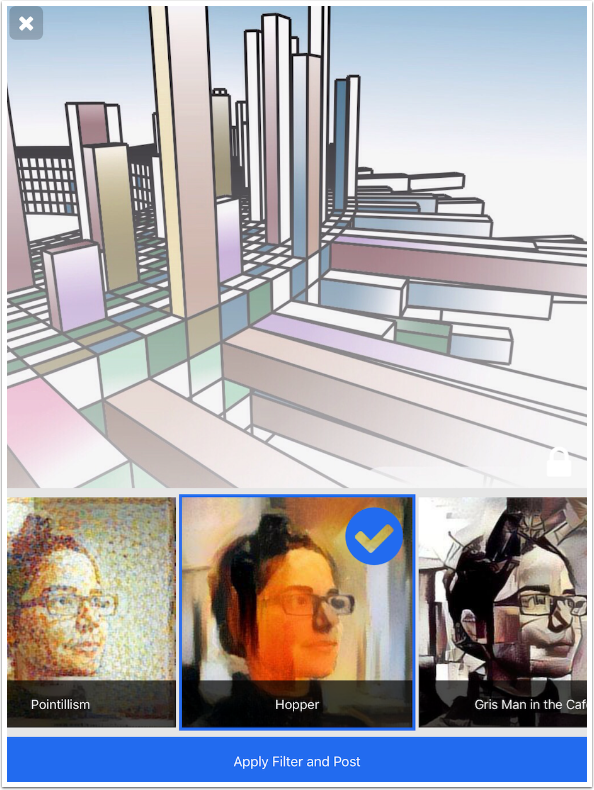
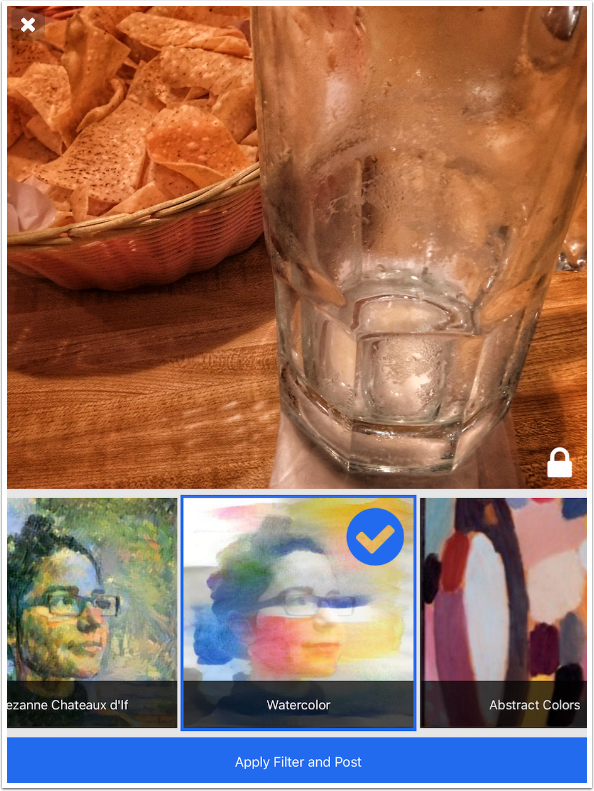
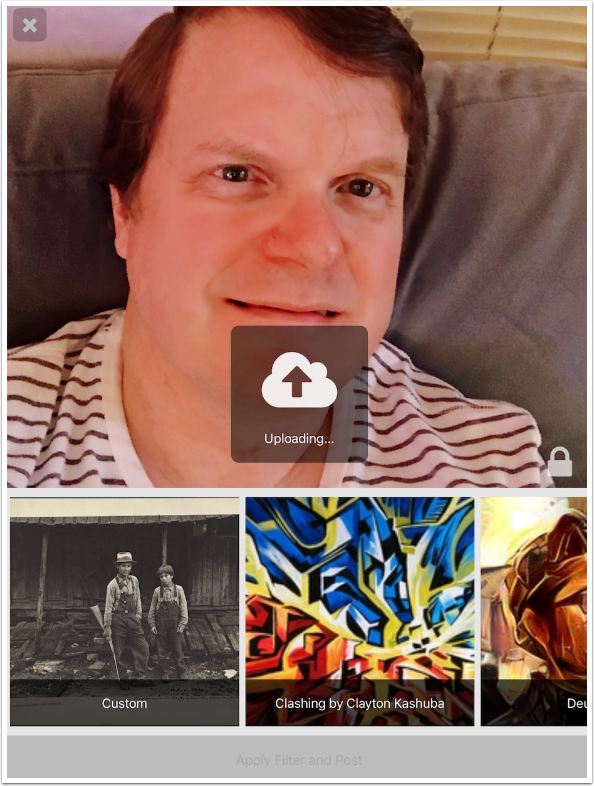
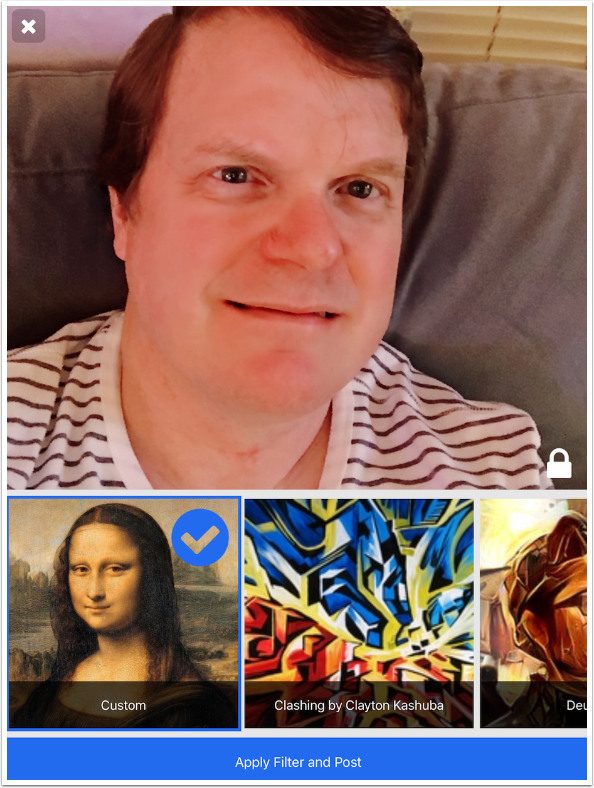
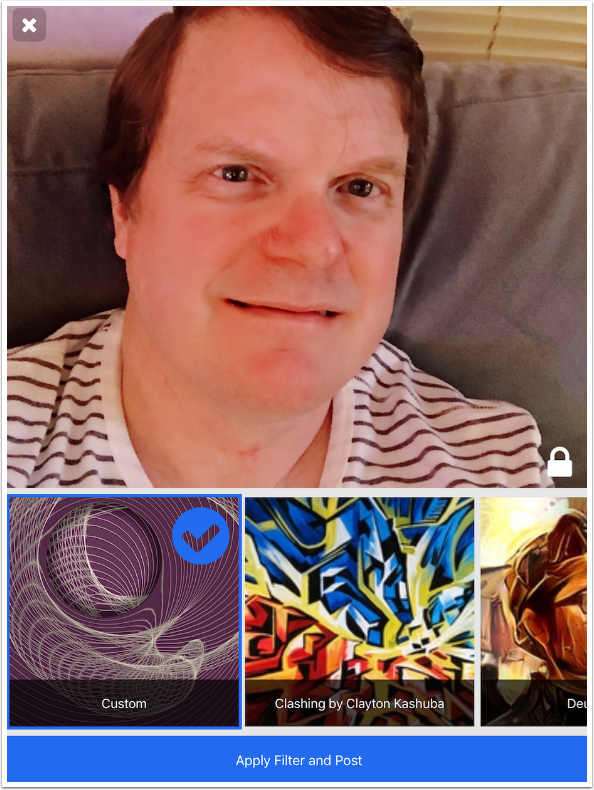
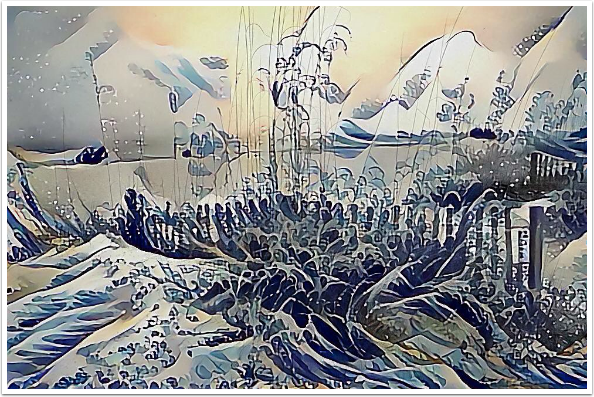
Once you have captured an image with the camera or loaded one from your photo library, you are taken to the filter picker. The image chosen is at the top of the page, and the list of filters are at the bottom, scrolling left to right. (“Choose your own” will be covered later.) As of this writing, there seem to be 172 different available filters. Please notice the globe at the bottom right of the chosen image. That means that sharing your image is the default for the app.
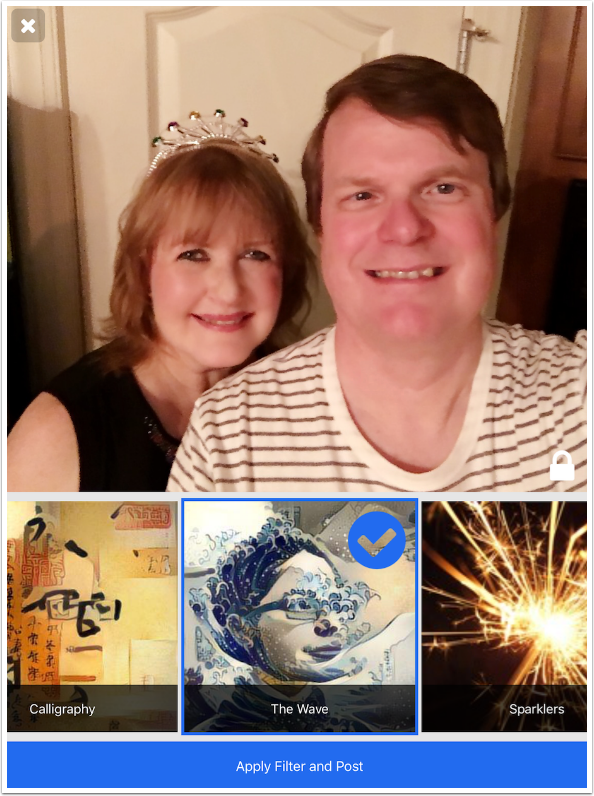
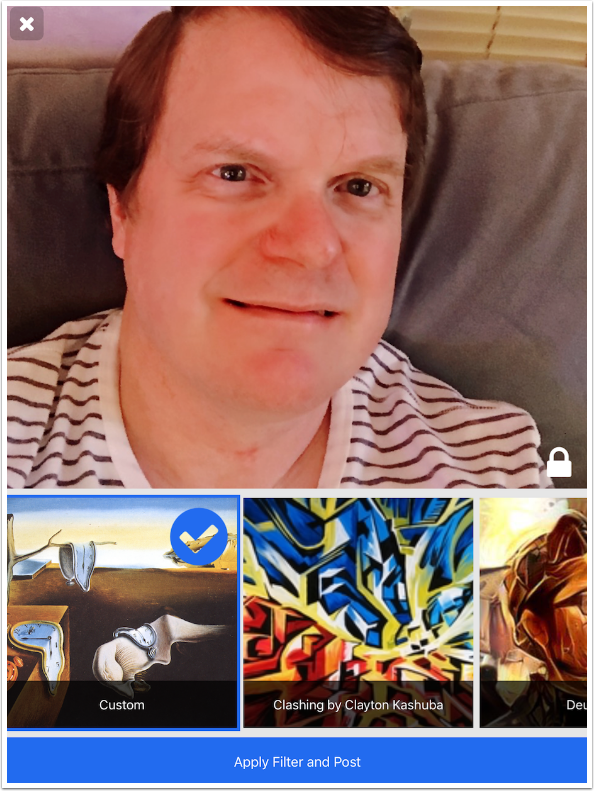
I scroll and find the filter called “The Wave” and tap it. A large blue check appears on the chosen filter. Before tapping “Apply filter and post”, I tap the globe to change it to the lock. That means my result will only be seen by me, and will not be put onto the network.
“Apply filter and post” now becomes, in effect, “Apply filter and send it back to me”. I am taken to my image stream to wait for the results. The message at the top says “These beautiful images take about 3 minutes to create”. That three minutes is on the low side, and I’ve had some take over five.
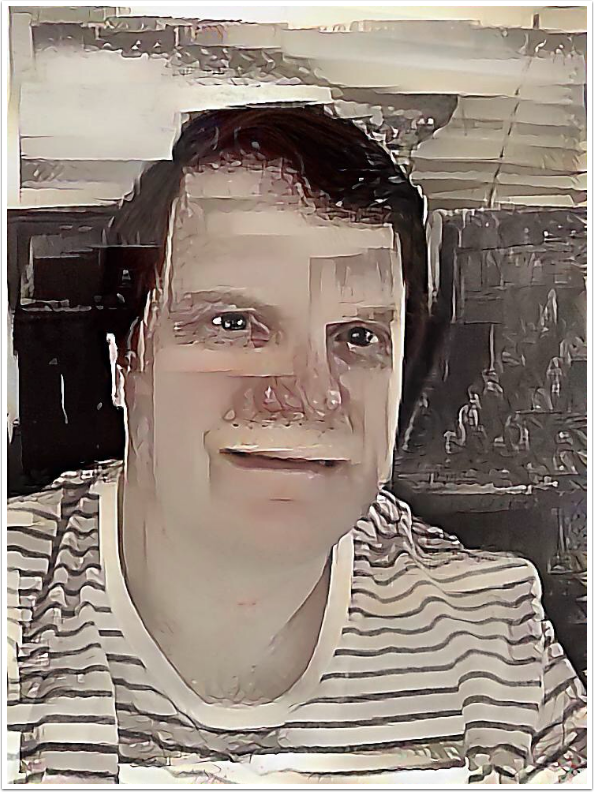
The results come back. I’m not happy with this combination of image and filter, so I do not tap Share to save it to my Photo Library. I tap the Trashcan to delete it. When I tap the Back arrow at the upper left, I am not taken back to the same image pre-filter. Instead, I am taken back to the Camera and have to choose the same image again. This is a horrible user interface decision.
There is a confirmation dialog on the delete.
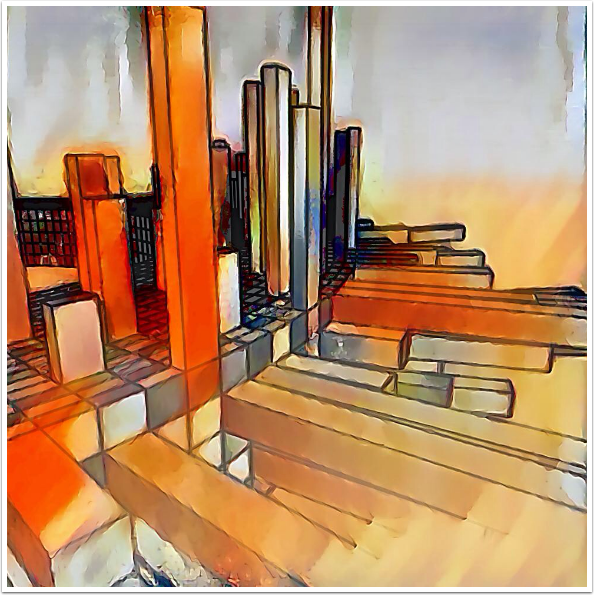
Some of the results are quite smooth and nice, such as when I use the Hopper filter on this partially-coloured Pigment abstract.
This was about the third filter that I tried with this particular image, so it took more than ten minutes to get a result I liked.
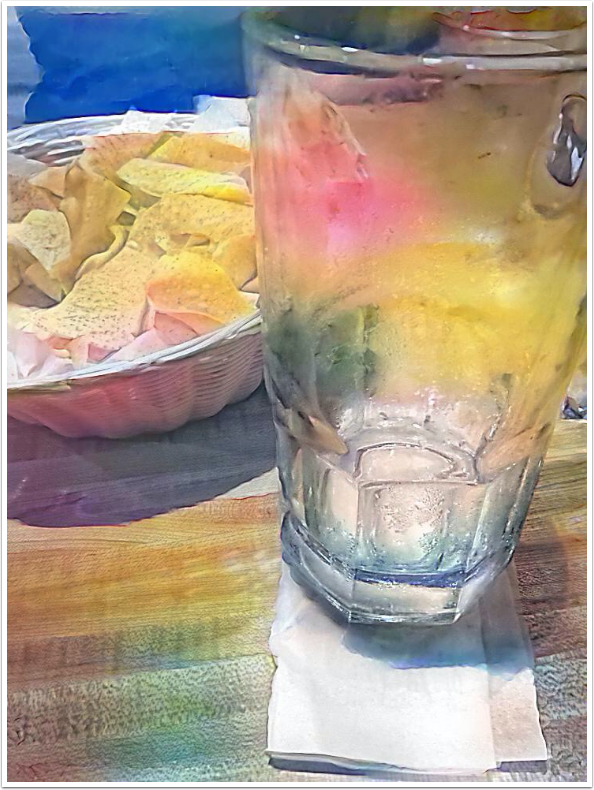
Another subtle filter that I liked is this Watercolour filter. There is more than one filter with the name Watercolour, which can add to the confusion.
Always remember to lock the image so it won’t be shared!
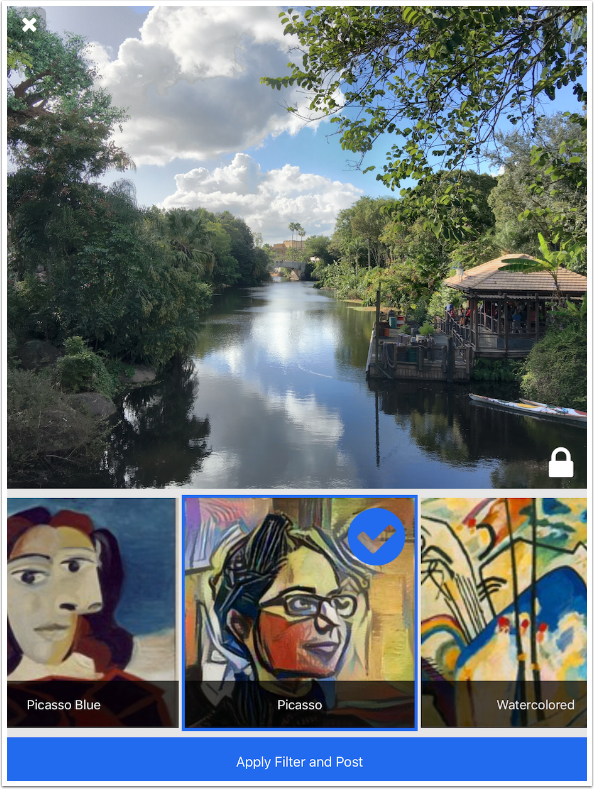
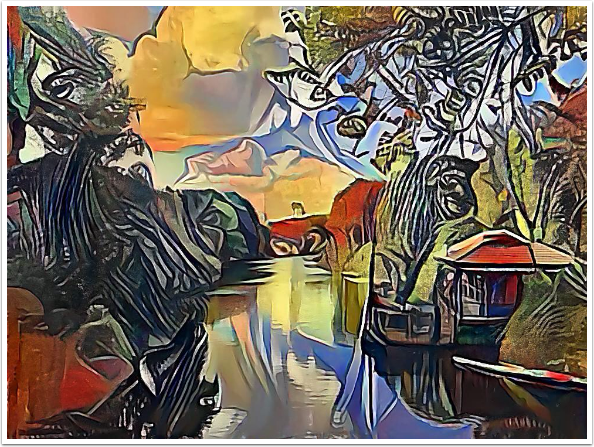
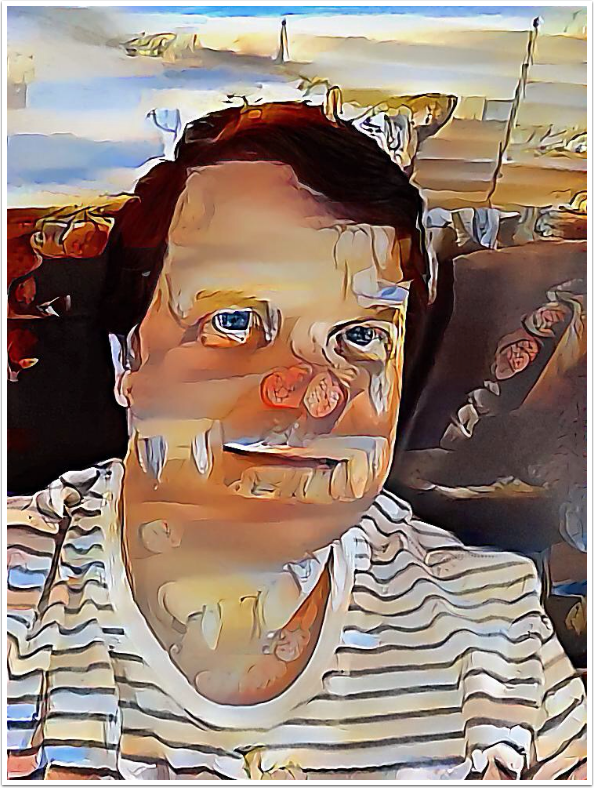
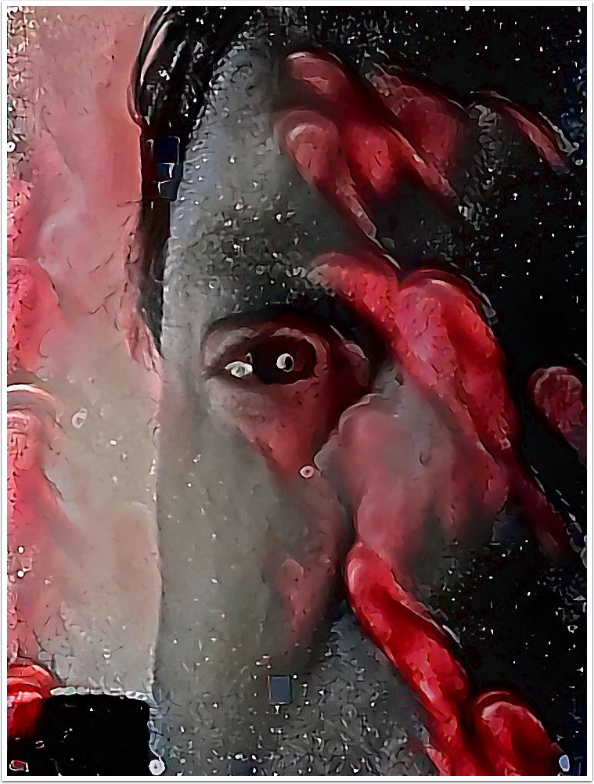
Most of the filters are far from subtle. This can result in some unusable images, like the portrait above paired with “The Wave”. Other times, you can get some spectacular results. Here’s a water scene that I am using the Picasso filter on.
I must say, I am very pleased with the results below. The only qualm is that the image was sent with over 3000 pixels on the longer side, and is returned as 1000×750 pixels.
Let’s move on to the “Create your own” filter. If you expect to see a lot of sliders and textures to apply in creating a filter, you are wrong. Dreamscope merely takes you to your Photo Library, and allows you to choose a single image that will act as the filter. Below I picked an old public domain sepia print to use as the filter.
The result not only picked up the sepia tinting, but also the squared-off boards on the porch. The shape was carried over into the boxy results. That’s ugly.
I’m a big fan of Dali, so I wondered what would happen if I used “The Persistence of Memory” as a filter.
I don’t get a filter based on the brush strokes, as I might expect given the Hopper filter. I get the color scheme, obviously. Am I seeing drooping clocks, as well?
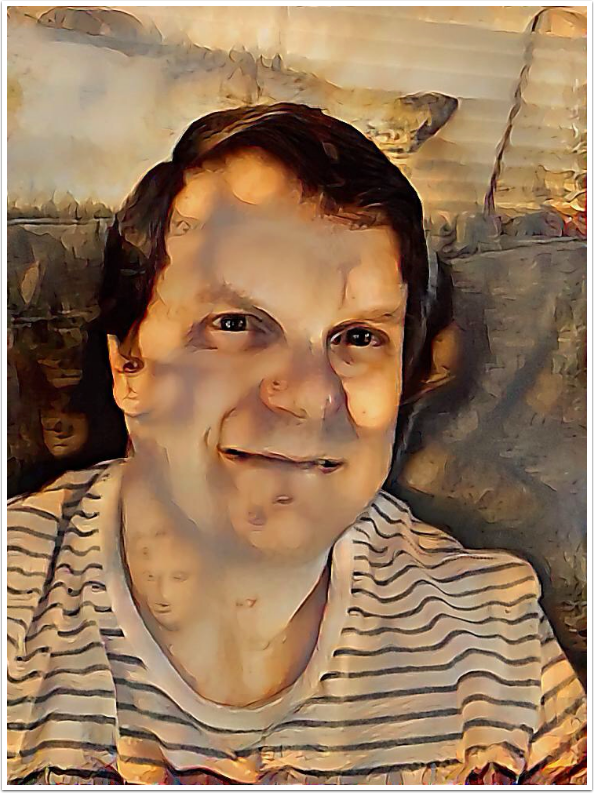
Another try, this time with the Mona Lisa.
I think I’m getting the hang of it. Dreamscope creates a filter from an image that picks up the color scheme and some of the structural details, but weds that to a simplified base image with some rather harsh lines. This is not quite what I expected, and I don’t find faces growing out of random places on my neck particularly pleasing.
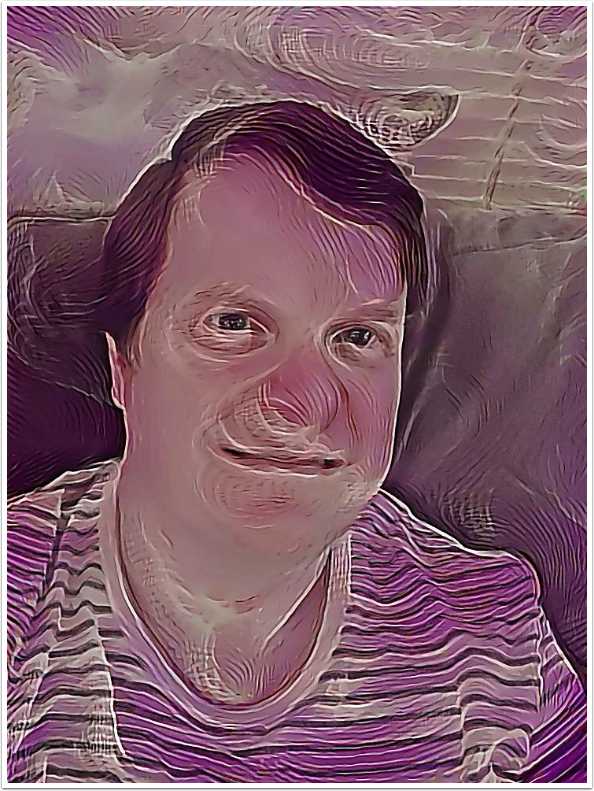
One more try, this time using an abstract created with Spirogrow and iColorama.
A qualified success, and I can see myself considering using that abstract as a filter on other images.
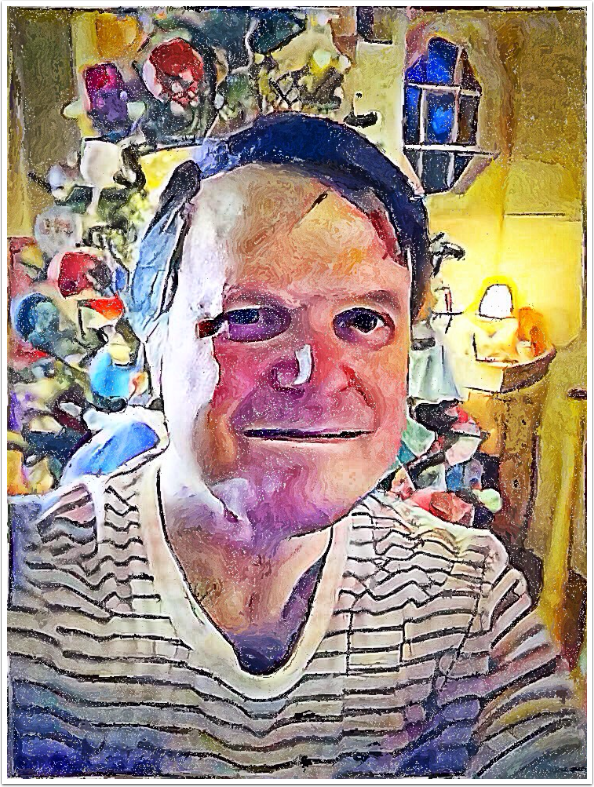
You can get some interesting results, if you have a lot of time to spend. In this image I used an image of red boots on wet asphalt as a filter for a too-dark selfie. It almost saves the image.
Just as a reminder that not all the filters are harsh, here is the same selfie I worked with above with the Facelift filter. This result actually came back in less than three minutes.

As with Artista Haiku last week, there are times when you can use the results blended with the original or with other apps to create something unique. Dreamscope has been getting a lot of use in some iPhoneography groups lately, and some of the users had some good results with Glaze in combination with Dreamscope. I used Glaze in a blend for the image below. Parts of it, like the window, I really like.
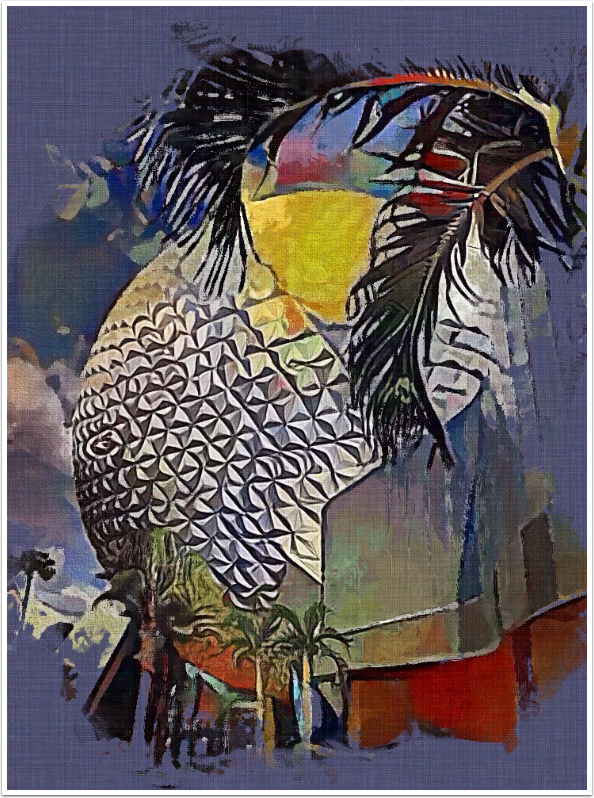
I turned this Dreamscope Picasso of Spaceship Earth into a painting using iColorama.
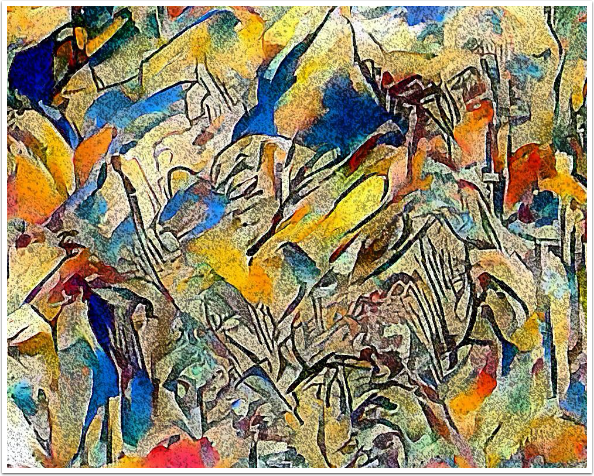
Just by using the Clashing filter on a relatively uniform abstract, I got the bold abstract below. None of the shapes seen were part of the low-contrast original.
In summary, Dreamscope returns low-resolution images after interminable wait times. There’s no way to know if a particular filter will work well with a particular image. It will occasionally result in spectacular images, like the Picasso landscape seen several images above or the beach scene below. Unfortunately, I don’t know if the results are really all that great, or if they just seem great because I spent hours trying different filters, and got really tired. For example, I can usually collect the 30-40 images I use for a tutorial within about 45 minutes. This week it took me three and a half hours, and I had to show you some results that are horrible.
Many of my friends will swear by Dreamscope, but I find that I spend more time swearing at Dreamscope. Until next time, enjoy!
TheAppWhisperer has always had a dual mission: to promote the most talented mobile artists of the day and to support ambitious, inquisitive viewers the world over. As the years passTheAppWhisperer has gained readers and viewers and found new venues for that exchange.
All this work thrives with the support of our community.
Please consider making a donation to TheAppWhisperer as this New Year commences because your support helps protect our independence and it means we can keep delivering the promotion of mobile artists thats open for everyone around the world. Every contribution, however big or small, is so valuable for our future.
Jerry Jobe
Never content with just scratching the surface of what an app can do, Jerry Jobe decided to pass on what he learned about imaging apps to others. He’s constantly trying to figure out just what tools other artists have used, and trying to incorporate them into his own work, in an attempt to find his style. He’s written tutorials on over 145 apps so far, which you can find (along with his Song of the Day entries) at http://enthusiasmnoted.wordpress.com/ He lives near Atlanta, Georgia, where he also finds a creative outlet in acting and directing in community theater.


4 Comments
Gattina
How do you change the privacy setting when the photo is in your gallery?
Jerry Jobe
As far as I can tell, you can’t. Once you’ve decided to release it to the gallery by making it public, there doesn’t seem to be any way to make it private again. Also, you can’t force a private image to be public (upload to the gallery). That decision has to be made before you get any results.
Bill Powers
Ive been enjoying this ap– but it has changed and im not undstanding what is up– it offered some super cool new filter options–“angelic” was one of them- and then one day those were gone– ive scrolled thru everything now and they are not there– what gives? any idea? Id like to get those back– it also started flipping the images I take w the ap–so now I have to snap a regular photo and then run it through the ap– no biggy there but still–it wasnt that way at first– lmk if you have knowledge of this issue– I’d hoped it would just be an update but there’s no update to do– thanks
Evi Cowan
I enjoyed your article above. I have only danced around Dreamscope but now I’ll read the tutorials and put them into practice.
Thank you.
Evi Cowan evi4044@gmail