
iPhone Photography – Tutorial – How To Create A Stunning Dali Inspired Time Piece Image
Our new mobile photography tutorial section is in full swing and we’ve received much acclaim from the mobile photography community, thanks to all. If you’ve missed our previous tutorials you can read them here. I recently took part in the A Day In The Life of Series on theappwhisperer,com, if you missed that you can read it here.
I was inspired by Dali’s painting; “Persistence of Memory with the melting clocks for this tutorial. It was this work that provided my inspiration as I created my image, “Holy Dali!”. Dali’s painting certainly is better….but I had a blast creating my image!
In this tutorial, I used the following apps: Fisheye Lens, Iris, and WaterMyPhoto. (I’m pretty sure that you could find other apps that would do the same thing so before you download any of these, you might check what you have.) Plan lots of time to do this as there are lots of “little steps” involved. I would suggest breaking the work flow into a couple of sessions just to keep things fresh.
Take a look at the steps below and see if you can also create something like this. All the apps I’ve used are available with links at the end of this article.
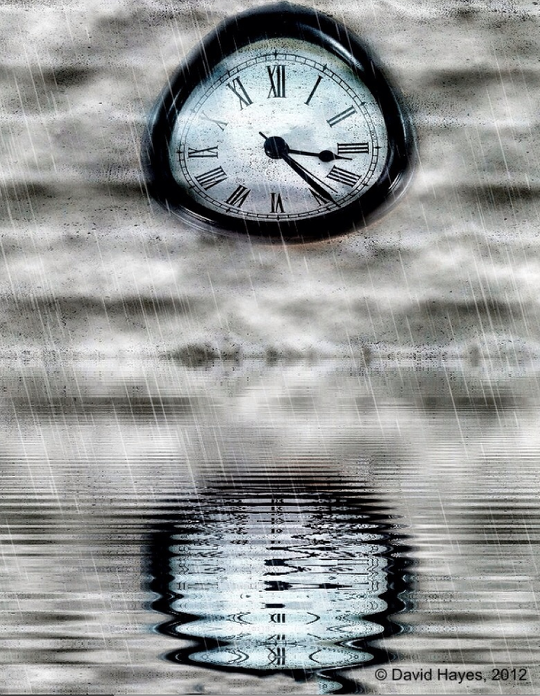
Final Image
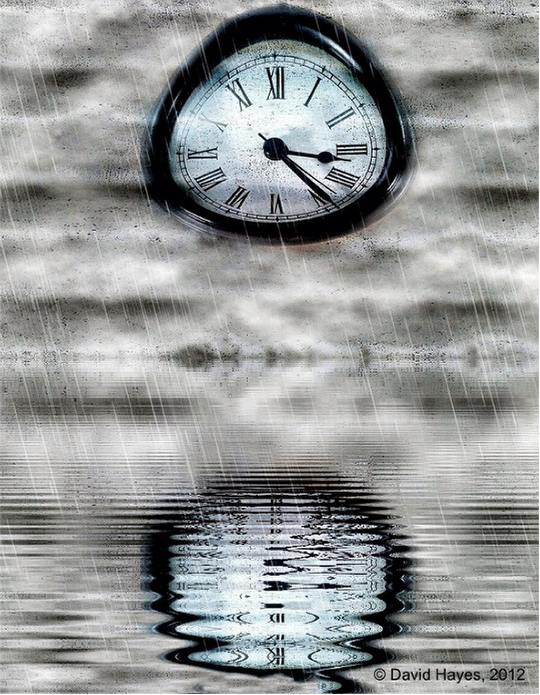
Copyright Image – David Hayes – ‘Holy Dali’ – Apps used – Fisheye Lens, Iris Photo Suite, Watermyphoto
This is the final image, the one we are going to show you how to recreate.
Step 1
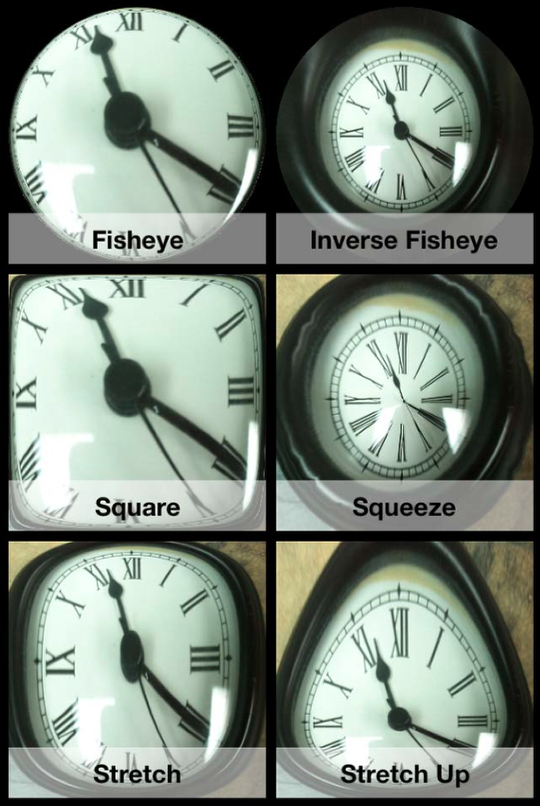
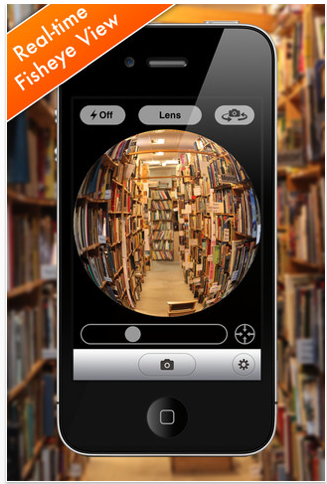
To start things off, I opened the FishEye Lens app and pointed this at a small mantle clock. As you can see in the above screenshot, the app gives you six different lens to pick from….for this tutorial I chose “Stretch Up”.
Step 2
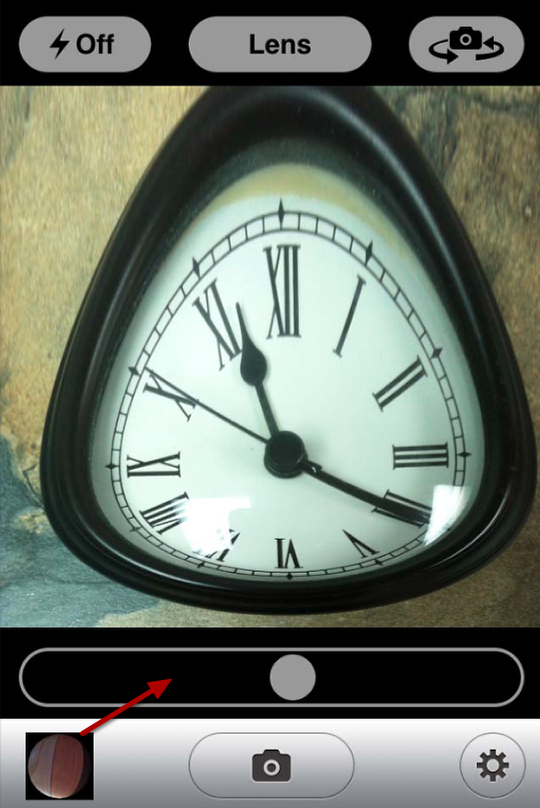
Use the slider bar to determine how much of a distortion you want….
Step 3
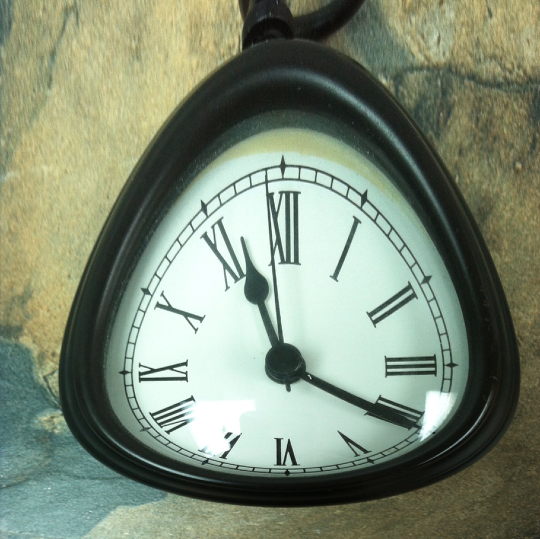
And I settled on this! I saved this image to my Camera Roll and opened up the app, Iris Photo Suite.
Step 4
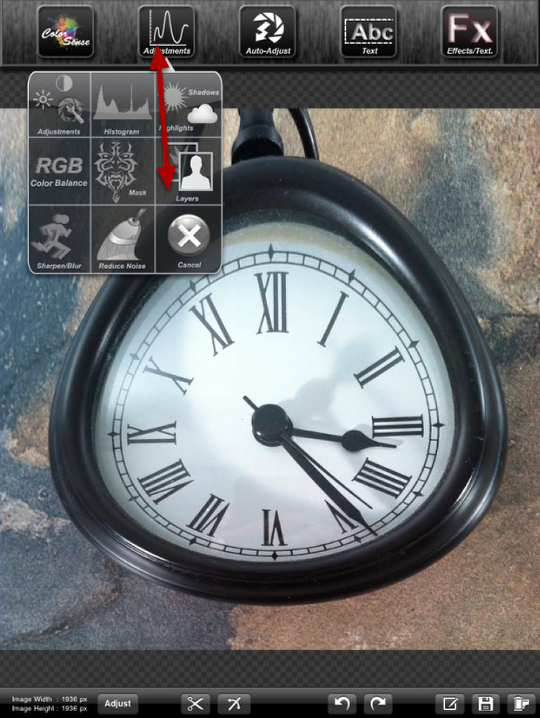
In Iris, I opened the FishEye lens image. Clicking on the Adjustments button, I then clicked on Layers….
Step 5
When this screen came up, I clicked “set as base”. Once you click on that, this screen will disappear leaving just the clock image. Now…and I don’t have a screen shot showing you this…at the bottom right corner of the screen there is an icon that looks like film roll. Click on this and a screen will come giving choices for new images. Click on “Open a New Image”. This will take you to your folders where you can pick a background image. (Of course you could pick “Click a New Image” and take one using your camera apps!).
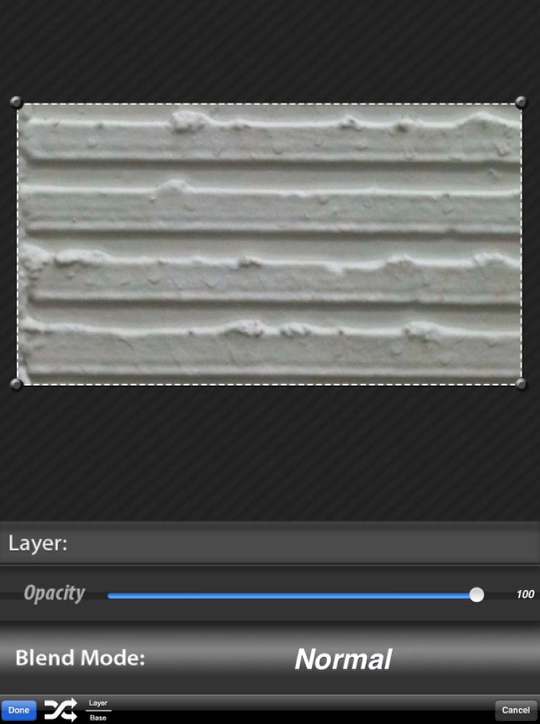
Step 6
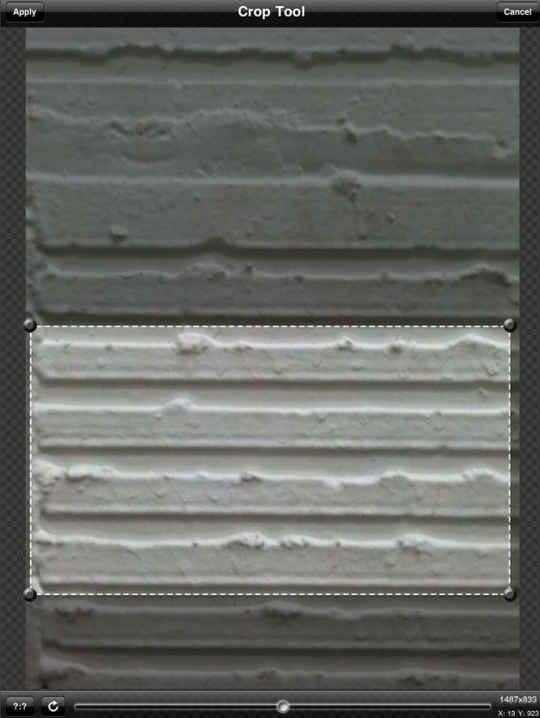
I opened a pic that I had shot earlier of a wall. (I chose this one because it gave a nice feeling of a cloudy sky which I needed for my composition.) Pulling up the crop control from the bottom tool bar, I selected a portion of the wall, using a 16:9 ratio. (As you will see, this ratio seems to work best when using the WaterMyPhoto app).
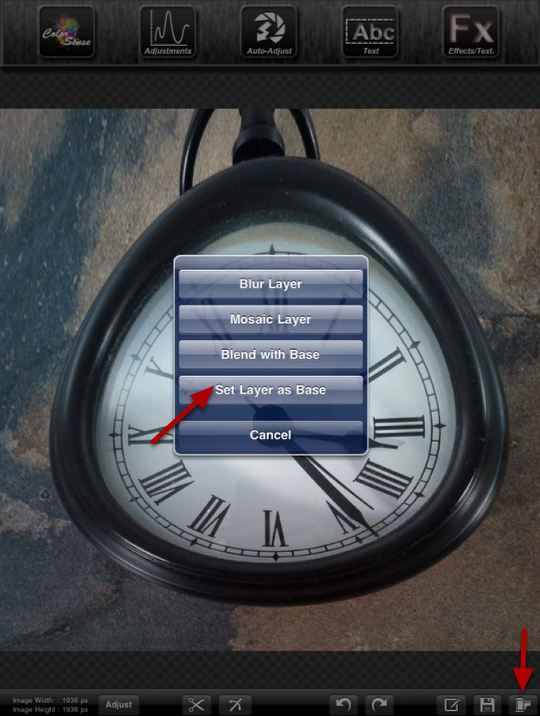
Step 7
That done, I repeated the Layer step from above, but this time I picked “Blend with Base”.
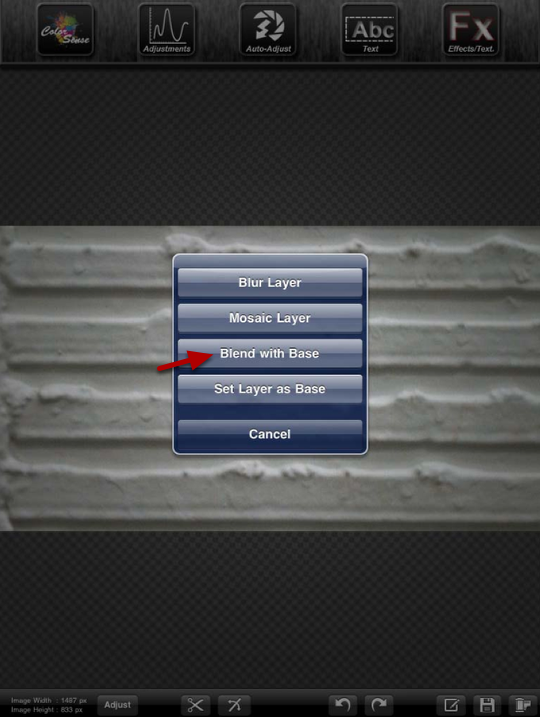
Step 8
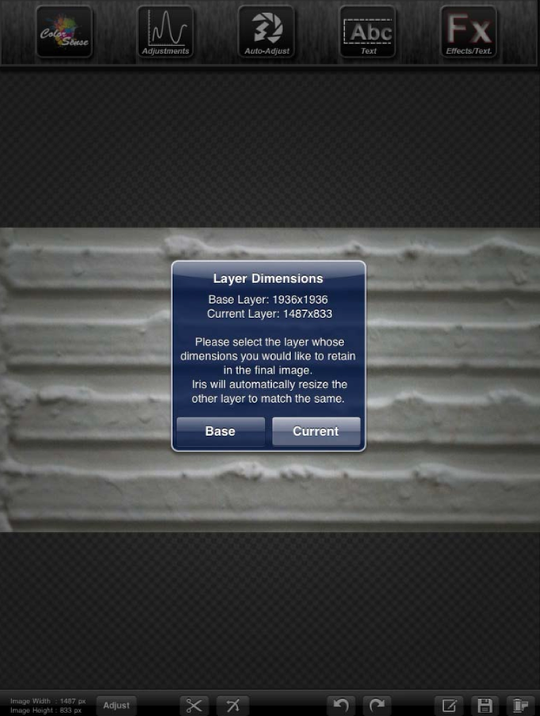
Clicking on “Blend with Base” brings up this screen. I picked “Current” as I wanted to have the clock image fit within the wall background.
Step 9
It is in this screen that you will do the initial positioning of the clock image and the blending. The first thing you need to do is to click on the Layer/Base arrows in the lower left hand corner…next to the done button….reversing the order of the layers.
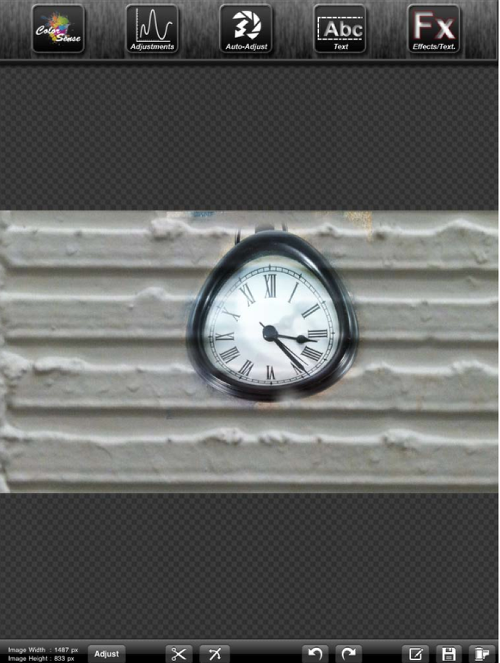
Step 10
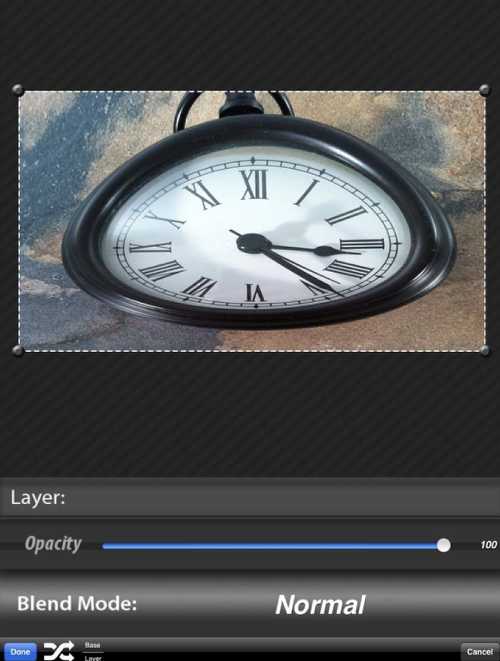
Clicking on that will bring the clock image to the front. (All of this may sound a bit backwards…but the blending process seems to go smoother this way!)
Step 11
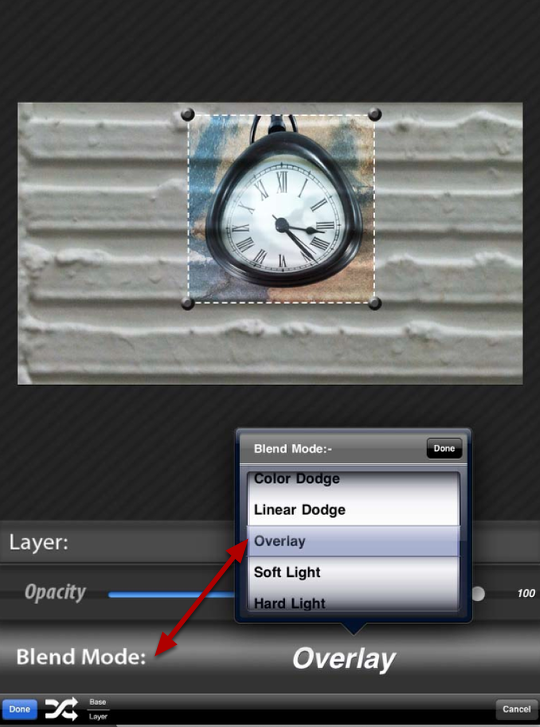
Using the toggle points around the clock image, resize/reposition the clock so it’s in the top center of the wall background. Once you’ve done that, click on the “Blend Mode” bar and a pop-up of blending options will appear. Click on “Overlay”…then use the slider bar to determine your blend percentage. For this image I stayed at 100%. To finish up this step, click on the “Done” button in the lower left corner.
Step 12
When this screen appears, click on “Draw Mask”.
Step 13
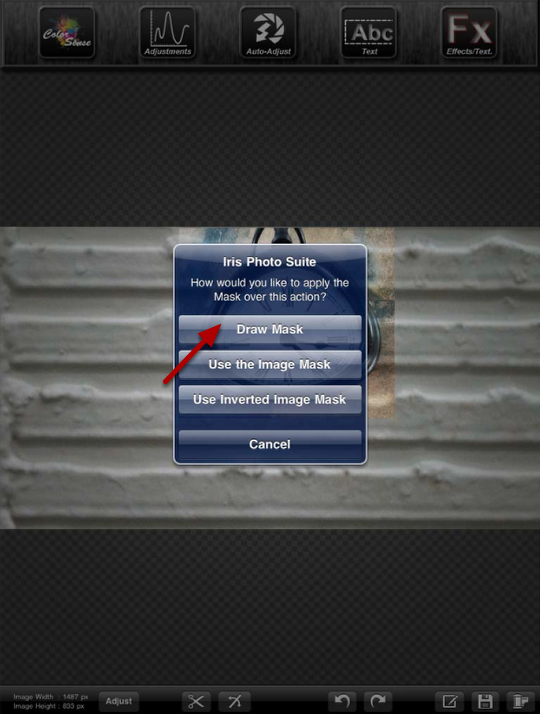
When this screen appears, click on “Draw Mask”.
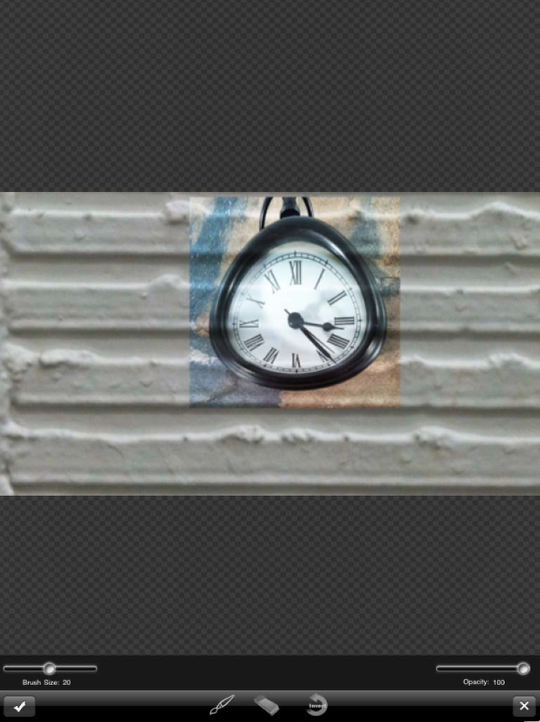
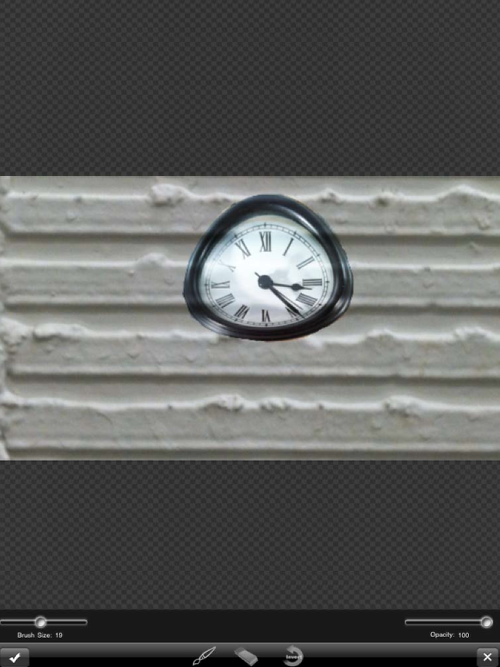
Step 14
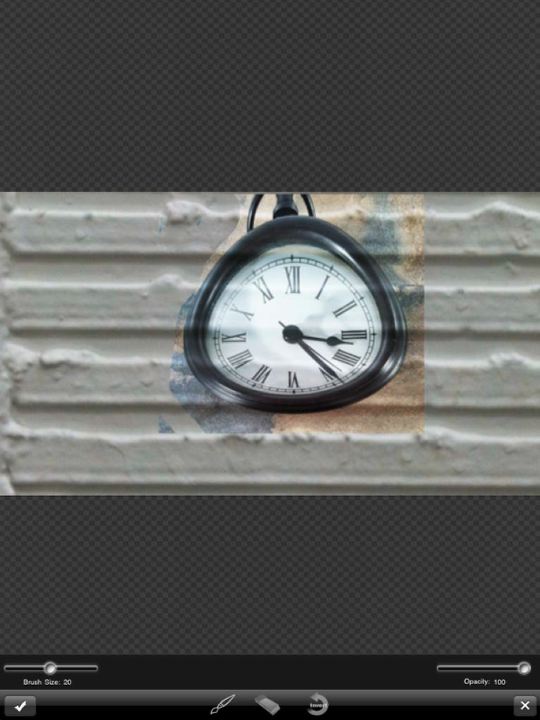
Now you can mask out the background around the clock image using the “paint brush” tool. (Iris does allow you to do the two-finger pan/zoom so you can get in tight with your mask).
Step 15
Step 16
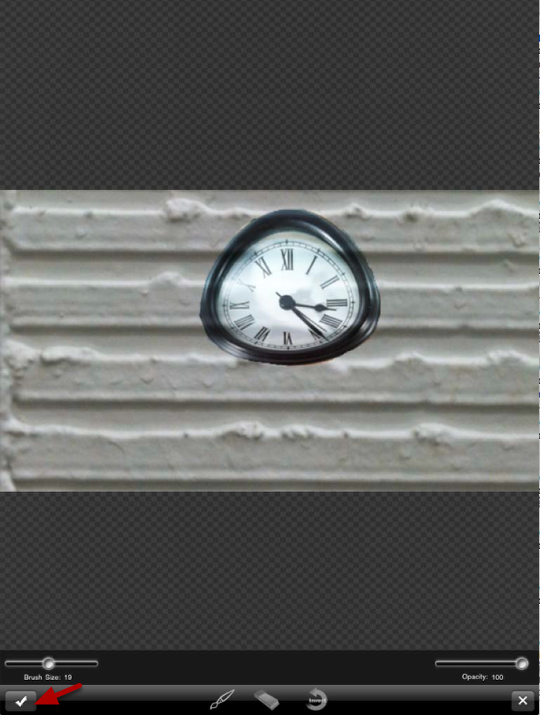
And…to finish the blending process all together, click the “check mark” symbol in the lower left corner. Now it’s time to “process-up” this image.
Step 17
I’m going to speed things up a bit and skip a couple of screens, but I think you be able to figure things out. Once you’ve clicked on the “check mark” symbol in the last step, Iris comes back to its home screen. Click on the FX button on the top right corner…and a selection of filters, etc. will come up. On the bottom tool bar, click on the “More” button….then on the “Dust ‘n’ Scratches” button.
Step 18
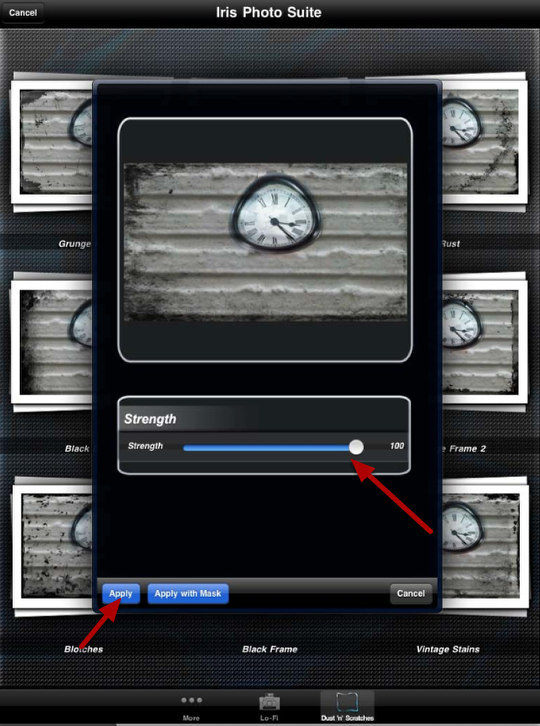
In this screen, pick “Classic Grunge”. Keep the strength at 100 and click on “Apply”.
Step 19
In this screen, pick “Classic Grunge”. Keep the strength at 100 and click on “Apply”.
Step 20
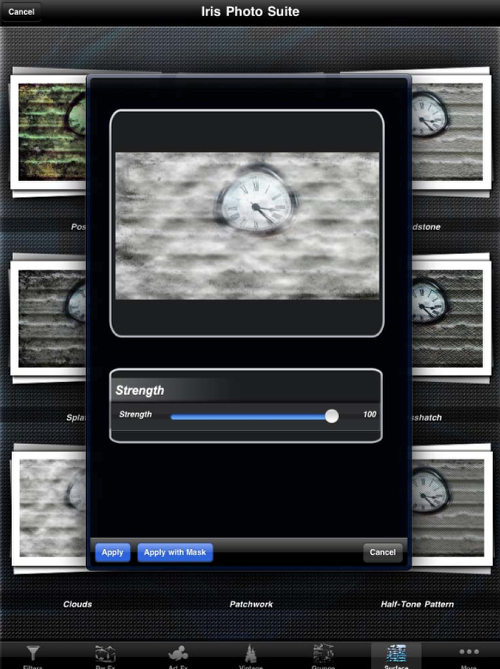
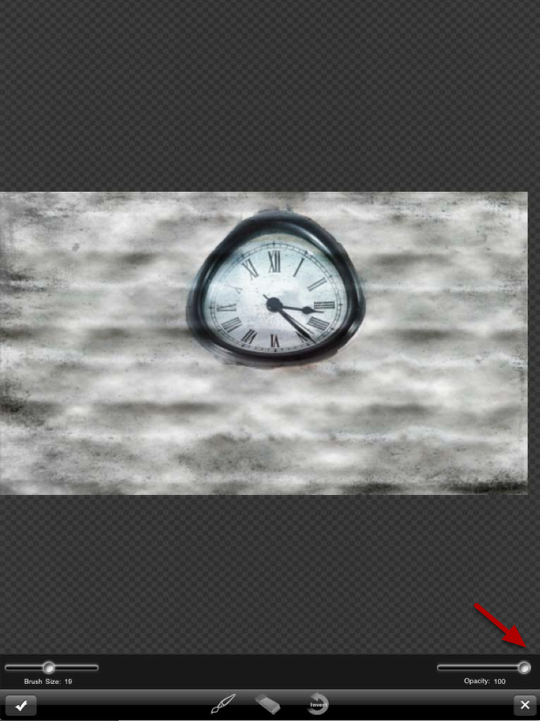
Once you’ve clicked “Apply”, you’ll be returned to the home screen. Repeating the steps….click on FX, then “Surface”, then “Clouds”. Keep the strength at 100, but this time click on “Apply with Mask”. A screen will appear as before so you can paint out the clouds from the clock face. Click on the “check mark” in the lower left corner when you’re done. Time to move to the WaterMyPhoto” app. Save your work to your Camera Roll and take a break!
Step 21

Step 22
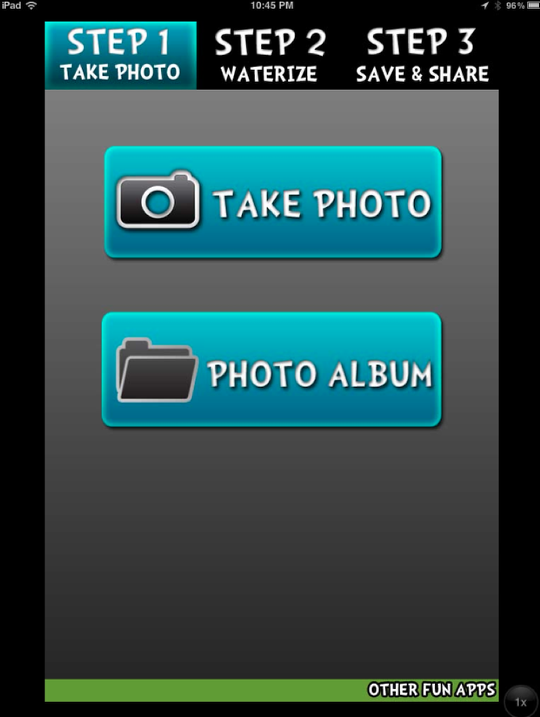
The WaterMyPhoto app doesn’t have much in the way of controls or options…which is a good thing actually! When you open the app, you’ll get this screen….pick “Photo Album” and open your image.
Step 23
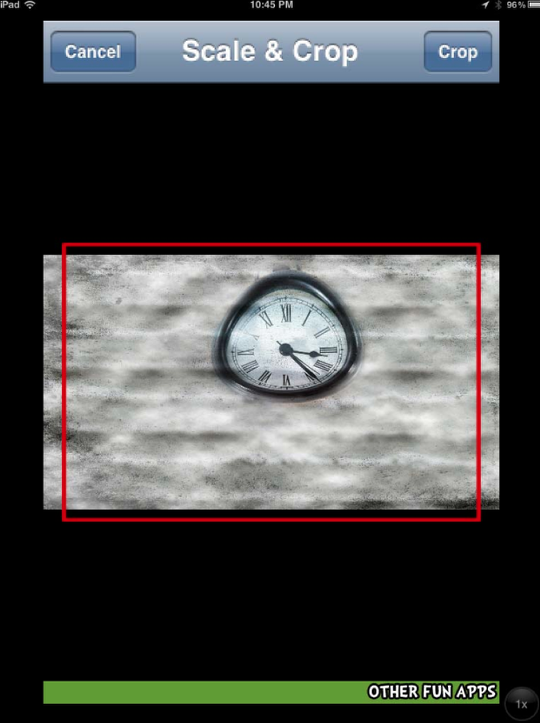
WaterMyPhoto has only one crop size…and you’re looking at it! You can reposition and do a little “resizing” of your image, but that’s about it. Make sure to place the clock image towards the top of the crop lines…this will also place the horizon line. Click on “Crop”.
Step 24
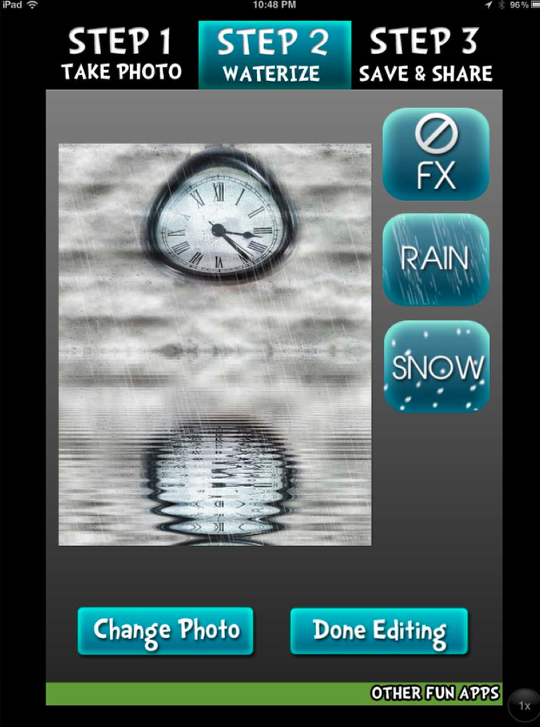
The “waterize” screen will come up and you can see what you have so far. If you like where the horizon line is placed then you can decide if you want to add “rain” or “snow” or nothing at all. Or…you can start over with the crop step until you’re happy with what you get. (I had to do this a couple of times myself!) I picked “Rain”…and then clicked “Done Editing”.
Step 25
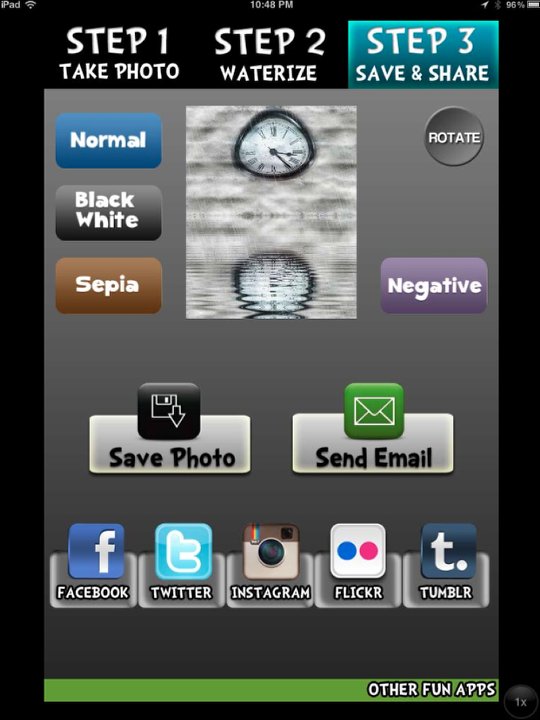
In this step, you have the option of leaving the image alone and saving/sharing it…or use a black and white, sepia, or negative filter. You can also rotate the image. I didn’t use any of these, picking “normal” and saved to Camera Roll. Done!! Surreal!!
Final Image
Copyright Image – David Hayes – ‘Holy Dali’ – Apps used – Fisheye Lens, Iris Photo Suite, Watermyphoto
As you can image, it took me a bit to put this all together. If you’re experienced using these apps, I’m sure you’ll either know faster or “different” ways of doing this…which is great. Just have fun!!
David Hayes
David is Head of Technical Tutorials here at theappwhisperer.com and this role adds to the many things David has done in his life…some of which he considers more significant than others. Yet, he feels all have made him the artist he is today. He’s been a cook at a truck stop, a janitor at a military base, worked in advertising, been a banker managing other people’s money, and an elementary school teacher. Trained as a photographer as an undergrad, he’s recently returned to these roots and now considers himself foremost a photographer and secondly a mixed media artist.You can find David’s work on many other popular websites including his own: http://www.clearerreflections.com.

3 Comments
Julie
Another great tutorial, Dave. Learned several new things in this one, actually!
Holly Dean
A many-layered and altered image! The result is fantastic and I have discovered more apps. Thanks, Dave!
David
Thanks Julie and Holly! This was fun image to build…and I learned a lot while making it myself!!