
ProCreate Tutorial By MaryJane Sarvis – Adding To Your Brushes Collection
We are so pleased that MaryJane is back with this brand new and excellent ProCreate tutorial to help you add to your brushes collection. MaryJane is an inspiration, over to you MJ (foreword by Joanne Carter).
ProCreate can be purchased here, it retails for $4.99/£2.99.
There are 3 basic ways to add to your brush collection:
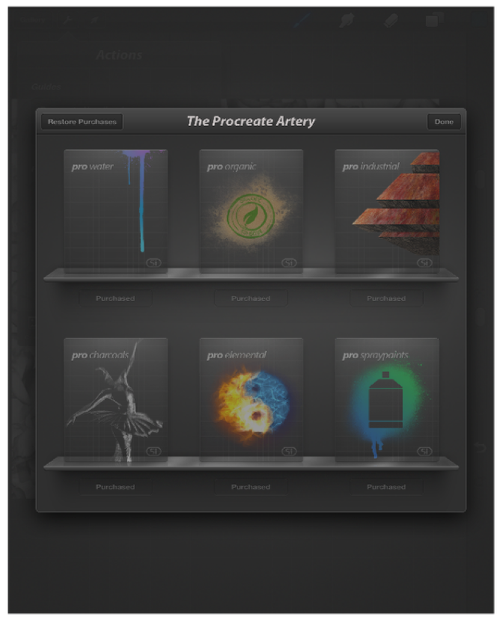
1. Purchase the extra sets from Procreate Artery. You’ll find the link at the far left on the top brush collection strip. I’ve found uses for all of them.
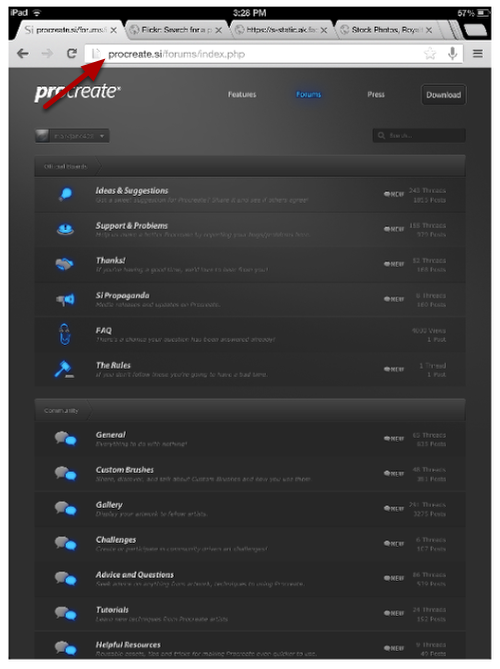
2. Go to the Procreate forum and go to the custom brushes sharing page. I’ve gotten some of my favorites here.
3. Make your own! It’s tricky at first but really exciting once you get your flow.
ProCreate Artery
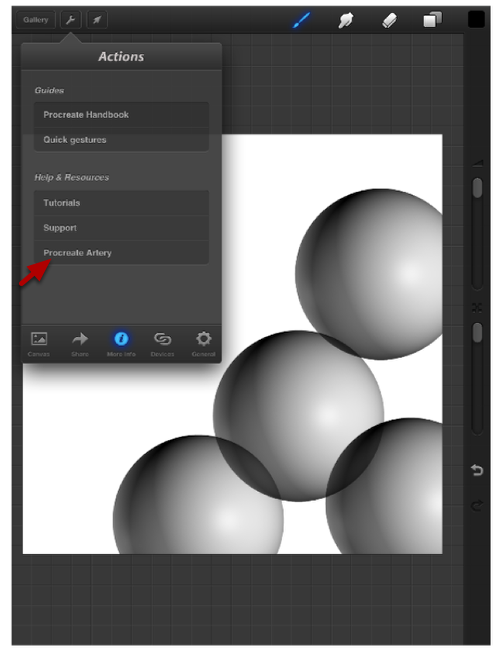
You can purchase more brush sets within the app from two different tabs. You’ll see Procreate Artery at the far left end of top brush menu. There’s also an entrance through the wrench, top left under the info tab. Most people end up buying them all. I don’t regret any.
Shared brushes from Procreate Forum
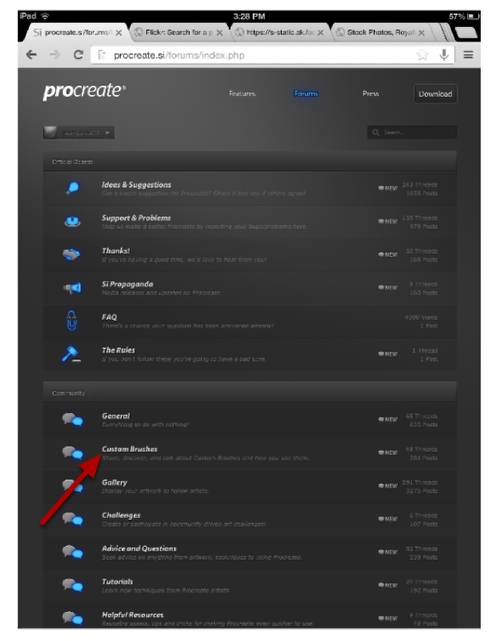
Go to their website, then custom brushes. They download to either Dropbox or directly into the Imported group. I just got a great group I tested in blue. You can move brushes into your preferred group by tapping and dragging directly into the title on menu bar. It’s a bit tricky and takes a few tries. I have yet to share mine, I will as its only fair!

Make Your Own!
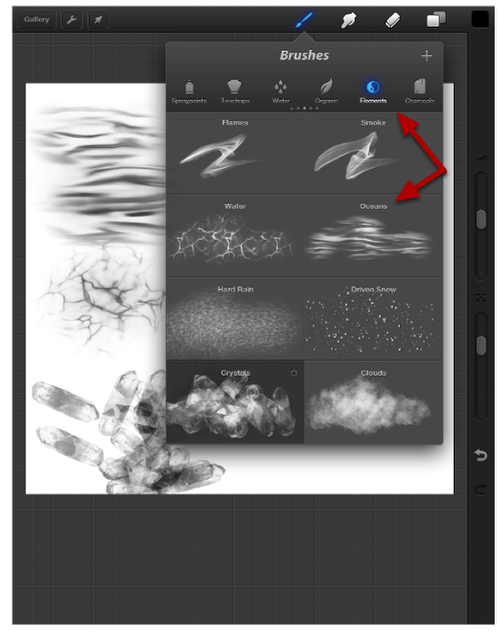
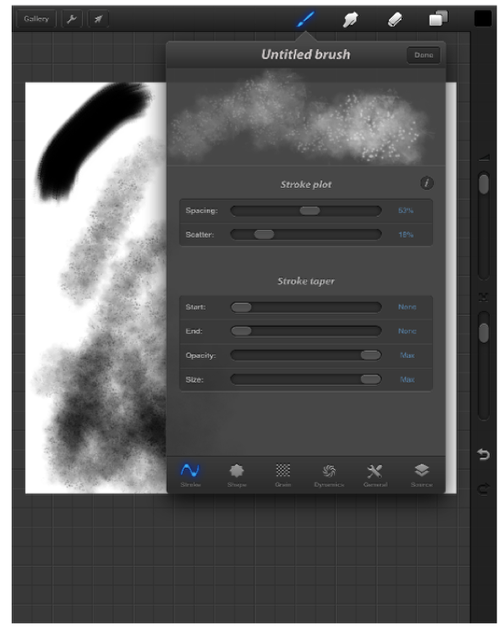
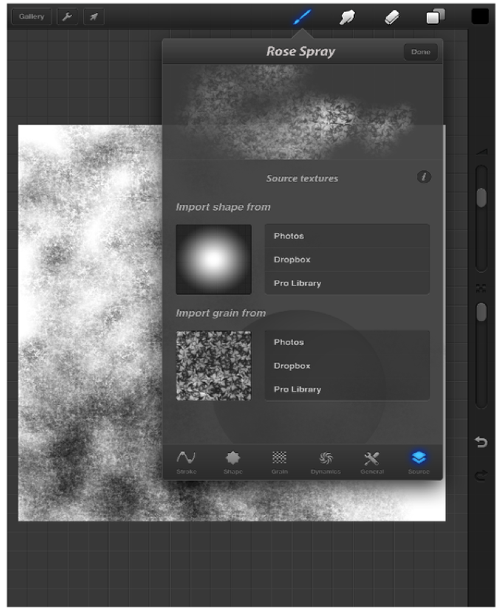
Start by observing any brush. We’ll do Elements group. Double tap an individual brush. (Oceans) It will flip to show you the brush structure details. Notice the 2 windows. Observe the choices in each.
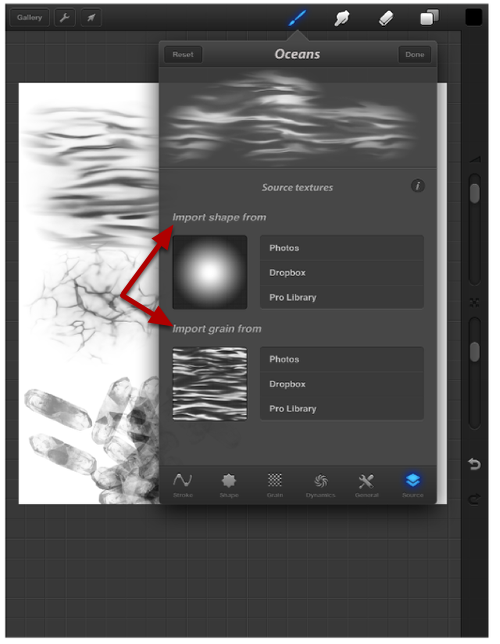
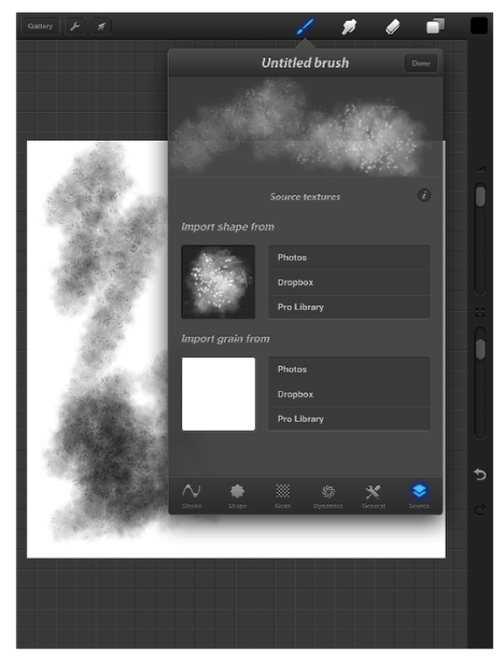
Top-import shape from –
Bottom-import grain from –
All of these brushes are made from the pro library choices. You’ll be styling your new brushes in this way. You can also edit each and all of the existing brushes from the menu on the bottom strip on each brush profile.
Basic Recipe

For your first tries make a few from the choices in the pro library. Hit the + sign in the upper right of any brush group. You can add to any group. The panel will rotate. Notice on the bottom menu – Source must be blue. Then try different shape/grain combinations. (I keep a white canvas open and save my tests). To adjust your brush use this bottom menu to weak your brush. This is your basic recipe.
The general tab, dynamics, stroke etc. will all become familiar as you tweak. I’d recommend playing with them all. Also learn by examining each back panel to your existing brushes. Tweak them too. You can add and rename. Thankfully there’s a reset tab top left of your existing Procreate brushes so you can’t lose them.
To make a brush from your own shapes and grains, or any combo of both:
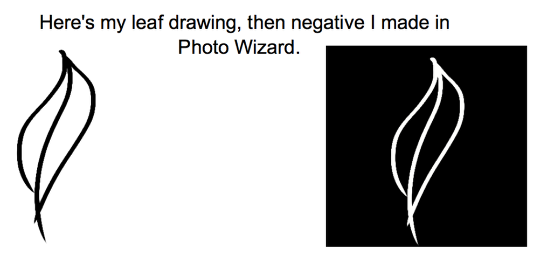
Take a drawing or photo of your desired brush. I’ll explain making stamps later. For a brush remember these marks ‘pile up’.
Then go to another app to reverse your image. Positive to negative. I use Photo Wizard. There’s several filters there to assist with this. Remember that lighter marks might disappear.
I also used other settings like brightness/contrast to sharpen for this particular brush.
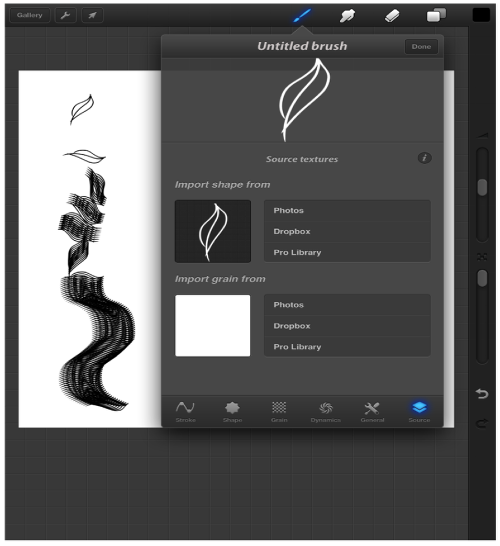
If I just barely touch the brush it acts like a stamp. We’ll get to stamps later. As I drag or paint with it you can see what all of the other settings along the bottom menu of each brush can effect. Size, opacity, scatter, the tips or how each stroke starts and stops is all there. Mostly I find that I have to tweak each brush individually. There’s no way other than trial and error to get the brush you want. At least in my intuitive style approach, though I’m sure you can investigate specific settings. I use the info I obtain from the brushes from the Procreate selections.
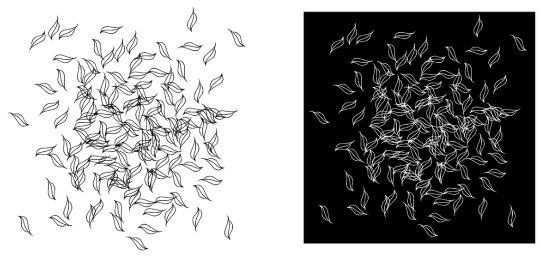
I decided that big leaf was too heavy so I made this drawing of small scattered leaves. I then reversed it.
I made two brushes from the above negative shown here. I think I’ll use them often now. I like the tiny spray. Save your negatives!
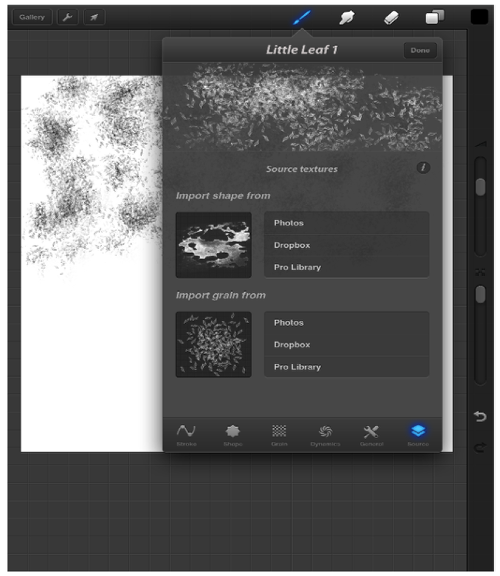
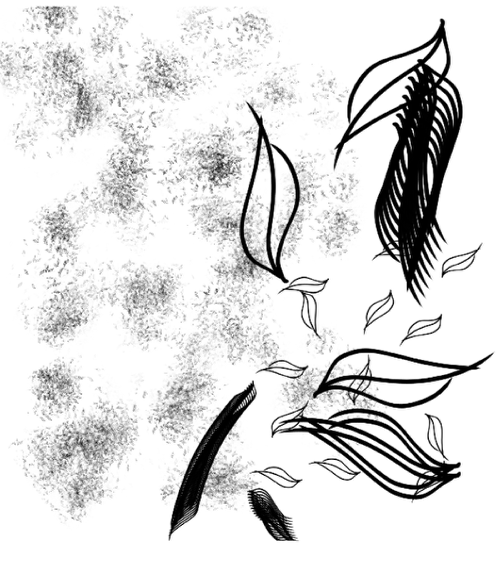
Little leaf 1- I used it as grain, then adjusted the scatter etc. so that its heavy then thick, but also does a wide sweep.
Very ScatteredLi
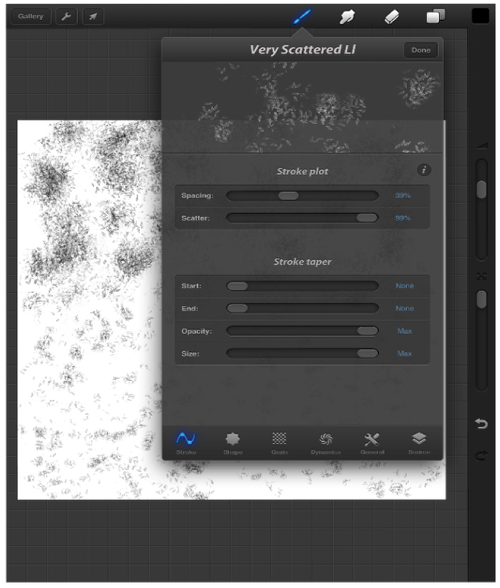
Very scatteredLl – shown at bottom left on canvas. I really changed the scatter, made it randomized and used a different shape. You can make a huge variety
of brushes from one negative.
Notice the dark stroke on top left of canvas. This was before I set the stroke spacing and scatter as is now on the settings shown. Most negatives will be dark until you’ve tuned it to your desires.
Shape (or negative) shown here. I made this brush from other brushes in Procreate by layering them, reversing the image, then returning it to Procreate as a shape. I still can use the grain box to create more options. I like it as is.
Stamps
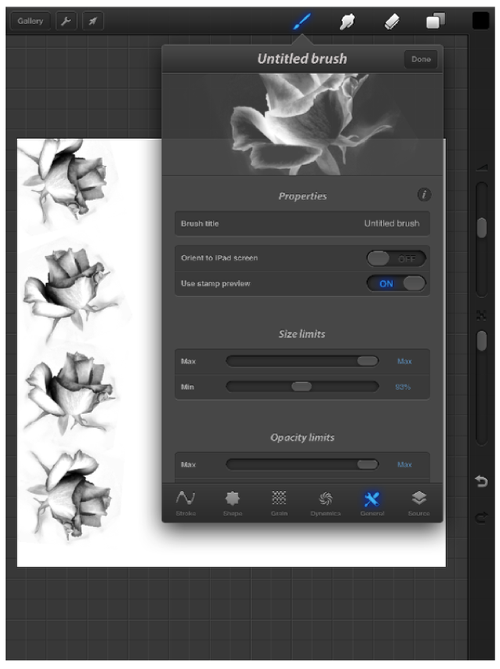
Any negative can become a stamp if you put the setting on stamp preview in general on bottom brush attribute menu. See blue highlights.
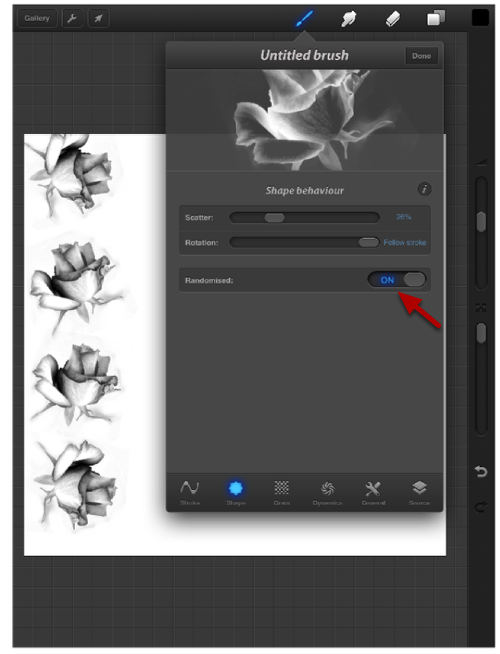
This was made from an photo of a rose then put through Photo Wizard. I also set the behavior to randomized. If I need them to be one direction I’ll just turn it off. Other than sizing and opacity, that’s it. *if you want to make stamps like in Juxtaposer that’s done in layers not as a brush necessarily.

I made the rose, then a few patterned and textures with the rose stamps. I ended up with another texture brush too. Possibilities are endless!
I made the rose, then a few patterned and textures with the rose stamps. I ended up with another texture brush too. Possibilities are endless! From stamp to texture. Note that a square pattern results until you fix your scatter. It’s still slightly visible in this brush. It really takes some time to get to know and to tweak each brush.
MaryJane Sarvis
MaryJane graduated from Bennington College majoring in painting, printmaking and ceramics. Growing up with a passion for Matisse and the many other colorists who involved textiles in their paintings, she chose to continue her evolution as an artist by developing methods of applying paint and dye to silks and velvets. Along with designing for a few major labels beginning in 1986, she grew her own fine art couture business. Her work is in many collections in the USA and the UK. She’s been featured in several publications including Ornament Magazine and has been involved in numerous shows and exhibits over a 25 year career. She’s best known for her knowledge and command of color.Always enjoying photography for both business and pleasure, MaryJane discovered the IOS system of editing and shooting with an iPhone in 2010. Thus began a whole new investigation into color imagery. Documenting the beauty of nature and Vermont, then editing to achieve the look of old oil paintings and textural color studies became a whole new fascination. She has also done a series taking 19th century wood engravings of women and collaged them with photos of her own fabrics. MaryJane feels that although this new realm of expression is in its infancy both personally and in the Art world, there is an excitement and depth that’s palpable. She plans to continue to develop new series including more abstracts and mixed media works on paper.MaryJane lives with her daughter, an up and coming artist/photographer, and cat on top of a high hill in Vermont, USA. They have a beautiful studio on their land.

8 Comments
Lola Mitchell
Thank you for this. It still feels like magic to me. Now you have given us a great tool to start experimenting with.
Davide Capponi
Great Tutorial! Thanks MJ and Joanne!
Brett Chenoweth
Fabulous! Thank you!
Candice Chidiac
Had lots of fun creating some brushes, Thank you so much Maryjane! xox
Maryjane Sarvis
I want to thank everybody here and Joanne for this opportunity! I’d love to hear and see more about your brushes.
Catherine
Thank you for all the hard work you put into this MaryJane! 😀
Cara Gallardo Weil
Wow MJ – thanks for the tutorial! I can see that I will have to battle and do lots of trial and error in order to understand it. You are such a whiz at it! oxox
Joyce Harkin
many thanks! Really useful and easy to follow, this could turn out to be addictive!!!!