
Mobile Photography / Art Tutorial – iColorama Cloning: From The Mundane To The Surreal
We are delighted to publish Jerry Jobe’s latest mobile photography/art tutorial for our reading and viewing pleasure. This time Jobe takes a look at the latest update to popular mobile art imaging app, iColorama. Read his thoughts as he puts it through its paces (foreword by Joanne Carter). Take it away Jerry…
iColorama retails for $2.99/£1.99 and you can download it here.
“Once again, a new release of iColorama adds art tools that further the reach of this feature-packed art app. The latest release brings the Clone Brush, Light leak textures, and a few other tweaks. I’m going to be concentrating on the Clone Brush in this tutorial.
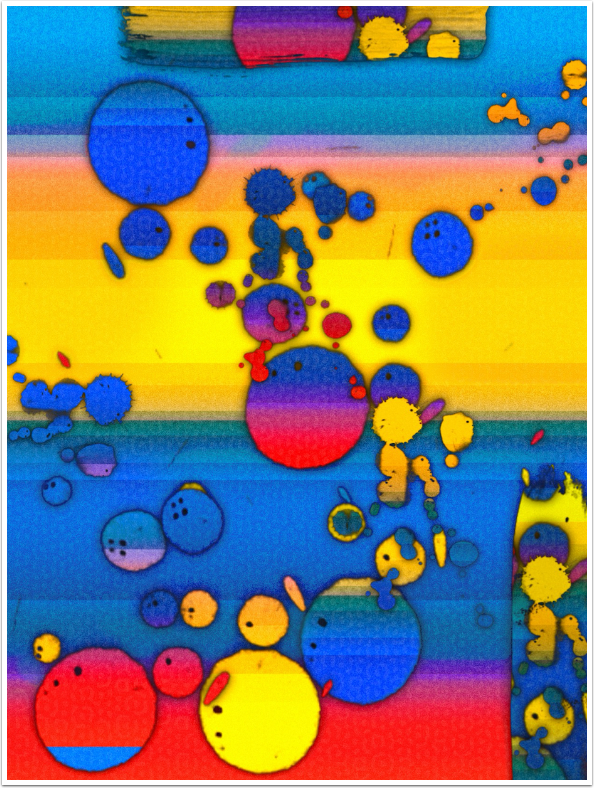
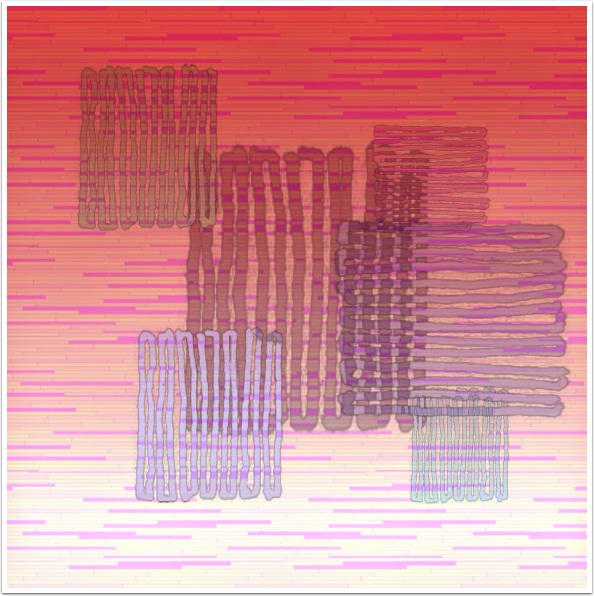
Why use a clone brush? You may, quite frankly, not need it in your artwork. But I’d like to show you some ideas for how to use them that you may want to incorporate into your artwork or just play around with. Here’s a result of play with the Clone Brush that made a nice, vibrant appstract”.
Clone is available on both the iPad version and iColorama S, the iPhone version. Screenshots in this tutorial were taken from iColorama, but some of the works, like the image above, were created in iColorama S.
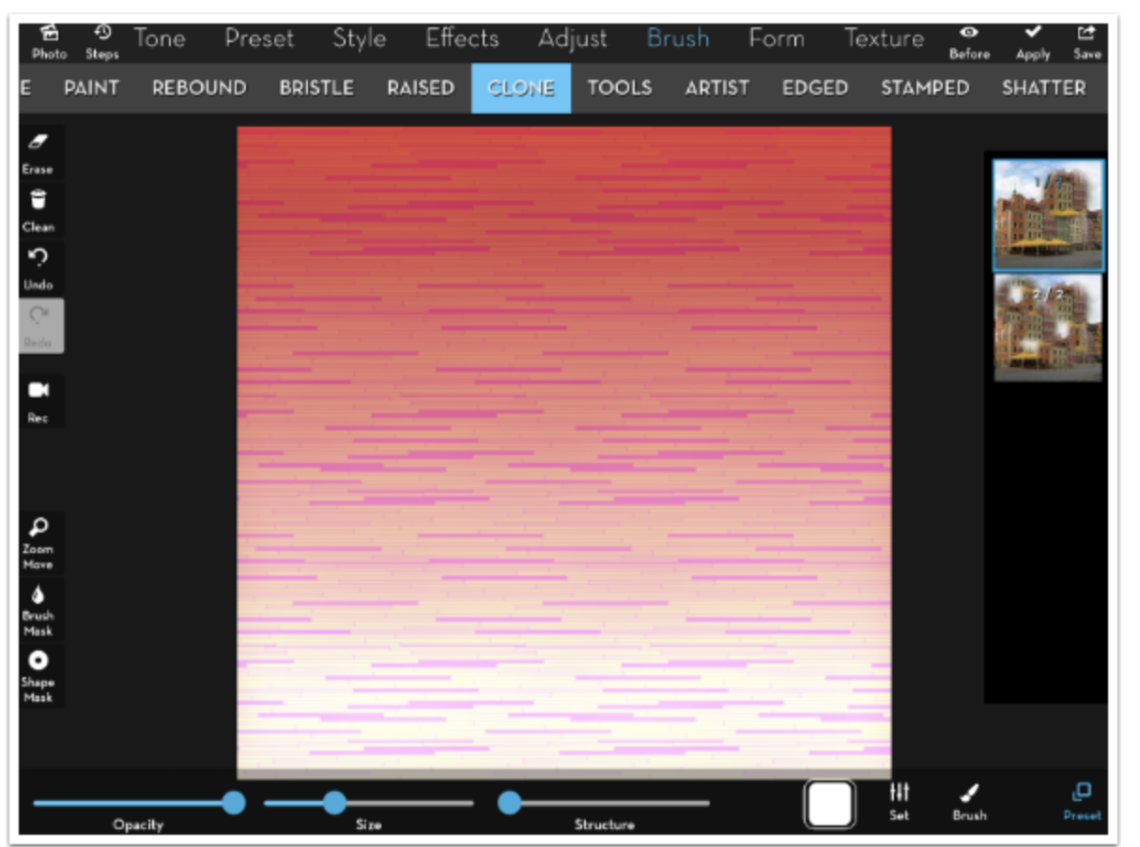
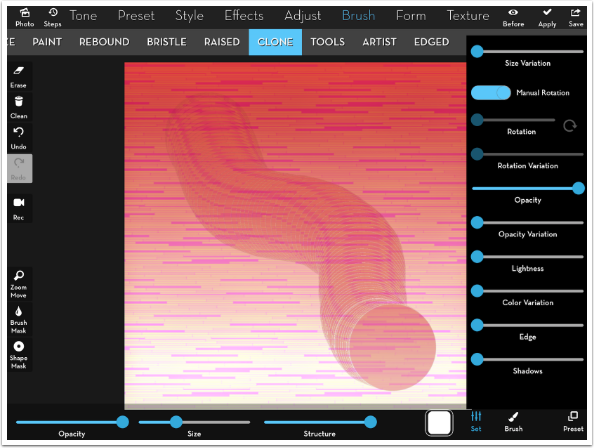
Clone is found under the Brush menu. There are two presets, which will be discussed later. At the bottom are Opacity, Size, and Structure sliders; a Color Picker; a Settings button; and a Brush selector.
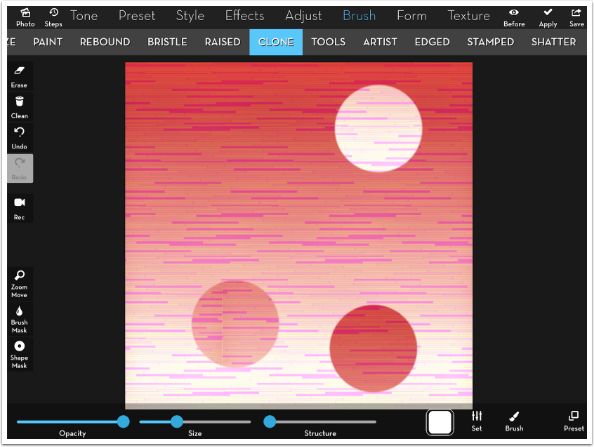
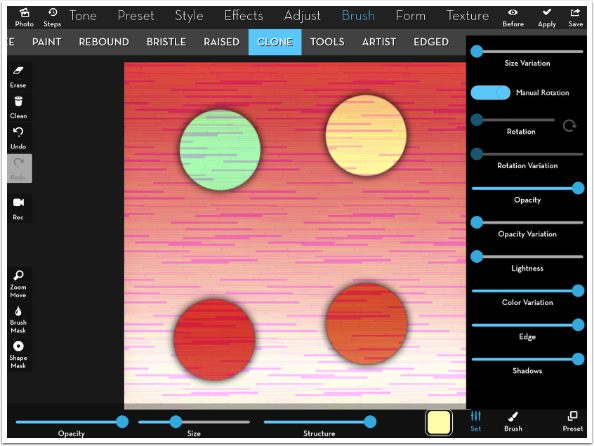
To make it easy to see the results of the Clone Brush, I have created a background that consists of a red-to-white gradient overlaid with a purple pattern of thin horizontal blocks.
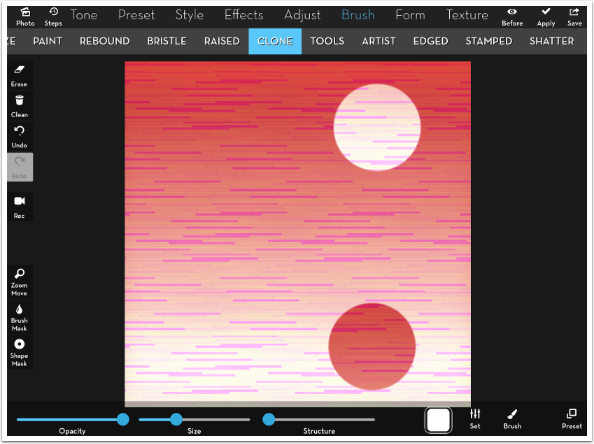
Using a hard-edged circular brush, I make two strokes – one that drags the darker red from the top to the bottom, and one that drags the white to the top. Within each circle is the pattern from my starting point, so it doesn’t match the pattern from the ending point. Notice that the lines from the pattern remain horizontal. Later, when I discuss rotation, you will see that only the brush tip rotates, not the contents of the brush. The cloned image never rotates or changes size. If I were cloning an eye from a portrait, the eye doesn’t flip around or become larger or smaller.
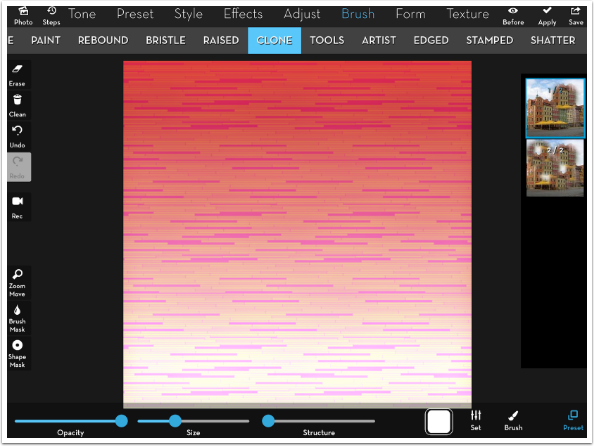
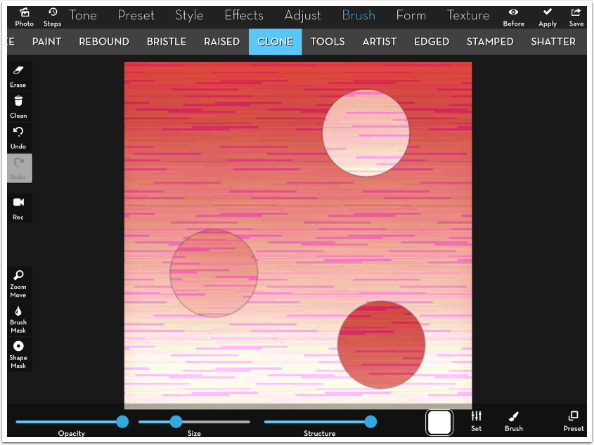
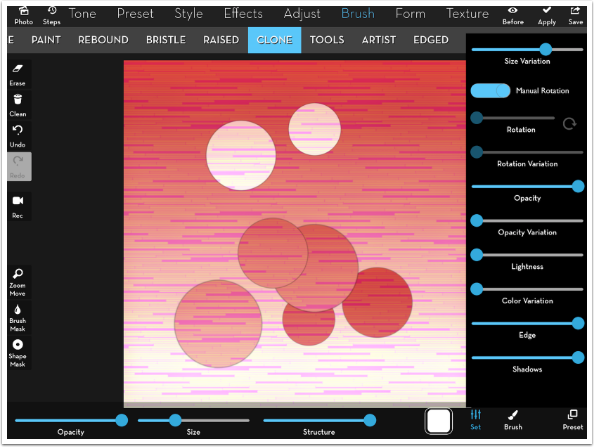
If the starting point is at the edge of the image, iColorama “wraps” the contents of the brush. In the image below, my starting point was near the center right edge. In the resulting circle, you can see the left third of the contents come from the center right of the overall image, while the right two-thirds come from the left center of the overall image.
This wrapping is even more obvious when I start from, or “sample”, the corner of the image. In this fourth dot you can see both horizontal and vertical wrapping.

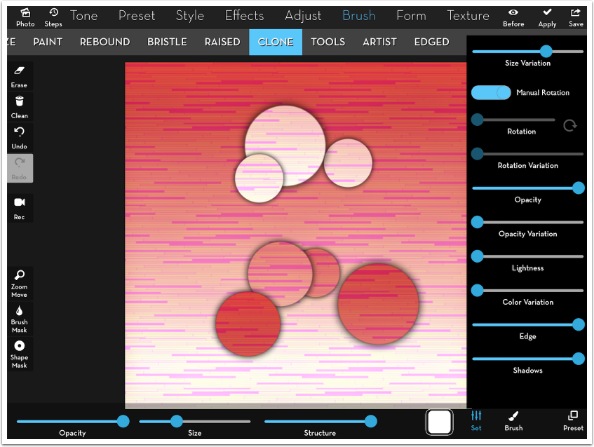
The Structure slider adds an edge to the brush. Since the example is using a hard-edged brush, you can see a thin, dark edge added with structure. When you use a soft-edged brush, the entire soft edge is made darker. This is a result that may not be exactly what you desire.
To make your brush strokes really “stand out” from the background, you may want to add Shadow as well as Structure. Shadow is the bottom slider within the Settings button, and can only be used when the Structure slider is greater than zero. You can’t have Shadow without Structure.
With some brush tips, the added Shadow will send out dark lines vertically and horizontally from the tip, so keep an eye out for that. This normally happens when the brush tip goes close to the edge of the allotted square.
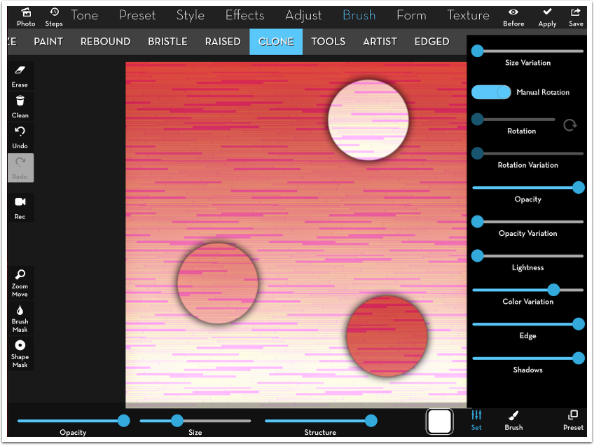
You will notice in the image below that I have raised the Color Variation slider, but the colors are exactly what were sampled from the starting point. Color Variation, as with all brushes in iColorama, requires a starting color to vary from. White, which is the default value in the Color Picker and does not recolour the brush stroke, does not give a good starting point for variation.
Below I have changed the Color Picker to a light yellow, and put the Color Variation at zero. Both strokes are coloured with the yellow.
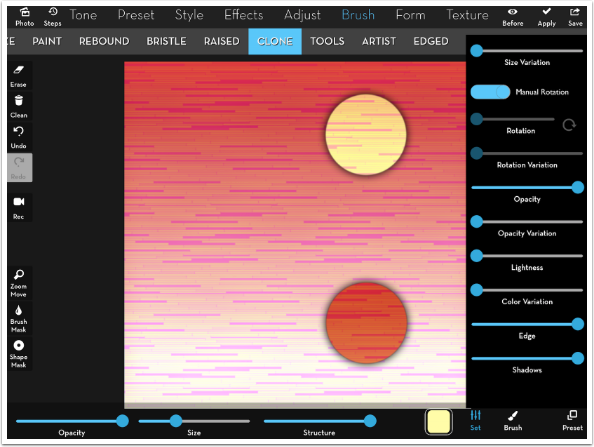
If I raise the Color Variation, then I see the colors change as I drag the brush across the screen. The controls are very fidgety, and I will often see the color change yet again as I lift my stylus/finger from the screen. If you want to have a specific color in the result, it is better to assign the color directly than try to mess around until you get the right color using Color Variation.
Size Variation, like Color Variation, is fidgety. As I raise my stylus/finger from the screen, the size will change from the result I think I’m getting when I stop my stroke. Use the Size slider to get a specific size for your brush tip rather than depending on Size Variation.
It seems that the larger size tips get a larger Shadow, if I’m looking at the image below correctly.
Edge is an interesting setting. As soon as you move it from 100 percent, you get a trail made up of multiple clones of your starting point.
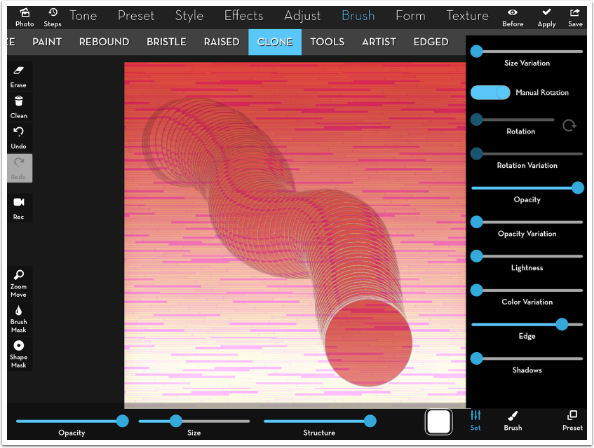
Moving the Edge slider all the way to the left lowers the opacity of the trail.
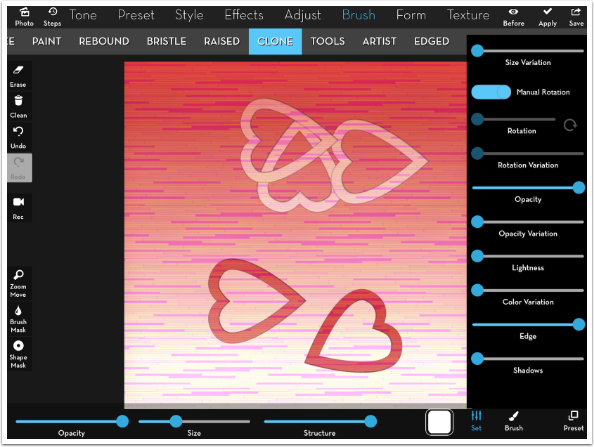
So far we’ve been using a circular brush, which does not show the effects of rotation. By default, the brush rotates as you move it across the screen. Just as with Size and Color Variation, it can be difficult to get the Rotation exactly correct when Manual Rotation is on. Below I used a heart-shaped brush tip, and my results are very close to random. Once again, the rotation changes as I lift my stylus/finger.
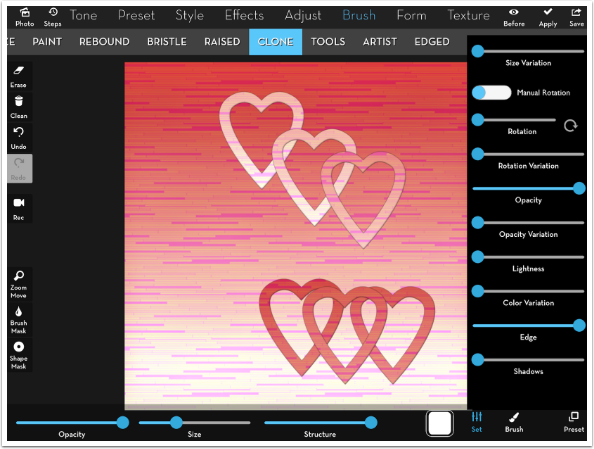
Turning off Manual Rotation leaves the tip in an upright position, unless I change it using the Rotation slider. Rotation Variation is yet another fidgety control.
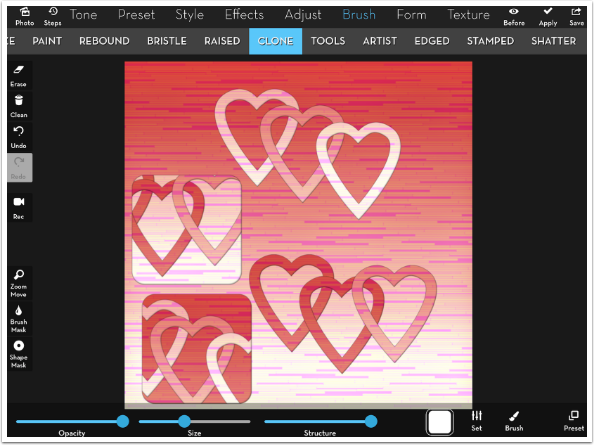
Up to now we have been using Preset 1. Preset 1 always samples from the original image. Preset 2, on the other hand, samples from the results. In this way you get a clone within a clone. Below I changed my brush tip to a round-cornered square and changed to Preset 2. Both resulting strokes contain the heart strokes within the square strokes.
So what can you use the Clone Brush for? Well, as I showed in the initial image and in the image below, you can make some fairly interesting appstracts.
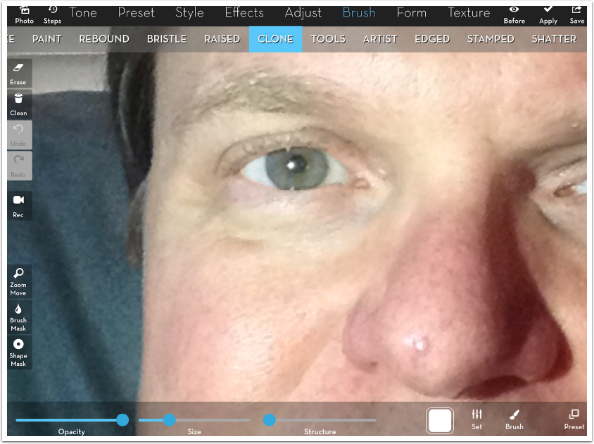
But you can also use the Clone Brush in more traditional ways: for retouching. In the image below, I want to remove the shiny bump on the nose and the dark under the eye. I choose a soft-edged brush.
By dragging from a nearby good patch of skin to the blemish area, I cover up the blemishes with good skin. Compare the above image with the one below.
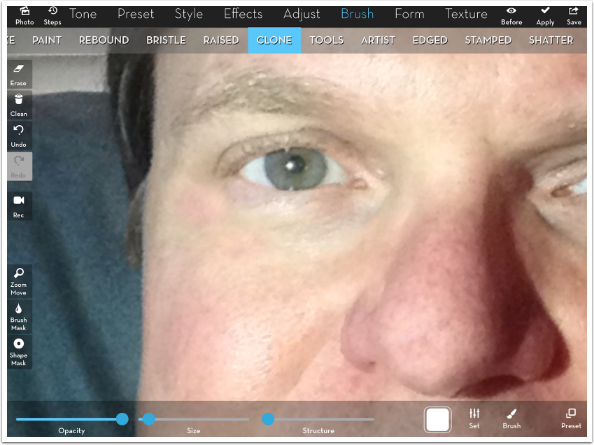
Obviously, you want to keep Structure at zero when doing retouching work, since Structure adds a dark edge.
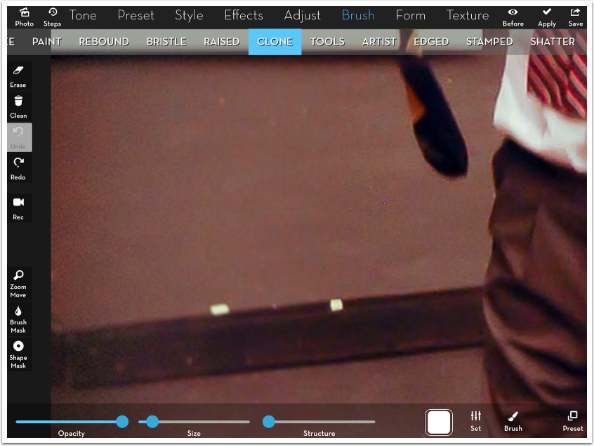
As another example of retouching, here’s an onstage photo with some distracting pieces of yellow glow tape (used to show actors moving around in the dark where the step is).
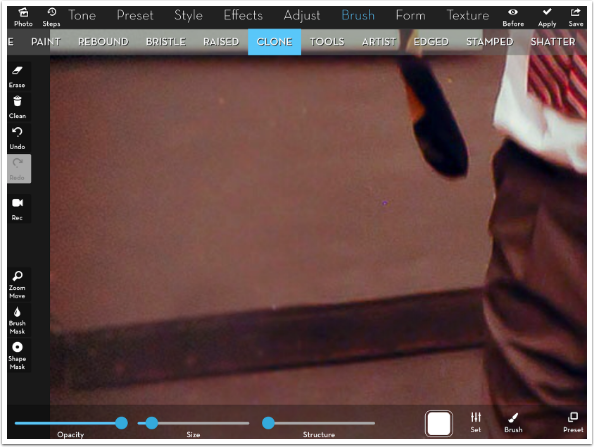
A couple of strokes with the Clone Brush and the tape disappears. It’s just a matter of selecting the correct starting point, or source, and lining it up correctly with the ending point.
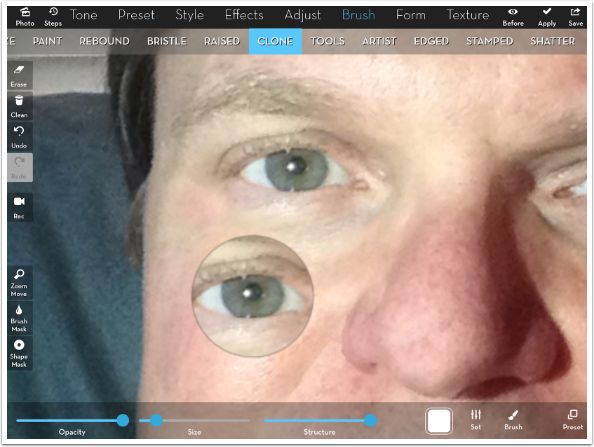
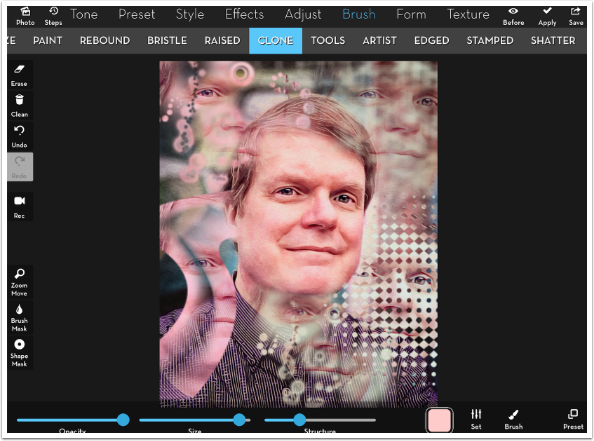
Why not combine retouching and appstract? Below I am cloning a portrait, using different brushes, to create a surreal version of myself. I used a little bit of Structure and some Color Variation, but turned off Manual Rotation.
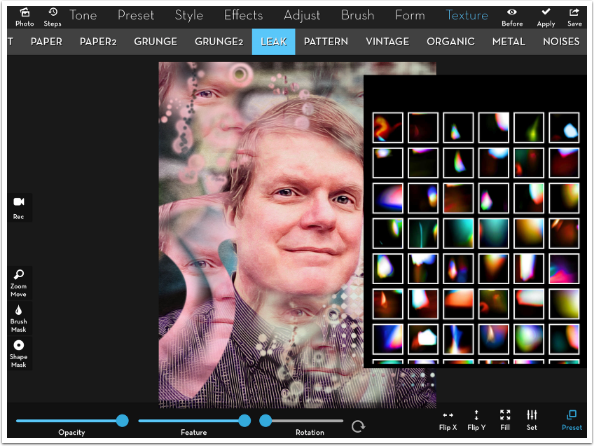
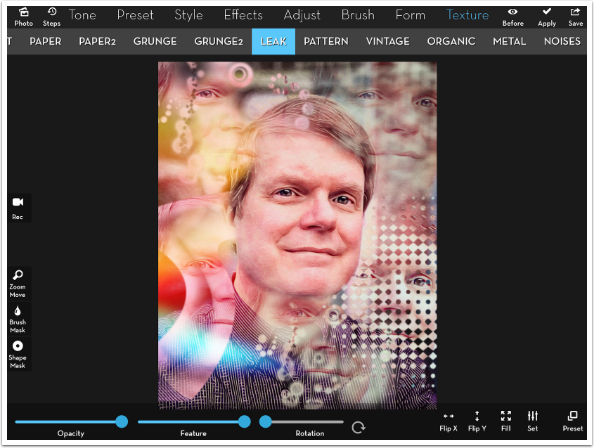
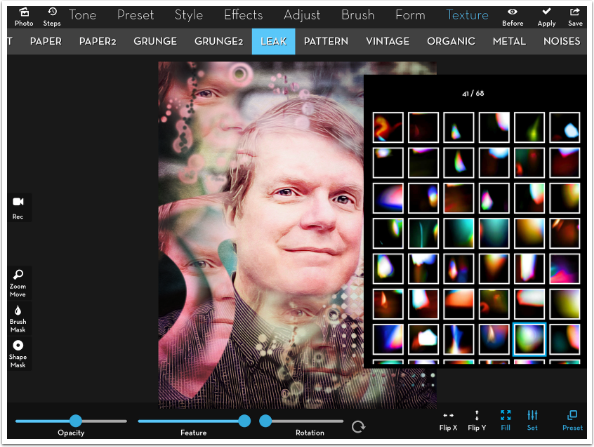
Let’s take a look at Light Leaks, found in Leak under the Texture menu. (By the way, iColorama S has now matched iColorama by putting Textures under its own menu. It is a welcome change.)

There are 68 different Leak overlays. These are in landscape orientation, and you can resize them and rotate them to get just the look you like. You can also flip them using the buttons at the bottom.
Below I’ve chosen one and resized it using a two-fingered pinch – just as I would resize in Effects>Blend.
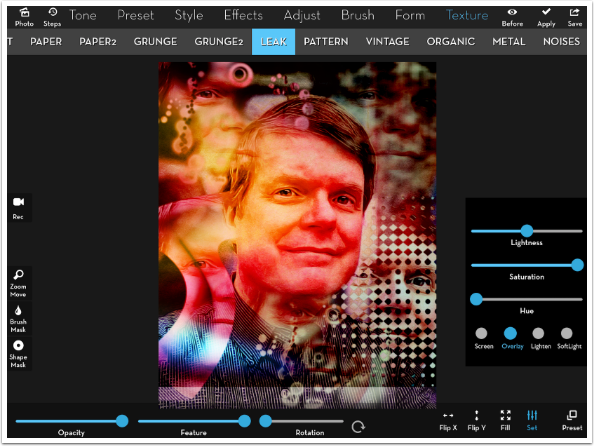
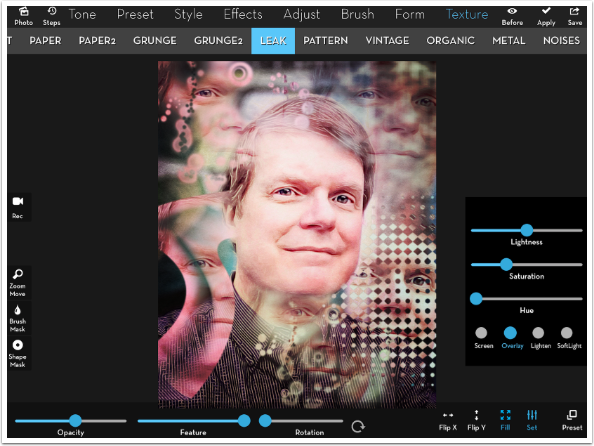
The settings include different blend modes for the Leak texture. When I change from Screen (the default) to Overlay, I can see that the texture as now placed does not cover the entire image. That doesn’t matter in Screen mode, but it does in Overlay, where the blacks of the texture affect the underlying image.
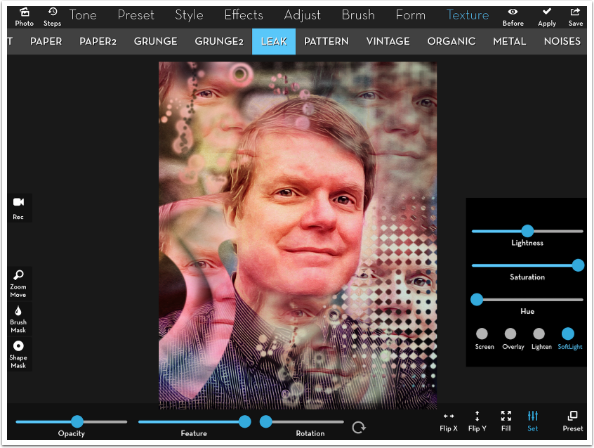
I made the texture even larger so it would cover the entire image, and changed the blend mode to Soft Light. (I could have used the Fill button also, but that locks the texture in place and does not allow you to move it around.)
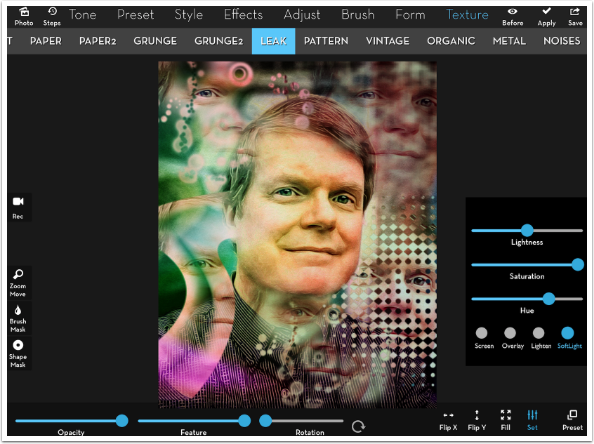
The Hue slider will change the color of the Leak. Here I’ve made a fairly radical change, and it makes my face a bit too green.
If you want to change the lighting without changing the color, use the Saturation slider. Below I’ve changed the Leak to number 41/68, and tapped the Fill button
By lowering the Saturation, I was able to reduce the green on my neck from the texture.
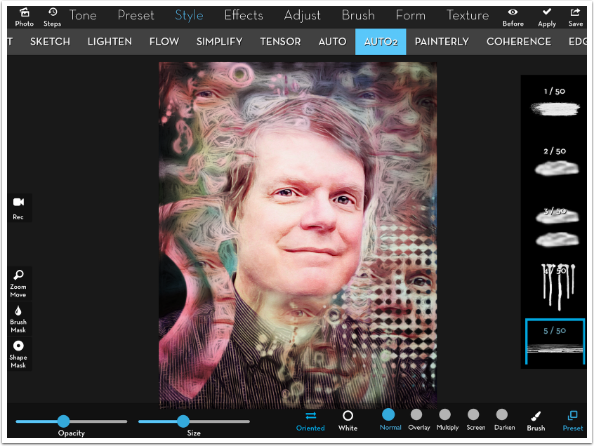
One of the tweaks I mentioned in the opening of this article is a fix to the Style>Auto2 painting option, which I covered in an earlier tutorial. Auto2 left a black or white border around the image; it did not paint to the edge. Now Auto2 paints to the edge. I lowered the Opacity of my Auto2, Preset brush 5 effect to about 35%, and masked it away from my face. I like the way that looks.
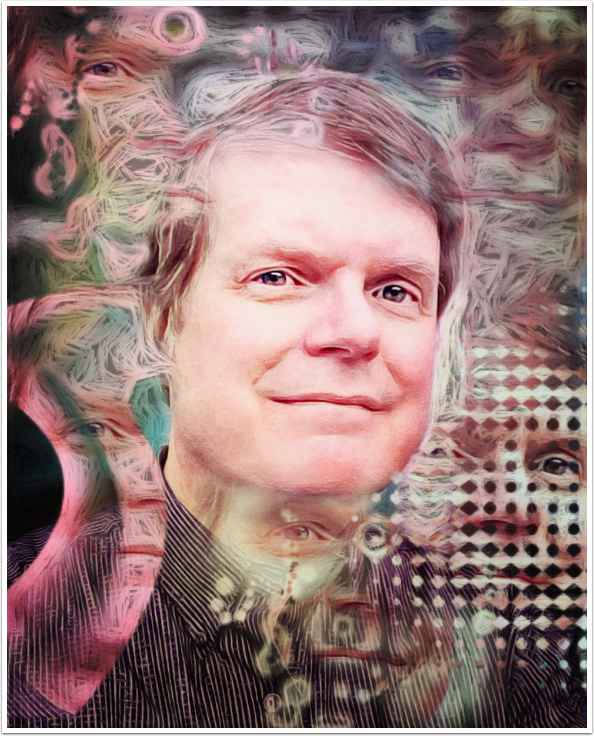
Here’s my finished surreal portrait. Who doesn’t like floating eyes?
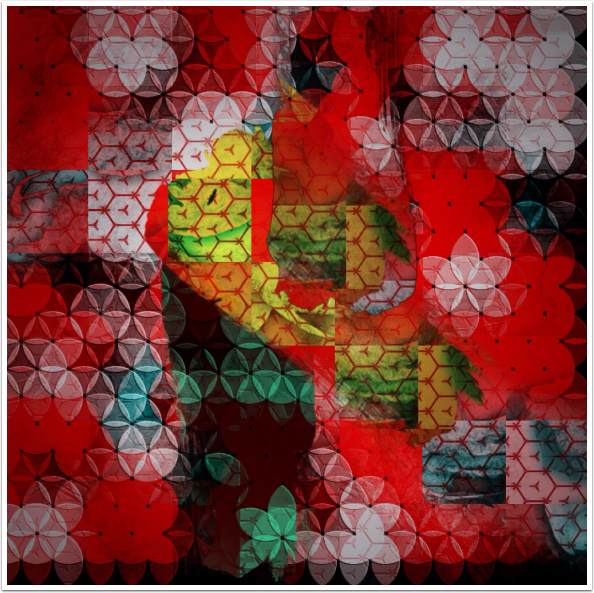
Clone Brushes, when used in appstracts, can fracture your image in interesting ways. This appstract used a Gradient, Pattern, and Clone Brush as seen above before finishing it with Tiles and masked Pixels.
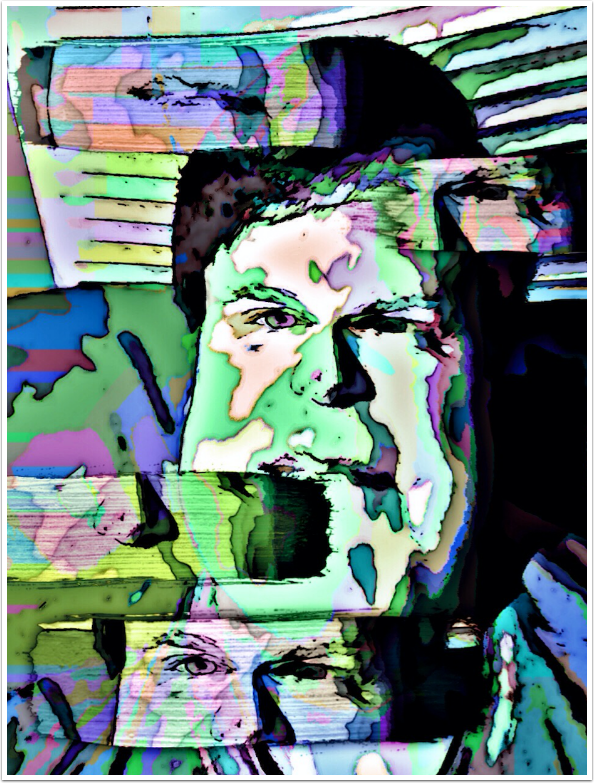
The next image used a deformed and “cartoonized” portrait and finished it off with four strokes of a Clone Brush. By using a Dry Brush tip, it looks as though the clones were swiped in.
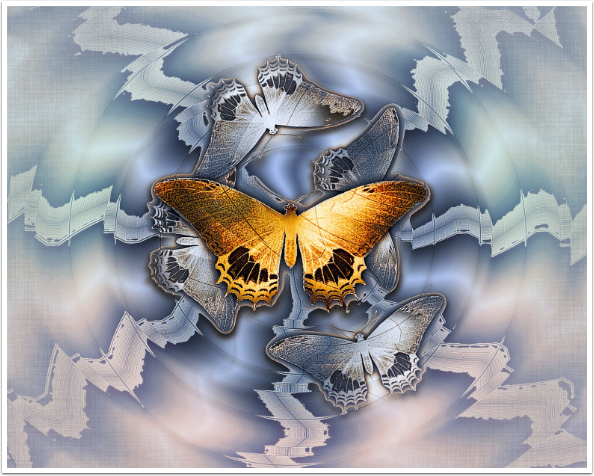
Choice of brush can make a big difference in your cloning. In my final example, “Experiments in Electricity”, I had great fun when using a butterfly brush included in iColorama.
It’s a rare tool that is equally useful in standard photography and in stylised artwork, but I believe the Clone Brush tool in iColorama qualifies. In addition to retouching, you can create works limited only by your imagination. Until next time, enjoy!
Jerry Jobe
Never content with just scratching the surface of what an app can do, Jerry Jobe decided to pass on what he learned about imaging apps to others. He’s constantly trying to figure out just what tools other artists have used, and trying to incorporate them into his own work, in an attempt to find his style. He’s written tutorials on over 145 apps so far, which you can find (along with his Song of the Day entries) at http://enthusiasmnoted.wordpress.com/ He lives near Atlanta, Georgia, where he also finds a creative outlet in acting and directing in community theater.

One Comment
Teresa
This a fabulous tutorial! I had no idea the clone brush was so versatile!