iPhone Astro-Photography Tutorial
We are delighted to publish this thorough tutorial to help you photograph the night sky with an Apple iPhone 11, by Rob Layton – mobile journalist, smartphone photographer, PhD scholar and educator, enjoy!
iPhone astro-photography tutorial: If you’re self-isolated, have an #iPhone11 and able to see the night sky, you may find this short tutorial helpful (and relief from boredom) as I explain how I made these images and edited them in @Lightroom on iPad.
The addition of #NightMode was a boon to @Apple, and followed the pioneering work of Google’s NightSight (check out Distinguished Engineer Marc Levoy’s excellent blog). However, it’s often not used to potential.
NightMode will kick in as soon as the camera senses darkness. Tap the NightMode icon at the top left. It will default to either 3 or 5 second exposures, depending on ambient light. This is fine for globally lighting a restaurant or park at night, but …
… keep your phone steady, swipe along the slider, and that extends to 10s (handheld) or 30 seconds if you use a tripod. Now you are ready for astro-photography. It will look terrible on screen due to noise, and you may not be able to frame correctly in the dark …
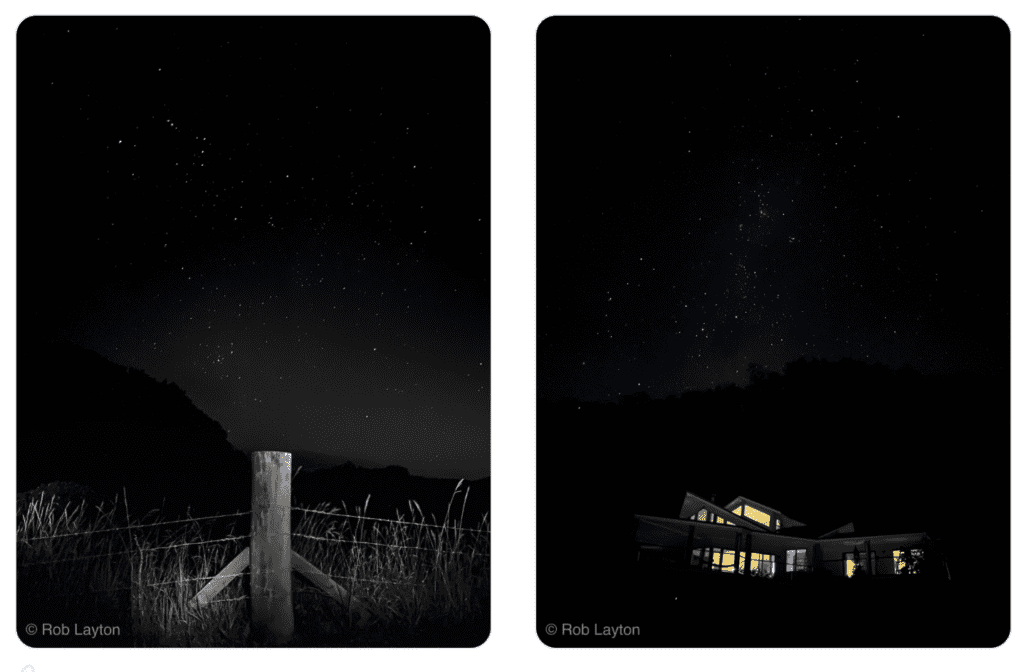
… so check after each shot and shoot again until you get the pic. This is achieved computationally. The phone takes multiple images, stacks and averages them and removes fixed noise (I’ll explain how to remove random noise shortly). If you want to include a foreground..
… (such as the house, fence post), the light needs to be faint as NightMode is incredibly sensitive. The house was lit inside with dull lamps, and I illuminated the roof line with short bursts from a pocket torch from 30 metres.
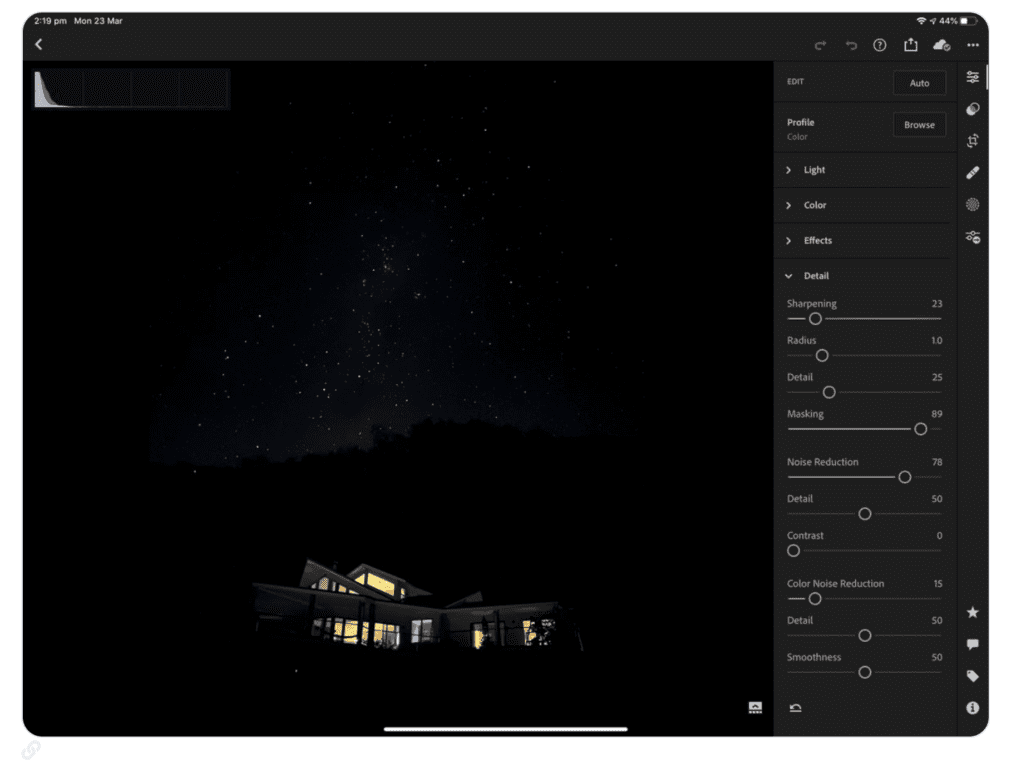
First step in editing was slight sharpening and global noise reduction (the app removes fixed-pattern noise). The night sky was more grey than black, and filled with random noise, so …
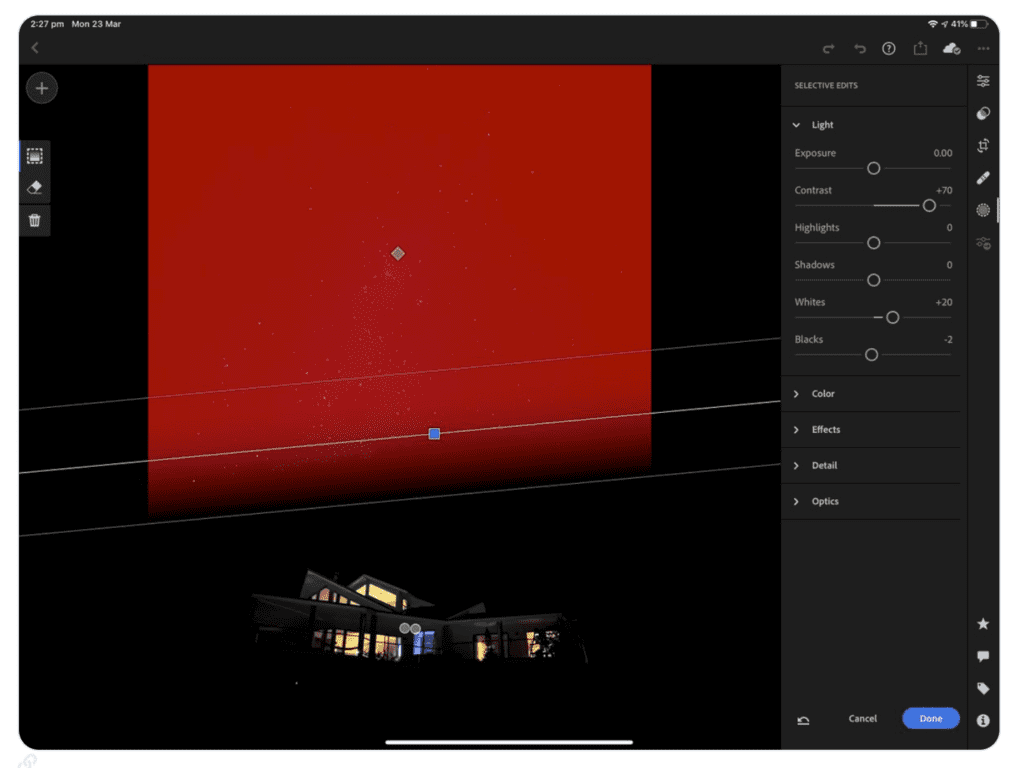
… the linear gradient tool was used to isolate the stars from the house. Contrast was boosted to make the grey sky black and remove random noise, whites increased to make the stars pop, a tad black added, and -33 Desaturation to remove a slight red colour shift.
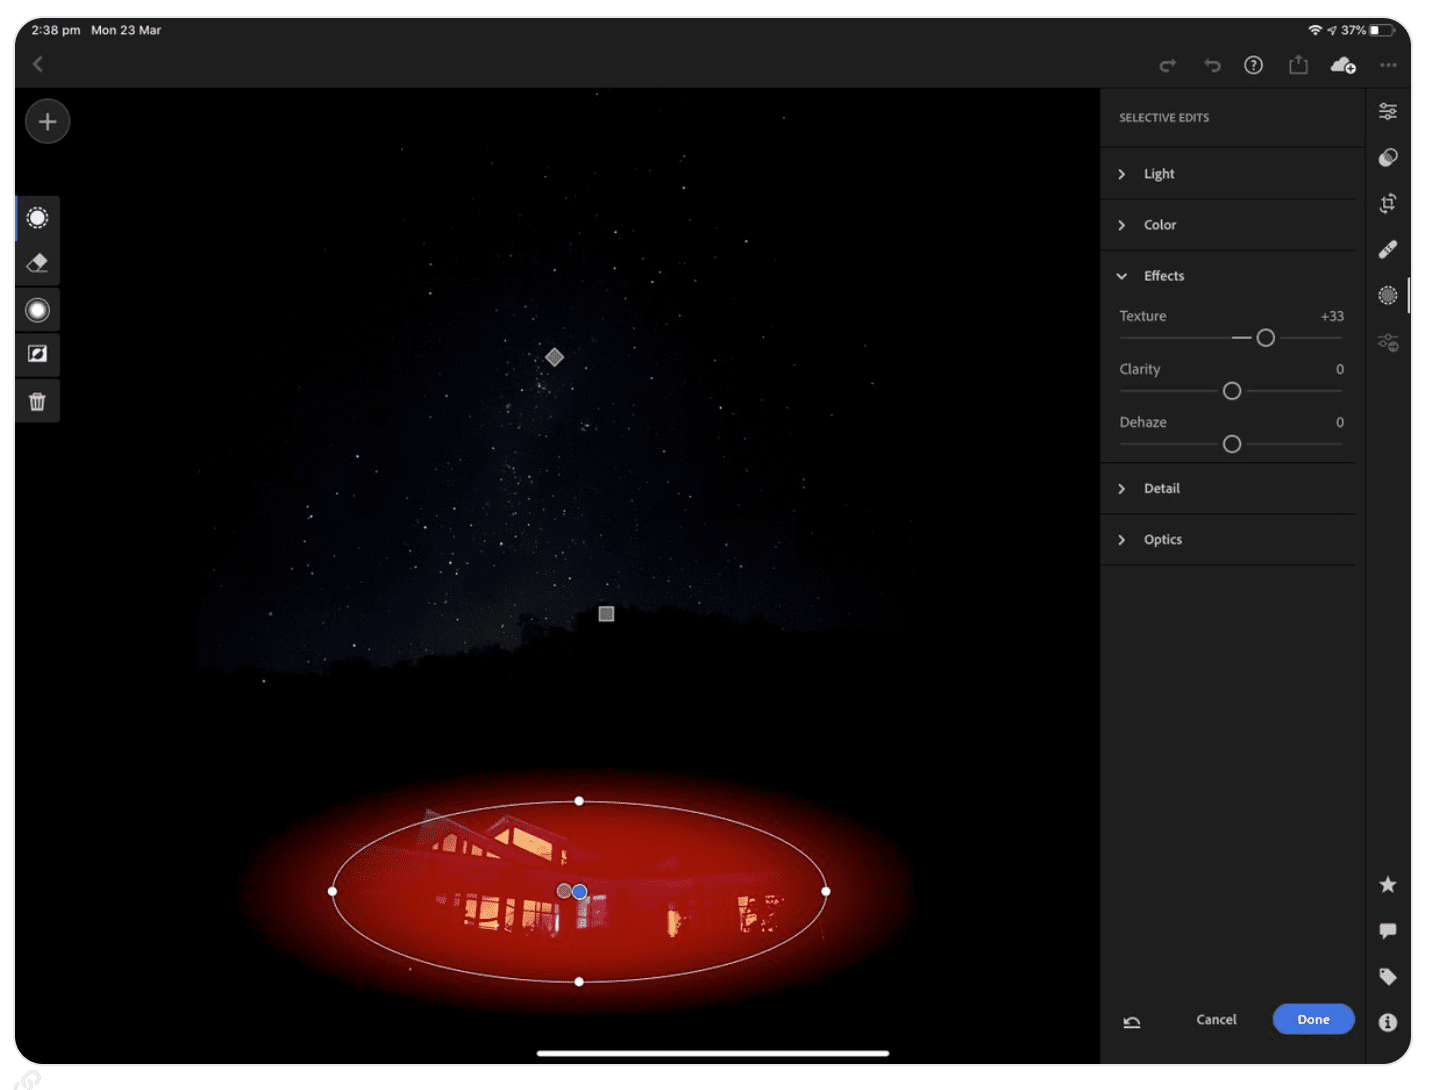
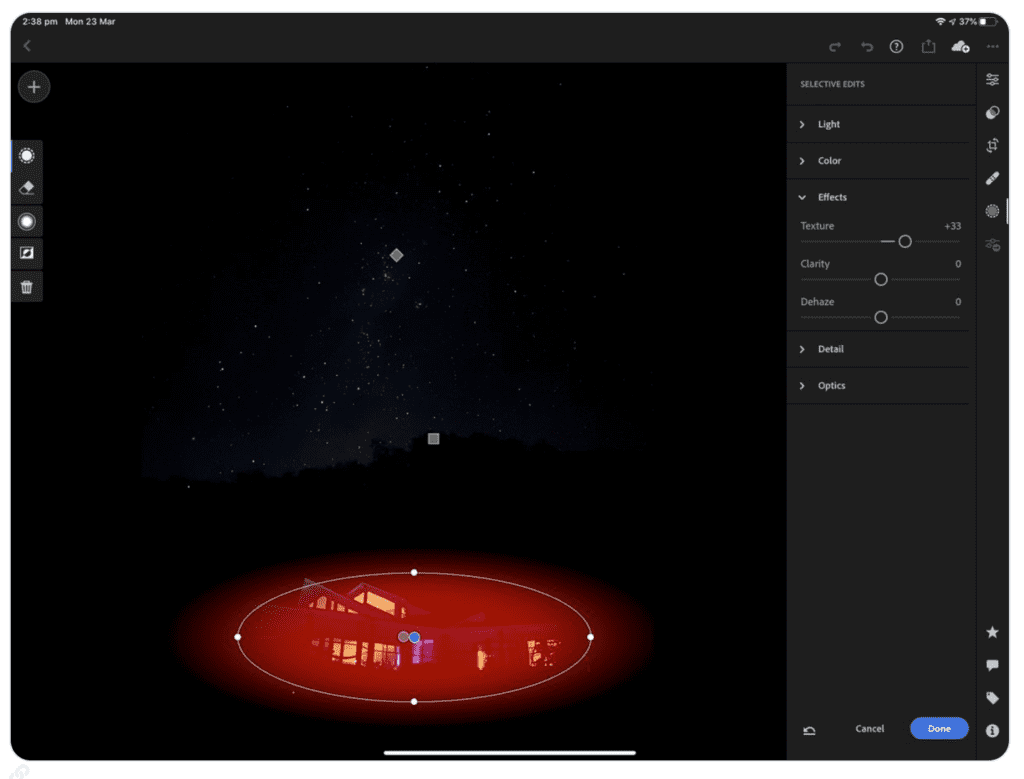
Two radial gradients on the house, one inverted to add a bit more black to the image, and the other to boost whites, sharpen edges using the Texture tool, and counter the noise reduction (which can soften edges)
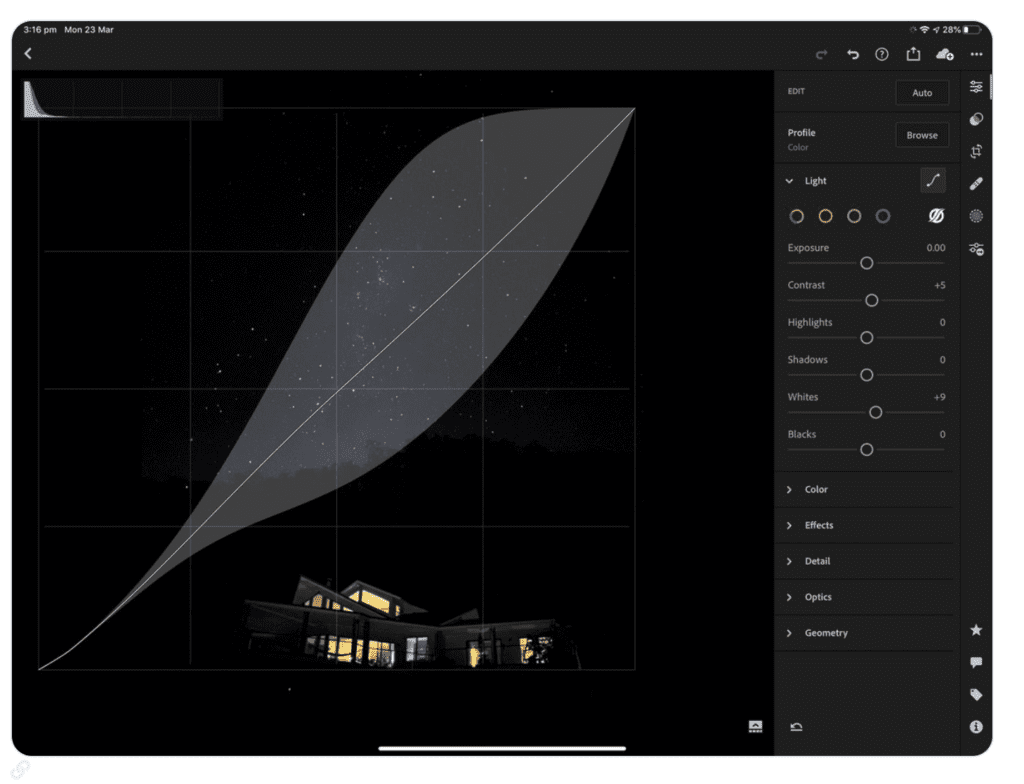
My final step of every edit is in Curves, and ALWAYS with the histogram on. This is where I check each colour channel to see how it sits on the histogram. In this case, I just used the tone curve to make final adjustments.
I hope this tutorial helps. Have fun 🙂
Please help us…
TheAppWhisperer has always had a dual mission: to promote the most talented mobile artists of the day and to support ambitious, inquisitive viewers the world over.
As the years pass TheAppWhisperer has gained readers and viewers and found new venues for that exchange. All this work thrives with the support of our community.
Please consider making a donation to TheAppWhisperer as this New Year commences because your support helps protect our independence and it means we can keep delivering the promotion of mobile artists that’s open for everyone around the world.
Every contribution, however big or small, is so valuable for our future.