
Wood Camera – iOS Photography App Review

When you first open up the Wood Camera app, you get a nice feeling of familiarity about the interface. The ever popular Camera+ app springs to mind. Not that the makers have copied anything – itʼs just one gets the feeling that all the knobs and buttons are all in the right places and is intuitively navigated. There is a handy “live“ tutorial when you first open up the app so you should be creating images with ease in no time at all. With 22 “lenses” (filters), 17 textures and 12 frames, there are thousands of creative ways to chop and change an image to achieve some interesting results.
Read more of this incredible review below…
Wood Camera retails for $1.99/£1.49 and you can download it here.
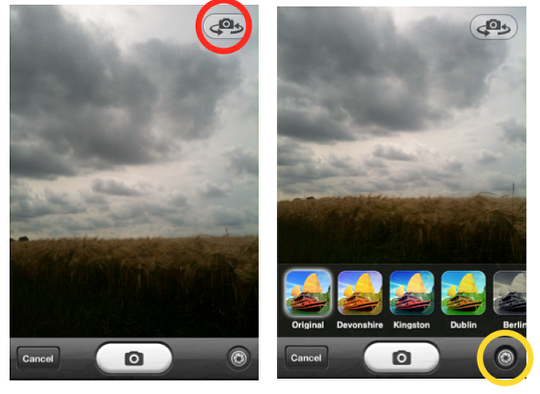
Open up the app and you are confronted with some choices before you shoot anything. In capture mode you can ʻflipʼ the image before you shoot (see red circle). Itʼs nice to have choices but Iʼm at a loss as to how or where this function could be useful. The other choice is the ability to choose a filter before you shoot or, if you prefer, shot the image ʻau naturaleʼ. You can also clear the viewing screen of the filter selection bar by tapping on the bottom right-hand corner (see yellow circle). Once you have shot your images, you can easily access them on the ʻLightboxʼ. This is accessed by tapping on ʻCancelʼ.
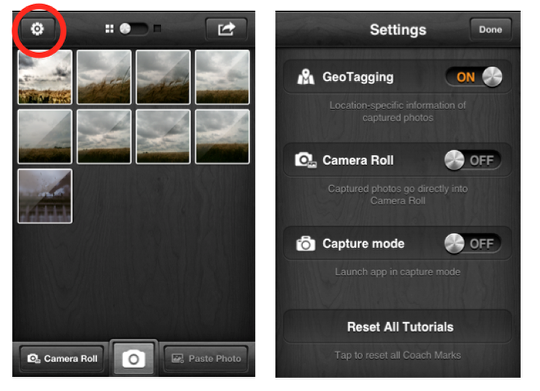
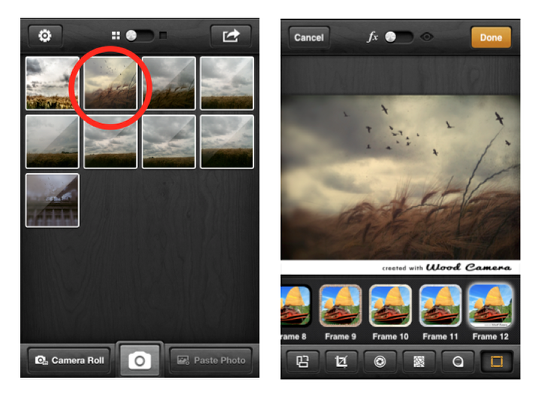
When you arrive at the ʻLightboxʼ there are more choices available. There is a ʻSettingsʼ button (see red circle) where you can adjust operations to your preferences. You can also access images from you Camera Roll if you so desire and import them into the appʼs ʻLightboxʼ for editing. Single tap on an image and you go into preview mode of all the images on the ʻLightboxʼ. Tap twice on a chosen image to begin applying filters and effects.
The ‘Paste Photo’ button allows you to more quickly import multiple photos from your iPhone Camera Roll. To do so, open the Camera Roll and select up to five photos, just as you would if you were going to email photos from the camera roll. Then, instead of sharing to email or MMS you simply select ‘copy’. Switch back to Wood Camera and click the ‘Paste Photo’ button and the images will import. This is particularly helpful when you need to go through a bunch of photos on your camera roll and only plan to import a few. Note that due to iOS limitations, you can only select 5 photos at a time on the iPhone. If you select more than 5, it won’t let you import them into the app.
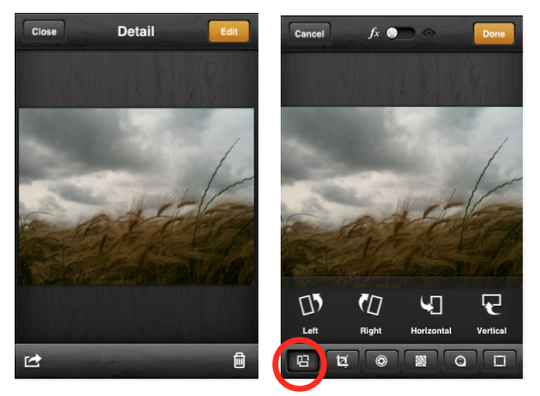
If you tapped once on your chosen image then you arrive at the images in ʻPreview Modeʼ and will have to hit the ʻEdit” button to bring up the editing menu. The first editing button (see red circle) allows you to flip your image in the desired orientation.

The next button along (see circle in red) allows you to chose a cropping format.
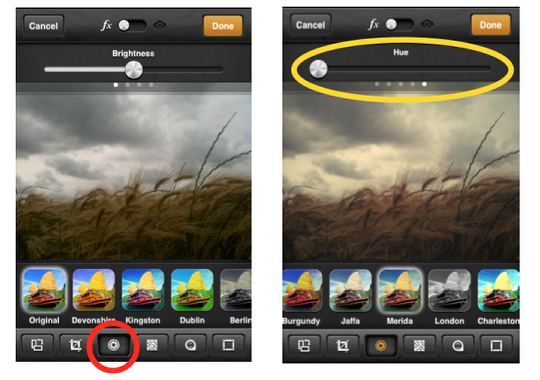
The next button allows you to chose a filter or ʻLensʼ. I like the filters – they have a moody quality to them. For this particular demonstration I chose Merida. You will also notice that you can adjust brightness, contrast, saturation and hue with a slider bar on the top of the image (see yellow eclipse). You can toggle through the options by sliding your finger from right to left.
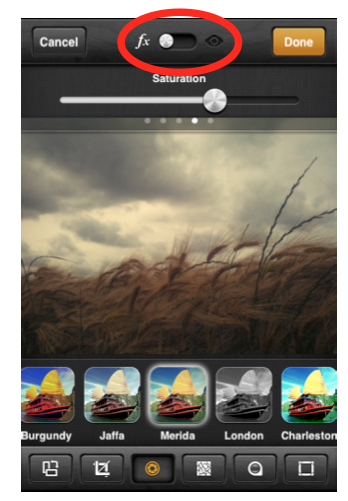
A nice feature of the app is the One-Touch Preview. Place your finger on the image and hold. This way you can quickly compare the edited shot with the original. You can also jump from edit mode (fx) to preview mode (eye icon) very easily (see red eclipse). Neat little time-saving devices that makes you like this app more and more.
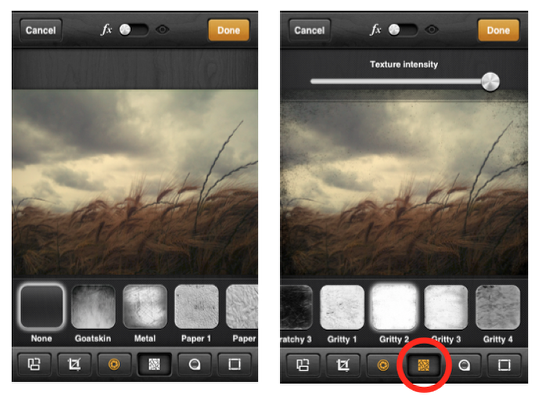
Next up is the Texture tool bar. Lots of different grunge style filters. Again, there is a slider bar on top of the image to help you control the amount of texture you want. I find that being able to nuance the amount of grunge effect that you want is very important when working an image – over-egging on the texture front can total spoil the end result.
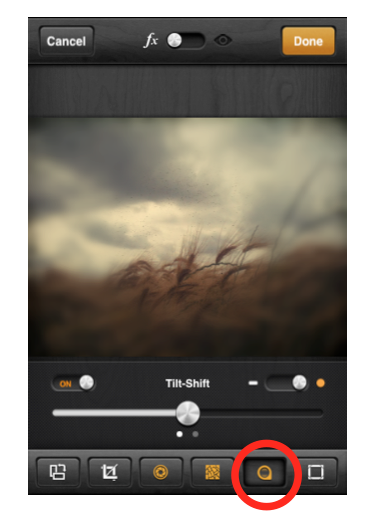
Love Tilt-Shift. Playing around with a shallow depth of field can really enhance an image. It has the prerequisite radial and linear mode and is fully adjustable. Swipe slide bar to the left and you have an adjustable vignette function as well.
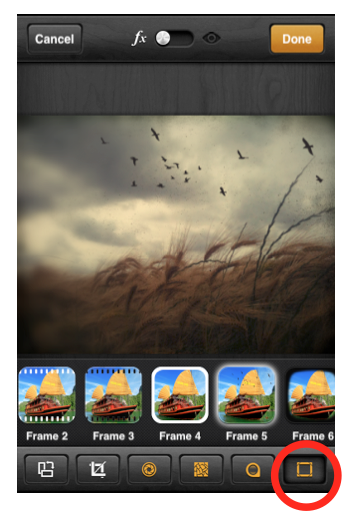
Next on to Frames. And by a wonderful stroke of luck – the app has the perfect frame for my image – Frame 4 (Birds). While not strictly a classic ʻFrame” it was a pleasant surprise to discover this. There are lots to chose from but the birds frame just made the whole composition come together. When you are happy with the finished image – tap ʻDoneʼ.
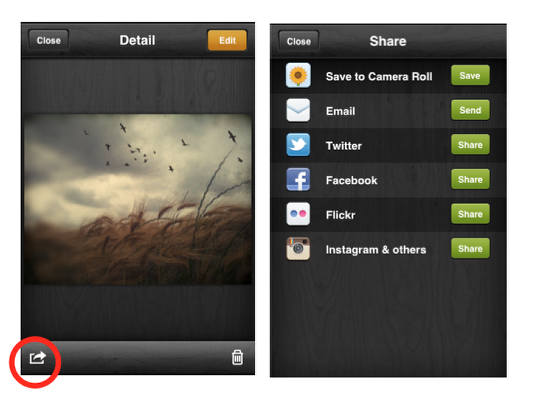
When you tap on ʻDoneʼ your image is automatically saved to the ʻLightboxʼ to do further work on it if you want. Or you can scroll on to another image to edit from the ʻLightboxʼ. Otherwise you can tap on the share icon (see red circle) to give you multiple options of posting the image directly on to a social site or your Camera Roll.
I decided to continue to work on the image. Tapped ʻCloseʼ and that brought me back to the ʻLIghtboxʼ I brought it back it into ʻPreview Modeʼ with a single tap. Taped on ʻEditʼ and then on ʻFramesʼ.
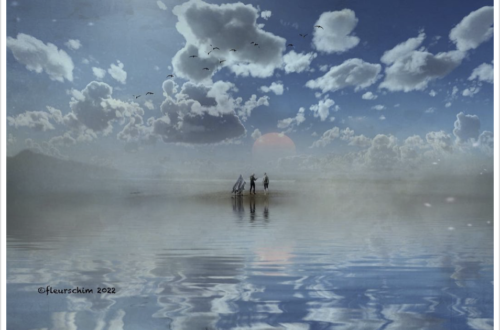
Considering this is a demonstration, I decided to created a little ad for this really nice and neat little app (with a lot of help from Frame 12). Does what it says on the tin with speed and reliability. Never crashed once and has some nice little touches that can really bring your images to life.
This app comes highly Recommended by theappwhisperer.com
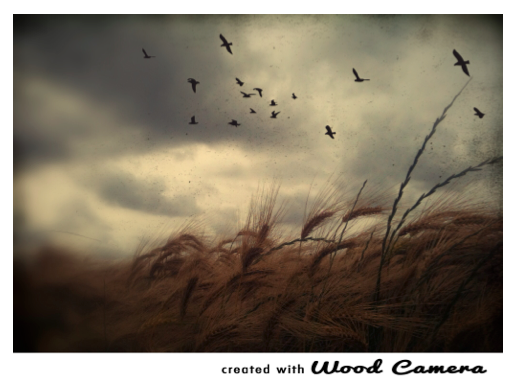
Tadaa. The finished image.
Sean Hayes
Sean is a Freelance Advertising Art Director by profession, and you can find out more about that here at www.wix.com/shonski/sean-hayes. Sean started shooting images with an iPhone in 2009 and began to submit work on a regular basis to sites such as www.iphoneart.com, www.eyeem.com and pixelsatanexhibition.com in 2010.Sean’s iPhone photography work has been exhibited in Los Angeles, Miami and Naples, Italy.

3 Comments
David
Great review, Sean. I too am puzzled by the Paste Photo button and it’s function. I have a iphone4 and it doesn’t work for me either. I checked a couple of other reviews and they don’t say anything about it! In any case, I like this app as well and can see using it a lot!
Sean Hayes
Thanks David.
I really enjoyed writing it. A passion is never work.
Hope you found it useful.
Regards, Sean
LynneM
Wood Camera is an app that deserves more attention. I rarely see it used by the iPhoneography community. I like it and your tutorial. Thanks.