Mobile Photography / Art Tutorial – Circular Tiny Planet: Funny Shapes?
We are delighted to publish Jerry Jobe’s latest mobile photography/art video tutorial for our viewing pleasure. This time Jobe takes a look at the app Circular. Take it away Jerry…
Circular Tiny Planet retails for $1.99 and you can download it here
“The story behind the title of this week’s column is that it comes from a line in the movie Raising Arizona and a scene where two small-time hood brothers discuss some provisions they picked up for a kidnapped baby:
Evelle: I got me some baby grub, baby wipes, diapers, them disposable kind. I also got a package of balloons.
Gale: They blow up into funny shapes and all?
Evelle: No, just circular.
Circular by BrainFeverMedia is a tiny-planets style app that turns the horizon in your image into the surface of a very small planet. It wraps your image around into a circle – no funny shapes. There are a number of these apps available, including Tiny Planets and RollWorld (covered in September 2014). As with most specialised apps, there are reasons to like each of them. I say like rather than prefer, because Circular and RollWorld each has features that the other lacks, and I can make use of both apps”.
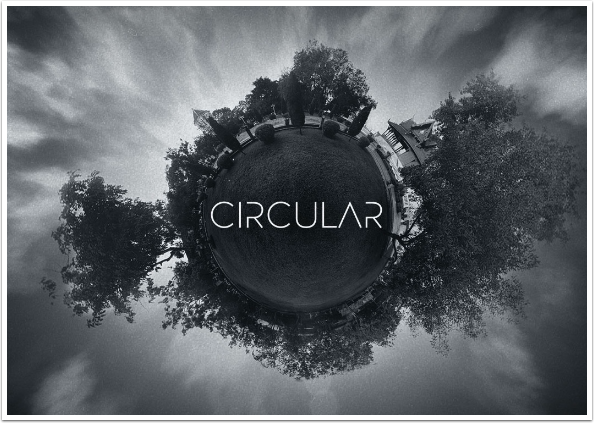
Circular has the same kind of user interface as the other BrainFever apps I’ve covered over the last several weeks. The splash screen allows you to choose an image to edit (New), or see Samples or ads for other BrainFever Apps.
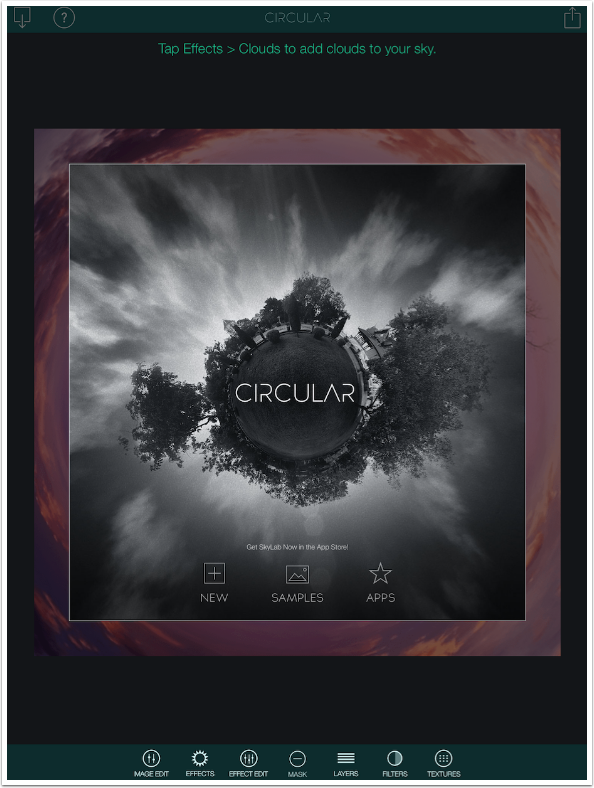
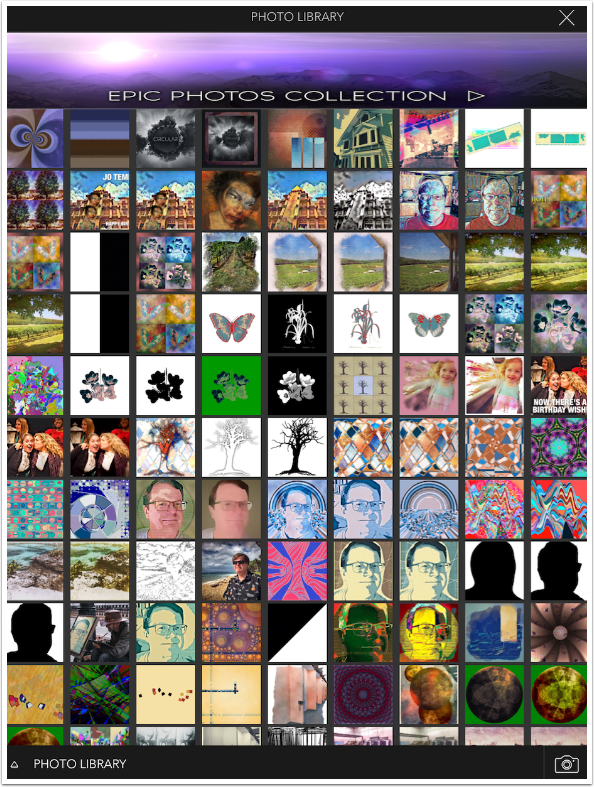
Tapping the New button brings up your Photo Library. At the top is the “Epic Photos Collection”, which is a selection of stock photos free for your use, as long as you give credit.
Tapping the words “Photo Library” at the bottom allows you to narrow the search to specific albums on your library. Tapping the Camera allows you to capture an image for use in Circular. Circular works only with photos; unlike RollWorld, it will not process videos.
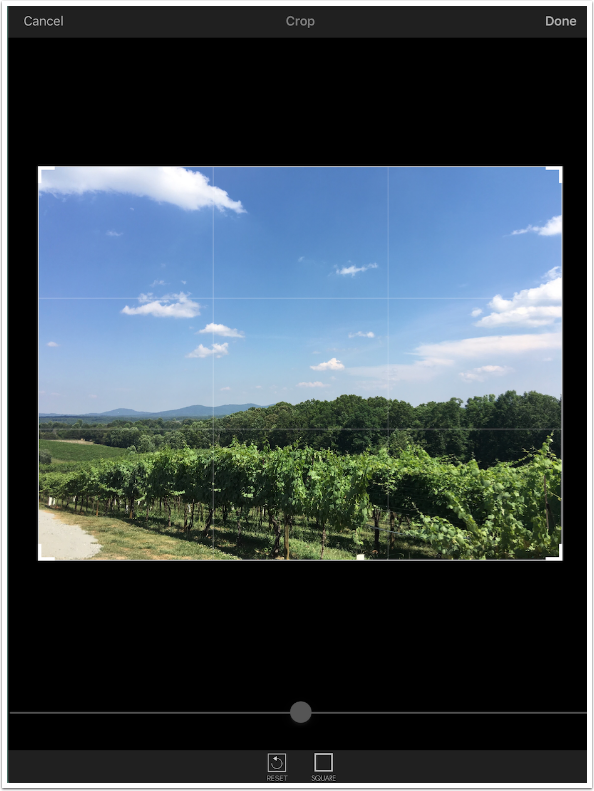
Once you’ve selected or captured an image, you are given the opportunity to crop or rotate the image. Why would you want to do that? When Circular “wraps” the image, the left side of the image meets the right side. If the horizon line does not meet, there will be an obvious sharp break in your “planet”. You may have to crop out a tree on the side or rotate the image so that the left and right side will meet correctly.
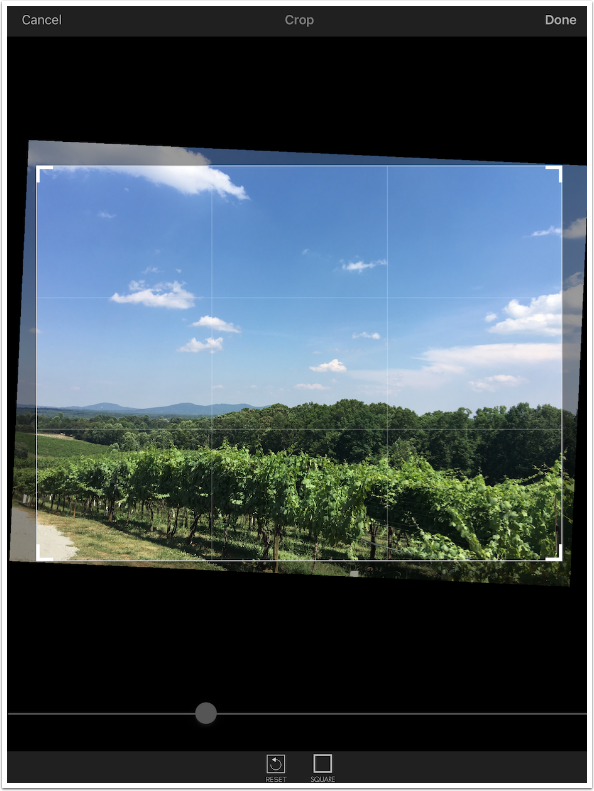
Below I rotated my image of a vineyard to make the horizon perfectly, well, horizontal. The grid helps with that. You may also use a app that does “mirroring” on the y-axis to process your image before loading it into Circular, since the mirroring will force the image to have identical left and right edges. An example at the end uses this technique.
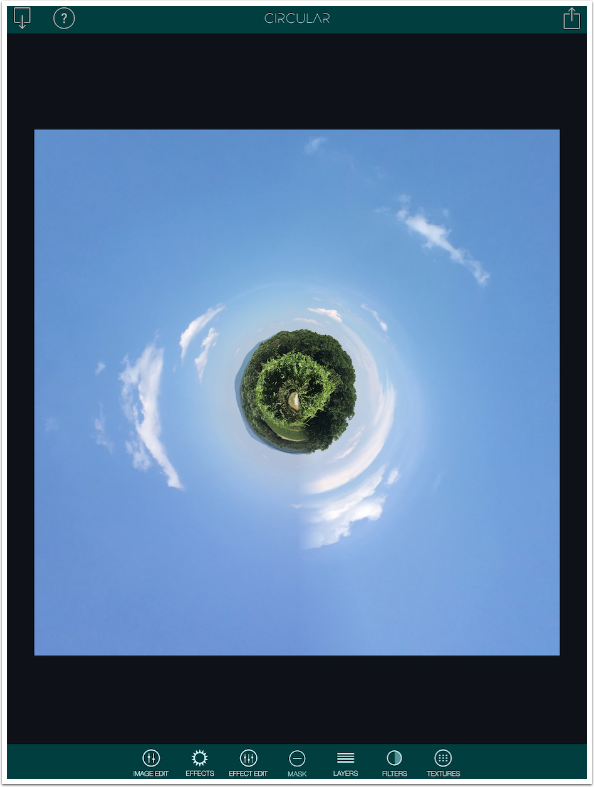
Below is the image loaded into Circular. At the top are Load, Help and Save buttons. At the bottom are the editing features: Image Edit, Effects, Effect Edit, Mask, Layers, Filters, and Textures.
Circular always creates a square image, no matter what aspect ratio is loaded into the app. Even panoramas will produce a square image.
Circular on the iPad allows you to switch from portrait orientation to landscape. All screenshots following this one will use landscape orientation.
Below you’ll see the controls under Image Edit. These all control the look of the “planet” effect. They include Zoom, Rotate, Invert, Repeats, Flip Y, Flip X, Melt, Blocks, Spiral and Tunnel. There is a Reset button at the right which resets all sliders to their default positions.
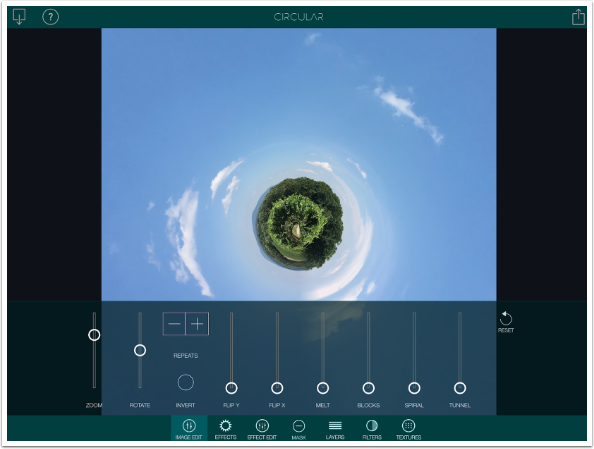
Zoom affects the size of the planet. It starts at about 75%. Moving the slider down increases the amount of sky and makes the planet smaller.
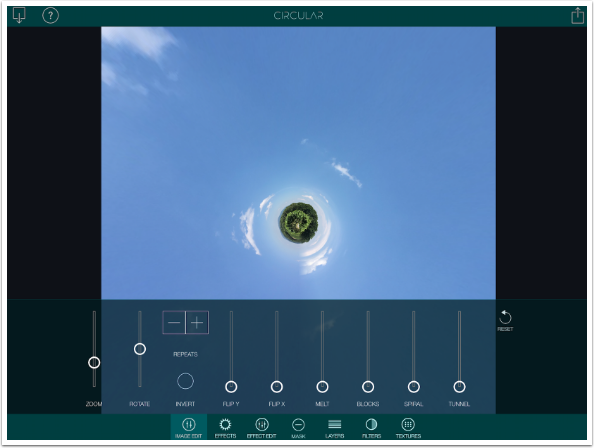
Increasing Zoom to 100% stretches the center until there is no sky at all.
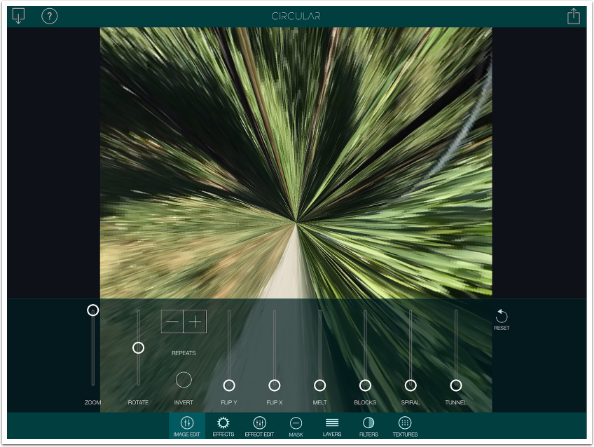
The “seam”, or the place where the right side of the image fades into the left side, defaults to the bottom (6:00 on a clock). By using the Rotate slider you can move the seam to any point of the circle.
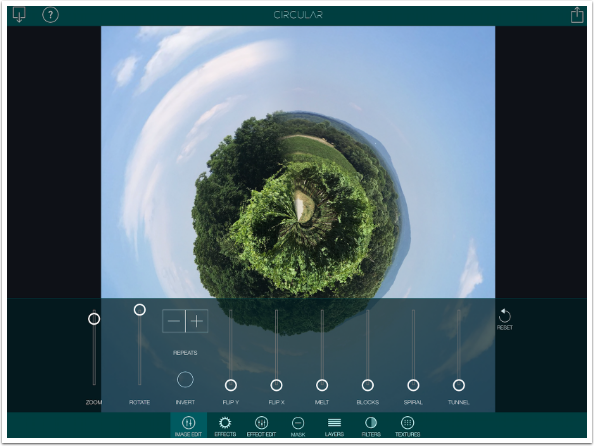
The Invert button swaps sky and ground, so that the ground wraps around the sky.
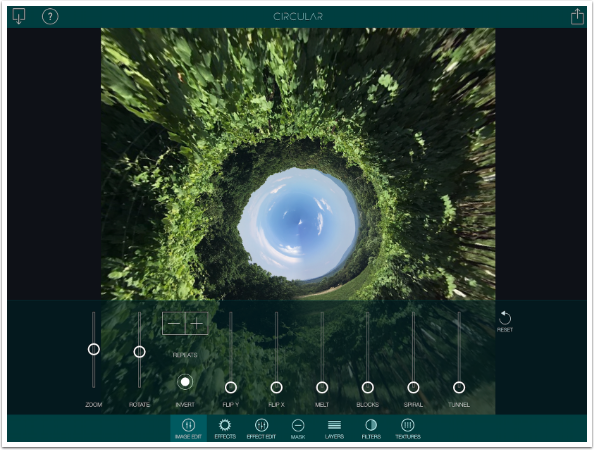
By default, Circular uses the image once to wrap around and create your “planet”. Below I have tapped the + Repeats button twice, so there are three copies of the vineyard image wrapped around.
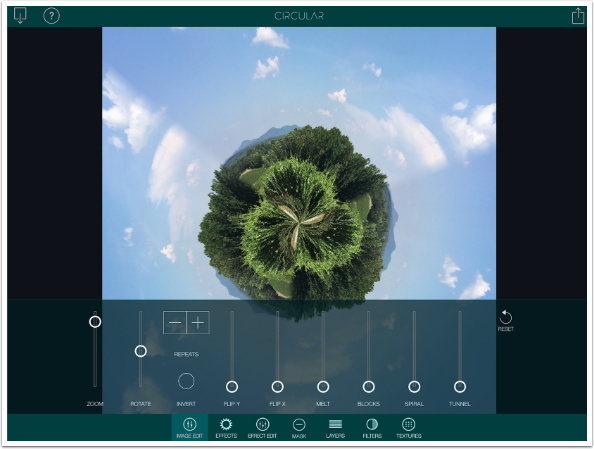
Flip Y moves the center point. It moves between having the ground in the center to having the sky in the center. Interesting effects can be produced by having the slider moved partway, as seen below.
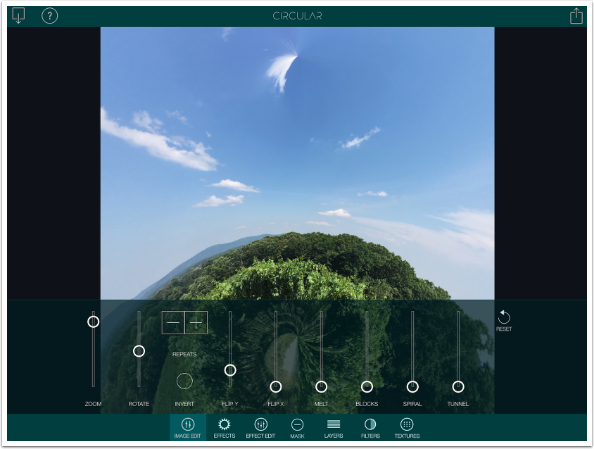
Continuing to move the Flip Y slider moves the ground until it eventually surrounds the sky.
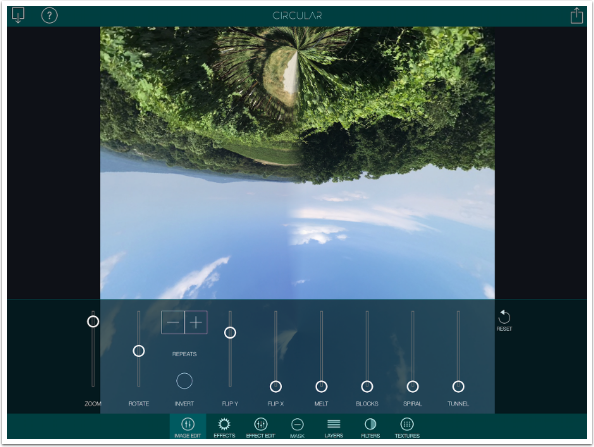
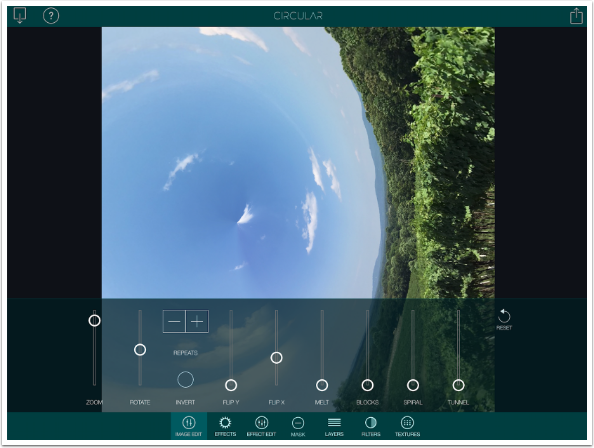
Flip X moves the center along the horizontal axis, creating even more looks for you to try.
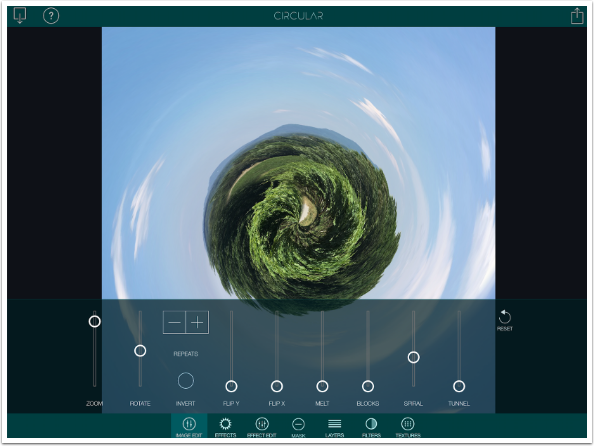
The Spiral slider moves the outside of the image counter- or anti-clockwise in relation to the center, producing a spiral.
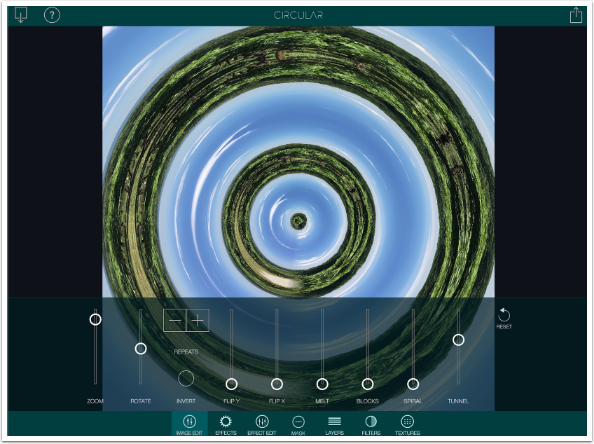
The Tunnel slider produces multiple version of the planet, ground and sky, radiating out from the center.
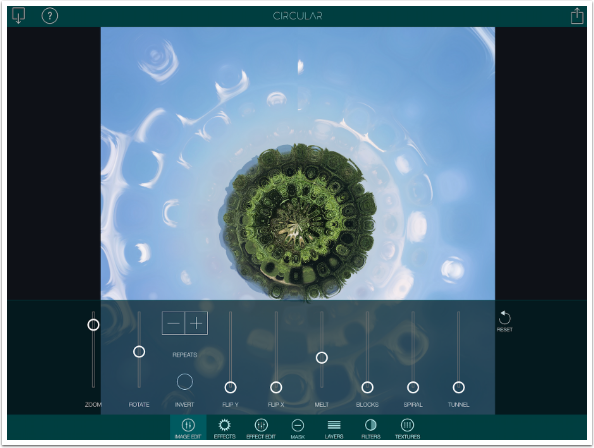
Melt produces soft-edged blocks that distort the image. The blocks radiate from the center. Moving the slider up produces more, smaller blocks.
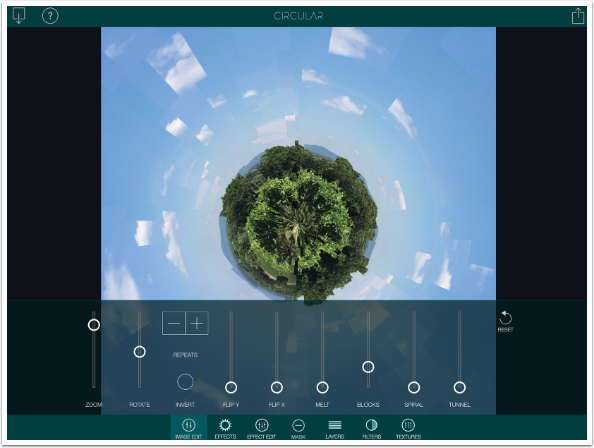
The Blocks slider does the same, only the blocks have sharper edges.
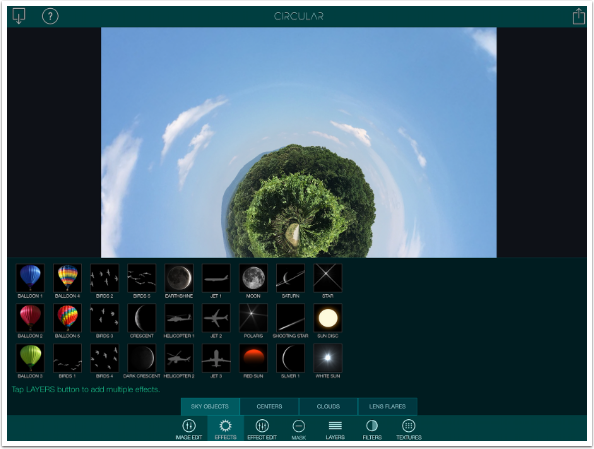
The remaining controls should be familiar to you from the columns on Lens Light, Lens Flare, Alien Sky and SkyLab. Effects adds effects on top of the tiny planet image. There are four types of Effects: Sky Objects, Centers, Clouds and Lens Flares.
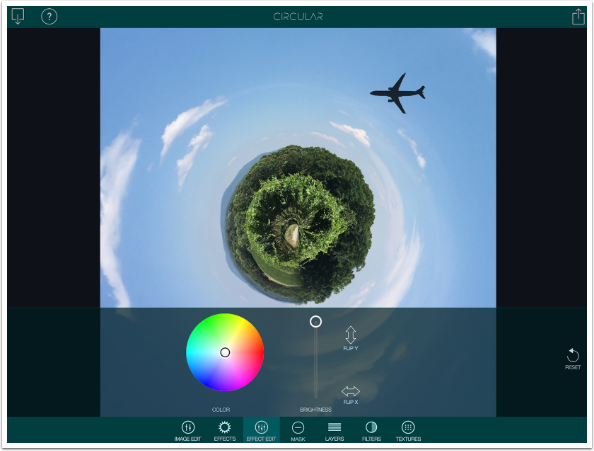
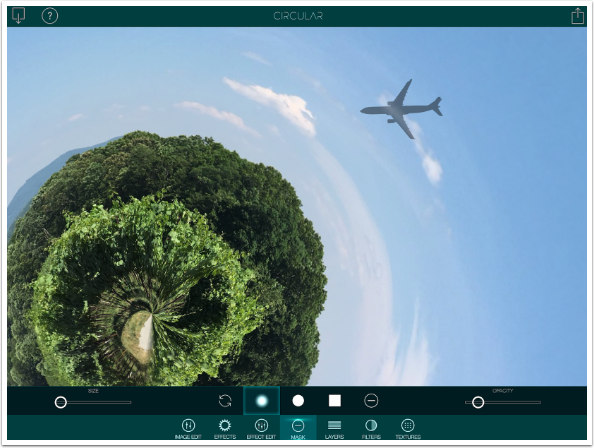
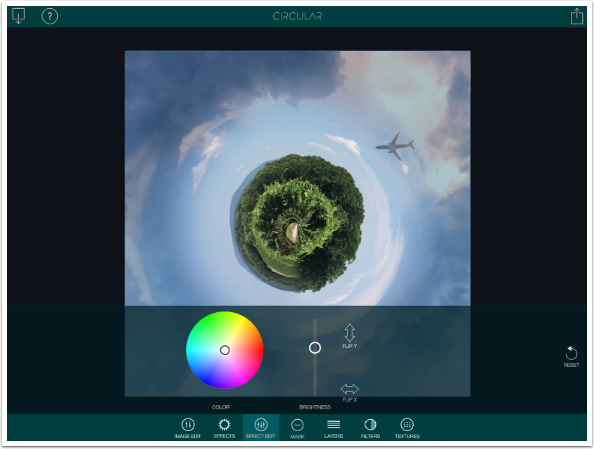
Tapping one of the Effects adds it to the image. You can use a two-fingered pinch to resize and rotate the object. Below I’ve added the Jet 2 object, resized and moved it, and tapped the Effect Edit button. There are controls for Colouring and flipping the object. The Brightness slider is mislabeled, since it really controls the Opacity of the object.
I lowered the Brightness/Opacity of the jet some, but I still want it to look as though it passes behind the cloud. I move to the Mask function, change to a soft-edged brush, and lower the Stroke Opacity. Then I brush on the jet until I am satisfied with the look.
You can zoom in on the image when you are in Mask mode with a two-fingered pinch. If you are in any other mode, the pinch will resize your object, so be very careful. The mask moves with the object, so resizing or moving the masked object in this case will move the mask away from the cloud and make the mask useless.
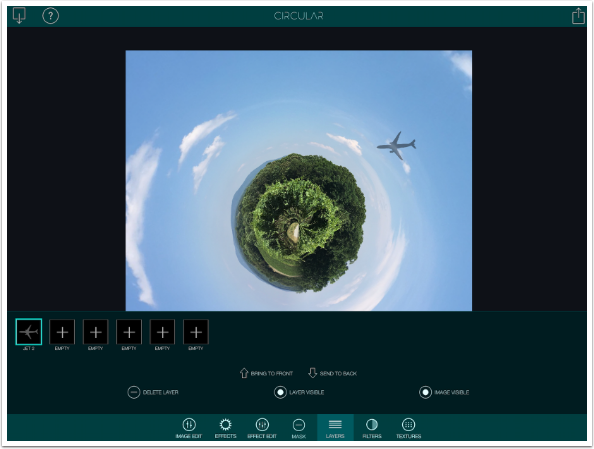
Layers are used to add additional objects. Tap any of the empty Layers before returning to the Effects area to add another object. If you do not select an empty Layer, the object you select will replace the existing object instead.
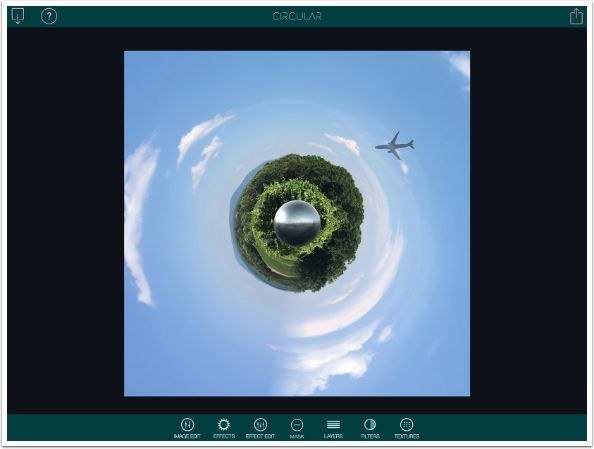
Below I added a Centers object. They will be placed in the center, but can be moved elsewhere.
The Clouds objects are designed to wrap around your planet. They are not useful if you have changed the planet to a tunnel, or used the Flip Y or Flip X sliders.
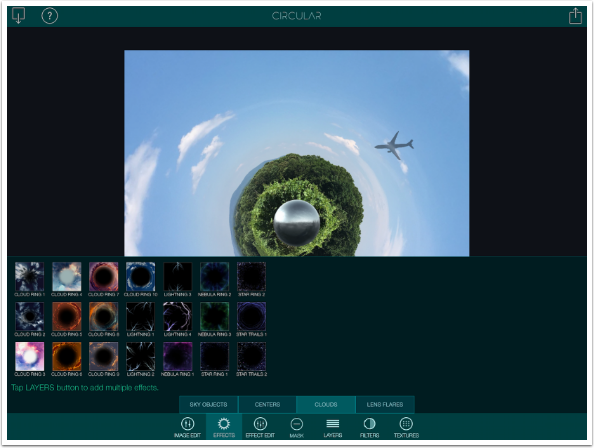
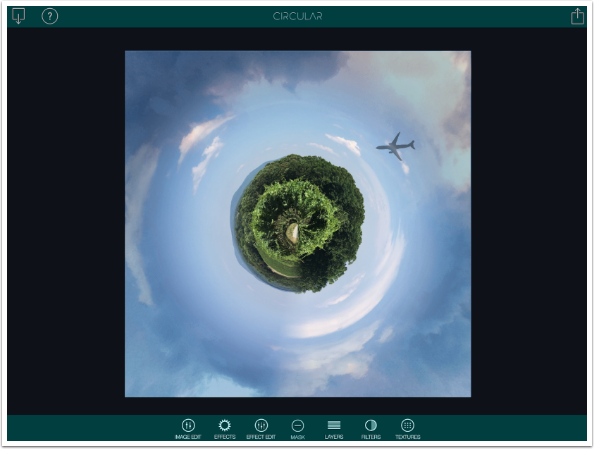
Below I’ve added Cloud Ring 4, and gone to the Effect Edits to reduce the Opacity. Notice that the clouds are now on top of the jet. I can use the Send to Back switch in the Layers menu to move the clouds behind the jet
I can also resize the Cloud Ring to make it fall outside the jet.
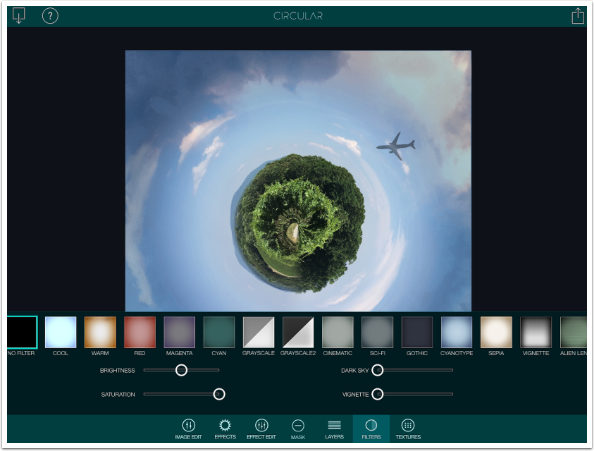
The Filters are the same, with the same controls, as you will find in other BrainFever apps.
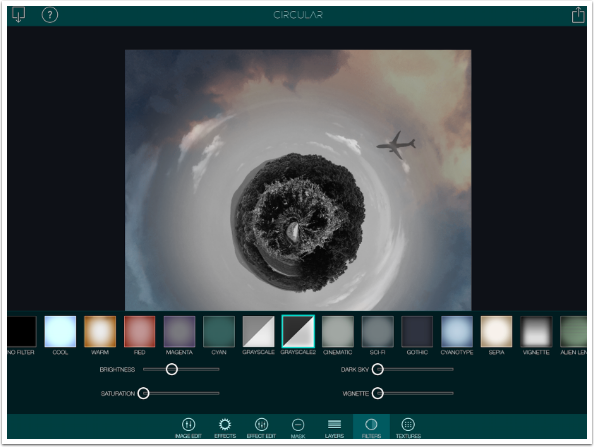
Notice that the Filters affect the image, but not the objects. I added a grayscale filter below, but the Cloud Ring is still in color.
Textures are also the same as you will find in Alien Sky, Lens Light or SkyLab.
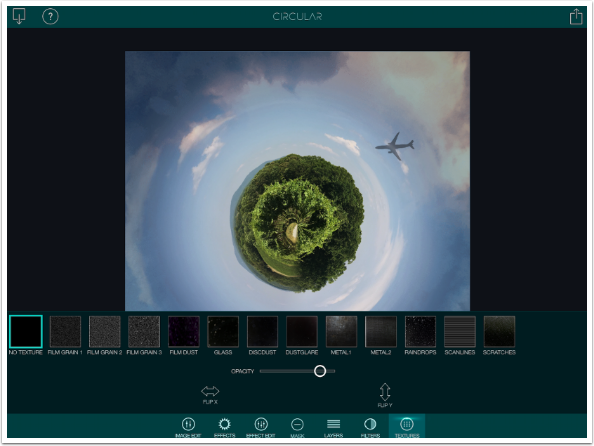
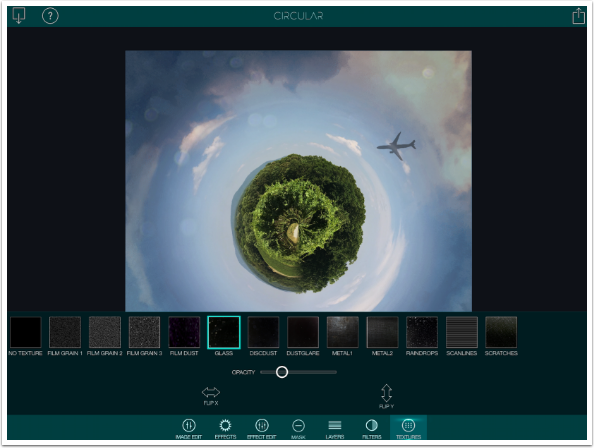
Textures are laid on top of objects, as can be seen below.
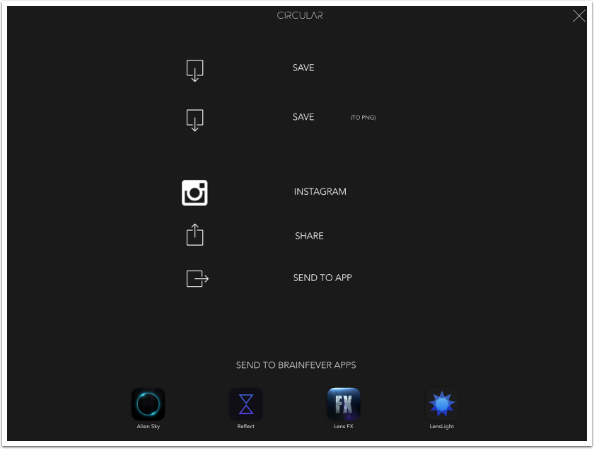
When you are ready to save, tap the box at the upper right and you will see the following screen.
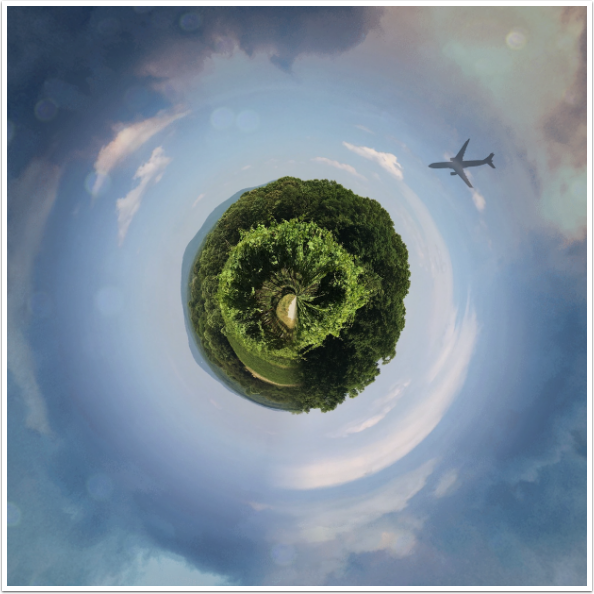
Here is my finished vineyard image.
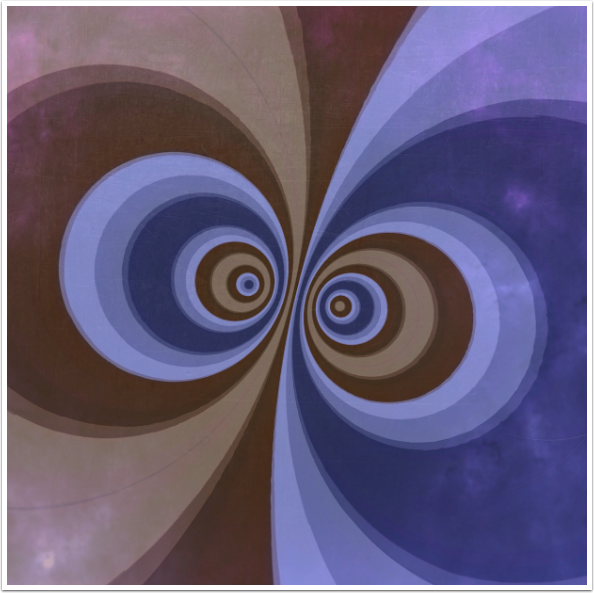
Don’t limit yourself to images of outdoor scenes. You can create some interesting abstracts by starting with something as simple as a set of horizontal lines. The image below used the Flip X and Tunnel sliders, and was finished in Stackables.
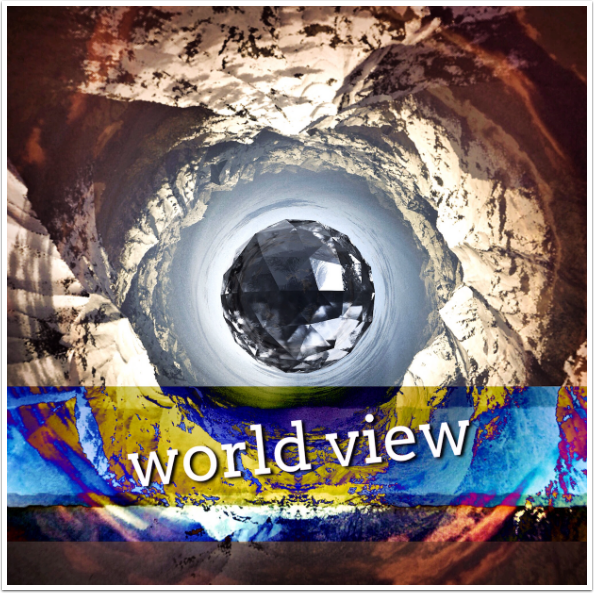
The next example used one of the sample images provided in the Epic Worlds Collection and a center object. It was finished in iColorama.
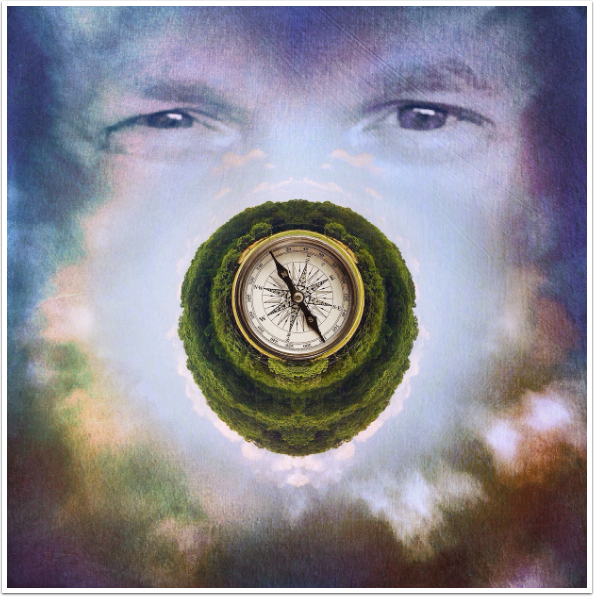
My final image, “Disoriented”, started with an image that I had mirrored, so that the left and right horizon lines matched. The horizon rose in the center, making for a lopsided planet. I rotated the rise to the bottom and added the compass object in the middle. It was finished with iColorama and Stackables.
Circular is a worthwhile app. I would appreciate some of the controls that RollWorld has, including Droste and the ability to change the width of the seam line. On the other hand, RollWorld does not have the Flip X, Melt or Blocks sliders, or any of the add-on Effects. For now, I’m perfectly content to use both apps, depending on the look I want to achieve.
Until next time, enjoy!
TheAppWhisperer has always had a dual mission: to promote the most talented mobile artists of the day and to support ambitious, inquisitive viewers the world over. As the years passTheAppWhisperer has gained readers and viewers and found new venues for that exchange.
All this work thrives with the support of our community.
Please consider making a donation to TheAppWhisperer as this New Year commences because your support helps protect our independence and it means we can keep delivering the promotion of mobile artists that’s open for everyone around the world. Every contribution, however big or small, is so valuable for our future.

