Mobile Photography / Art Tutorial – VSCO: Heavy Hitter
We are delighted to publish Jerry Jobe’s latest mobile photography/art tutorial for our viewing pleasure. This time Jobe takes a look at the very popular app, VSCO. Take it away Jerry…(foreword by Joanne Carter).
VSCO is free and you can download it here
“There are certain apps that are almost universally revered in the mobile photography/art community. I always find it difficult to review these apps and teach about them because there are so many users who are better with them than I am. I could not presume to teach anyone how to use Procreate, for example. My art technique is weak and besides, Procreate has an excellent Artists’ Handbook that is much more clear and wonderfully illustrated than I could do. Today’s app, VSCO by Visual Supply Company, is that go-to filtering app in mobile photography, and I’ve seen many wonderful images that use VSCO. I’ve held off writing about it, but let’s give it a spin!”

Quite frankly, I also held off writing about VSCO because I didn’t understand it. It was originally designed as a community, with the social aspects of sharing images being paramount. You had to drill down to get past the sharing aspects in order to capture a photo or edit one, and sharing to the community was easier than saving to your Camera Roll.
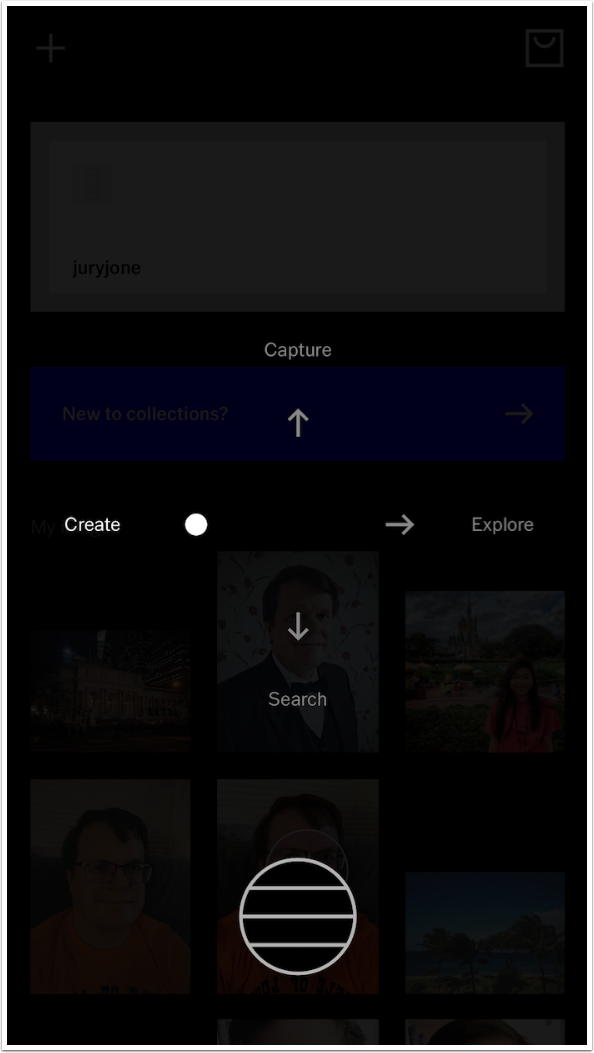
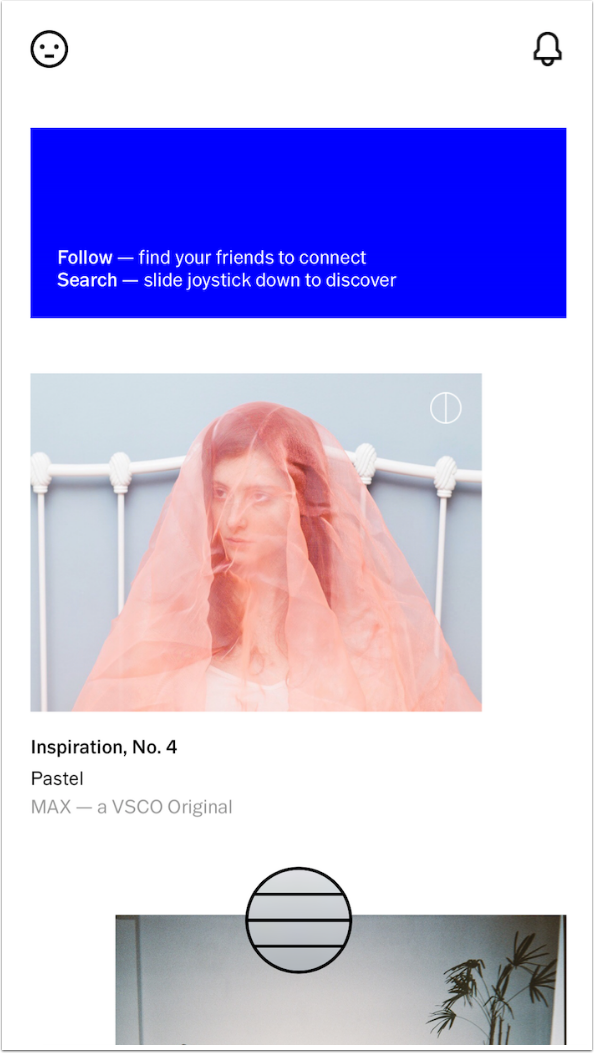
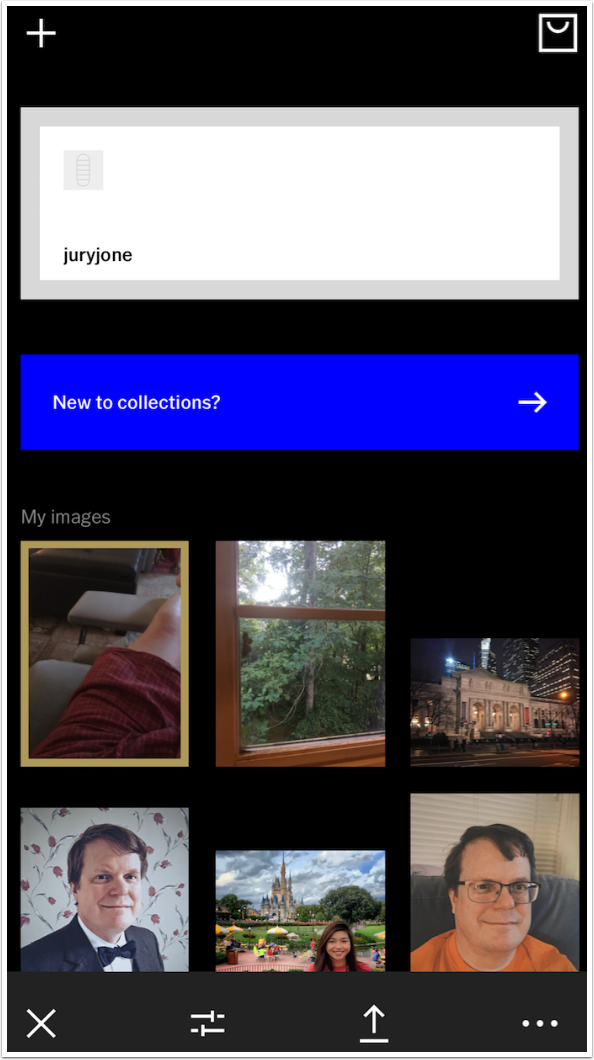
Many of the online tutorials are illustrated with screenshots from this earlier version. VSCO has changed the user interface to allow you to edit and capture more easily, while leaving the community aspects in place. In the screenshot below, you will see the large white box at the top that is my login to the VSCO user community. (I have not posted to it, so there’s no need to look for my images there.)
All the screenshots come from the iPhone. VSCO will run on the iPad, but capture is such an integral part of the VSCO app that I find that I use it more on the iPhone than the iPad.
VSCO has its own gallery. In order to get images into the gallery, you have to import them from your library or capture them. The images you see in the screenshot below are held in the internal gallery. The + at the upper left is for importing images into the gallery and the “envelope” at the upper right accesses the store for new filters. There is also a puck near the bottom center that takes you to various areas of the app.

Pressing and holding the puck brings up the only help in the app. It tells me that swiping the puck up will take me to the VSCO camera; that swiping right takes me to the Community; and that swiping down allows me to search the gallery images.
The Explore option takes you to a browse of the community images. As the instructions say, you can swipe the puck down at this time to search within the community.
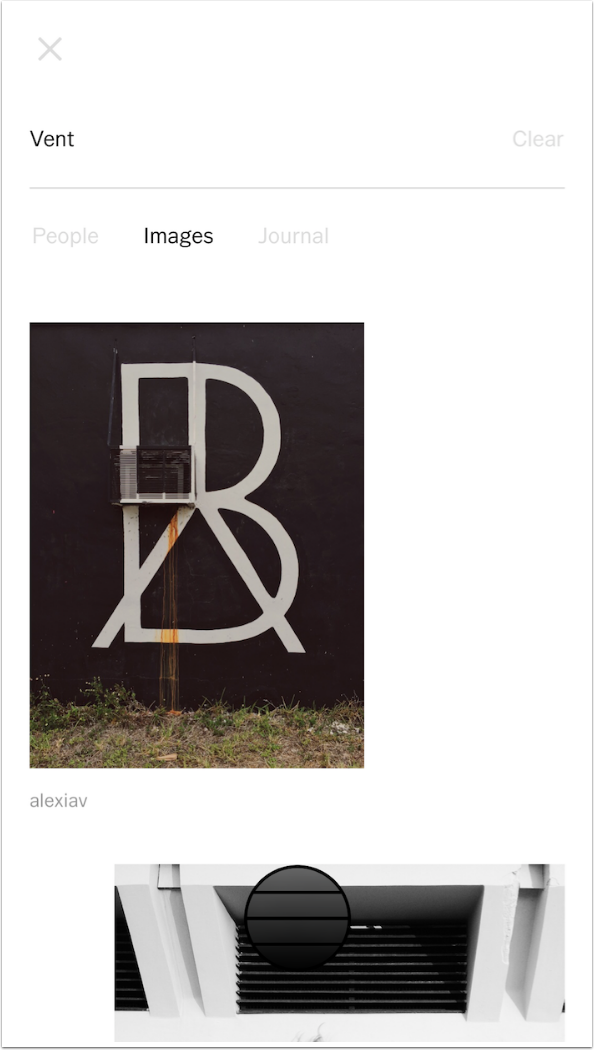
Here is a search screen. Free-associating, I entered the word “vent” and got images of vents. You can also search for people.
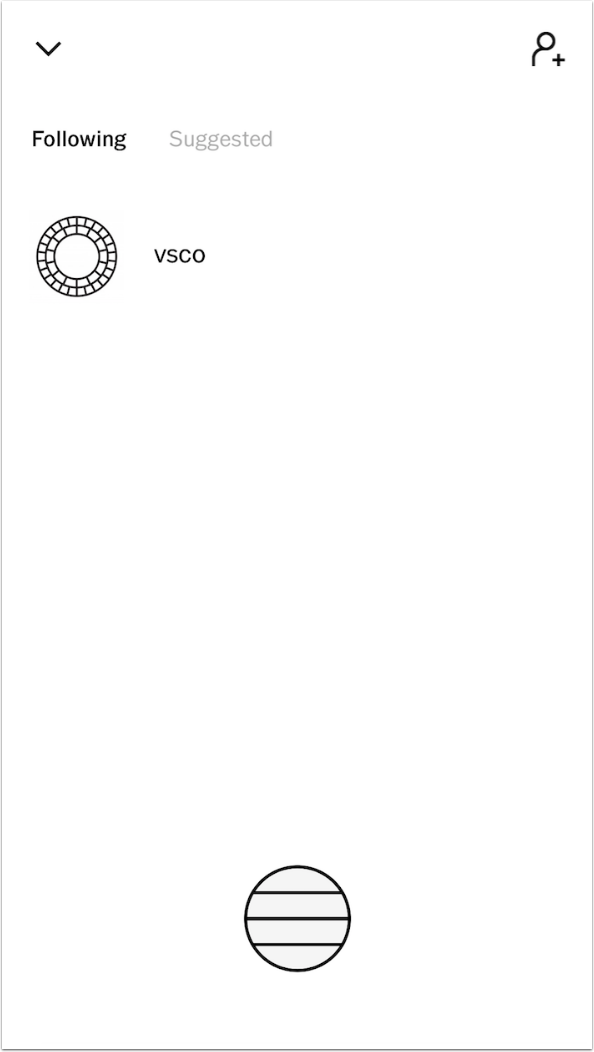
Tapping the smiling face at the top left of the Explore screen, you can then see the people you are following and get suggestions on more to follow.
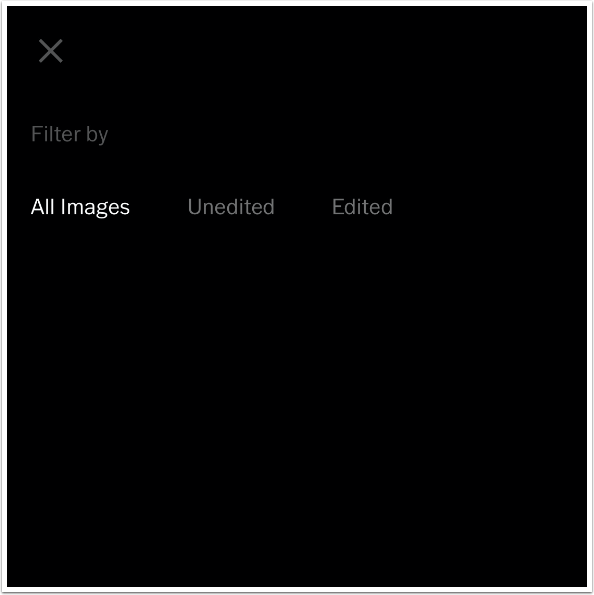
Swiping the puck down from the main screen allows you to filter the gallery to see all images or just those that are unedited or edited.
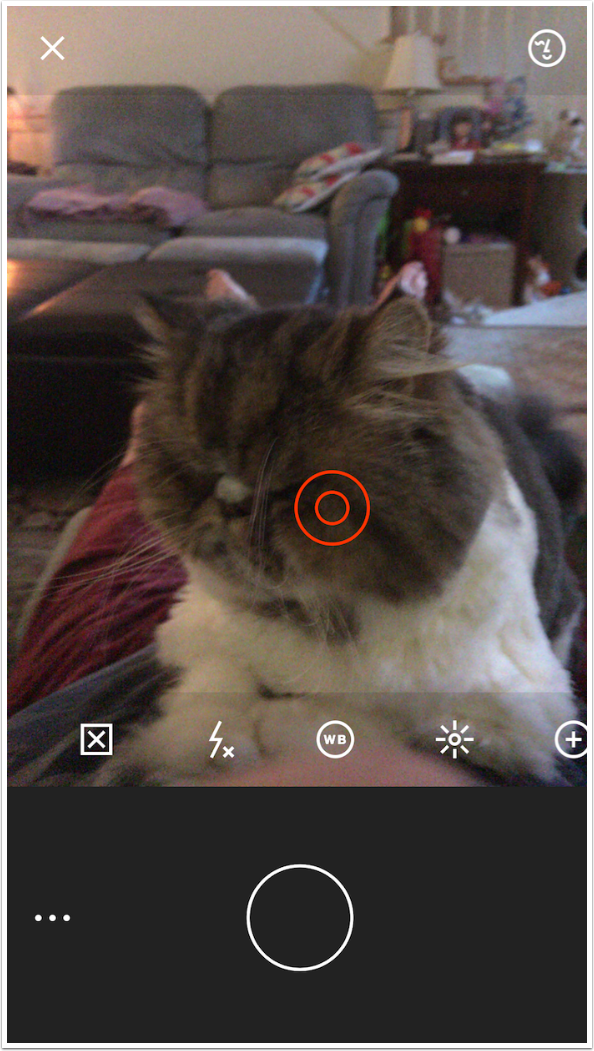
Swiping the puck up brings you to the Capture screen, or the VSCO Camera. A single tap on the image will bring up a double circle that sets both focus and exposure. Tapping on the image with two fingers separates the two circles into separate focus and exposure circles. You can lock focus and/or exposure by double-tapping the circles.

Tapping the three dots at the lower left brings up the camera controls. The first two are toggles, while the remaining controls bring up sliders. The boxed X gives you grid and leveling options. The lightning bolt is the flash options, which include a continuous light option. The remaining three controls shown here are White Balance, Brightness and Manual Focus.
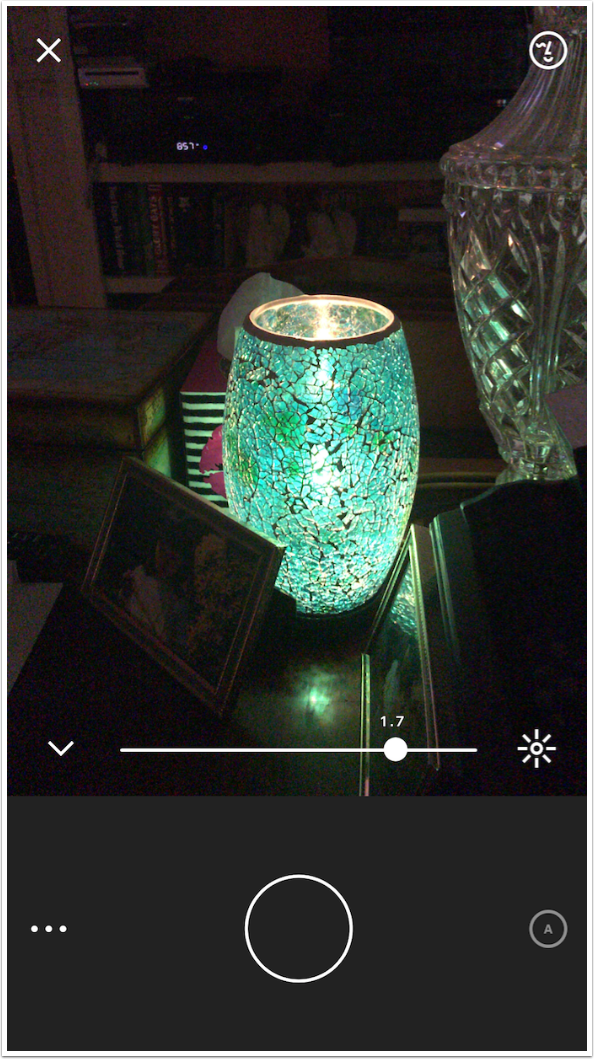
When a control with a slider is tapped, a slider appears. There is also an “A” in a circle at the lower right that stands for Auto. If Auto is engaged, there is no ability to adjust the slider. Tapping the A disengages Auto and engages the slider, and you can move it to your desired setting. Tapping the down arrow at the left of the slider returns you to the controls.
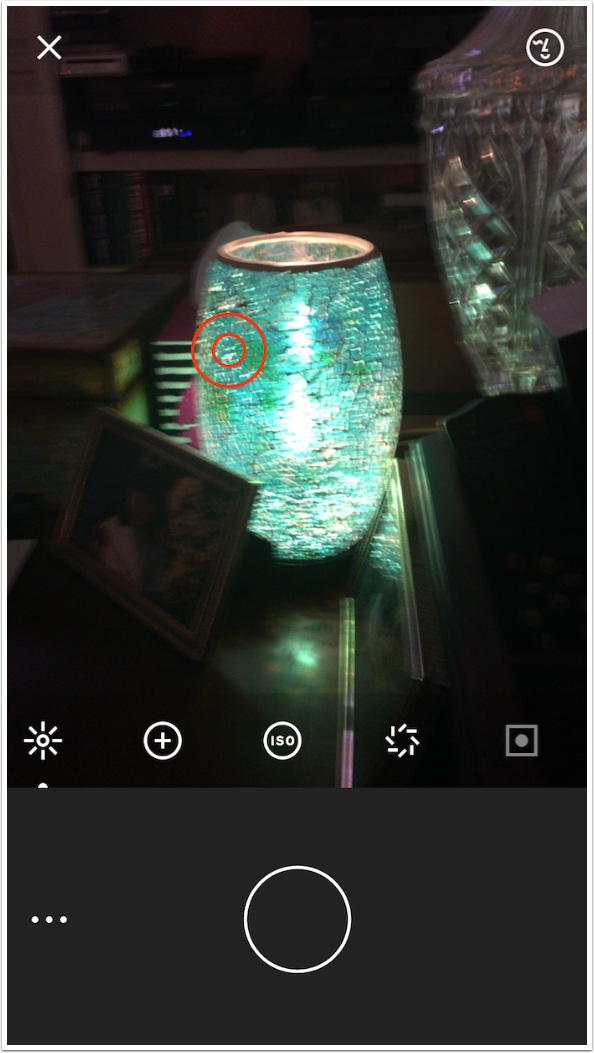
If you have changed the setting, a small dot appears below that setting. Additional controls appear if you scroll horizontally. The first of these is ISO, the second is Shutter Speed, and the last puts a red box around the image. That red box signifies that you can tap the image rather than the shutter button to capture the image.
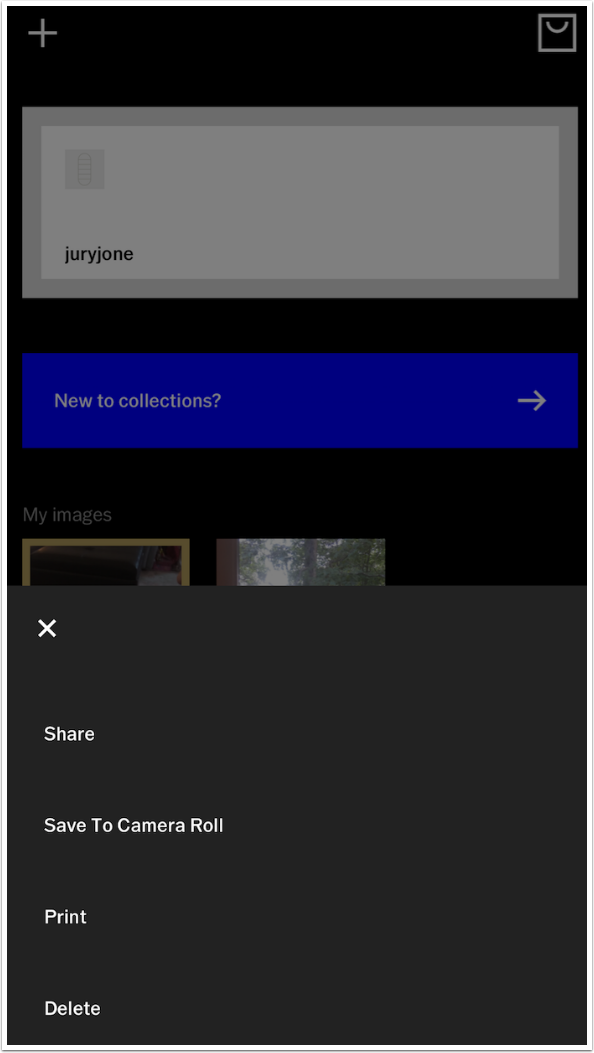
Any image captured is added to the gallery. (You return to the gallery by tapping the X at the top left of the Camera screen.) You can select a single image or multiple images by tapping them. Each image tapped will be surrounded by a gold border. Any further actions taken will apply to selected gallery images. The Sliders button at the bottom will take you into Edit, the Arrow will Share to the Community, and the three dots brings up other save, share and delete options.
Below the save, share and delete options are shown. I want to delete one of the captured images.
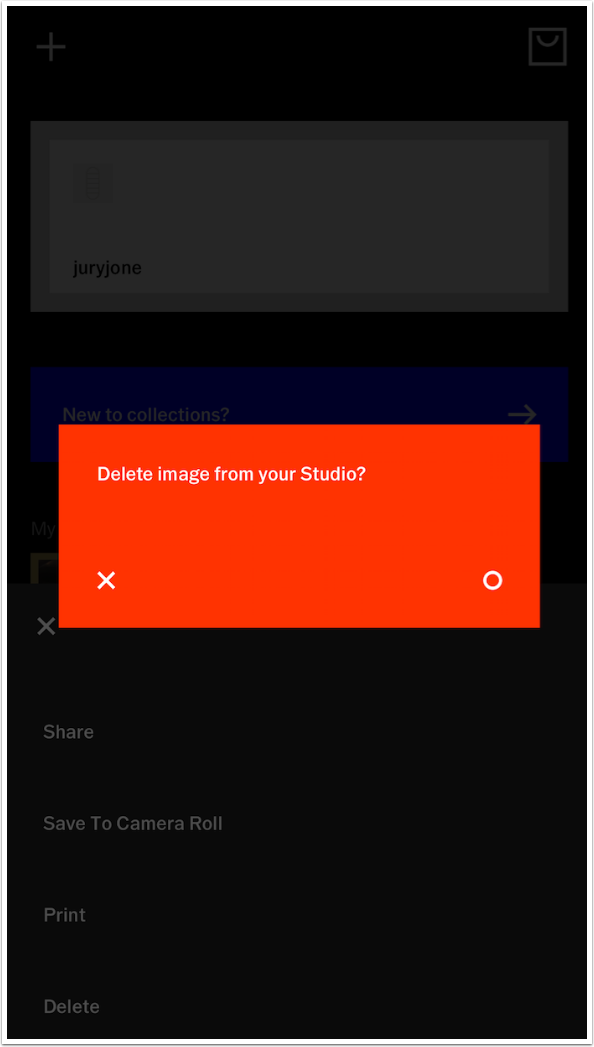
The Delete function does have a confirmation box. X will cancel, and the circle will confirm.
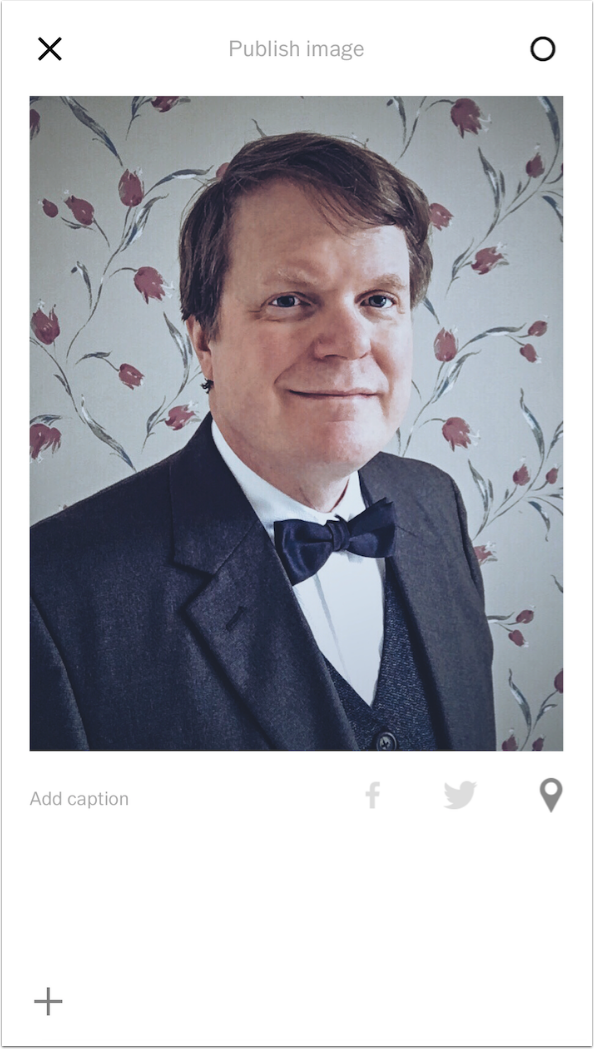
The screen shown below is the Share with community option, that allows you to add a caption and cross-post with Facebook or Twitter, as well as tag the location.
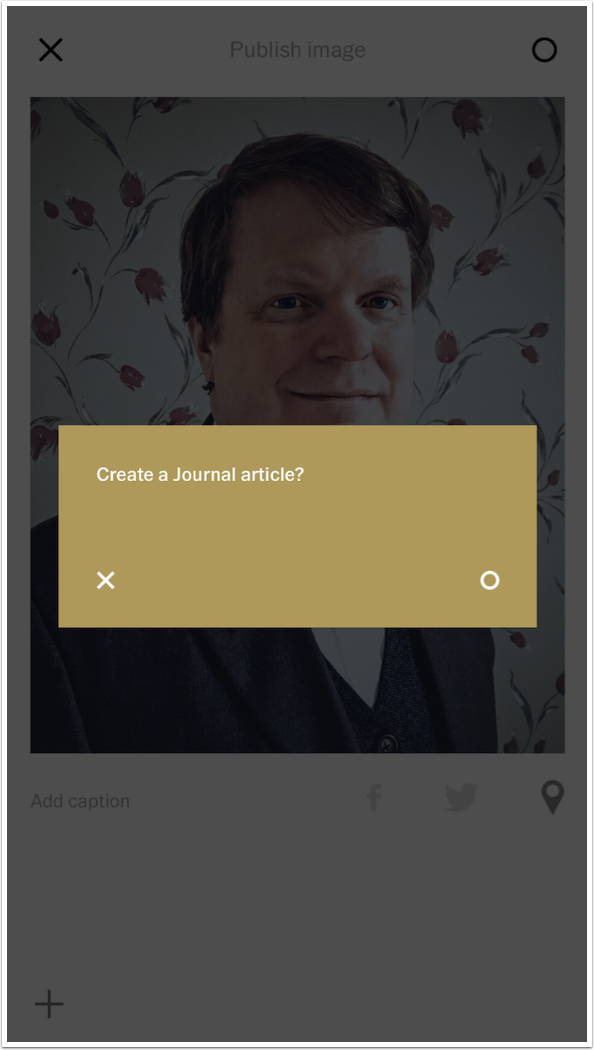
Publishing an image is also known as sharing a Journal article.
The Edit section of VSCO has four main controls: Filter, Adjust, Undo and History. Filter is chosen and you can see the thumbnails for the filters behind the main controls.
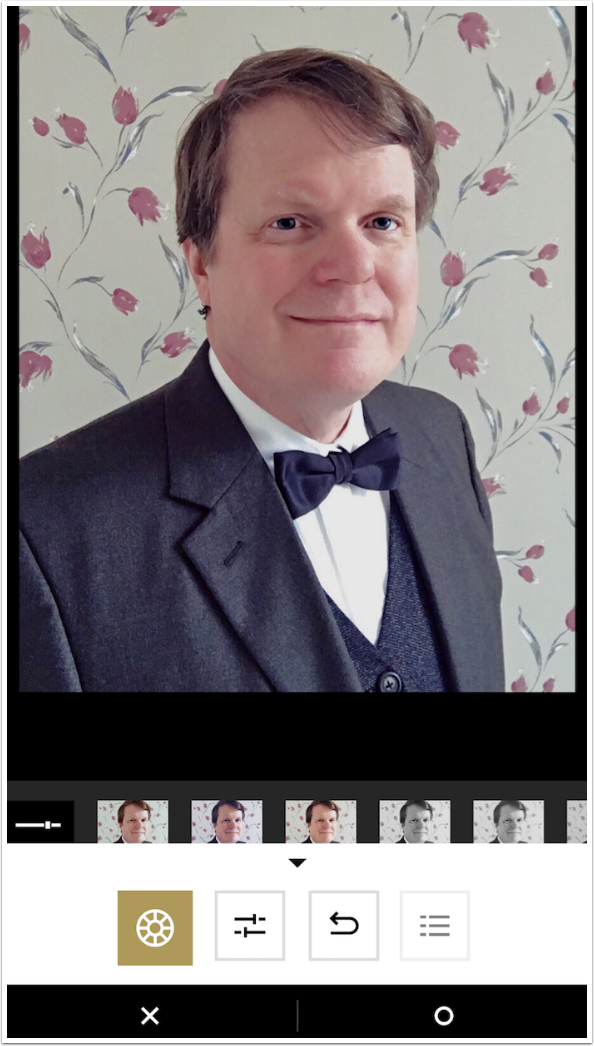
To choose a filter, tap the thumbnail. A slider appears on the chosen thumbnail.
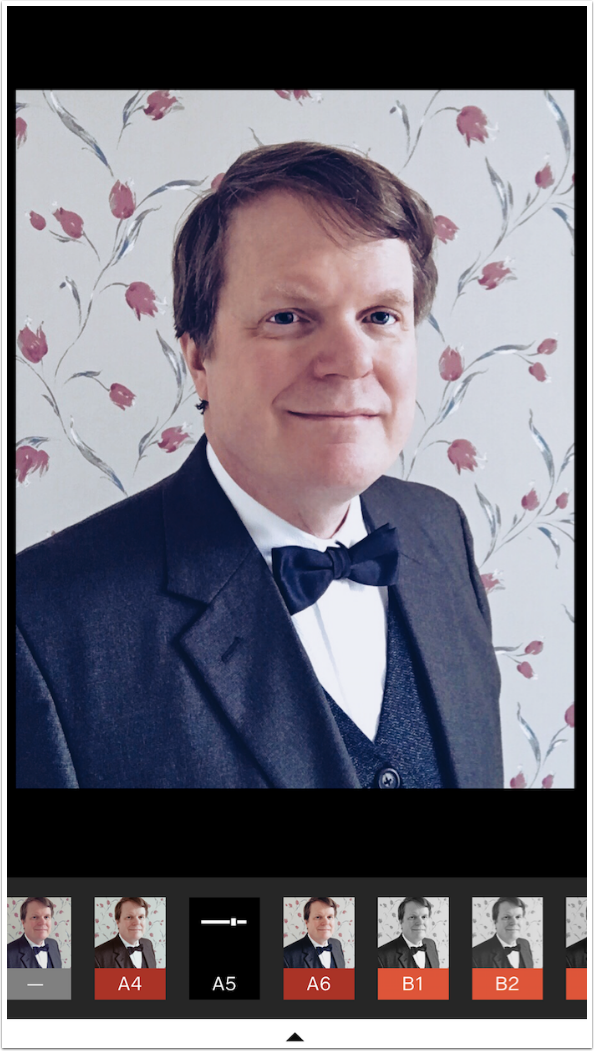
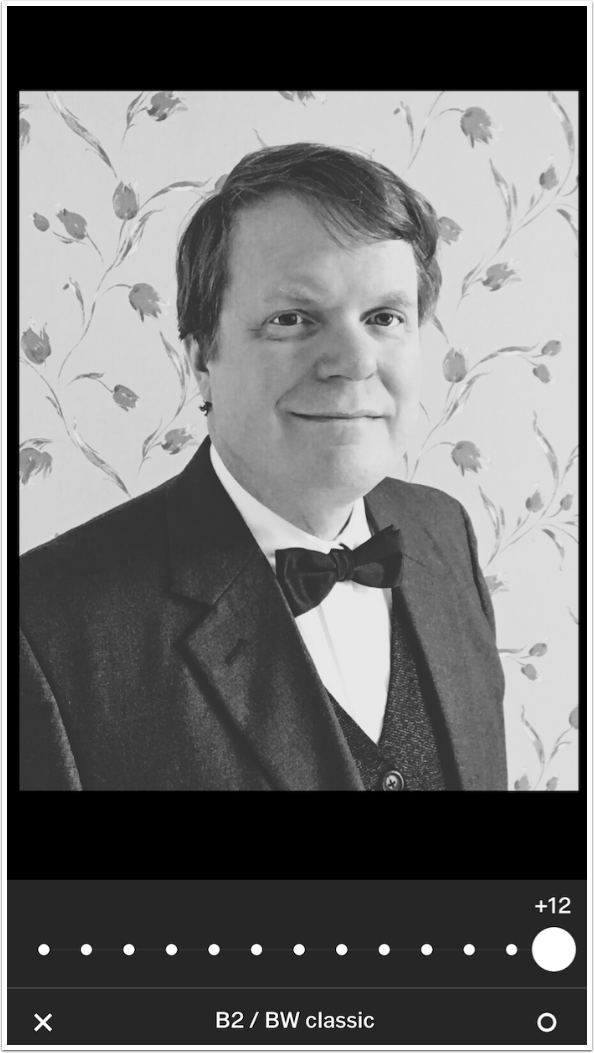
Tapping the thumbnail again brings up an intensity slider for the given filter. By default, the intensity is set at the maximum +12 value.
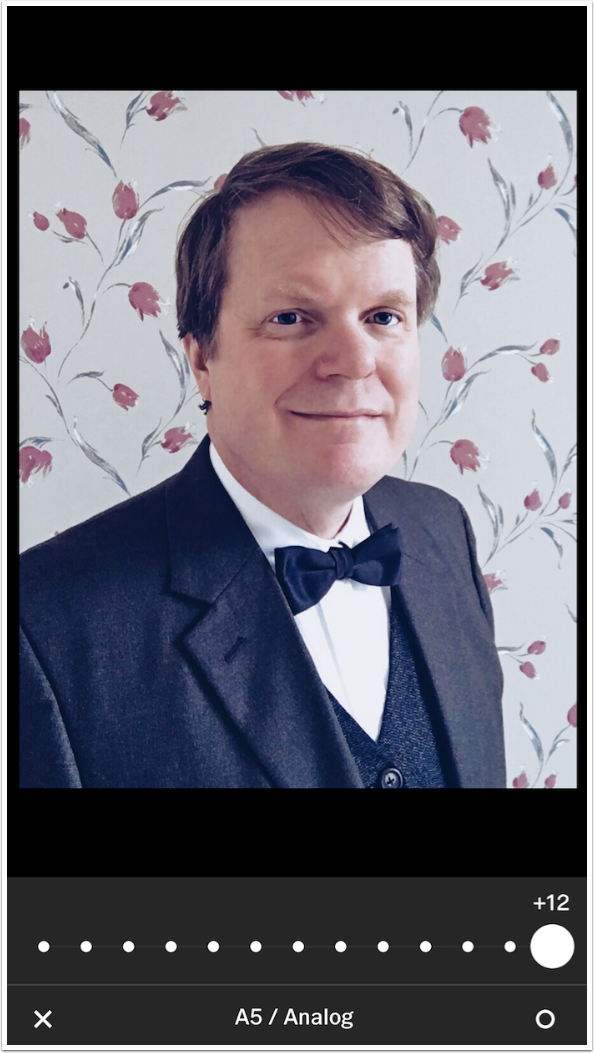
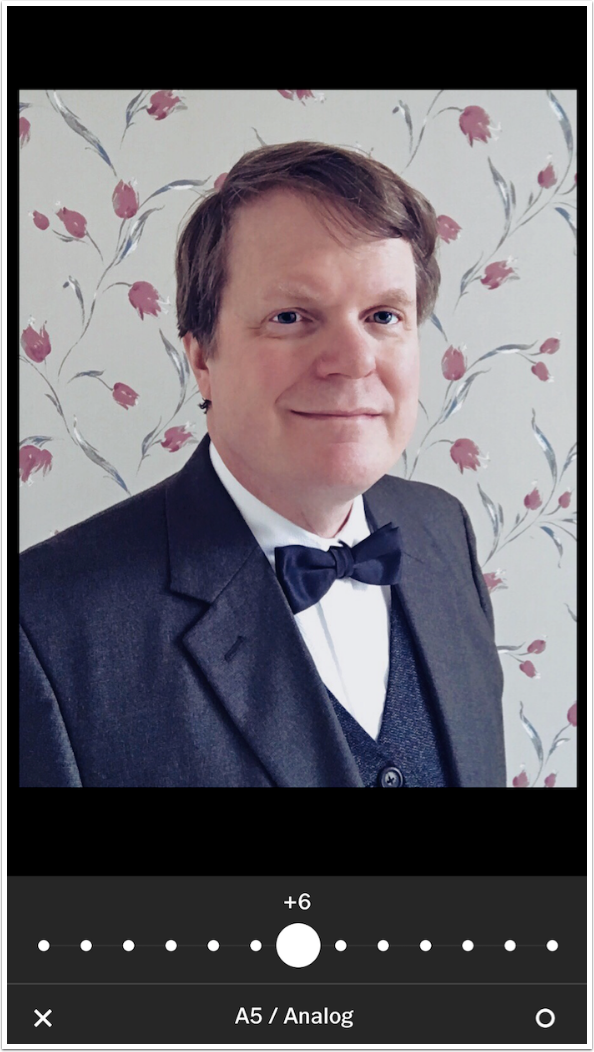
You can dial it back to any integer value, but you can’t set it to partial values, like a +5.75.
The black & white filters remain monochrome at any intensity. Below you see the B2 filter at full intensity.
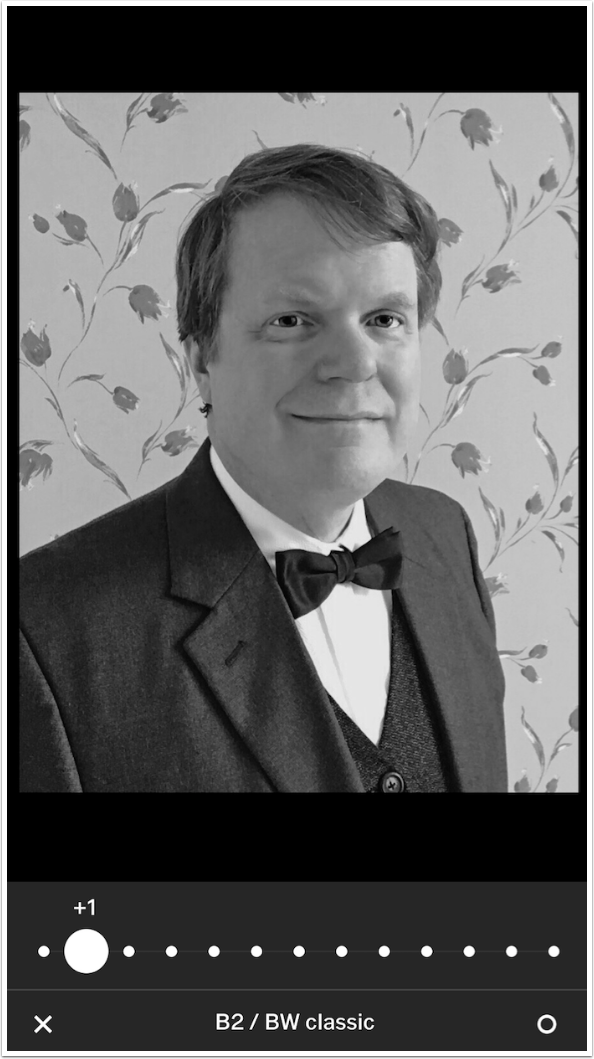
Even though I moved the slider value all the way down to +1, it’s still a monochrome image.
I have 54 of VSCO’s offered filters installed. In order to obtain more, you visit the Store to purchase more. The Store is found at the right end of the thumbnails.
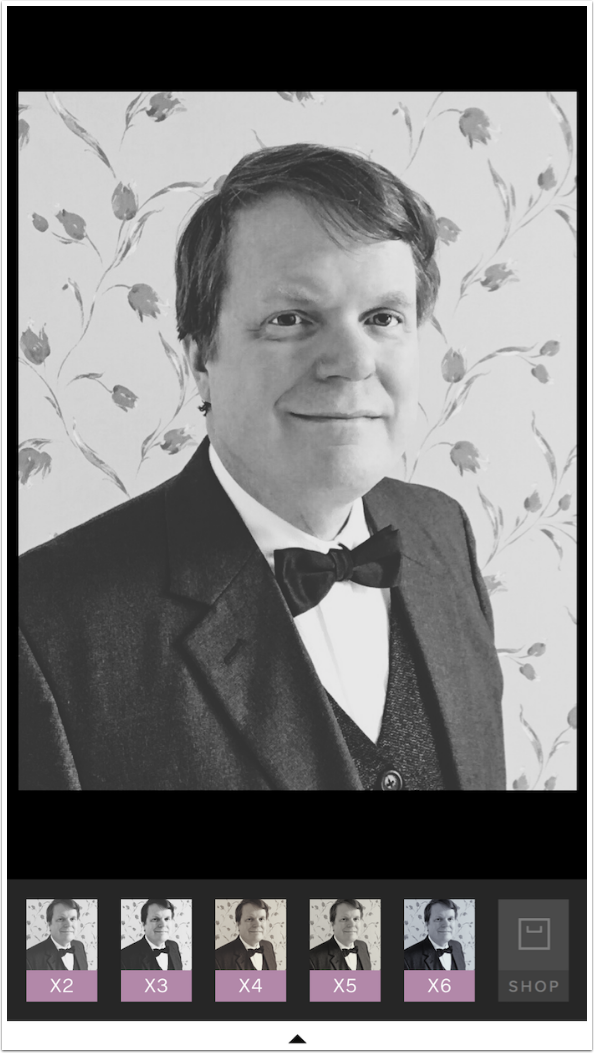
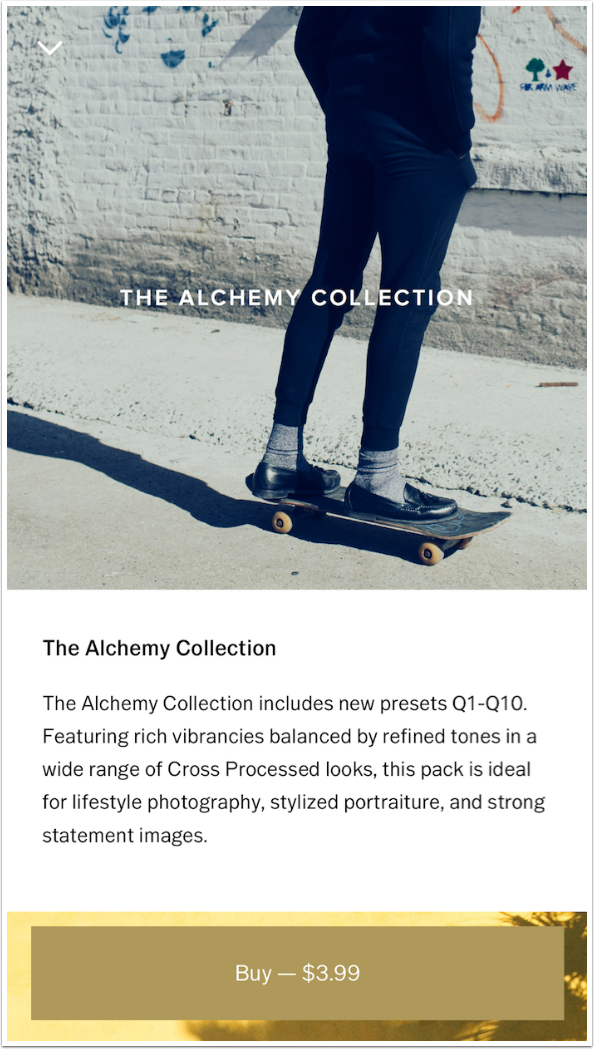
The filters are gathered into Collections. The Collections are groups of 3-12 filters. Prices range from .99 for three filters to 3.99 for 12.
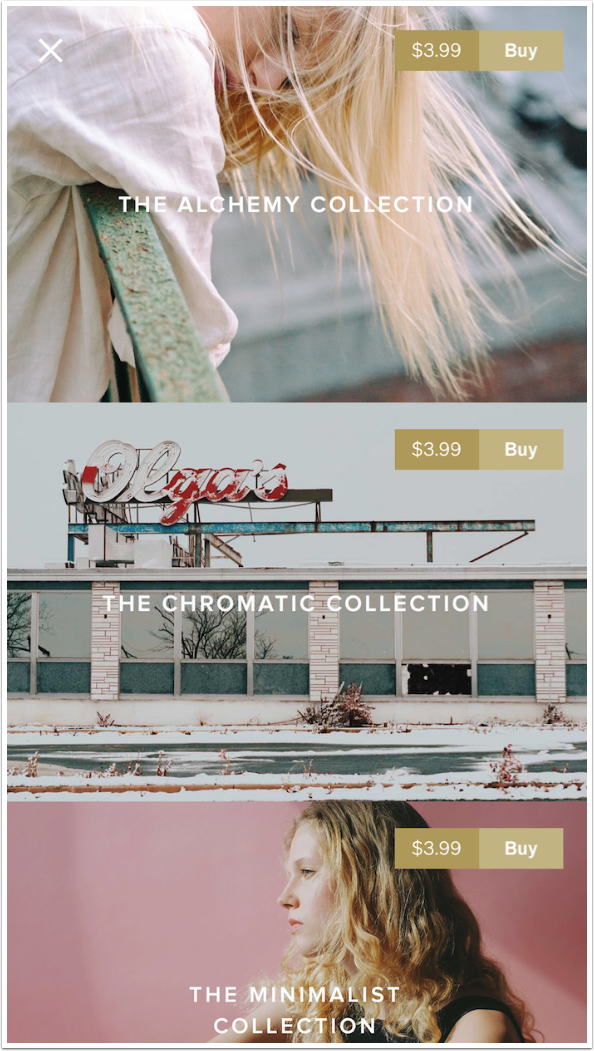
You don’t have to buy sight unseen – choosing a collection will show you examples of all the filters included in the collection.
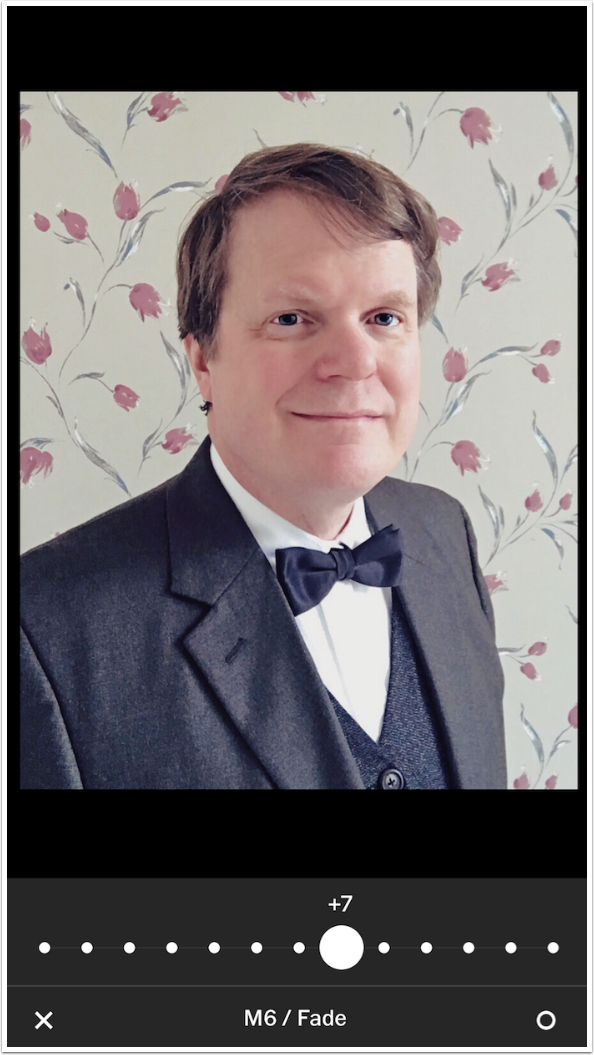
At any time while you are editing you can compare to the original by tapping and holding the image. Below you see the M6 filter at a +7 intensity.
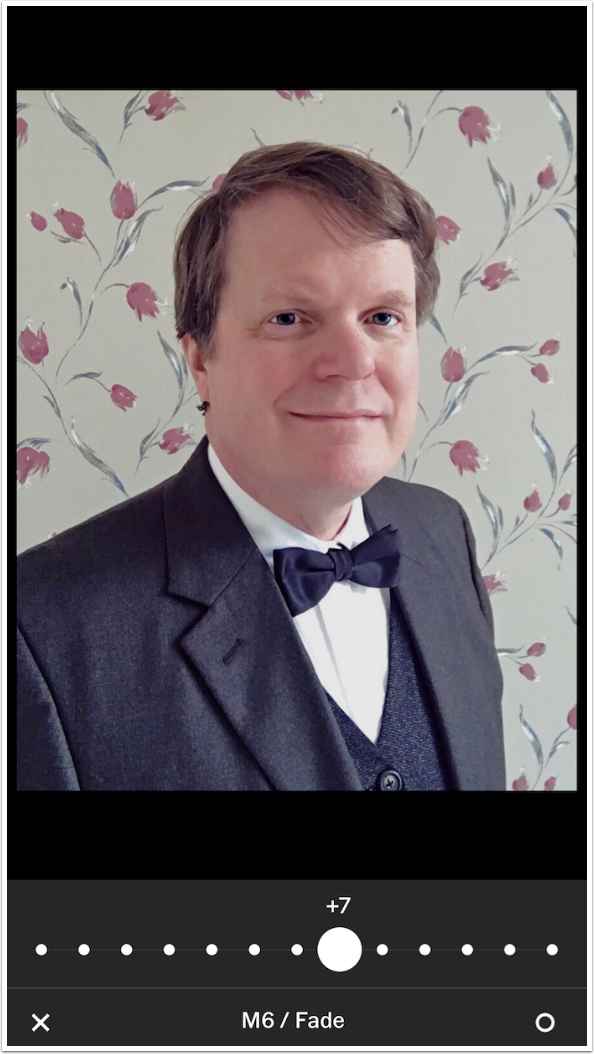
By tapping and holding the image, I see the original.
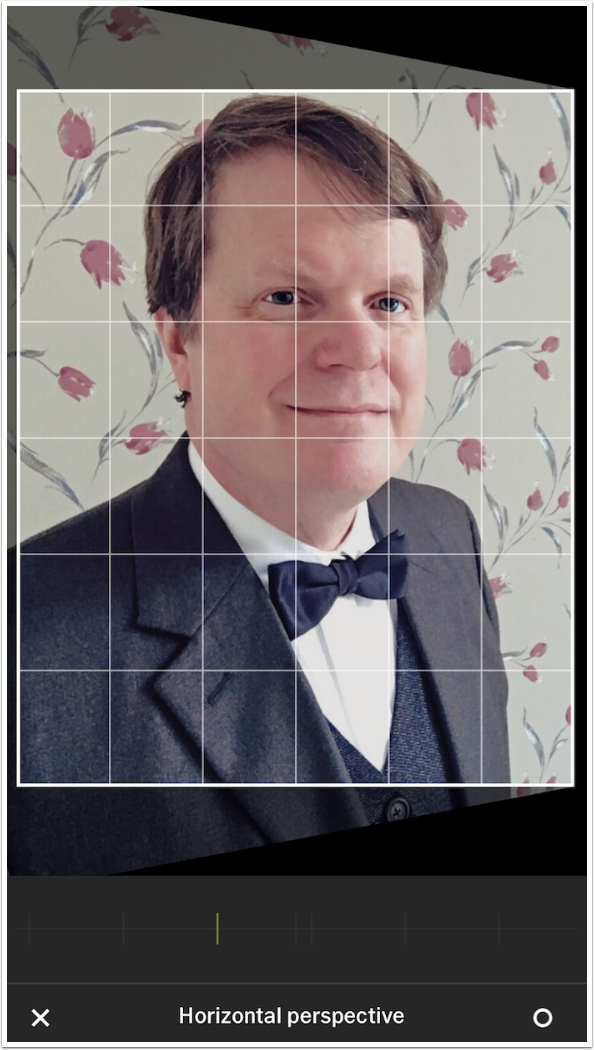
Once I’ve chosen the filter, I can move on to adjust the image by tapping on the up arrow, then choosing the Sliders icon from the pop-up menu. The first six adjustments, hidden by the pop-up menu below, are Brightness, Contrast, Rotate, Horizontal Perspective, Vertical Perspective and Crop.

Brightness, Contrast, and Rotate are self-explanatory. Below you see Horizontal Perspective. It’s not as useful on portraits as it would be on architectural shots.
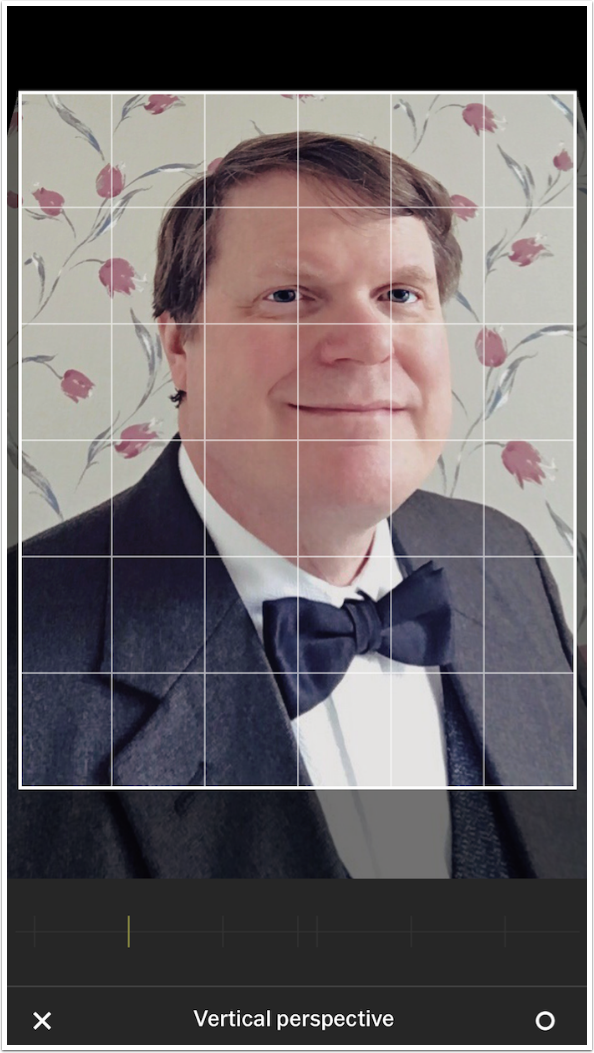
The same can be said for Vertical Perspective. As with all these controls, you move the slider to make the adjustment, then tap the circle to accept the adjustment.
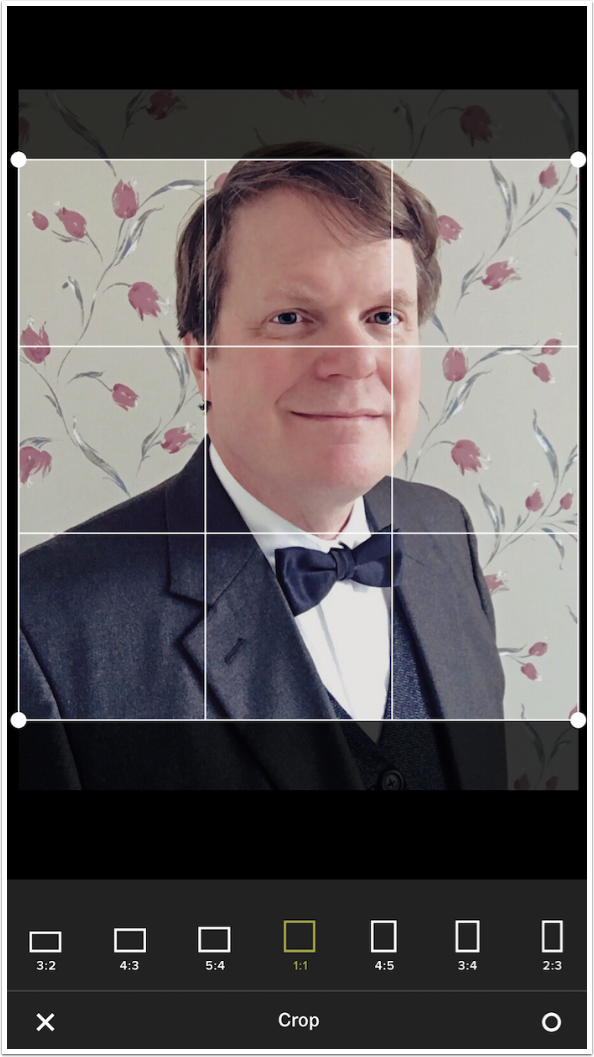
The Crop tool only offers 7 possible ratios to work with. There is no freeform crop. I tap the X at the lower left because I want to cancel the crop.
The next seven adjustments are Clarity, Sharpness, Saturation, Highlight Save, Shadow Save, Temperature (Blue-Yellow) and Tint (Green-Magenta). These are all rather standard controls, and will not be shown individual
The next control is Skin Tone, which is a rather subtle control. Below you will see it at the default value of zero.

At a value of -6, there’s a bit more redness in the skin.

At +6, I see redness removed.

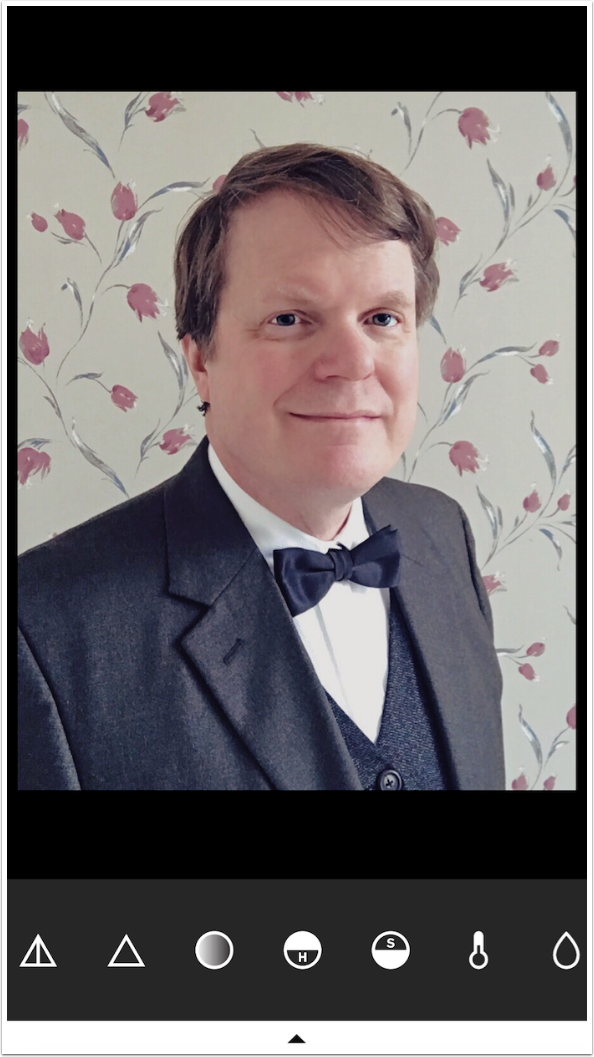
Below you’ll see the icons for the remaining six controls: Skin Tone, Vignette, Grain, Fade, Shadow Tint and Highlight Tint.

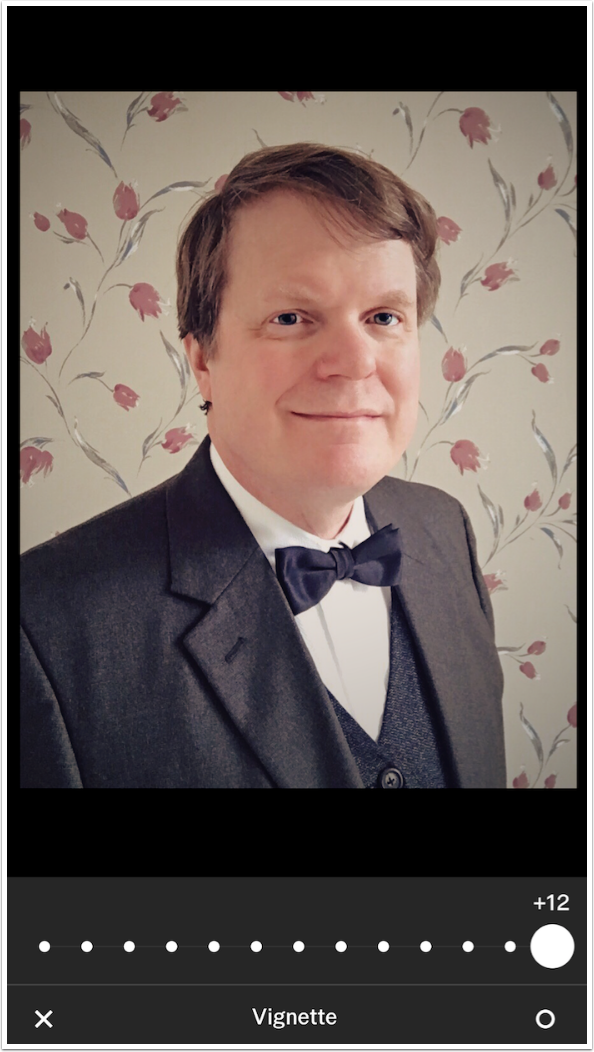
Vignette is a subtle control in VSCO. Below you can see the maximum Vignette, a value of +12.
Fade is a control that seems to be used often these days. It’s a lowering of contrast, well beyond what the Contrast tool allows.

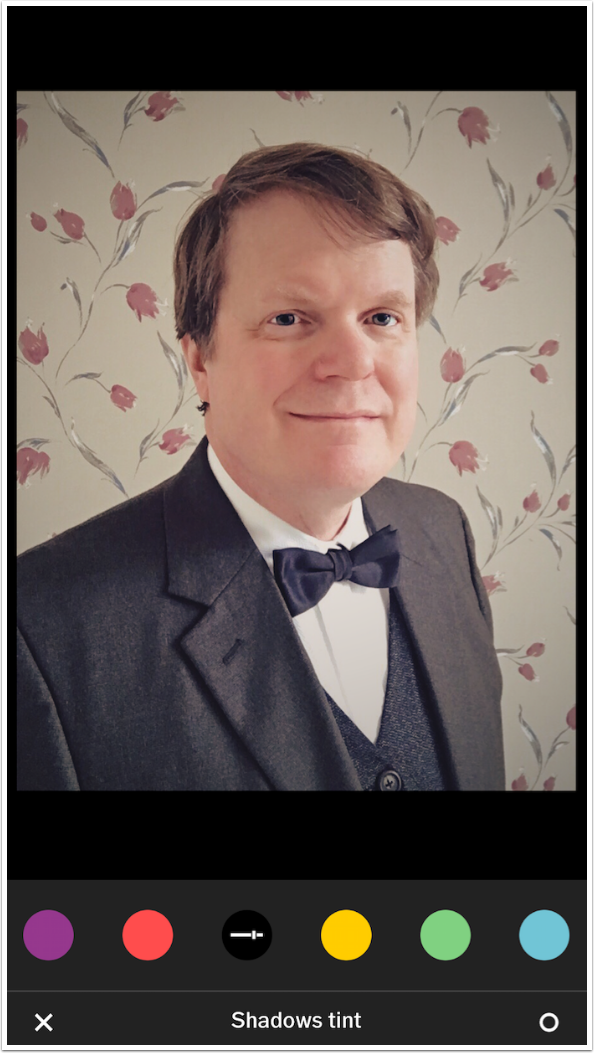
Shadows Tint affects the color of the darkest areas of the image. There are six colors to choose from: purple, red, orange, yellow, green and blue. When you choose a color, a slider icon replaces the color icon. Tap the color again to access the intensity slider.
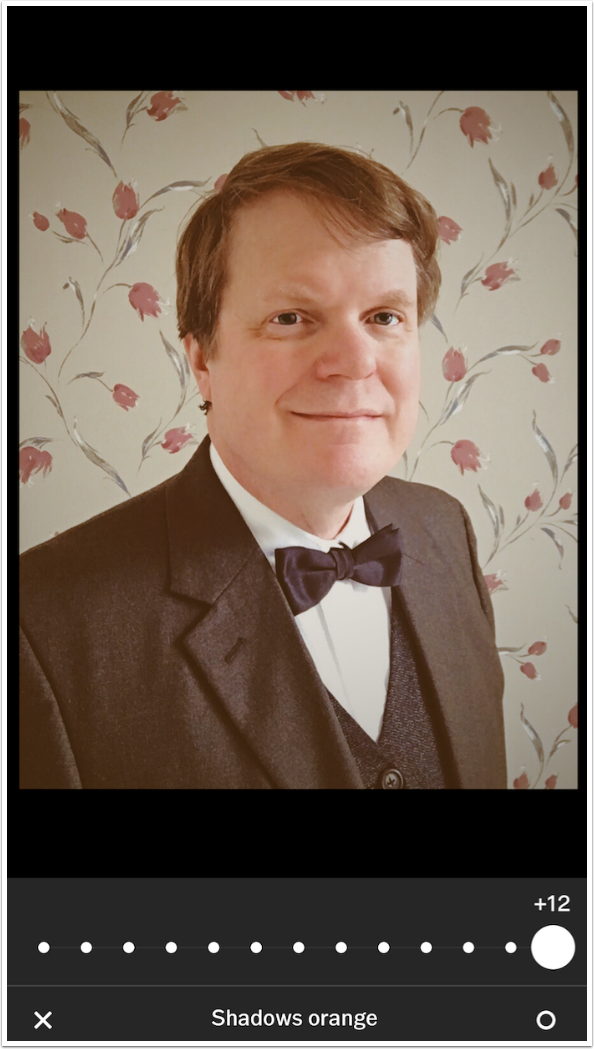
Below you’ll see the orange in the shadows at maximum intensity.
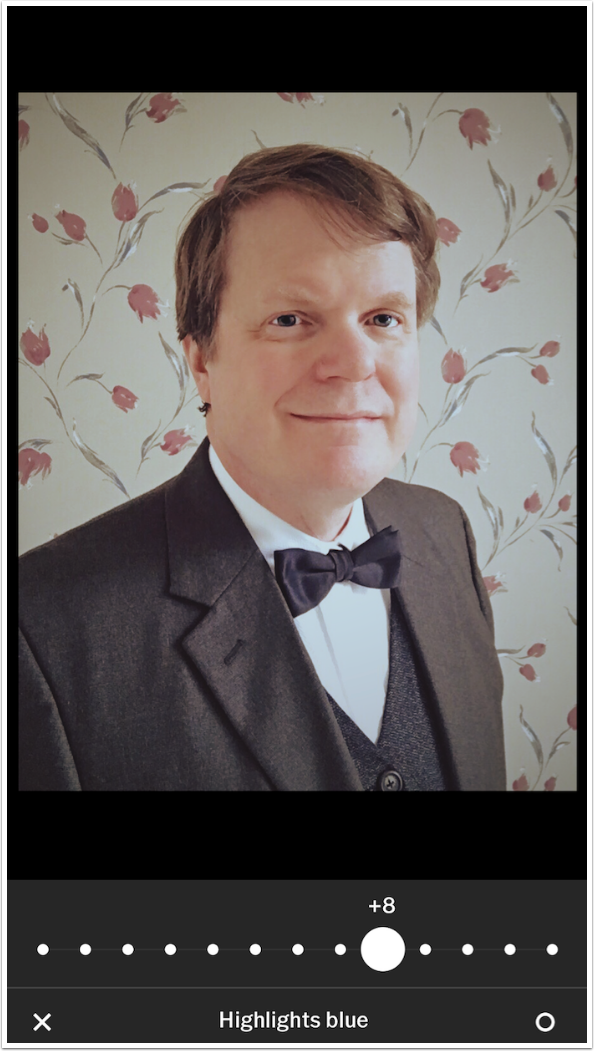
I can cool down the highlights with a blue Highlight Tint.
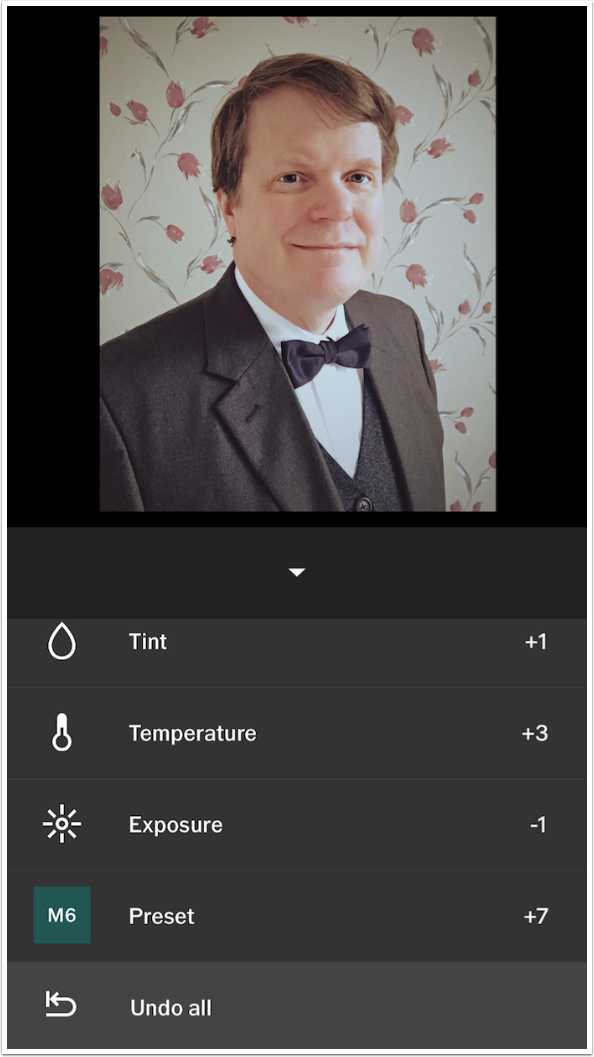
You can Undo the last change to any of the adjustment controls with the Undo button in the pop-up menu. The “List’ control is history.

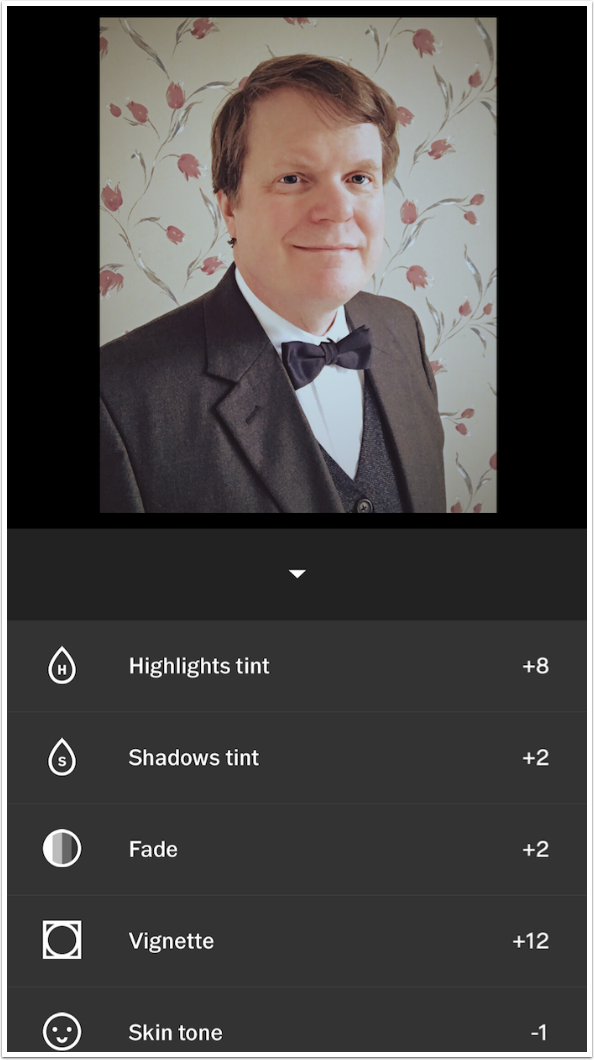
Below is the history list, from the most recent change to the least recent.
At the bottom of the History list is a button that allows you to Undo all changes and start over.
Once you tap the circle under the pop-up menu, then your changes are accepted and the changed image is now listed in the gallery.
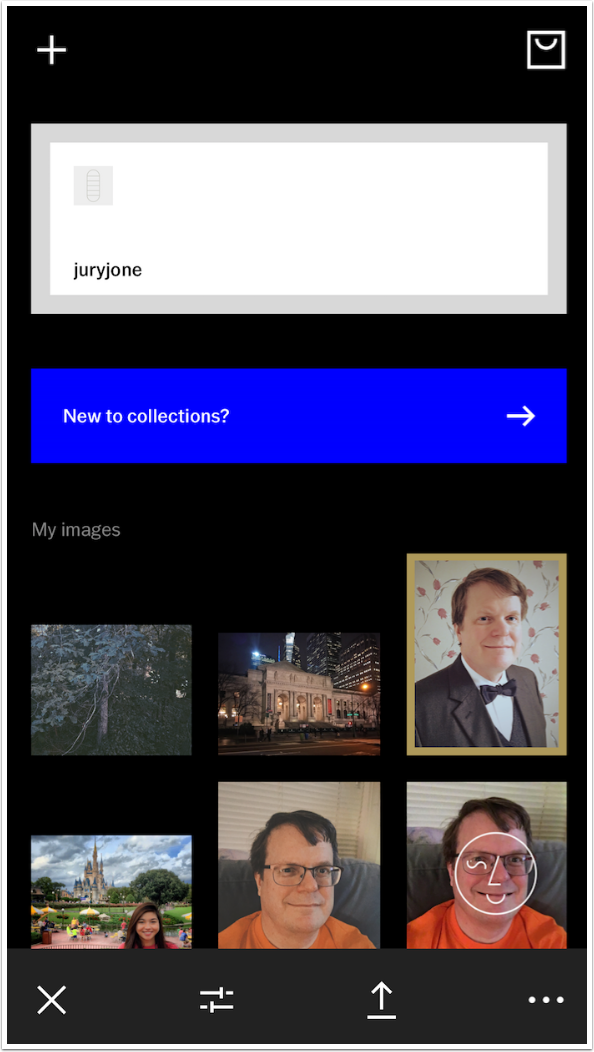
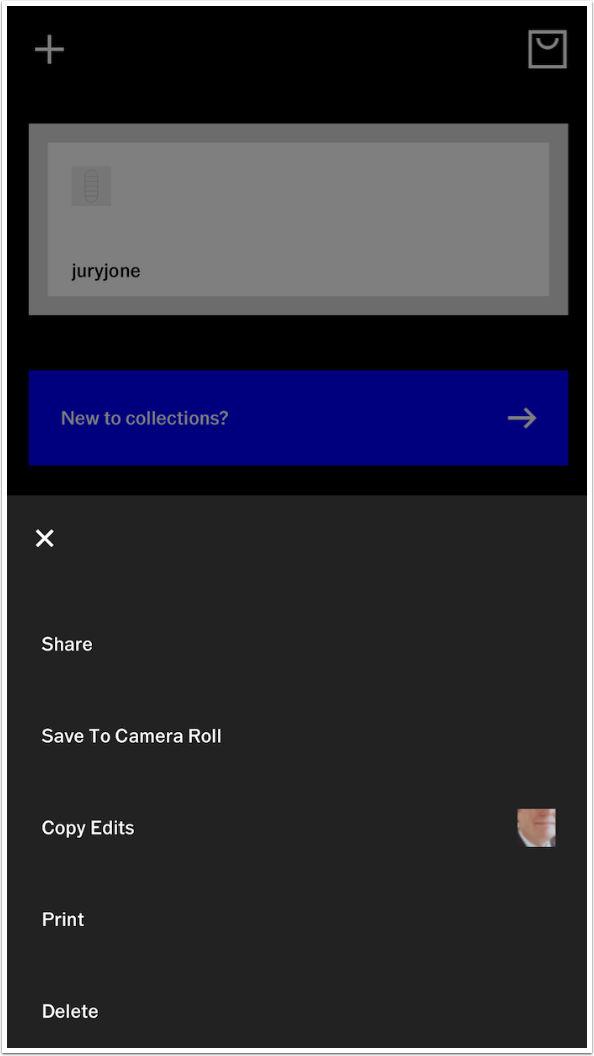
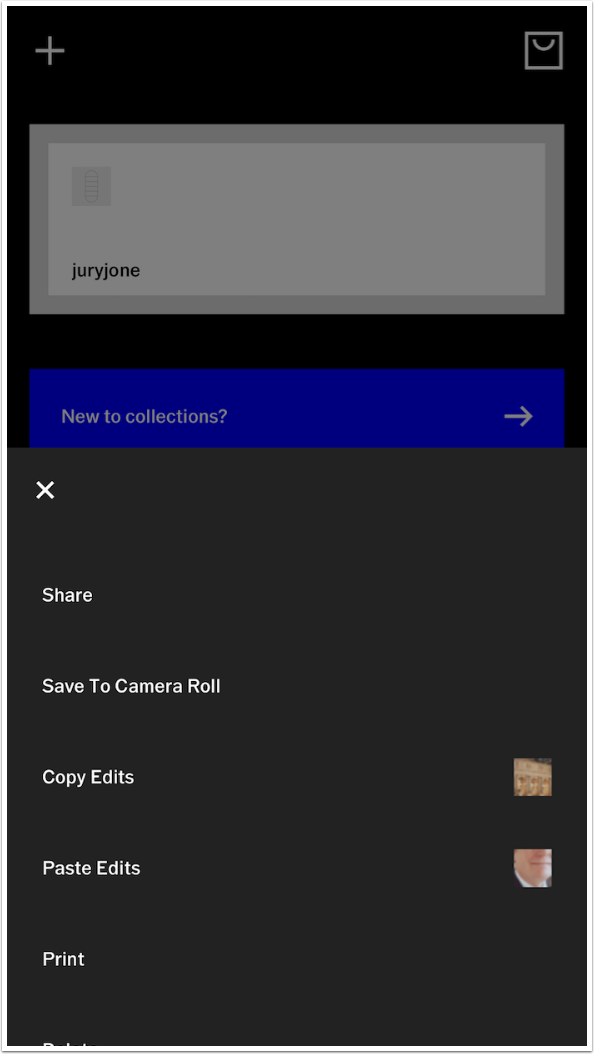
You can tap the “three dots” icon in the gallery to save the image. Notice that there is also an option now to Copy Edits. That means you can use all the same edits on one or many other images.
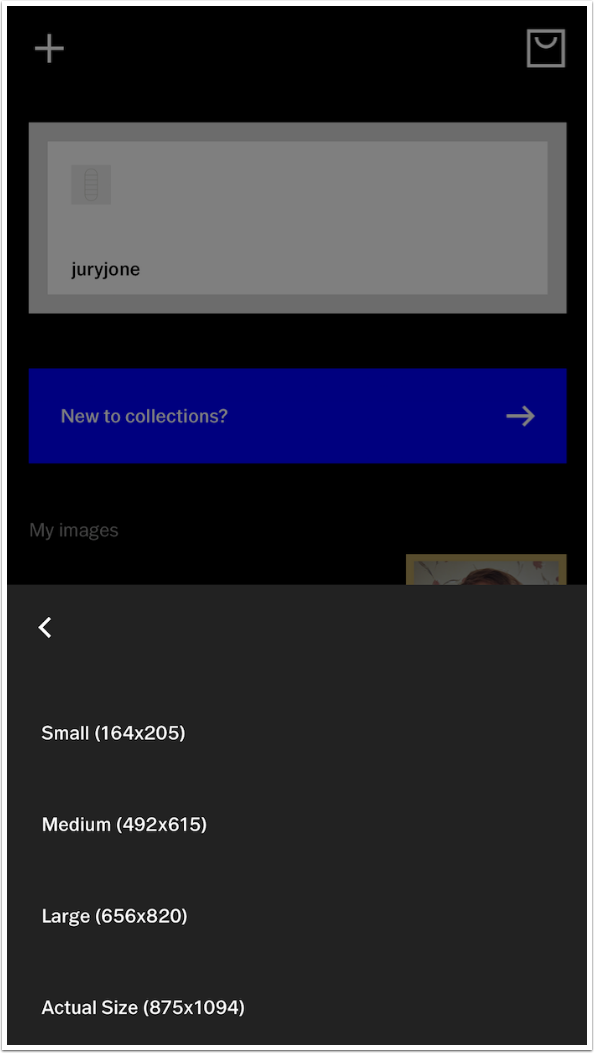
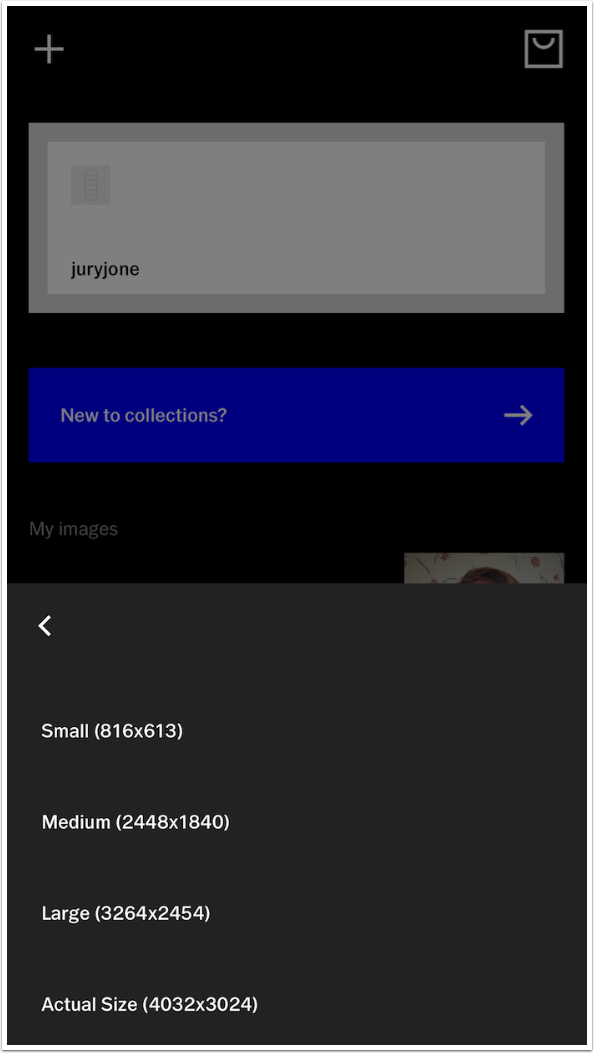
When you Save to the Camera Roll, you can choose from a number of sizes. I always stick with Actual Size.
Here’s the test image after all the edits.

I tapped Copy Edits on my portrait, then chose a landscape for my next session. Rather than go into Edit, I tapped the Save/Share/Delete icon and there is a selection to Paste Edits into this image. I pasted the edits and entered the Edit module.
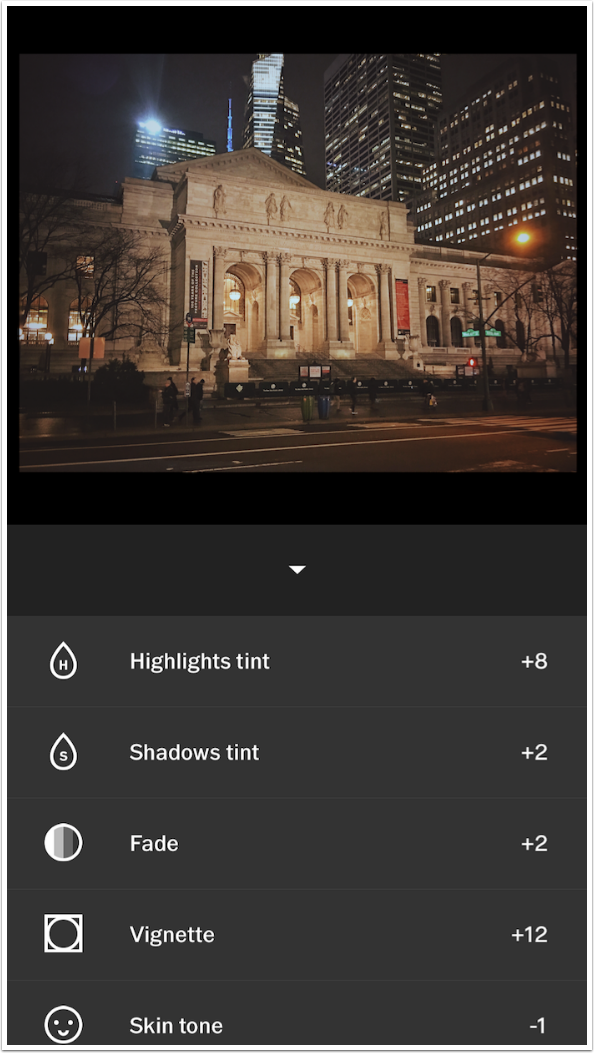
Here are the edits pasted onto the New York Public Library.
When I look at the History I see all the steps that I had applied to the portrait. In this way you can apply the same edits quickly to all the images captured in a particular session.
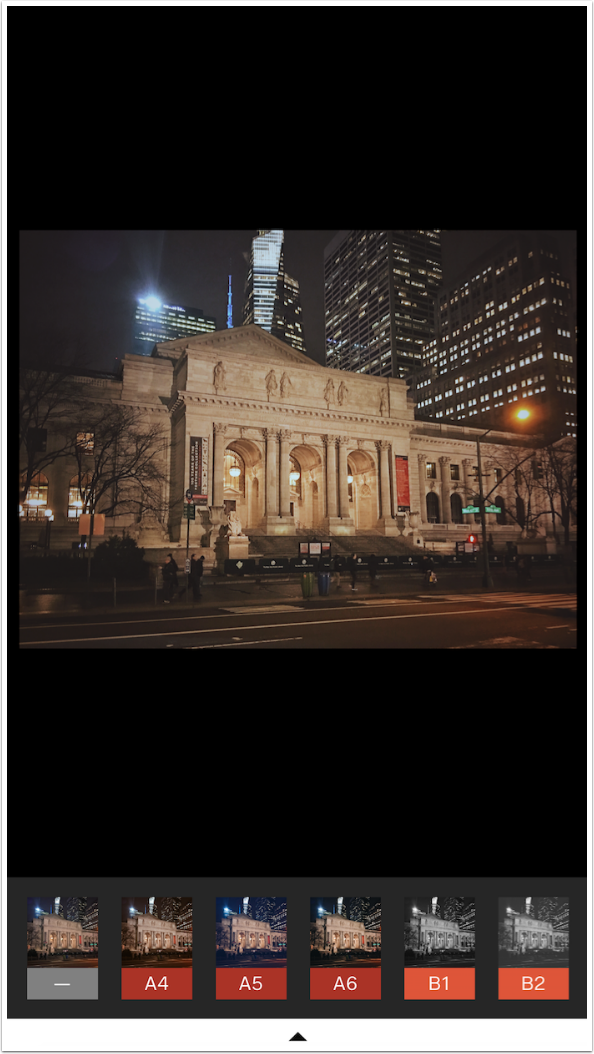
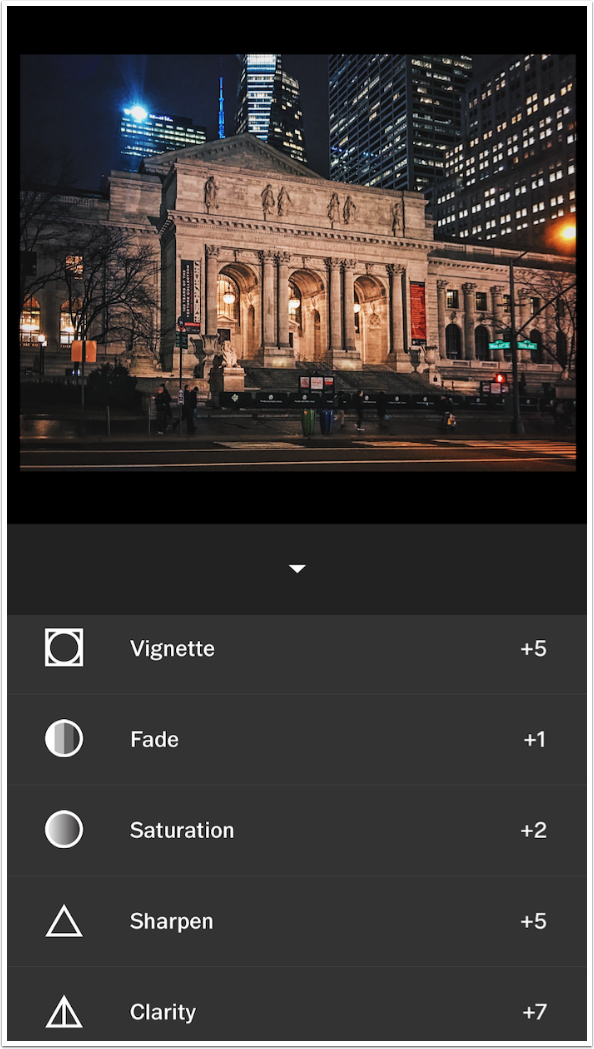
Of course, in this particular case those pasted edits don’t give me the look I like. If you compare the pasted edits above to the edits I chose below, I think you’ll agree. You should also be able to tell that I used Horizontal Perspective on the street scene.
When I go to save the street scene, you can see that VSCO will edit even your largest images.
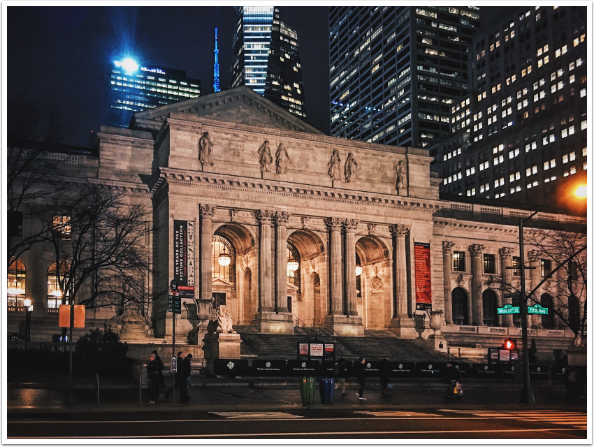
Here is the finished NYPL at night.
My final two images were mostly edited with VSCO, but there were some effects it just doesn’t have. The first is a cropped version of the window scene captured earlier when I was demonstrating focus/exposure with the VSCO camera. I decided I wanted a bit of glow, and I got that with Snapseed.

The final example looks a bit better with some depth-of-field blur added in Snapseed.

There are many mobile photographers who swear by VSCO, and who can blame them when they get such wonderful results? I’m certainly glad that the interface was tweaked to make it simpler for those of us who are not looking for a new image publishing site, and just want to make our images look nice. Yet it still remains powerful enough to allow you to handle an entire photoshoot while editing a single image, through the copying and pasting of edits.
Chances are, if VSCO is your find of app, you’ve already got it. As I said, it’s a well-loved app already. But if you were a bit leery about using it because of the strong ties to another image community, give the new interface a try. Until next time, enjoy!
Jerry Jobe
Never content with just scratching the surface of what an app can do, Jerry Jobe decided to pass on what he learned about imaging apps to others. He’s constantly trying to figure out just what tools other artists have used, and trying to incorporate them into his own work, in an attempt to find his style. He’s written tutorials on over 145 apps so far, which you can find (along with his Song of the Day entries) at http://enthusiasmnoted.wordpress.com/ He lives near Atlanta, Georgia, where he also finds a creative outlet in acting and directing in community theater.