
Wood Camera – iPhone Photography Tutorial – How To Create A Dynamic Image
I will have to admit that I didn’t warm up to this app right away. When I first looked at it, my thoughts were those of “not impressed… I already have apps that do the same thing…” These thoughts quickly changed as I started working with Wood Camera! This tutorial is the first of two were I will show you how to quickly create a dynamic image…without having to leave the app!
If you haven’t picked up Wood Camera yet, you can do so here. It retails for $1.99/£1.49/download.

This is the final image, the one we are going to show you how to create.
Step 1

When you first open Wood Camera, it takes you to its camera function. It is here that you can capture an image using the selection of lens filters displayed on the bottom of the screen. This isn’t what I wanted to do this time as I wanted to work with an image in my camera roll. To do this, click on the “Cancel” button…and this will take you to the Light Box.
Step 2
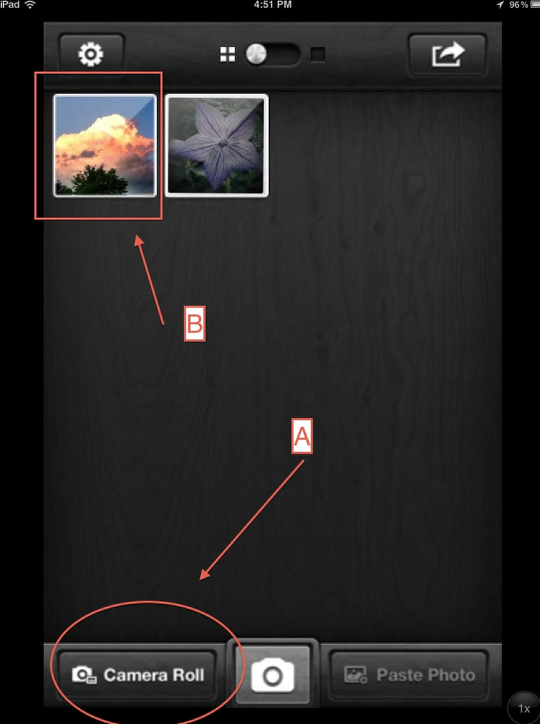
Here, click on the Camera Roll button on the bottom left (A) and you’ll be taken to your Camera Roll where you can select the image of choice. You’ll then be taken back to Light Box…click on the image (B)…and this will take you to the Edit screens…
Step 3
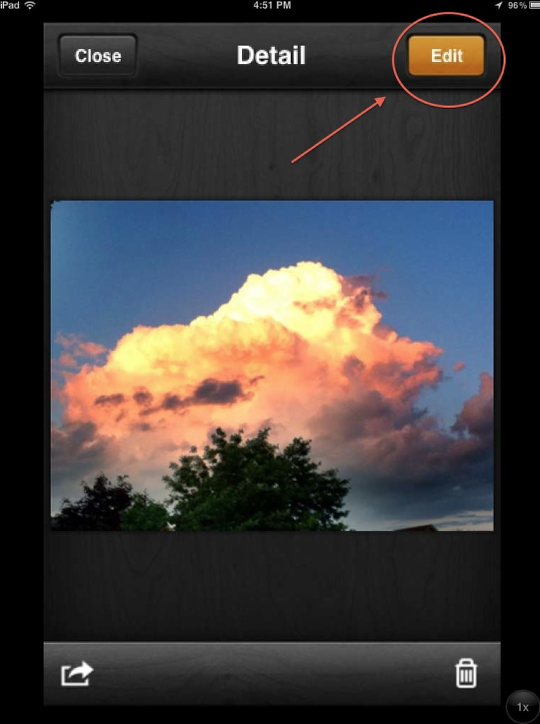
To begin your “transformations”, click on the Edit button in the top right corner…
Step 4
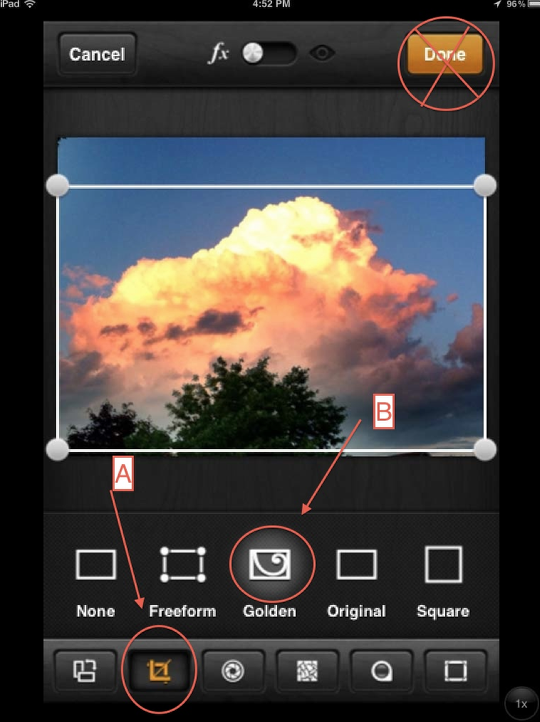
The first edit I did was to tighten up the cropping. I clicked on the Edit symbol (A) on the bottom tool panel, chose “Golden” (B) and then used the shown selector points to set my crop. Now…DO NOT click the Done button in the top right corner thinking that this will activate the crop. It will, but it will also end your Edit and you’ll have to start all over again! (I learned this the hard way…twice!) Instead, just click the next tool symbol you want to work with….
Step 5
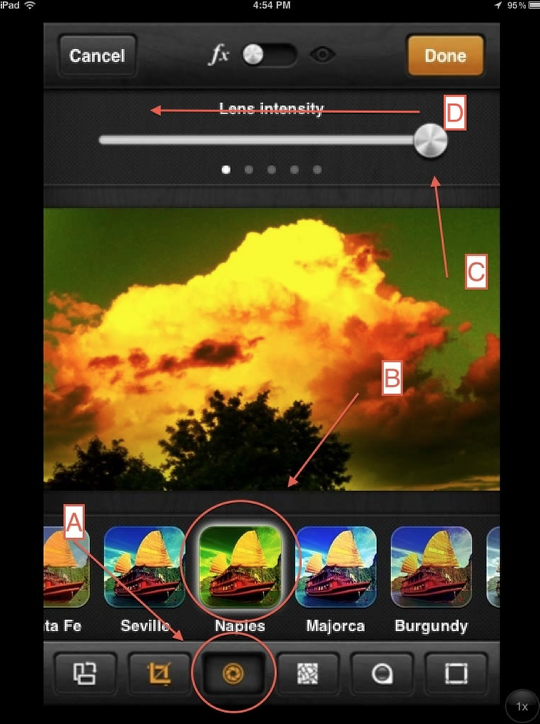
In this case, I wanted to work with the lens effect…so I clicked on (A) which brought up my choices. Playing around a bit, I finally decided on “Naples” (B)…and then adjusted the lens intensity using the slider bar at the top (C). There are more settings that you can adjust in this effect…to get to those, slide the top tool bar to your left! (D) (DO NOT click the Done button! I’ll tell you when!)
Step 6
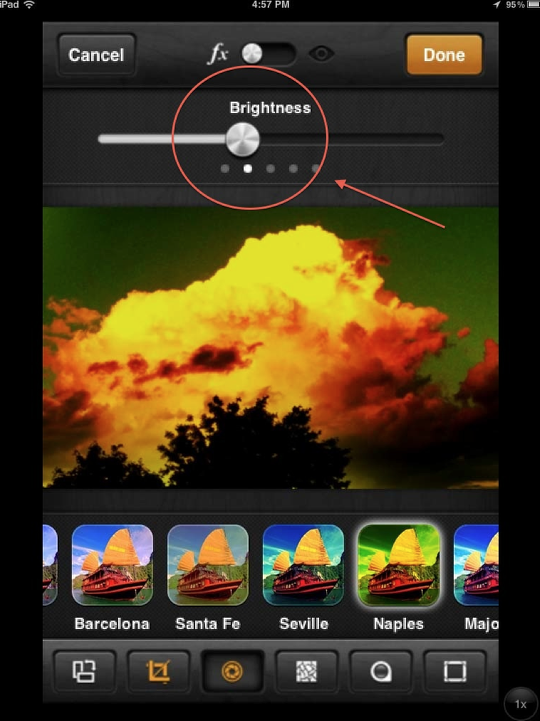
This brings you to the Brightness bar…and once again using the slider, adjust accordingly. Now it’s time to adjust the Contrast so slide to the left…
Step 7
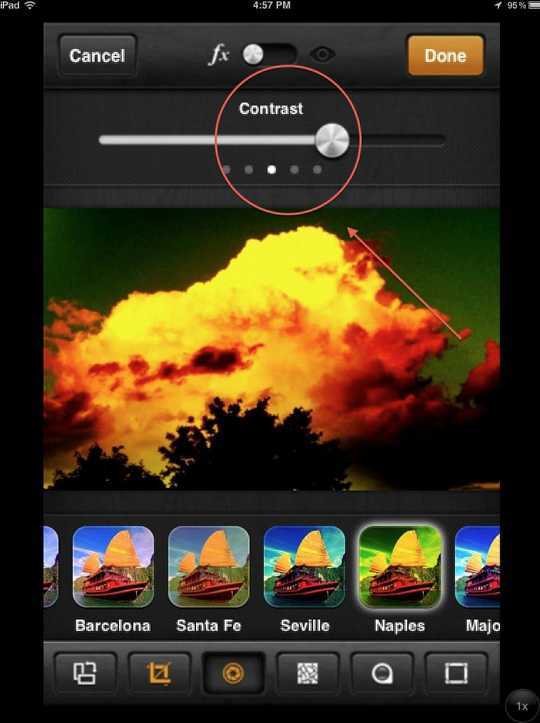
….and adjust the Contrast to taste. Next step…Texturize! (DO NOT click the Done button! It’s not when yet!).
Step 8
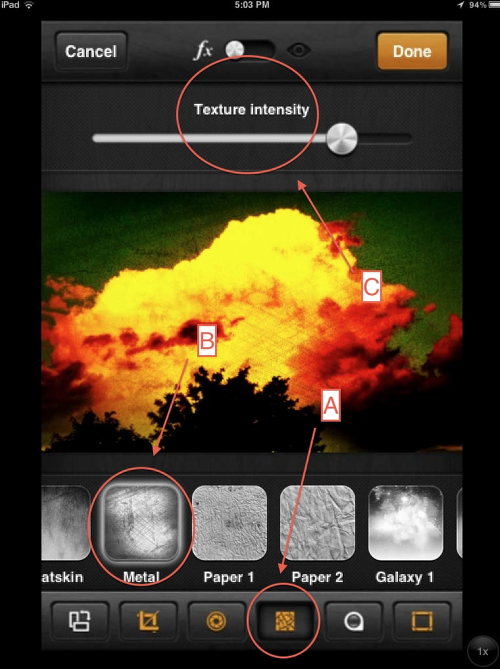
Click on the Texture button on the tool bar (A) which will bring up the selection of textures. Once again, I tried several out before settling on “Metal” (B). I then used the Texture Intensity slider bar (C) to adjust. (It’s not when yet!).
Step 9
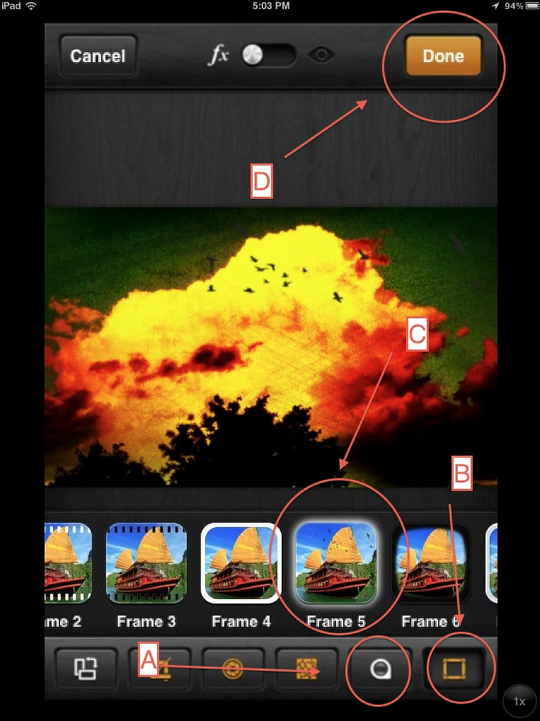
As you move down the Effects tool bar, the next one is the Vignette effects. (A). I chose not to use this one for this image, instead moving to the Frames. (B). Being inspired by Sean Hayes’s (no relation!) use of Frame 5 (C) in his recent review of Wood Camera here in The App Whisperer, I went with this! Besides, it makes this image all the more dramatic!
Guess what! Now it’s time to hit Done (D)! This will finish the image….and take you to the next screen….
Step 10
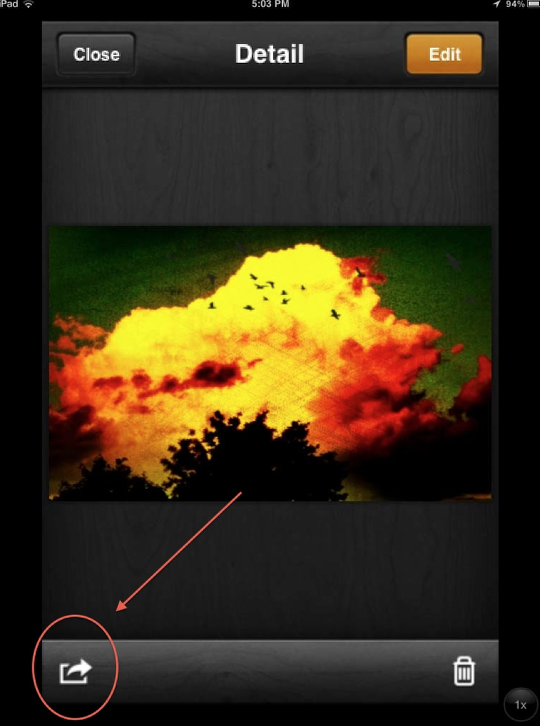
In this screen, you could hit the Edit button and add more effects to the image, hit the Delete button and start all over…or click on the button in the lower left which will take you to the Share screen…
Step 11
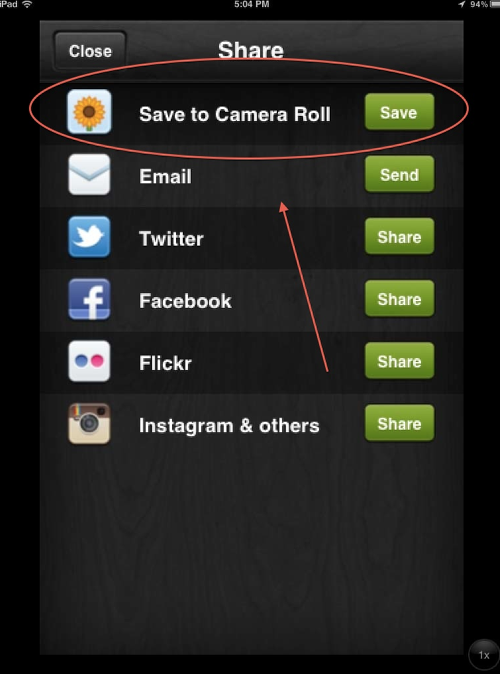
….which is where you can save to your Camera Roll or share to wherever you want!!
This finishes up this tutorial…I hope you found it useful! Thanks ahead for any comments and/or feedback you leave below!! (Comments are much appreciated!!)
David Hayes
David is Head of Technical Tutorials here at theappwhisperer.com and this role adds to the many things David has done in his life…some of which he considers more significant than others. Yet, he feels all have made him the artist he is today. He’s been a cook at a truck stop, a janitor at a military base, worked in advertising, been a banker managing other people’s money, and an elementary school teacher. Trained as a photographer as an undergrad, he’s recently returned to these roots and now considers himself foremost a photographer and secondly a mixed media artist.You can find David’s work on many other popular websites including his own: http://www.clearerreflections.com.


11 Comments
Catherine
Really gorgeous image David, and a great (and humorous!) tutorial. Well done!
Carlton Stith
Thanks for the tutorial. Just like you, I too was not too impressed with this app but this has all changed now.
David
Thanks Catherine and Carlton! I’m glad you both enjoyed the tutorial. Wood Camera is a great little app…I keep using it!!
Carol
I was so unimpressed that I deleted it! Should have asked you first. Now I’ll give it another go. Great tutorial, Dave!
Robert Lancaster
I have been a fan of Wood Camera since I first downloaded the app.
This tutorial has gone a long way to cementing my first impressions … it is a really cool app.
David
Thanks Robert! I agree with you…it is a really cool app. Sometimes I just need a little time to realize things! (o:
David
Carol!!! That’s okay…I’ve done the same thing with other apps…then reinstalled them later. I’m glad you liked the tutorial!!!
Vincent De Cock
I love these kind of tutorials! Thanks!
“Done”…
David
You are welcome, Vincent! And thank you!
LynneM
I have so many apps, that I had forgotten about Wood Camera, even though I did a very clever thing using Frame #5, the birds. I first took a photo of a white piece of paper. Then, added the “frame” and saved the file. I added it to my textures folder for safe keeping. I often take it in to Image Blender, where I can place and stretch the birds, as needed, over the background photo. Then, using Multiply as the blend mode, the white background drops, leaving only the birds.
I enjoy your tutorials, David. Very informative.
David
LynneM ~ I’ve done the very same thing…and not just with Frame #5 (one of my favorites!) I have a collection of such filter files that I made from Scratchcam, Iris, and others. Great minds must think a like!!