HDR Tutorial – Using More Than One HDR App On A Single Image
We have interviewed Geri Centonze and published a previous tutorial of hers recently, if you’ve missed those, please go here. In this latest tutorial Geri takes us through the paces of creating an HDR image with a variety of apps, something perhaps you may not do currently. Take it away Geri (foreword by Joanne Carter).
There are many ways to create the look of HDR (High Dynamic Range imaging) including apps that do a pretty good job, but I prefer to use a variety of apps to get the HDR look I want.
Here’s the before photo, just a casino bus that was driving down the road (below).

Step 1

Open in Snapseed. Crop if necessary, under Details, Adjust Structure +50, APPLY and SAVE (This will be Version 1).
Step 2

Open Version 1 in PhotoForge 2. Adjust the Exposure to +1.70. Click on the checkmark to APPLY and then SAVE (this is Version 2).
Step 3

Open the iCamera HDR app. Select Load a Photo and load Version 1. Then choose HDR option and load Version 2. iCamera HDR will combine the two images.
Step 4
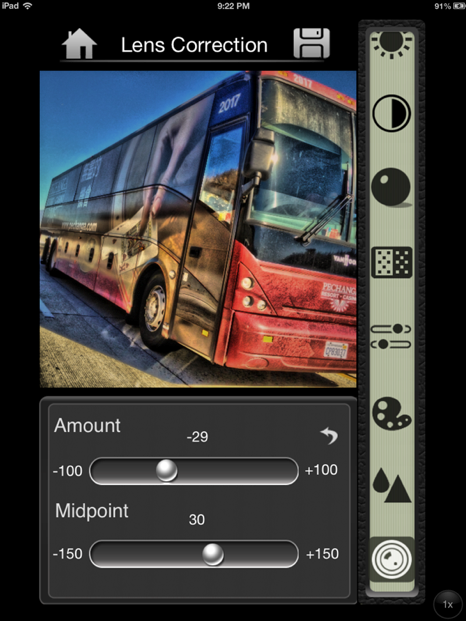
While in the iCamera HDR app, make the following adjustments (these could vary with your photo).
Select Tone Enhancer and using the adjustments on the right-hand side adjust:
Tone Mapping Strength +90
Brightness -60
Contrast -25
Shadows -25
White Balance Temperature +7
White Balance Tint -3
Saturation +10
Blur/Sharpening -30
Lens Correction Amount -30
Lens Correction Midpoint +30
SAVE
Step 5
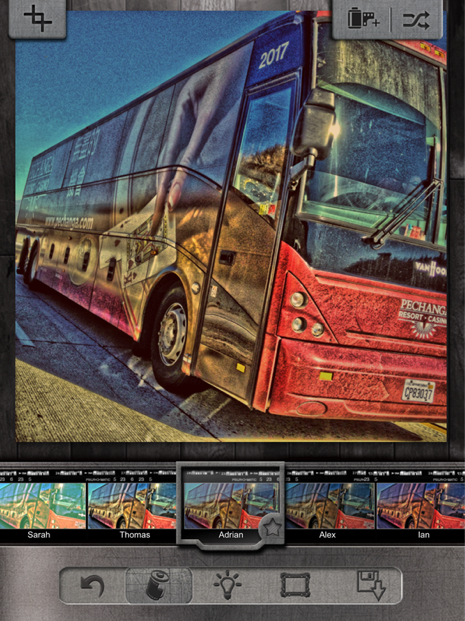
Open the iCamera HDR saved image in Pixlr-o-matic and select a Filter you like. I chose Adrian. SAVE.
Step 6
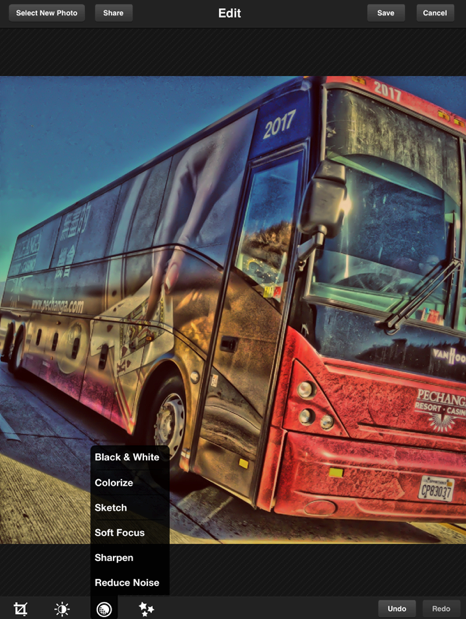
Open the Pixlr-o-matic edit in PS Express and reduce noise by 100%. Apply changes and repeat again but this time reduce noise to 50%. SAVE (Choose ORIGINAL size when saving to preserve the image resolution).
Step 8
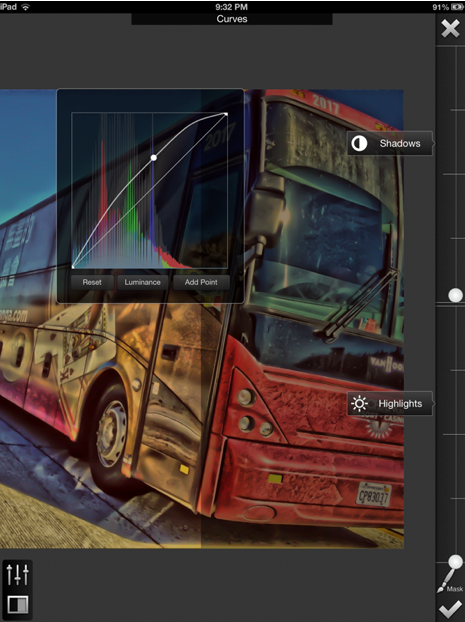
Open most recent version in Filterstorm.
Under Filters select Vignette and adjust Radius to 0% and Brightness to -40. Click checkmark to apply changes.
While still in Filterstorm under Filters select Curves to bump up to the desired brightness hit mask paintbrush instead of the checkmark and when the new screen opens you will choose the paintbrush to do the highlighting. Select the brush tool and the settings box will open up. The settings I used were Diameter 175, Softness 100% and Opacity 25%. Paint in highlights where you want them. Click checkmark to apply and then SAVE image.
Step 9
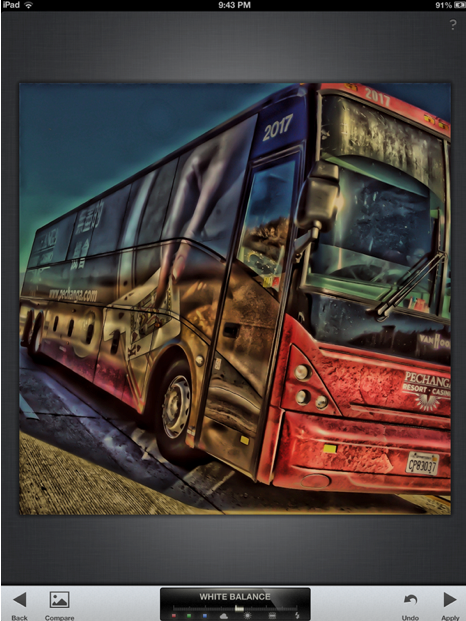
Back to Snapseed and open version you edited in Filterstorm. Adjust Structure +50. Under Tune Image, adjust Brightness +20, Contrast +10, Saturation -15, White Balance +12. Apply and SAVE.
Step 10
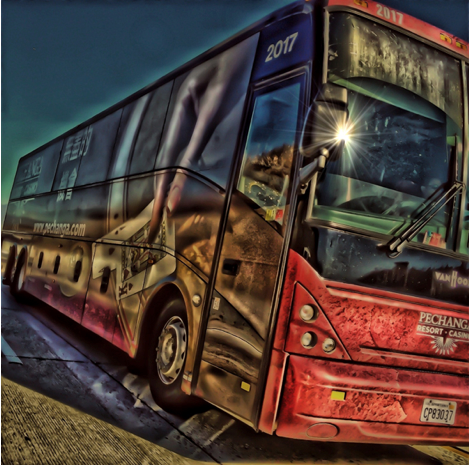
There was a little glint on the windshield and I wanted to make it stand out, so I took the most recent version into Lenslight and added the Glint effect lowering the brightness and adjusting the size to my liking. SAVE
Here is the final edited version.
Before & After

And here is a side by side comparison of the Before and After.





10 Comments
Delta
Great tutorial – Easy to follow and understand . Thanks so much !
Joanne Carter
Thanks so much for your feedback, pleased you found it valuable.
Geri
Thank you for checking out the tutorial – I’m glad it was easy to follow.
Robert Lancaster
What a brilliant tutorial!
So many horses for this course 🙂
I had never even considered using all those apps to HDR-ify an image,
Thanks very much again for a very good tutorial.
Geri
Thank you! There are many ways to HDR-ify an image and some aren’t as processed looking as this one. I appreciate the comment =)
Geri
Thanks for sharing my tutorial!
Mikro
The tutorial is well written and easy to understand, however this type of image processing is not my bag. I personally think it looks way over-processed. A good HDR would never show this much Haloing. The image looked complete and much better at step 4.
Geri
I tend to agree with you – looking back at it, as the author and editor I think it’s a tad over processed as well. I was showing the basic steps, but adjustments can obviously be made to go along with personal taste. I have more HDR included on my IG feed @gericentonze.
Geoff White
Fantastic tutorial,thanks so much Geri. Very easy to follow.
Geri
You’re welcome Geoff – once you know some of the basic steps you can always alter them to suit your taste.