Mobile Photography / Art Tutorial – AfterFocus: Add Some Depth To Your Photographs
We are delighted to publish Jerry Jobe’s latest mobile photography/art tutorial for our reading and viewing pleasure. This time Jobe takes a look at the app AfterFocus. Read his thoughts as he puts it through its paces (foreword by Joanne Carter).
AfterFocus retails for $0.99/£0.79 and you can download it here.
If you’re familiar with shooting with an SLR, whether digital or not, you know that a wider aperture (a smaller number, f2 vs. f11 for example) will result in a narrower depth of field (area that remains in focus). The iPhone lens does not generally shoot in the widest apertures, so you lose that ability to set off your subject with lens blur. But editing apps can remedy that situation by allowing you to add blur back to your photos.
Big Lens has been my go-to app for adding blur; it was covered back in January 2013. A few months prior to that, Dilshad Corleone covered today’s app, After Focus by Motion One, on The App Whisperer (see here). I recently added After Focus to my iOS devices, after hearing good things about it. As you should expect, there are features that After Focus does better, and others that Big Lens does better.
After Focus is built for the iPhone (and also for Android), and does not have a separate iPad interface. Because my eyesight doesn’t allow for fine adjustments on the iPhone screen, the screenshots come from my iPad running the app at 2X. That will account for the pixelization in the screenshots.
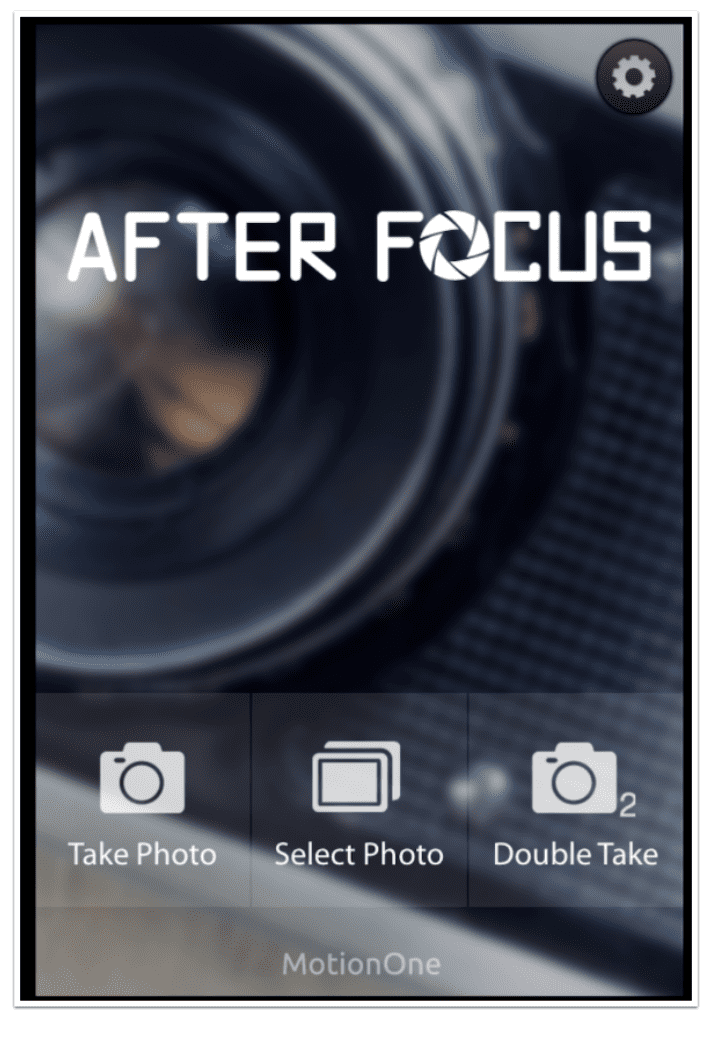
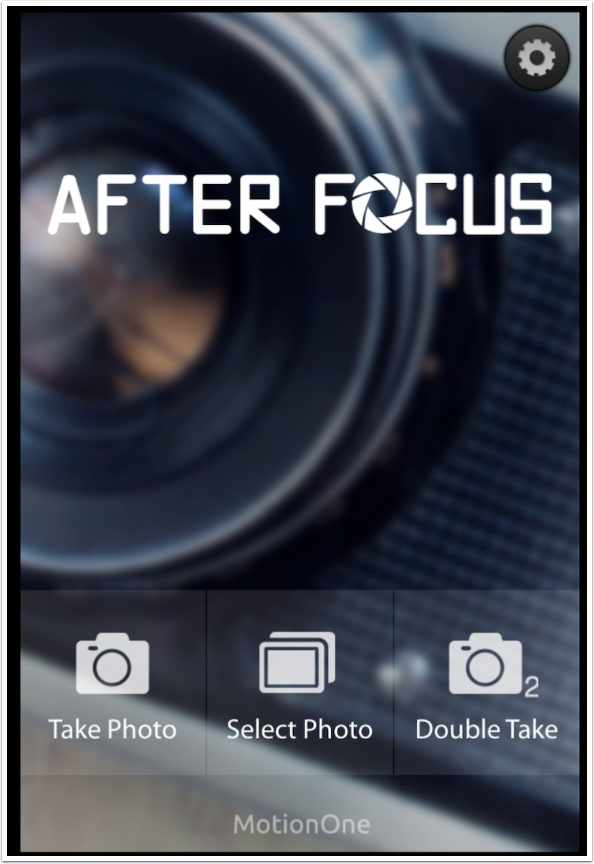
After Focus comes up with a screen that allows you to choose your input: Camera, Photo Library, or something called “Double Take”. We will look at “Double Take” first.
Double Take is designed to allow the app to automatically decide the focus area. You take two photos, slightly offset from each other.
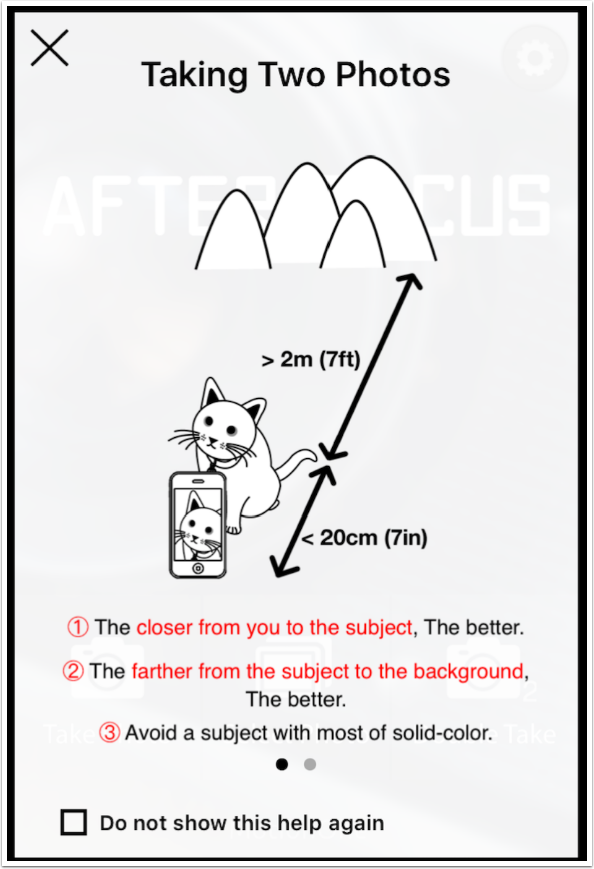
For best effect, you are asked to make sure the offset is slight and the difference between the foreground and background is great.
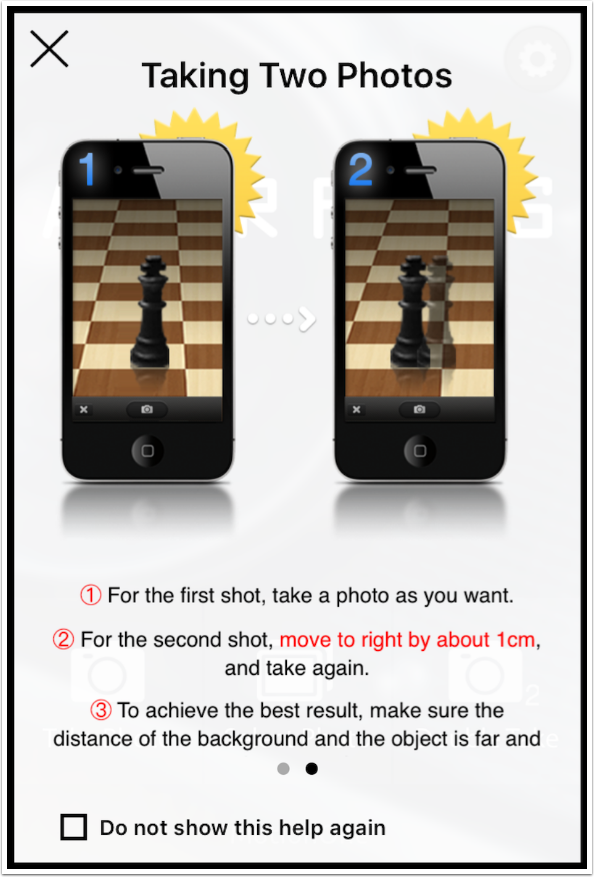
After the captures, you use controls to align the subject in the photos
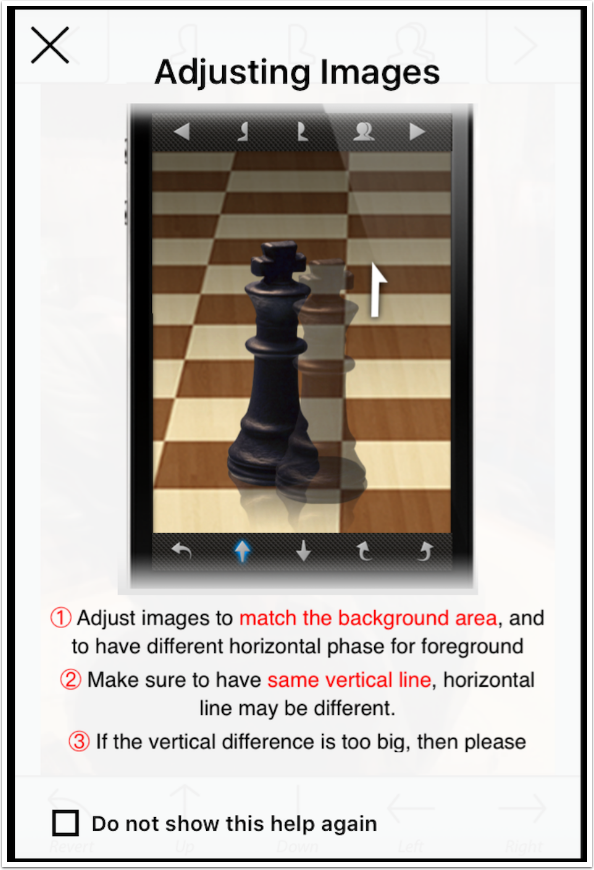
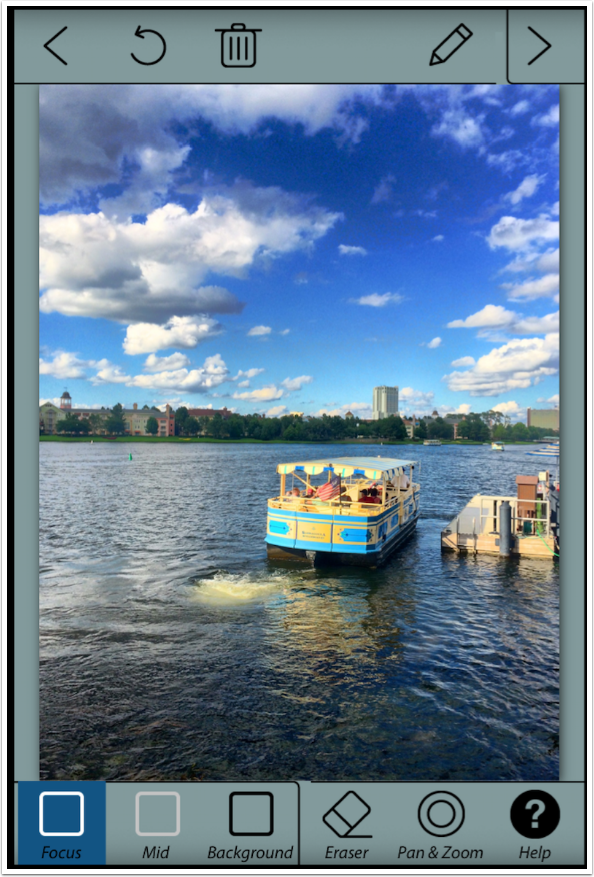
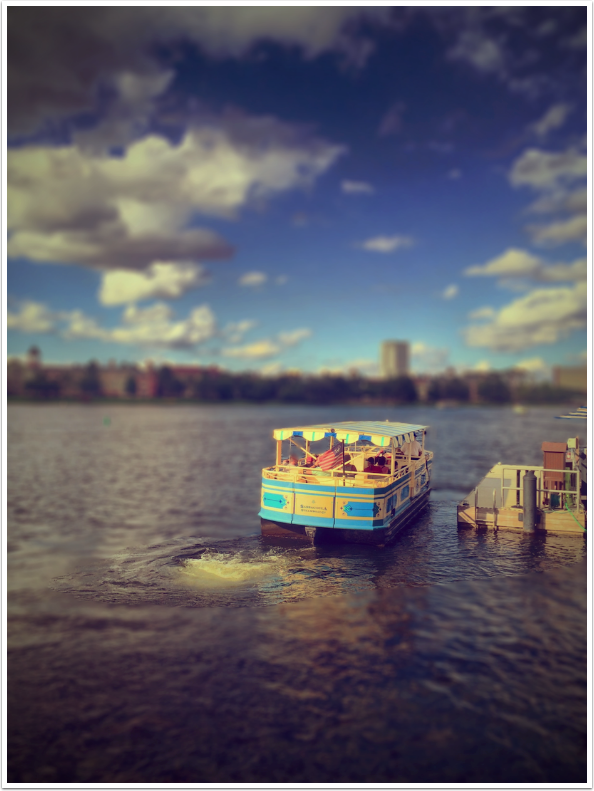
Here’s an example of a shot that I took. I believe the distance between the shots is too great: as an American who rarely uses the metric scale, I am sure I moved the camera more than 1 cm to the right. I have controls along the bottom to move the second image up, down, left or right.
When I get them in (pretty good) alignment, I tap the arrow in the upper right to let After Focus work.

As I said, After Focus tries to determine which areas should be in focus and out of focus depending on the offset from the main image. The results are disappointing because I did not shoot them correctly. I don’t care to become expert at a method of shooting I don’t often use, so “Double Take” won’t get much use on my devices.
After Focus has two methods of defining focal areas: you can paint them in using regular brushes or use edge detection (“smart” brushes). You are asked which method you wish to use as a default. I have chosen smart brushes for a more efficient workflow. You can start with edge detection and then change to normal brushes, but you can’t start with normal brushes and then move to edge detection. Your previous masking is discarded when moving to edge detection.
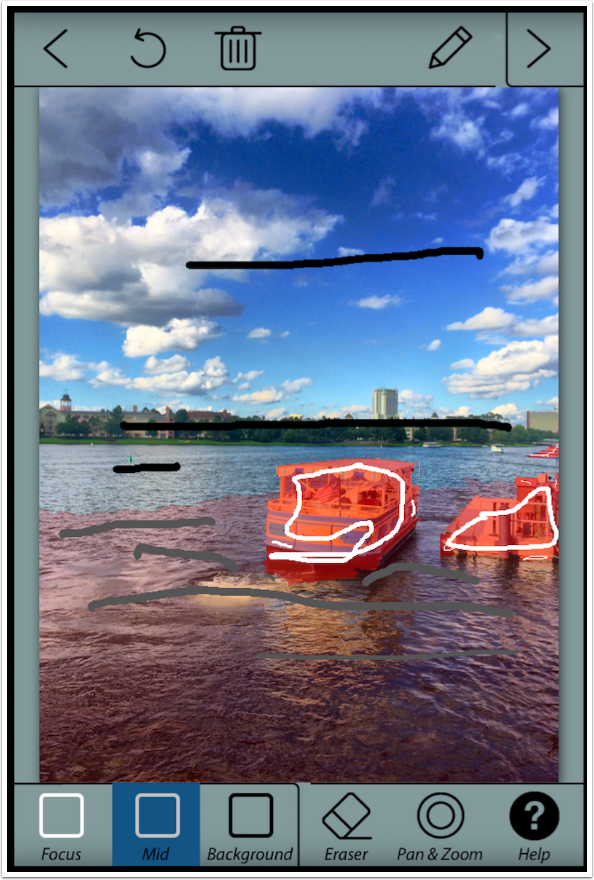
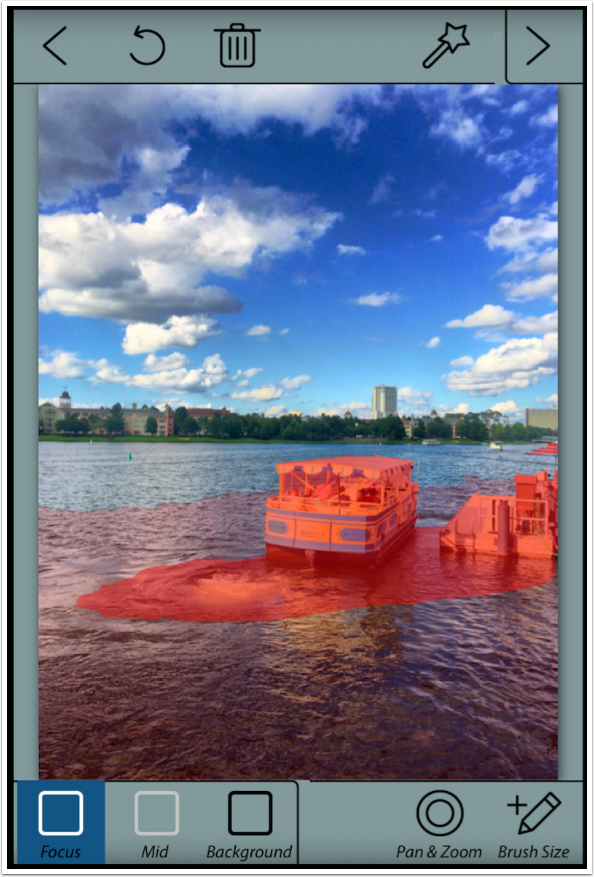
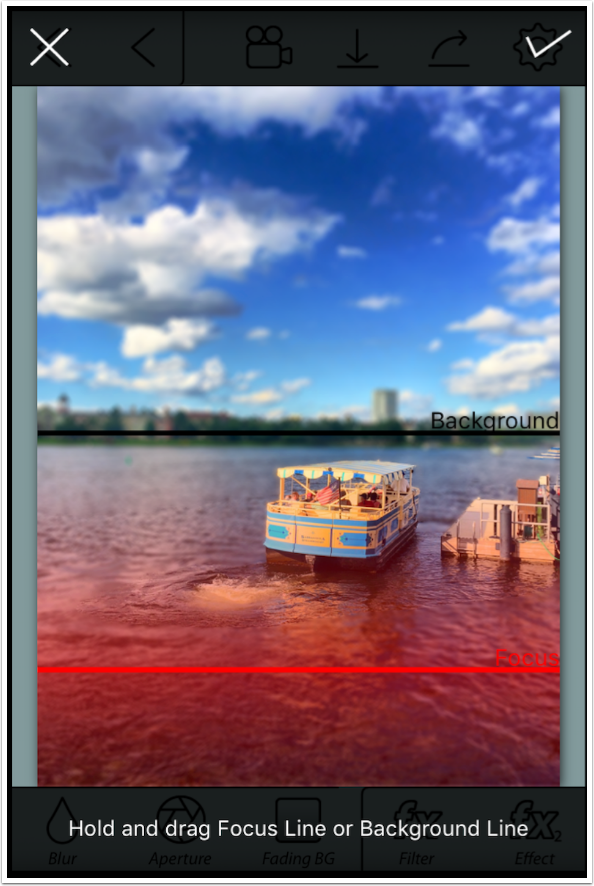
Unlike Big Lens, which only has two levels of focus, After Focus has three levels of focus: Focus, Mid, and Background. You also have an eraser and a Pan/Zoom control. (Pan/Zoom can also be done with pinching and dragging, so I rarely use the Pan/Zoom tool.)
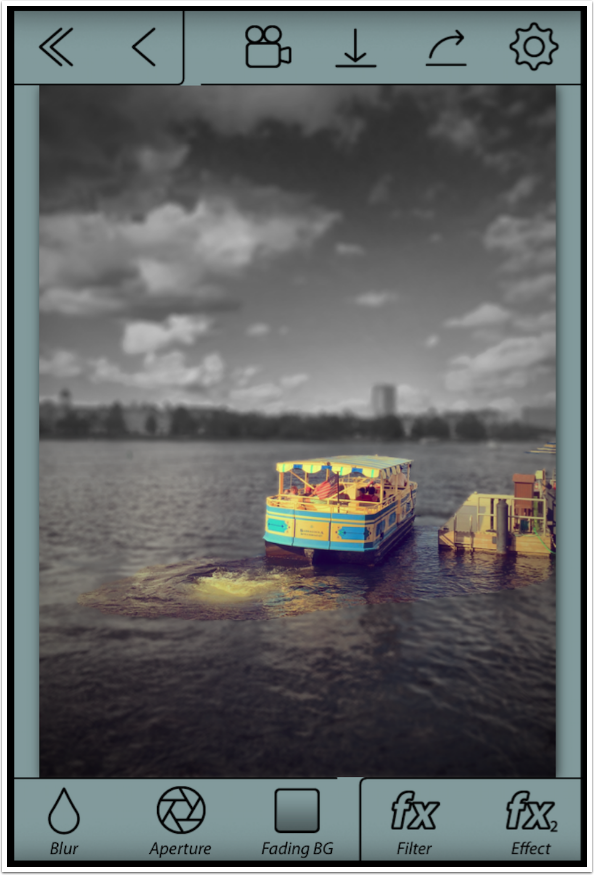
I zoom in on the boat and dock and start identifying the areas of focus. Those areas with the sharpest focus end up with the heaviest red overlay
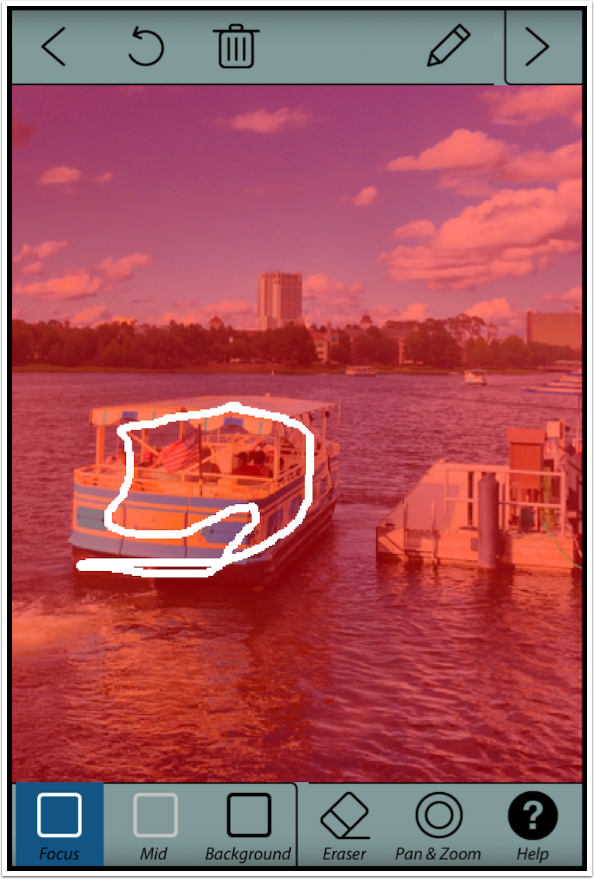
After defining the focus area with the white pencil, I move on to Mid level focus. I apply a gray stroke to the foreground, and the red overlay is lessened (but not eliminated), meaning that area will be blurred somewhat.
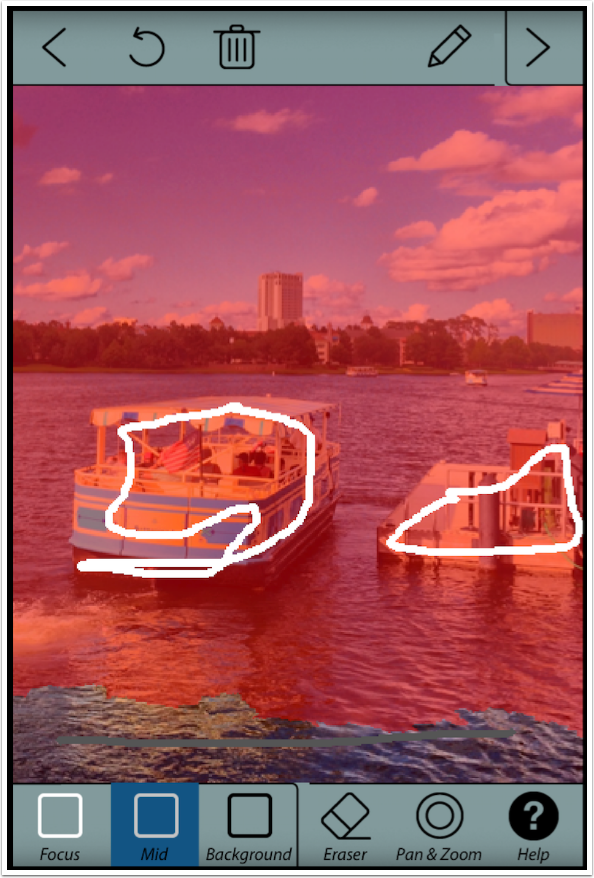
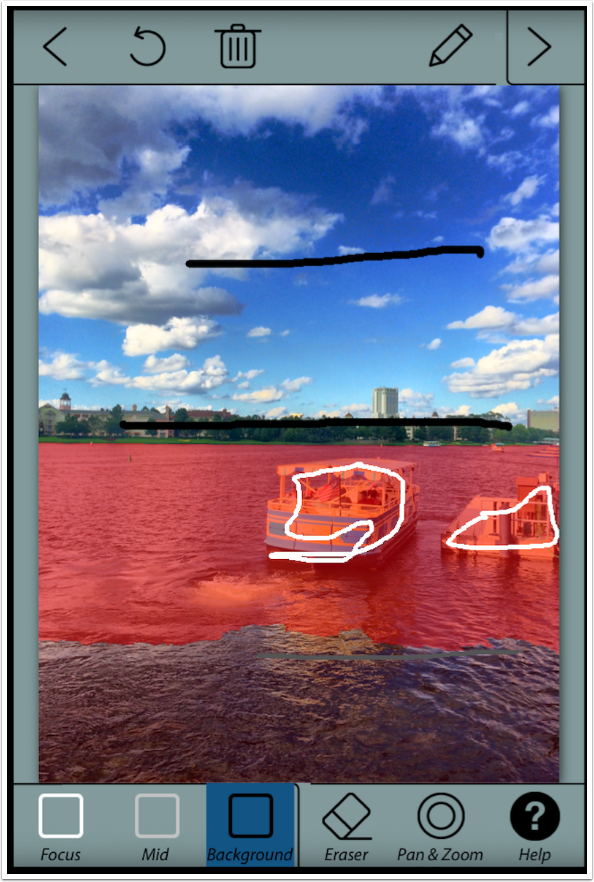
I move on to the Background, and a couple of black strokes eliminates all of the red overlay on the sky and the faraway land. This area will receive the most blur.
By moving back and forth between Focus, Mid, and Background, the areas can be further defined with more strokes.
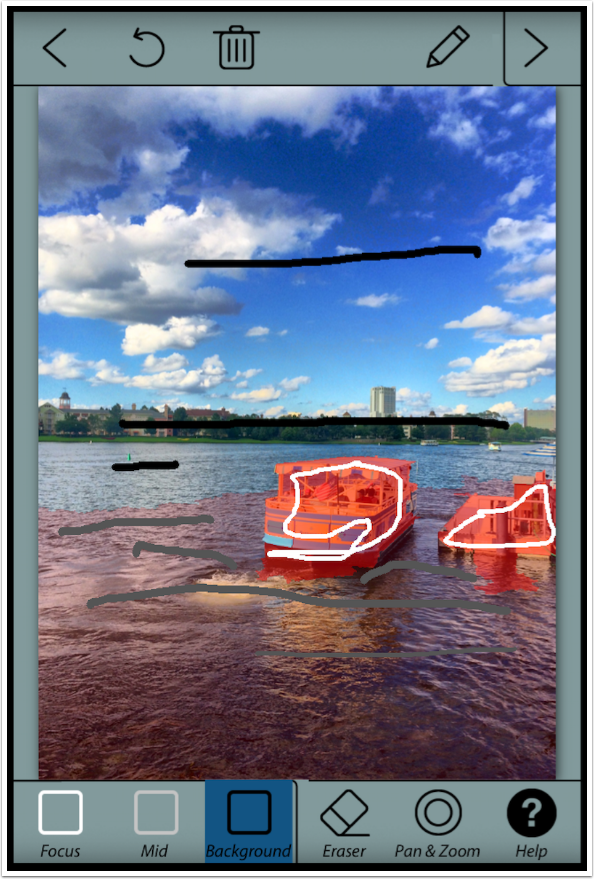
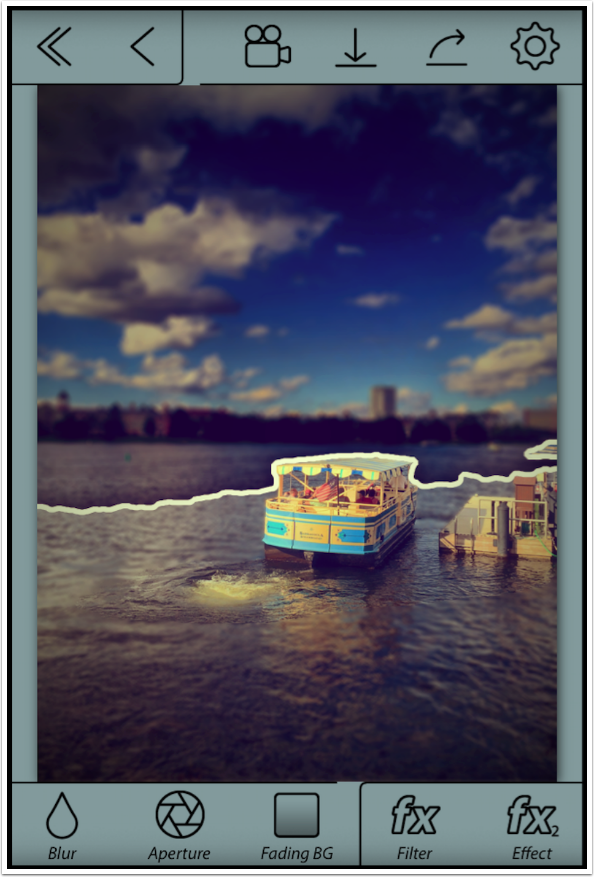
You can see in the screenshot below that I had to zoom in to make some smaller adjustments to the Focus (white) area on the boat and dock.
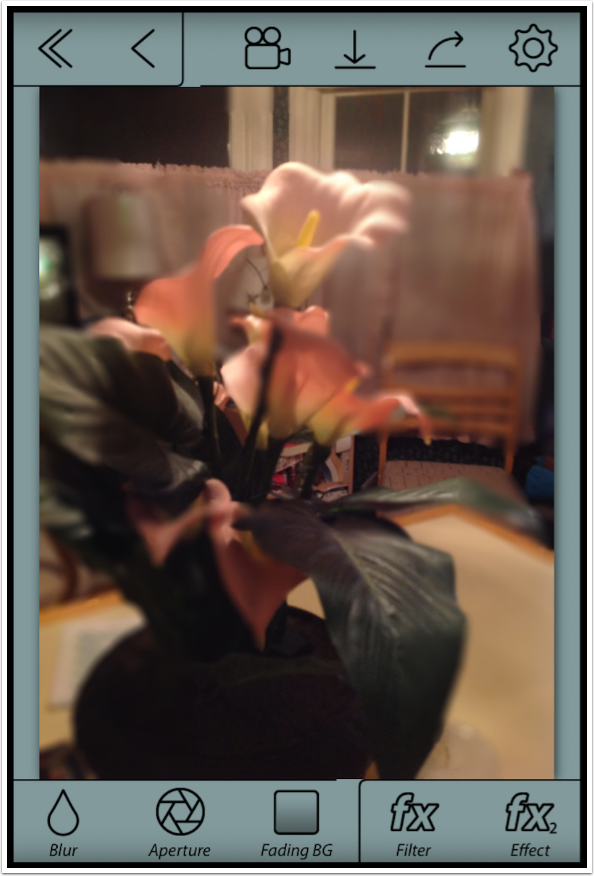
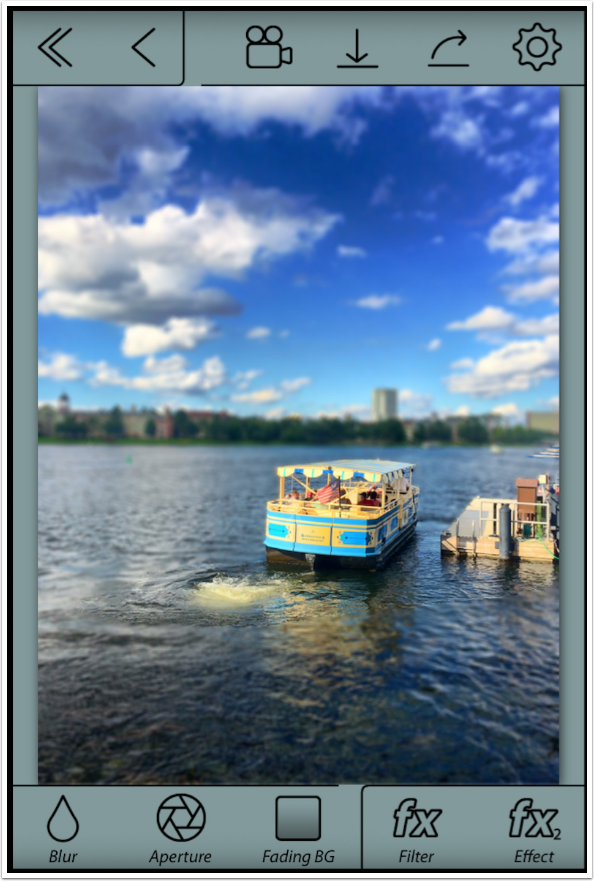
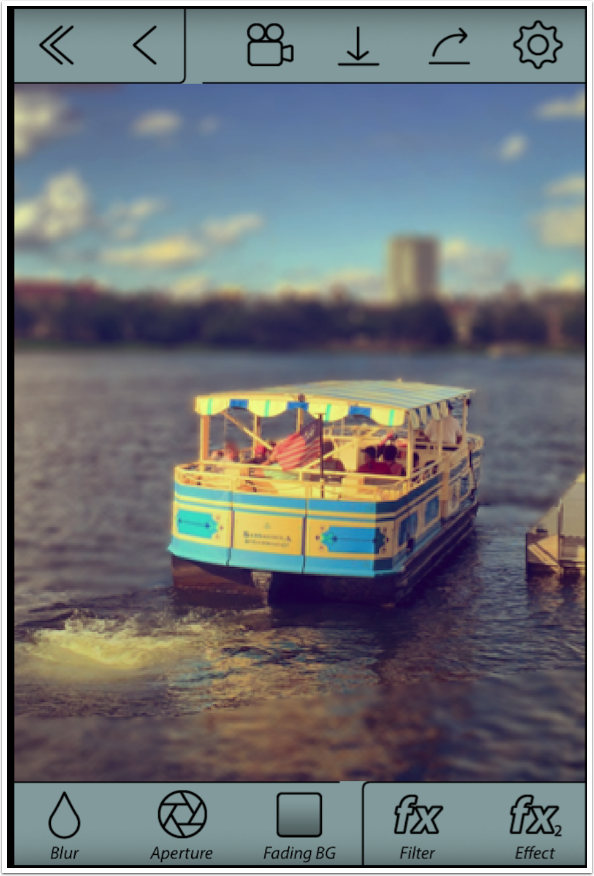
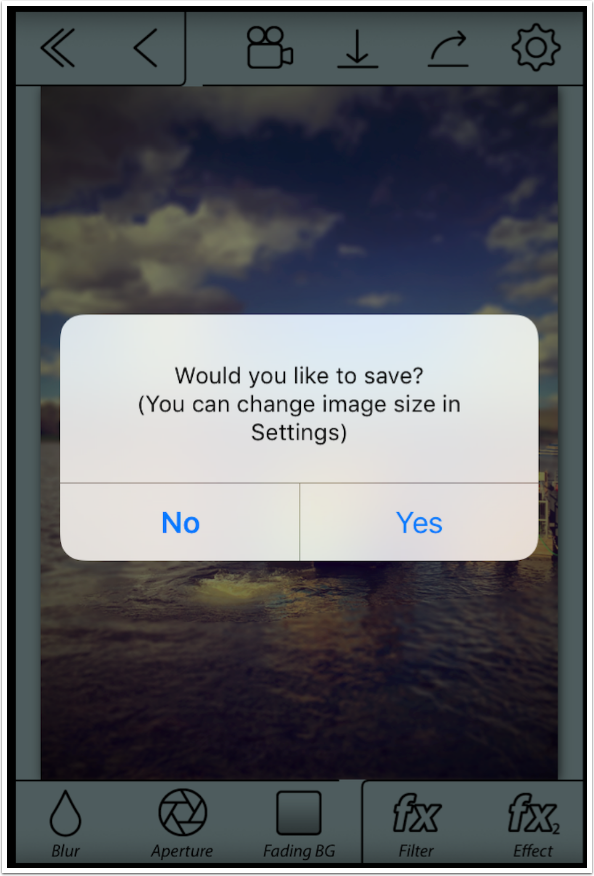
Once the areas heave been defined, tapping the arrow at the upper right takes you to the results screen. Along the bottom are controls for Blur, Aperture, Fading BG, Filter and Effect. Along the top are controls for returning to the image selection screen or the focal area screen; Recording your edit session as a video; Save to Camera Roll; Share; and Settings.
I’ve tapped the Blur control, because you will want to adjust the amount of blur applied. The default value of 50% is too high. One of the drawbacks of the three-tiered blur of After Focus is that the Mid areas have too much blur. Instead of 50% blur on Mid and 100% blur on Background, Mid in After Focus is about a 70% blur, making a huge leap between Focus and Mid. That’s obvious in the image below.
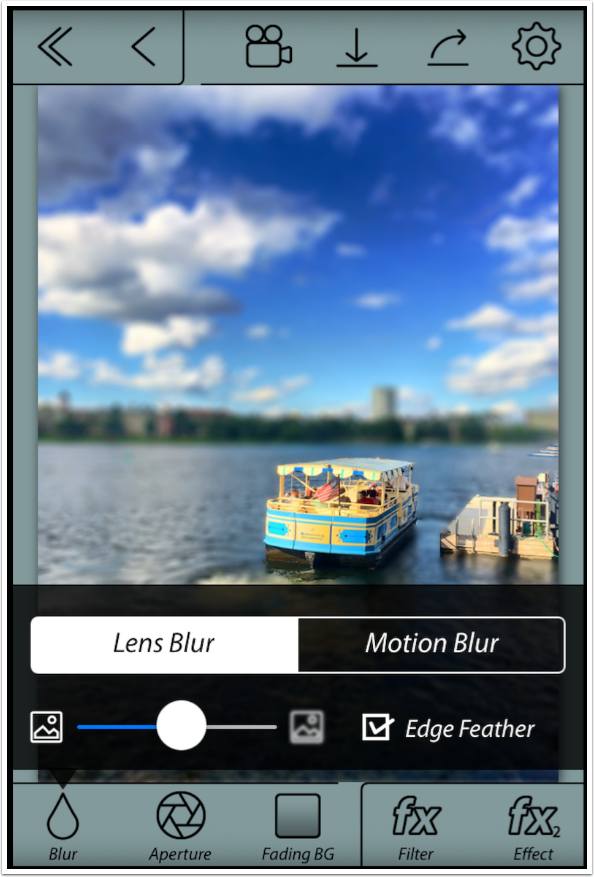
I use the slider to reduce the amount of blur. This changes both the Mid and Background blur. There are not separate controls for Mid and Background, making it more difficult to tune the blur to your desires.
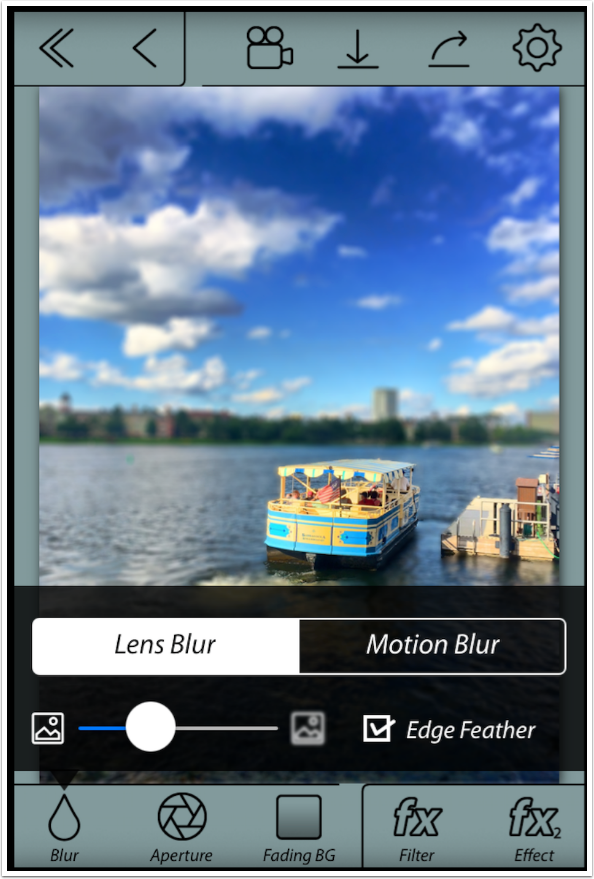
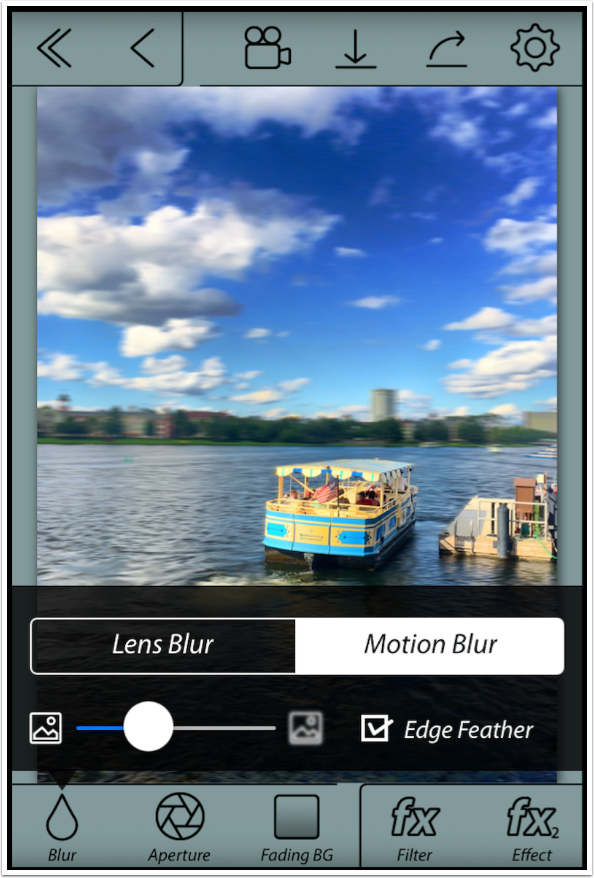
You can change the Lens Blur to a side-to-side Motion Blur by tapping the control.
As I said, you can adjust the focal areas by returning to that screen by tapping the single arrow at the upper left of the results screen. You can then change the brush to a normal brush by tapping the pencil icon at the upper right (it changes to a Wand icon). Remember: once you have changed to a normal brush, you cannot change back to a smart brush without losing your work! Below, I’ve brushed in some of the water as a Focus area.
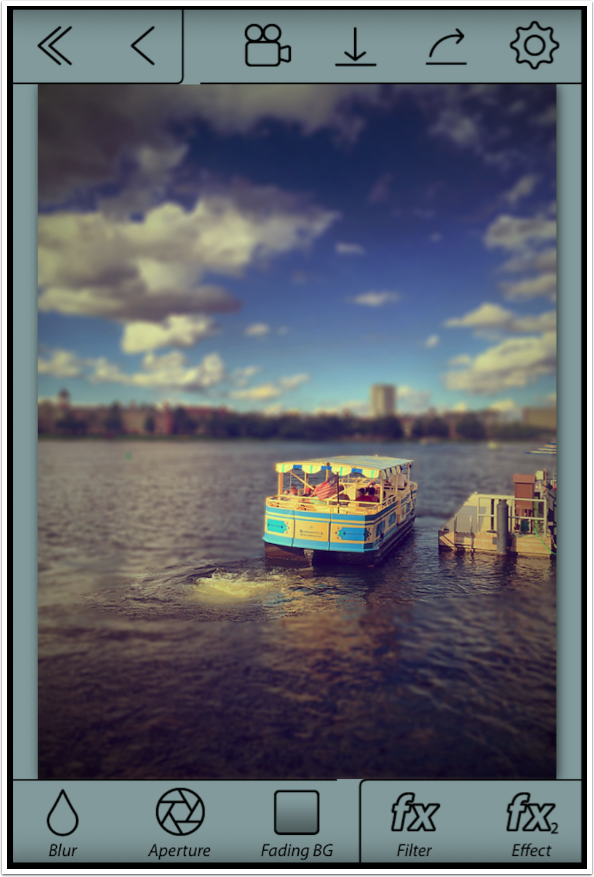
The next control on the results screen, Aperture, controls the shape of the aperture. This affects the blur in subtle ways. The default shape of the aperture is circular, as shown below, but can also be changed to a square, pentagon or hexagon. The Bokeh control is separate, and boosts the highlights of the blurred areas. If these highlights are very small areas, then the highlight will take on the shape of the aperture.

Below I’ve changed the Aperture to square. You can see that, in the absence of bokeh, the changes made by the aperture are very subtle indeed. As a matter of fact, the bokeh is also subtle, and I was unable to find any of my photos where changing the aperture made any truly noticeable difference.
Fading BG allows you to change the strength of the blur over a vertical gradient, like a tilt-shift effect added on top of the already-established focal points. Natural increases the blur at the top of the image, and Manual allows you to set the area of increased blur at the top and bottom. The Fading BG additional blur will not affect those areas in focus, like the boat and dock here.
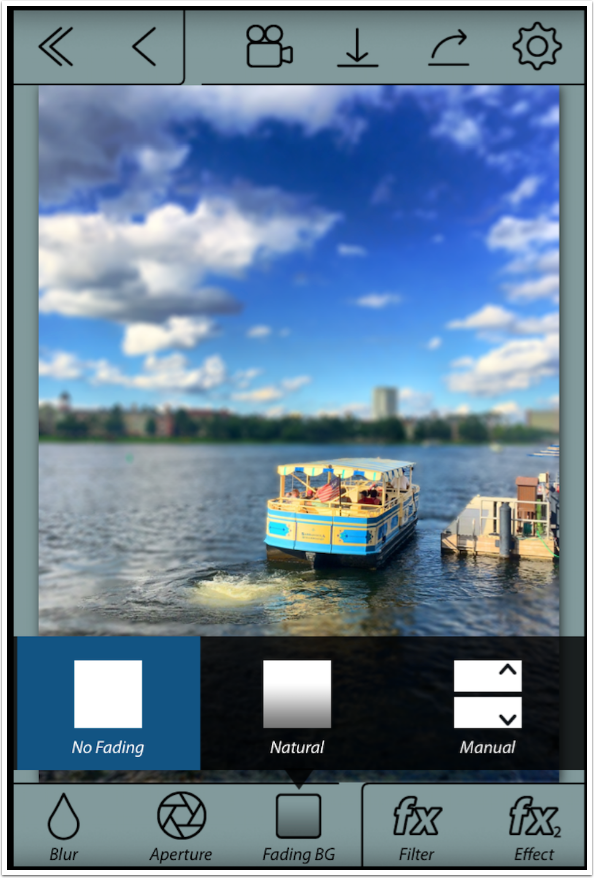
If you choose Manual, you are given moveable lines of Focus and Background.
One feature which I have not illustrated here in this tutorial is the ability to rapidly change the focal area. On the results screen, tapping the image in the Mid area will change that to the Focus area, throwing the initial focus area out of focus. In our boat image, we would be able to change the background to being in focus by tapping the sky. Returning focus to the boat would just be a matter of tapping the boat.
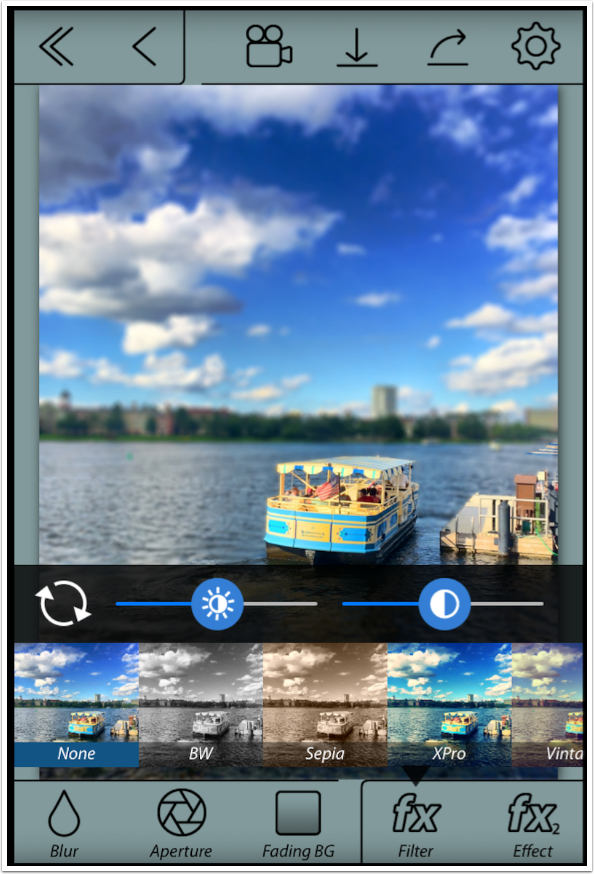
Filters in After Focus are applied to the entire image. (In Big Lens you can apply filters separately to the in-focus and blurred areas.) In addition to the nineteen filters, applied at a fixed strength, there are separate Brightness and Contrast sliders.
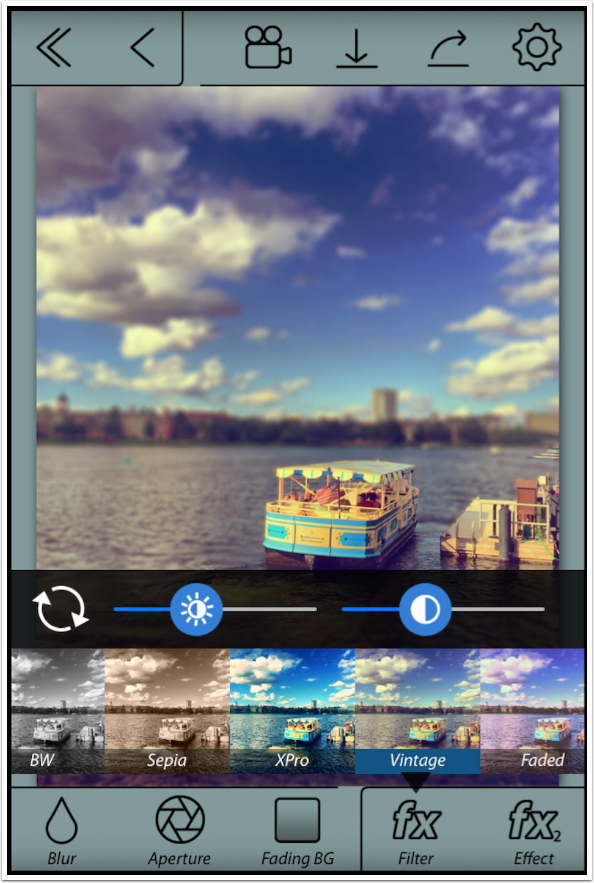
Below I’ve added the Vintage filter and lowered the Brightness and Contrast.
The four Effects, like the Filters, are not adjustable. They are either on or off.

Vignetting adds a nice, soft vignette, but not every image would benefit from this standard vignette.
Color Mask desaturates all blurred areas, making them black and white.
Sticker does a rather odd thing. A thick white border is added to the edge of the Background area. The need for such an effect is lost on me.
Sharpen sharpens the Focus area. This tends to emphasize the huge gap in clarity between the Focus and Mid areas, so I don’t find much use for it.
Remember to zoom in and check your Focus areas carefully. Below I’ve zoomed in to the boat and see that the areas of the water seen through the boat’s awning are still in focus. I’ll want to go back and add them to the Mid focus area.
Below I’ve added the blur. It had to be brushed in because I could not go back into edge detection.
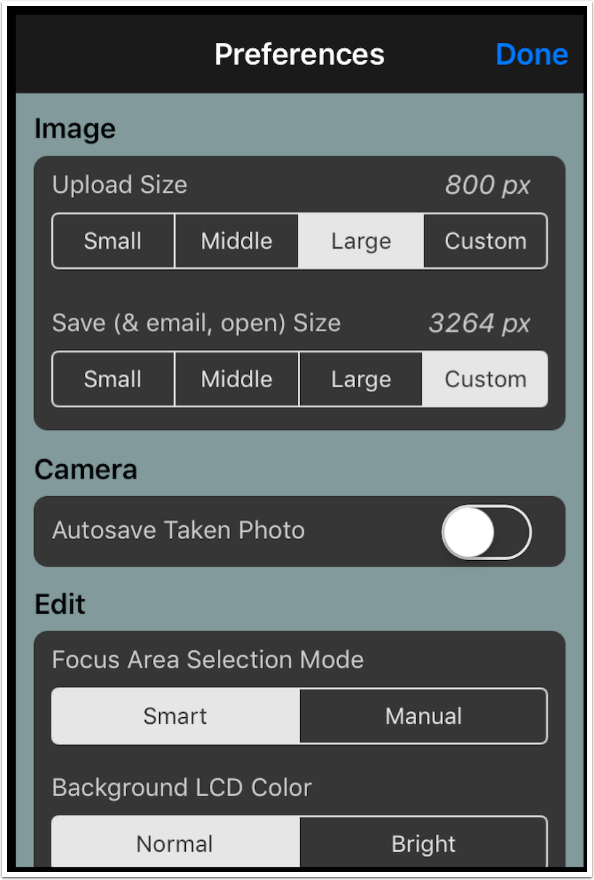
The settings are fairly straightforward. They have no help associated with them. As far as I can determine, the Upload Size refers to direct upload to Facebook or Twitter.
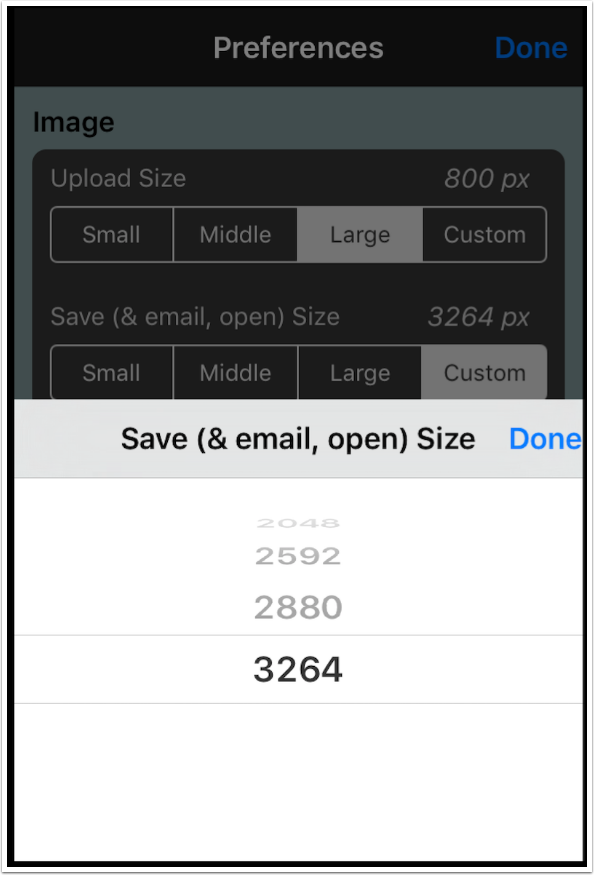
I would recommend changing the Save size to its maximum. When you choose Custom, a selection of sizes comes up. I chose the maximum, 3264.
The remainder of the settings are accessed by scrolling down, including the ability to turn on help popups.
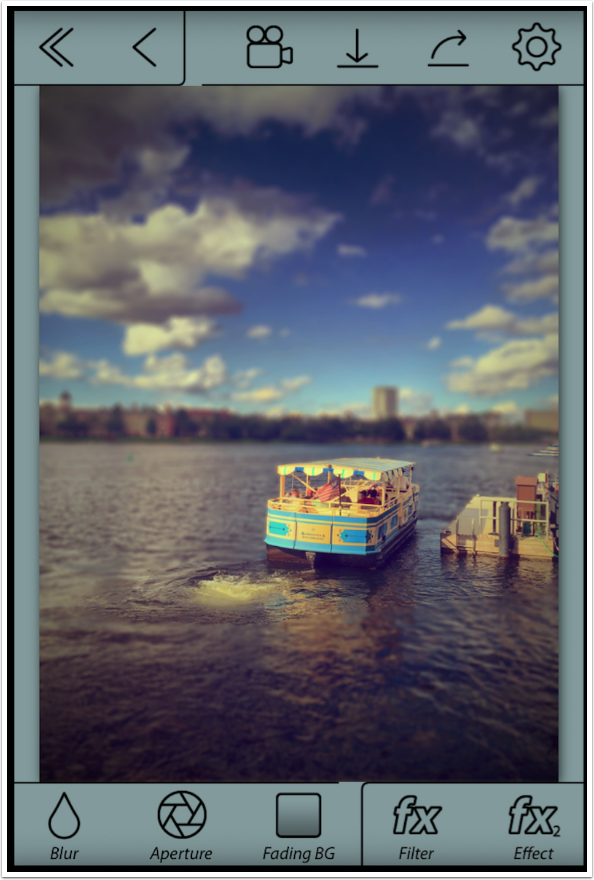
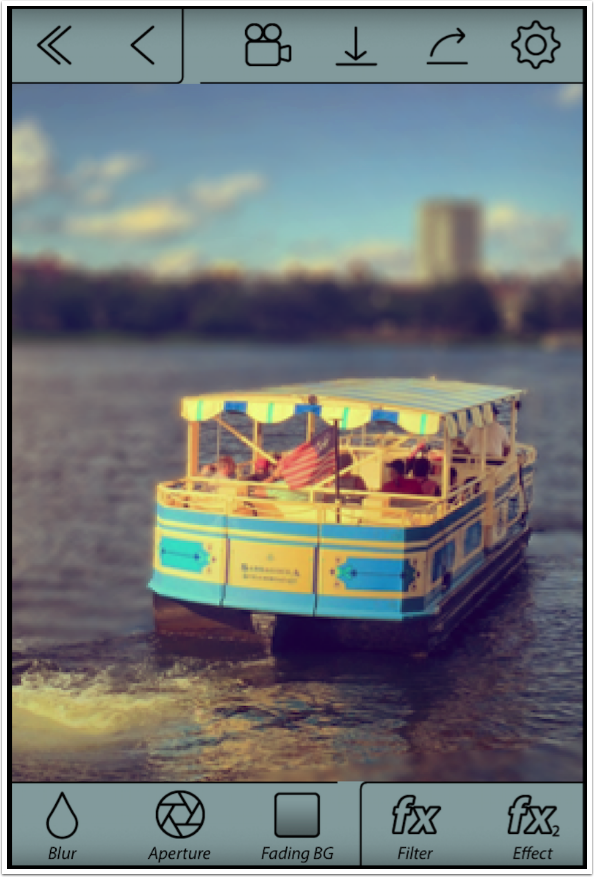
Now that I increased the Save Size, I can save by tapping the down arrow at top center. A dialog box confirms the save of your image.
Here’s the resulting image.
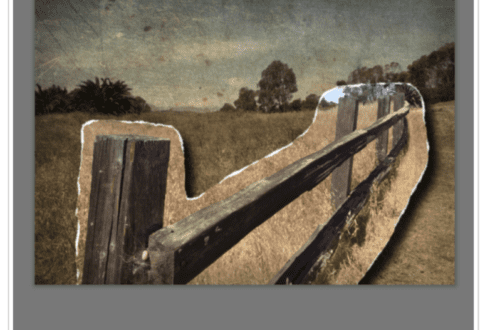
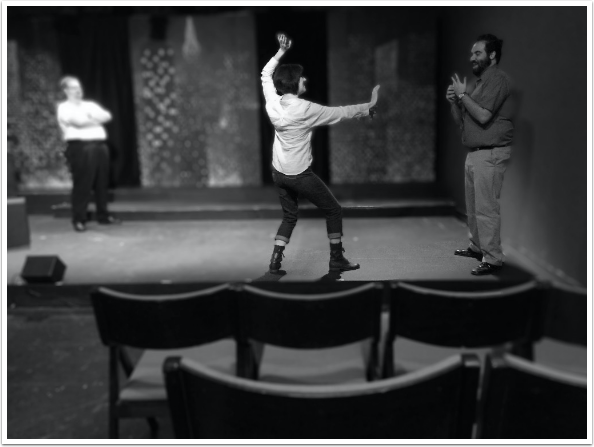
I find that I do not like blurred areas of an image to be bright, intense colors. Therefore I often will use the black and white filter, as shown in this rehearsal photo. I did this image on my iPhone, which accounts for some missed areas of focus that are obvious when seen larger. For example, there’s an area under her right wrist that is in focus when it shouldn’t be, and her left fingers and his right shoulder are blurred when they shouldn’t be. Operator error – check carefully.
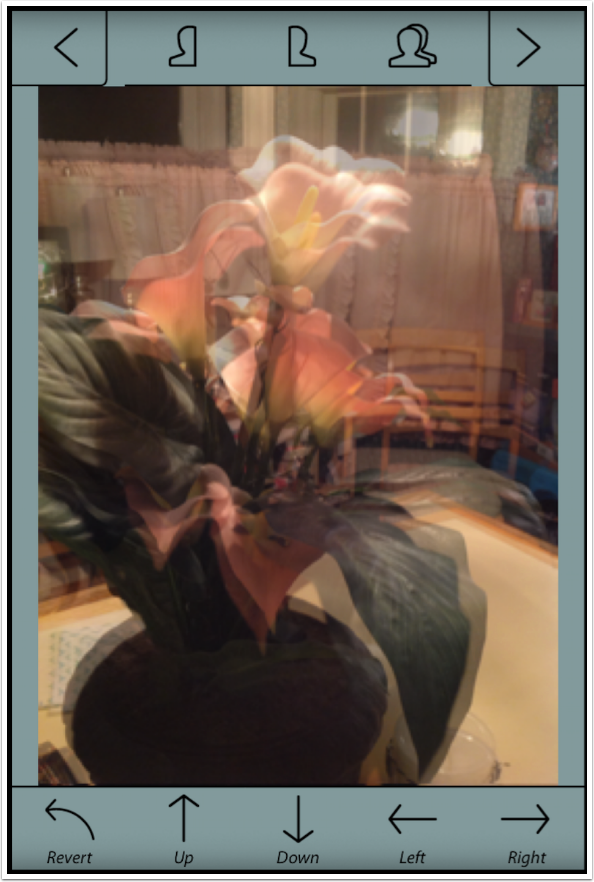
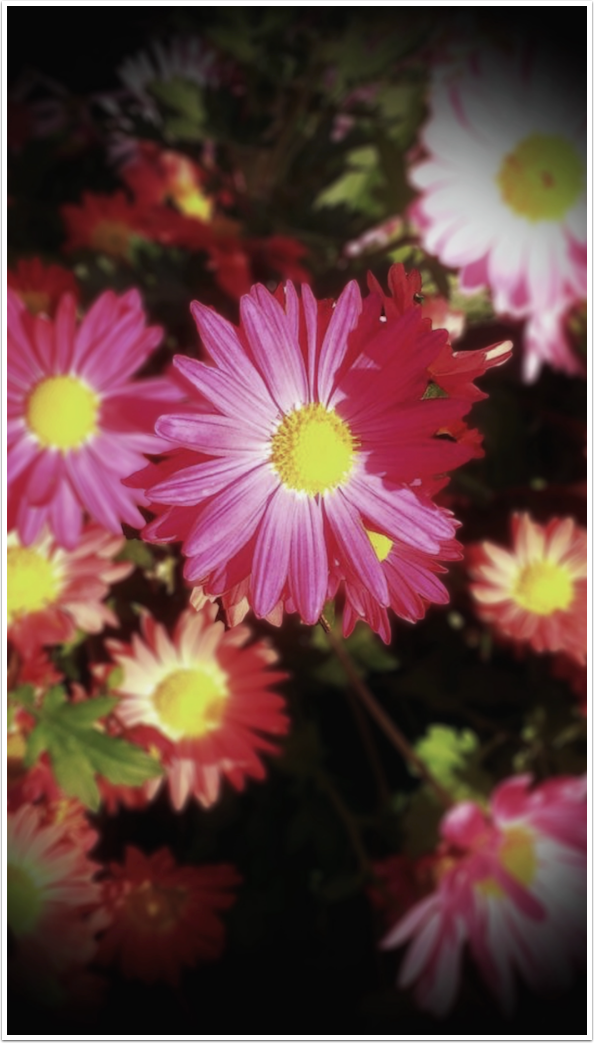
Finally, here’s an image of flowers. I took it into Snapseed after After Focus to reduce saturation and add a touch of glow.
The main advantage of After Focus is the three areas of focus, rather than the usual two. Once again, it could be better implemented by allowing for an adjustable Mid level that could fall from 10% to 90% blur. The Filters and Effects should be adjustable as well, and Sticker could be done away with entirely. Also, a Retinal Display version would be greatly appreciated.
Overall, After Focus is an OK app, but not as special as I’ve heard it was. I still prefer Big Lens. Until next time, enjoy!
TheAppWhisperer has always had a dual mission: to promote the most talented mobile artists of the day and to support ambitious, inquisitive viewers the world over. As the years passTheAppWhisperer has gained readers and viewers and found new venues for that exchange.
All this work thrives with the support of our community.
Please consider making a donation to TheAppWhisperer as this New Year commences because your support helps protect our independence and it means we can keep delivering the promotion of mobile artists thats open for everyone around the world. Every contribution, however big or small, is so valuable for our future.
Jerry Jobe
Never content with just scratching the surface of what an app can do, Jerry Jobe decided to pass on what he learned about imaging apps to others. He’s constantly trying to figure out just what tools other artists have used, and trying to incorporate them into his own work, in an attempt to find his style. He’s written tutorials on over 145 apps so far, which you can find (along with his Song of the Day entries) at http://enthusiasmnoted.wordpress.com/ He lives near Atlanta, Georgia, where he also finds a creative outlet in acting and directing in community theater.