Mobile Photography / Art Tutorial – Photo FX Ultra Part 1: Not An Editor
We are delighted to publish Jerry Jobe’s latest mobile photography/art video tutorial for our viewing pleasure. This time Jobe takes a look at the app Photo FX Ultra. Take it away Jerry…(foreword by Joanne Carter).
Photo fx Ultra retails for $2.29/£1.49 and you can download it here
“When I decided to write iDevice app tutorials, I realised very quickly that I could never cover every app out there. Hundreds of new ones are released every year, on top of the thousands that already existed when I started writing in November of 2012. Even though I’ve covered over 140 different apps, I still have some that I haven’t touched. Today’s app, Photo FX Ultra (and its companion on the iPhone, regular Photo FX) by Tiffen, is multi-featured, requiring a lot of explanation. That makes covering it a daunting task, but I thought it was time to buckle down and try to tell you more about this filter app.
Tiffen has been in the photographic business for decades, making filters for lenses. It seems that when companies who start in other areas branch out to iDevice apps, they quickly lose interest. One of my favorite B&W apps, Perfect B&W, was released by onOne Software, and then was removed from the App Store a year or so later. They didn’t want to expend the effort supporting it. PhotoFX Ultra has not been updated since October 2014, and it seems as though Tiffen may be treating it the same way as onOne’s offering.
As one might expect from a company that makes glass filters, Photo FX Ultra is not an editor, but a filtering app. It looks like an editor, but lacks certain basic controls that an editor app needs, like Brightness and Contrast, Shadow and Highlight. Changes to these basic characteristics are available as part of some of the filters, but not by themselves. Their promotional material states: “In Photo fx Ultra, you can choose from 77 exciting filters containing 934 presets organised in 8 different filter groups.”Definitely a filtering app”.
The user interface is similar to the interface for two apps that I have covered by Digital Film Tools: Photo Copier and Rays. Photo Copier and Photo FX Ultra appeared within a couple of months of each other back in summer of 2010, so it would be hard to say who originated the interface; they don’t seem to argue about it, so it may have been a joint venture.
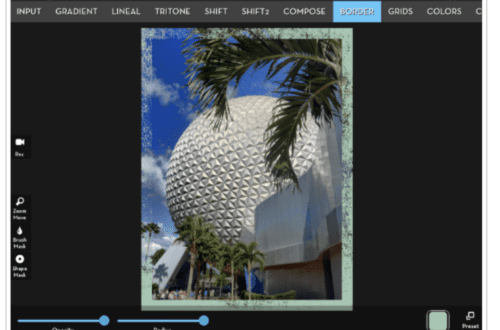
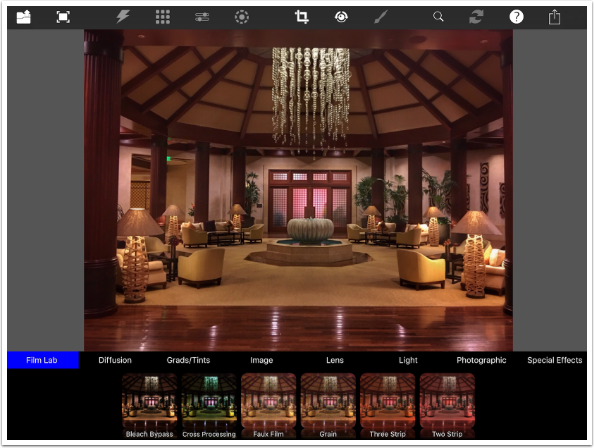
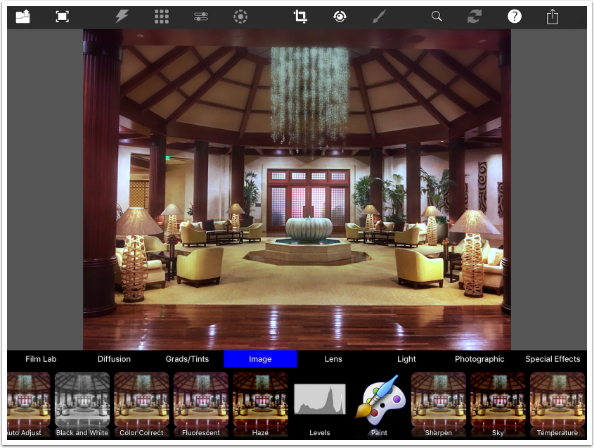
Anyway, images are loaded through the file folder at the top left; the app does not contain a built-in camera. (The iPhone version does contain a camera option.) There are a series of buttons which affect the view in the workspace; Crop, Straighten and Mask tools; Search, Reset, Info, and Save at the upper right.

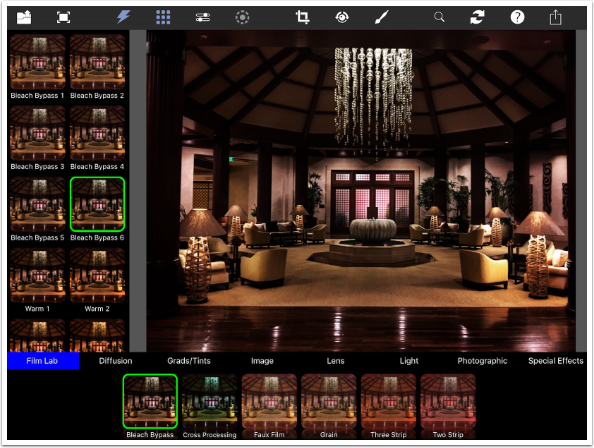
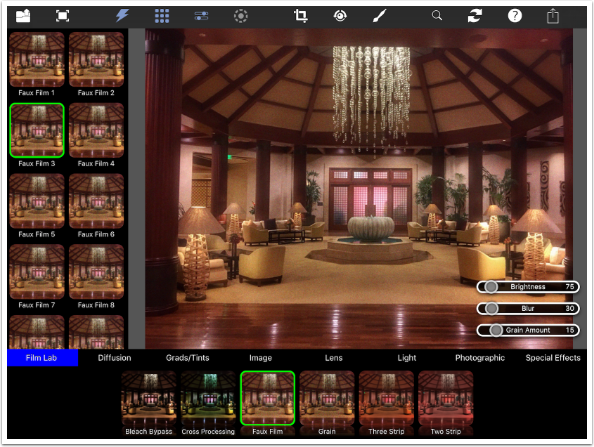
Once the image is loaded, a bar appears immediately beneath the image which identifies the eight different filter groups: Film Lab, Diffusion, Grads/Tints, Image, Lens, Light, Photographic, and Special Effects. Beneath that bar are a series of thumbnails which identify the filters within the selected group. Below you will see the filters contained in the Film Lab group.
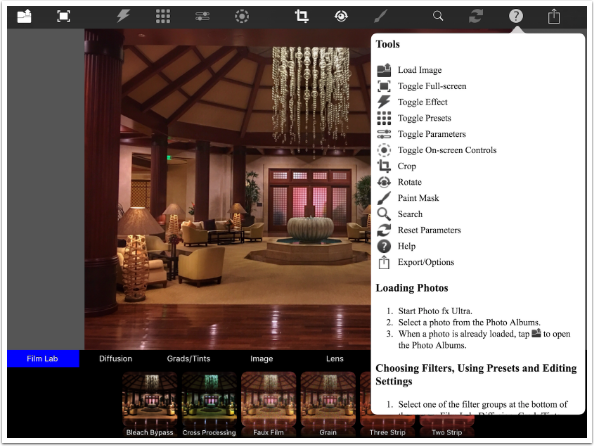
The Info option at the top right is scrollable text to help you with the current screen. Tap the question mark icon again to hide the Help information.
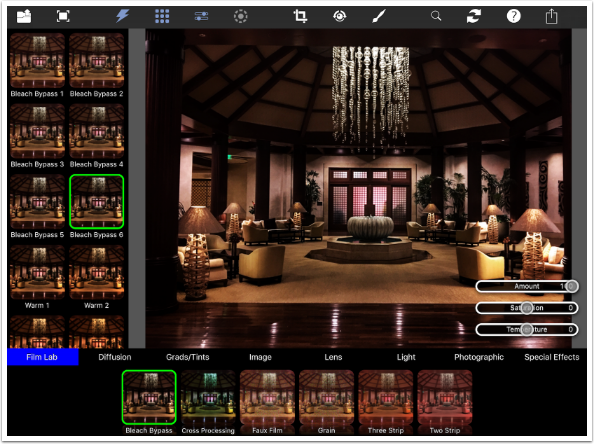
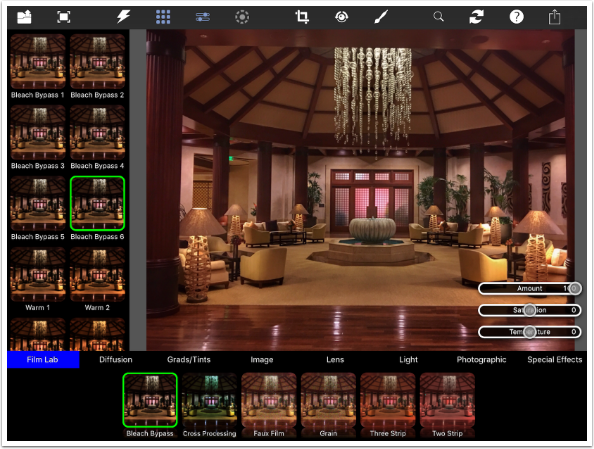
Once a filter is chosen at the bottom, a series of presets appears at the left. (On the iPhone version, filters and presets obscure the image, and a choice must be made before returning to the workspace.) Sliders also appear to help you tune the preset to your liking. In the case of the Bleach Bypass filter, these sliders are Amount, Saturation and Temperature.
The second icon at the top left is the Full Screen toggle. Notice that the Grid icon, fourth from the left, goes from blue (active) to gray (inactive). That means the filters and presets are hidden. The sliders are still visible, as indicated by the Sliders toggle (fifth button from the left).
Full screen is as far as you can zoom in when you are not masking. A two-fingered pinch does nothing.
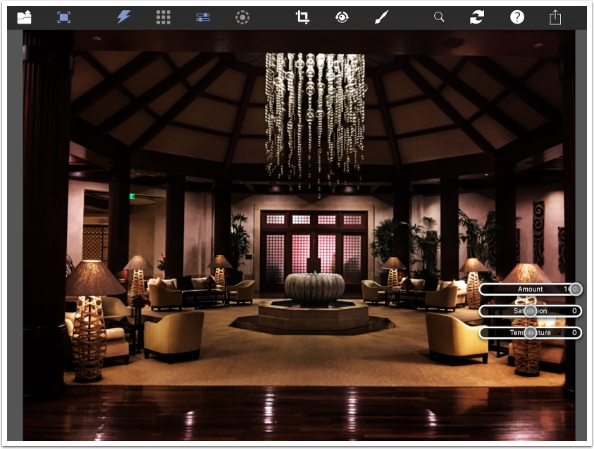
Below I have toggled Full Screen off, and also toggled the Sliders off.
The lightning bolt toggles the filter on and off. Below I’ve toggled the Bleach Bypass filter off and you can see the original.
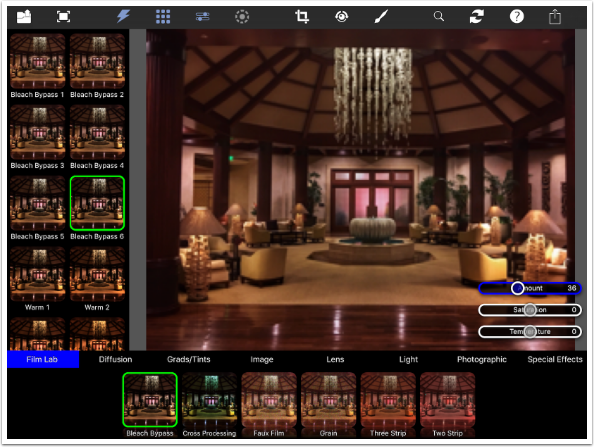
Moving the sliders gives you an instant response which you can see in the image. Unfortunately, the image is blurred at the same time, so the response you see is only an indication. In order to see how my change to the Amount slider really looks below, I would have to remove my finger from the slider.
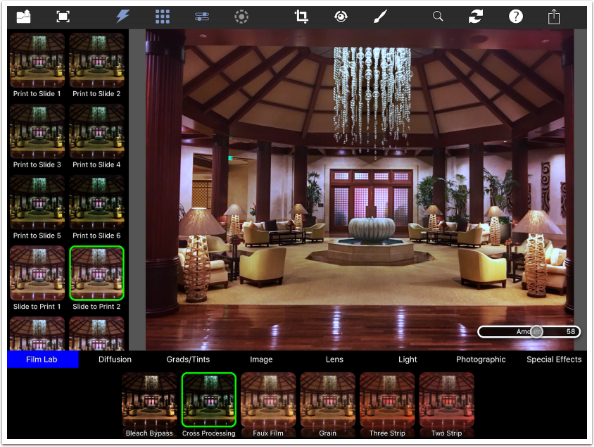
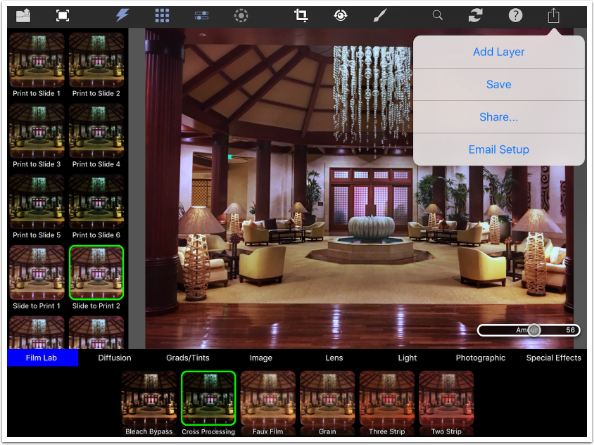
As I said earlier, changes to some basic characteristics are accomplished through the use of certain filters, not necessarily through direct control. That means there are several ways to accomplish the same thing. The excess warmth in my original image can be countered with some Cross-Processing, as seen below. I chose the Slide to Print 2 preset and adjusted the Amount to 58%.
The sliders change based on the filter you select. All the presets within that filter use the same sliders. All Faux Film presets have sliders to control Brightness, Blur and Grain.
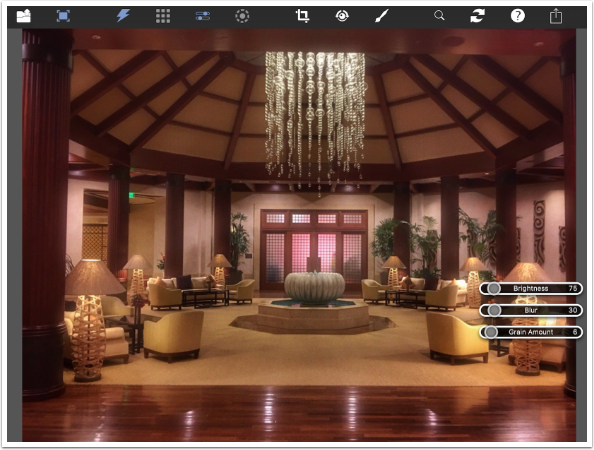
I would suggest looking at an image full screen whenever you add Grain to it. The smaller an image is, the harder time I have seeing whether the grain is acceptable. Below I found I wanted to lower the Grain amount from 15 to 6.
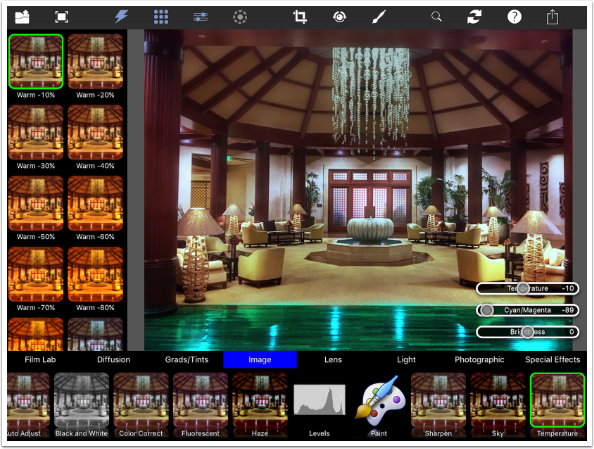
Three Strip and Two Strip filters mimic old ways of processing color films. They use sliders that control the Red, Green and Blue Intensity.
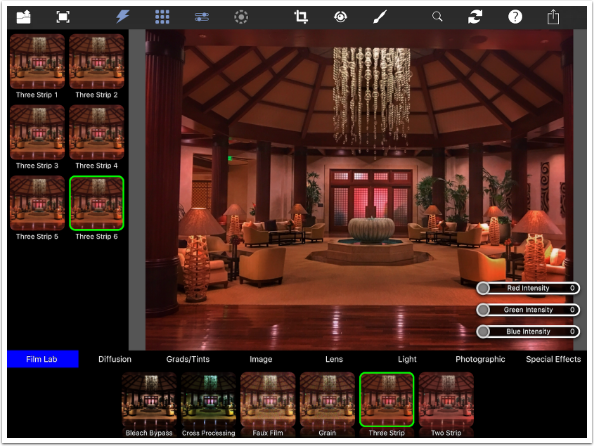
I increased the Green and Blue Intensity below, Notice how the chair and pillows at the lower right now contain a toxic green. This will give me an opportunity to show you masking, as I want to mask out the most toxic green.

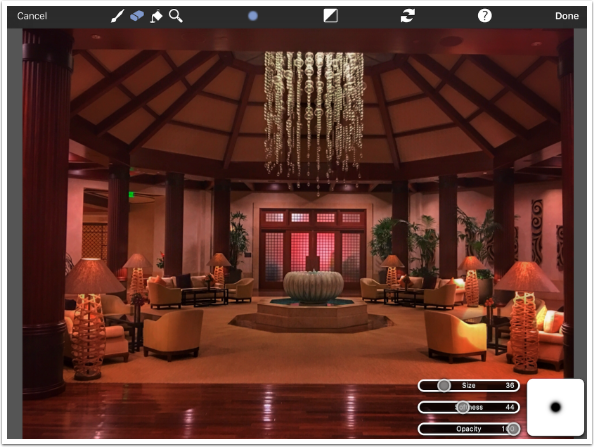
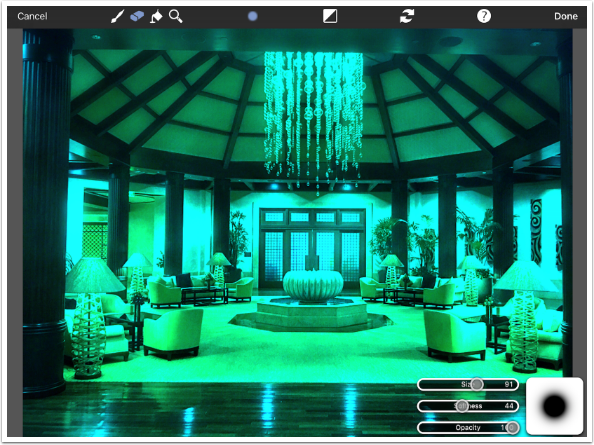
Below is the Masking screen. By default the effect covers the entire screen, and the Eraser is chosen to mask out the effect. The Brush icon paints in an effect. The paint can icon is Fill, which you operate by first tapping Fill, then either Paint or Erase, then tap anywhere on the image. The Magnifier can be selected to zoom in on any part of the image without any danger of painting or erasing the mask, but a two-fingered pinch also works at any time.
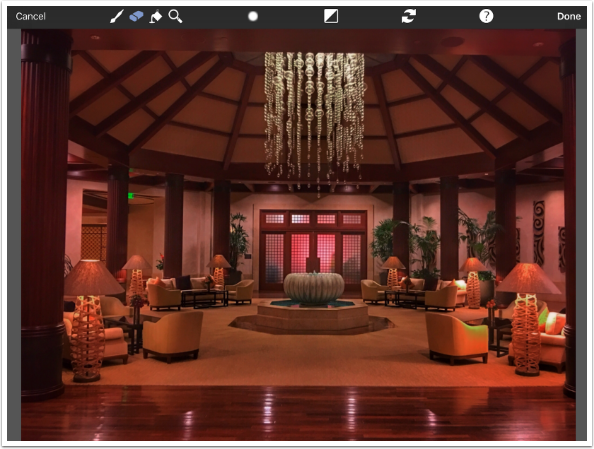
The soft-edged dot brings up the Brush Characteristics: Size, Softness and Opacity.

Using the current Brush Characteristics, I attempt to mask out the toxic green. The hard edge and 100% opacity is really noticeable.
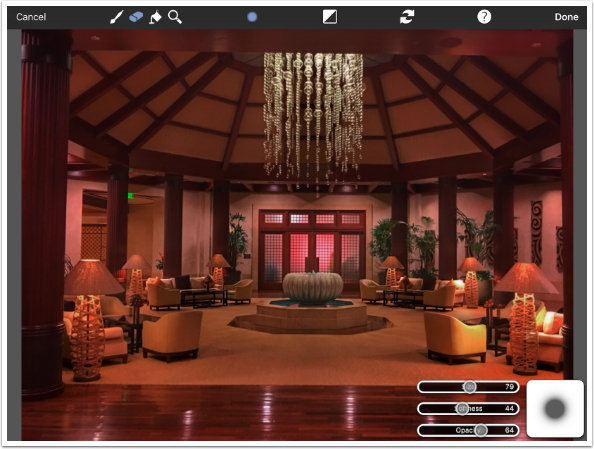
I tap Reset (two arrows in a circle) to reset the mask, then increase the Size and reduce the Opacity of the brush. The results this time are much less obvious, yet still eliminated the green
I went back to my Cross Processing setting that I liked. Up to now, each time I chose a new filter, it replaced the one I already was viewing. The new filter is directly applied to the original. But how can I choose a filter and actually apply it, so that subsequent changes are applied on top of the first filter?
When you tap the Save button at the upper right, there is an option to Add Layer. Photo FX Ultra is not a true layering app, though. It actually flattens the filter into the original and makes that the new base image. Once you “Add Layer”, you cannot return to the original image without reloading it. Since neither layers nor history are saved, there should be no limit to the number of changes you can make, but you cannot return to any intermediary step.
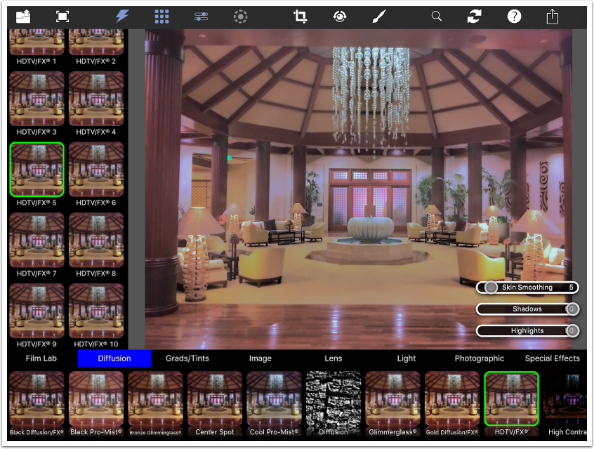
The next filter group is Diffusion, and many of the filters emulate Tiffen’s glass filters. Examples include the different Glimmerglass and Pro-Mist filters.
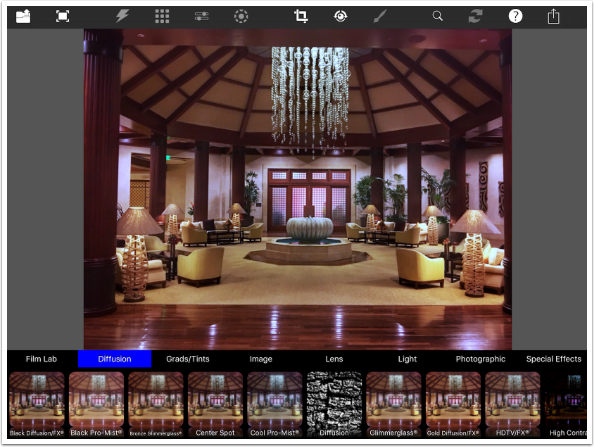
Most Diffusion filters do a combination of smoothing and glow. Glow is a function of blur.
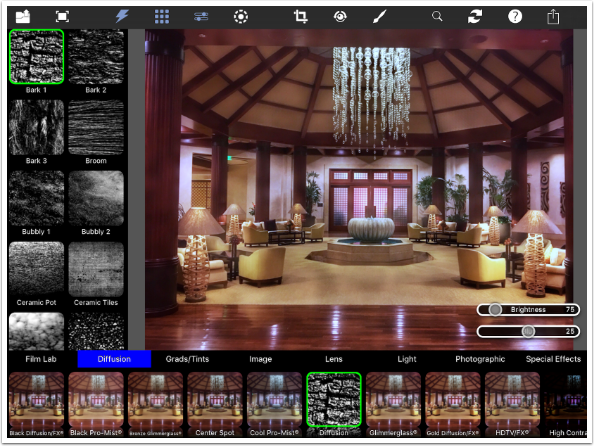
There is a specialised Diffusion filter that does not emulate Tiffen’s glass filters. Instead, it uses a texture to apply Diffusion. You can see from the presets on the left that it uses various black and white textures. You can see the resultant mottling across the ceiling and the carpet. There are 50 different texture presets under the Diffusion filter.
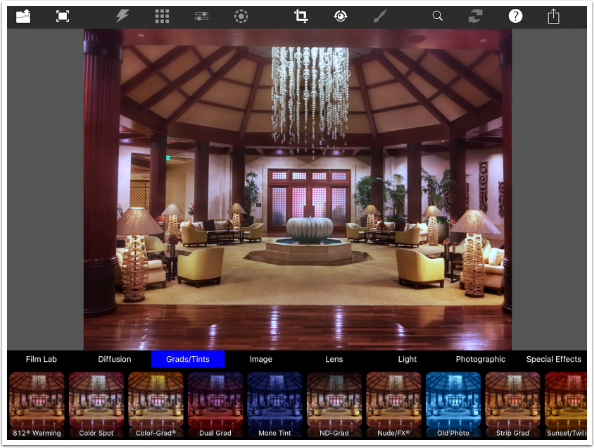
The next filter category is Grads/Tints (Gradients and Tints). There are eleven different filters in this group.
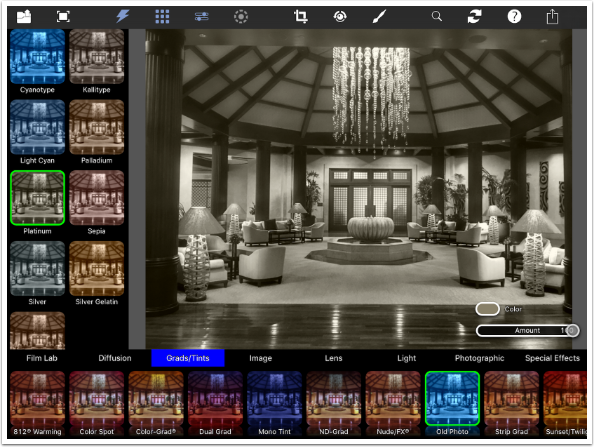
There are a number of good presets under the Old Photo filter, including the Platinum one seen below.
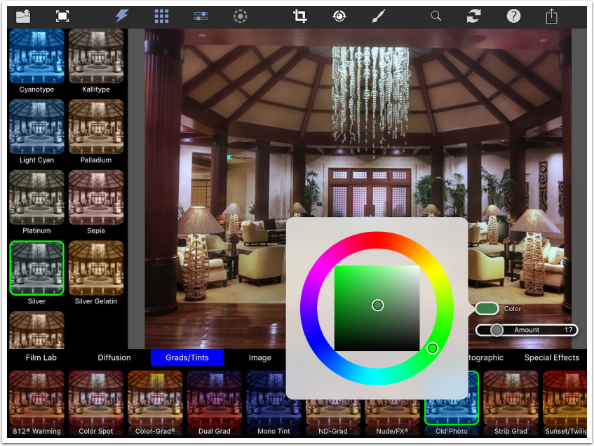
Anytime you see a Color option included in the sliders for a preset, you can use a color picker to change that color. In this way, I can actually use the Silver preset and counter the magenta in the image with a little green. (Of course, it can also be accomplished even easier by using the Green preset in the Tint filter. There are many ways to accomplish basic tasks – just not directly.)
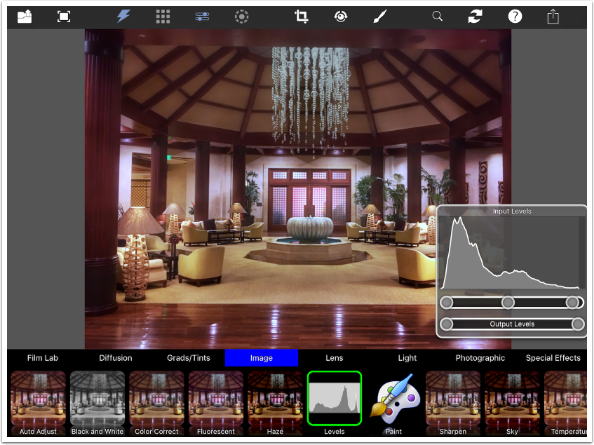
There are many basic tasks that can be accomplished under the Image filters. For example, you can improve the Brightness and Contrast under the Levels filter. Below I pulled in the right end of the Levels slider to where it met the right end of the histogram increase the amount of white in the image.
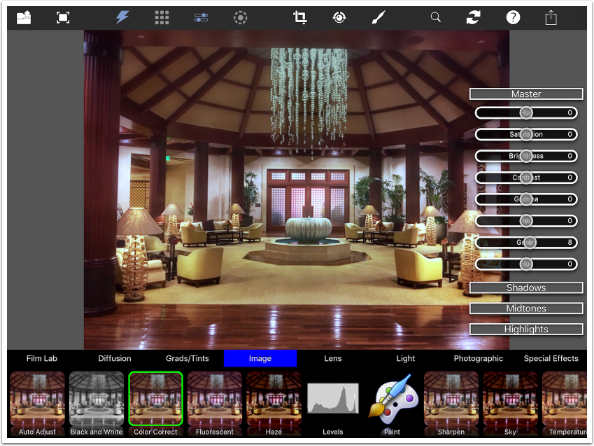
The Color Correction filter allows you to change the Hue, Saturation, Brightness, Contrast, Gamma, Red, Green and Blue for the entire image under Master. You can make the same adjustments to just the Shadows, Midtones and Highlights.

I added a bit of Green below under Master to correct for the Magenta tint.
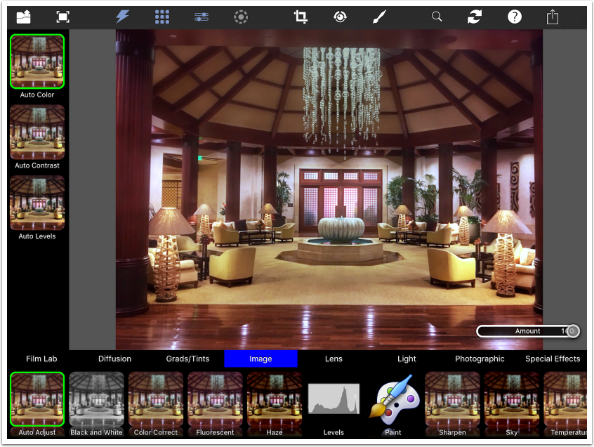
There are three Auto Adjust presets (Color, Contrast and Levels) that were so subtle on this image that I really couldn’t make out the difference
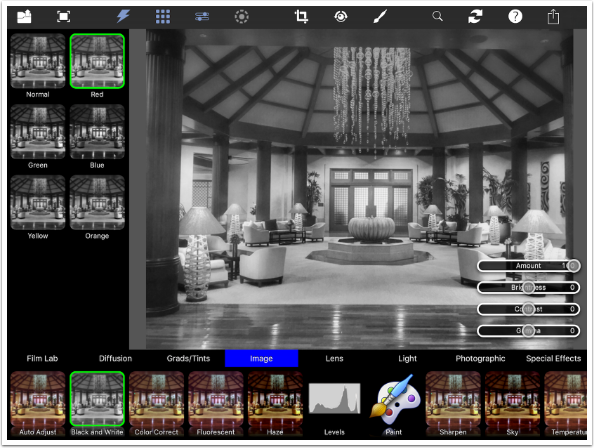
The Black and White presets are set up based on a color filter, just as you would expect from Tiffen
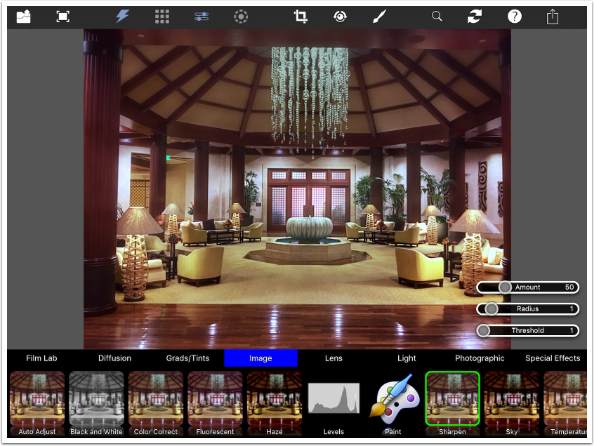
The Sharpen filter (no presets are present for this filter) does a nice job of sharpening without adding halos or emphasising grain. I used Add Layer to accept this change.
The Paint filter under the Image group is a submodule that allows you to paint a color onto the image, but also allows you to clone, blur, desaturate, pixilate or fix red-eye through a brush.
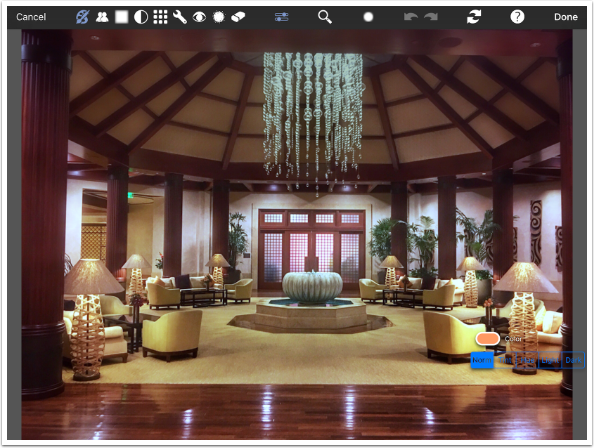
Although it’s difficult to see, you can change the blend mode of the color you paint in: Normal, Tint, Hue, Lighten or Darken. Below is an orange in Normal Mode. You can change the Brush Characteristics using the soft dot icon at the top center-right, just as you would in masking.
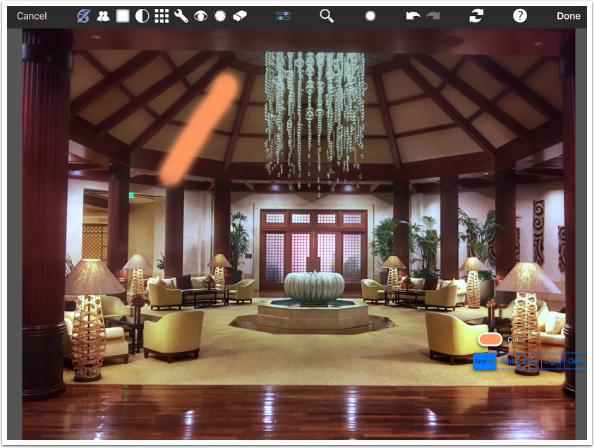
I used Undo and brushed over the chandelier with the orange in Darken mode.

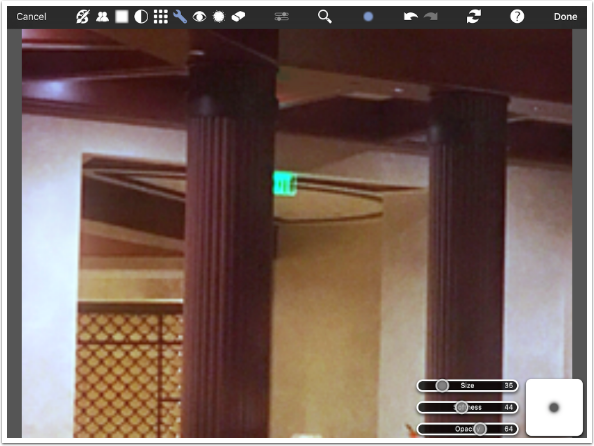
There’s an Exit sign on the left of the image that I want to get rid of. I can try that using the Clone brush (double person icon on the top left). Usage of the Clone brush is not very clear. I dragged from lower on the post up to the exit sign, then had to lift my finger and paint over the sign again. This results in a straight clone, and the dark ceiling inlays are overlaid with blank wall. Unless it’s simple very cloning, I would do any repair work in Touch Retouch or Snapseed.
I have zoomed in, but that does not change the brush size. Brush size is not relative to the screen, but to the image. The Size slider is the only adjustment to the size of the brush.
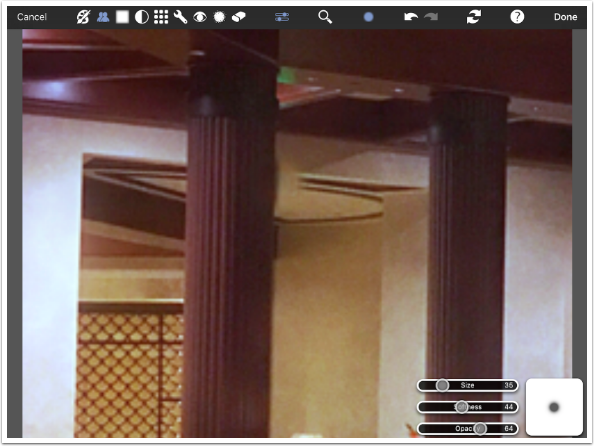
The bright green exit sign reflects on the ceiling. Instead of Cloning, I try the Repair brush (the wrench). What it does is paint the color from the starting point of your brush stroke over the remainder of your brush stroke. Below I started to the right of the green reflection and stroked to the left, over the reflection. It hides the green, but inelegantly.
The blurred square icon allows you to paint in Blur; the divided circle allows you to paint in a totally desaturated (black and white) stroke. The Grid here pixilates what is under the stroke. Below I’ve pixilated the chandelier.
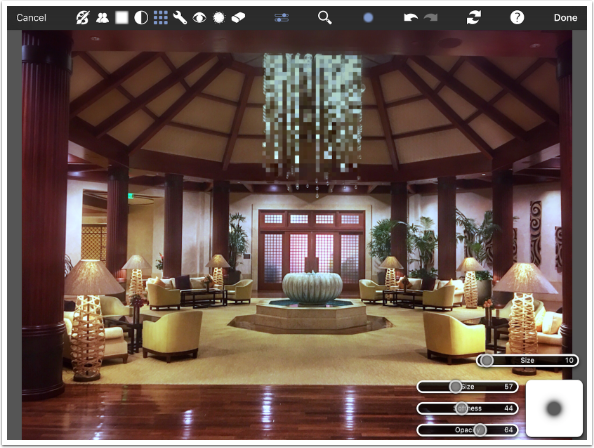
The Scatter brush does a finer version of the Mosaic (pixilated) brush. It’s applied to the chandelier below.
Be careful with the Paint filter. Even though I tapped Undo and watched the Scatter and Repair changes disappear, they reappeared when I tapped Done. Tapping Done in the Paint submodule acts as an Add Layer, and you cannot step back to the image as it was before the Paint session. I ended up having to re-import the image and reapply the Cross Process and Sharpen that I had already applied.
Before wrapping up this first part of the two-part tutorial, I want to mention that masks are sticky. Once you’ve added a mask, that stays in effect when you switch to another filter. It even stays in effect after you’ve flattened with Add Layer. Below I show a mask on the wood floor. I created it with the Black and White filter, but now that I switched to the Temperature filter, it’s still there.
In order to get rid of the mask, tap the Brush icon at the top to enter the masking module, then tap the double arrow to reset the mask.
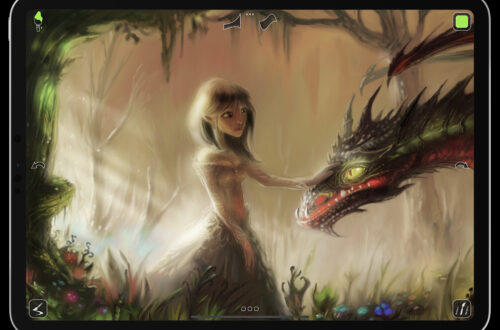
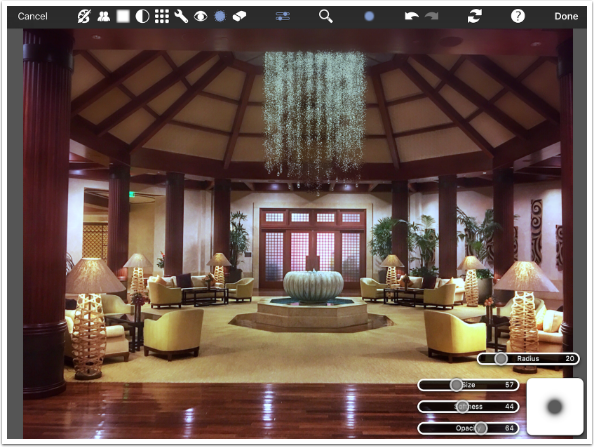
I added a Light filter, which I will cover further in Part 2, and this is my result.
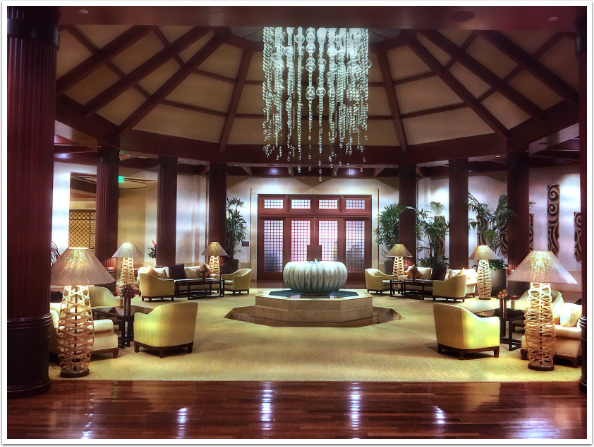
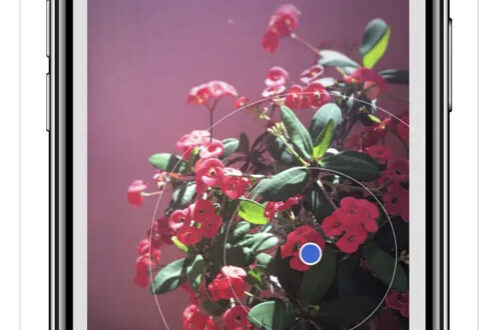
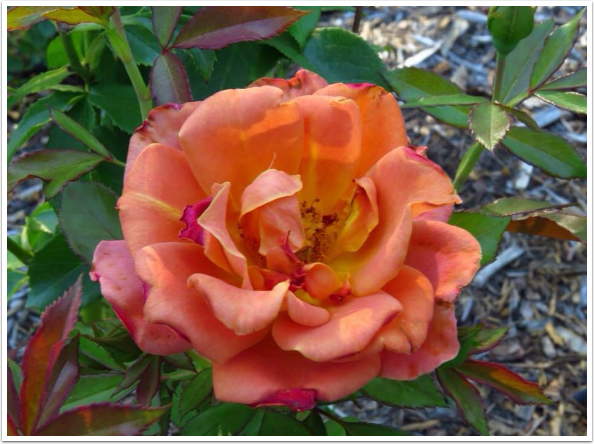
Photo FX Ultra is capable of subtle or more robust effects. Here’s a photo of a flower, straight from my iPhone.
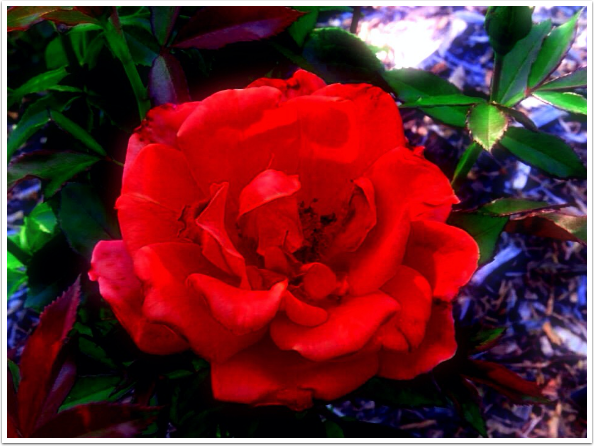
Here’s the image after Photo FX Ultra.
And here’s a further enhancement using the Rebound brushes in iColorama.
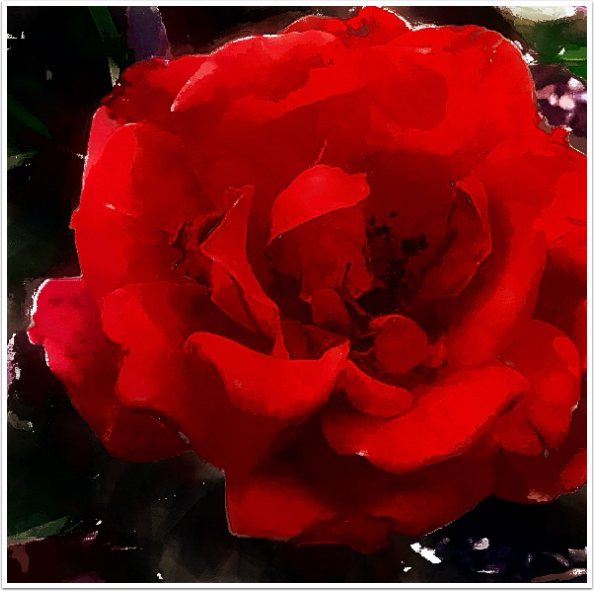
Photo FX Ultra is an odd app in that it is a filter app trying to be an editor. It does quite a lot of different things, but the particular look you might be wanting is not necessarily in the place you expect, and it may be hard to control once you find it. (Seriously, Platinum monochrome under Grads/Tints>Old Photo?) It will, however, reward the user that puts in the time. Next time, we’ll go over the remainder of the options of Photo FX Ultra. Until then, enjoy!
TheAppWhisperer has always had a dual mission: to promote the most talented mobile artists of the day and to support ambitious, inquisitive viewers the world over. As the years passTheAppWhisperer has gained readers and viewers and found new venues for that exchange.
All this work thrives with the support of our community.
Please consider making a donation to TheAppWhisperer as this New Year commences because your support helps protect our independence and it means we can keep delivering the promotion of mobile artists that’s open for everyone around the world. Every contribution, however big or small, is so valuable for our future.
Jerry Jobe
Never content with just scratching the surface of what an app can do, Jerry Jobe decided to pass on what he learned about imaging apps to others. He’s constantly trying to figure out just what tools other artists have used, and trying to incorporate them into his own work, in an attempt to find his style. He’s written tutorials on over 145 apps so far, which you can find (along with his Song of the Day entries) at http://enthusiasmnoted.wordpress.com/ He lives near Atlanta, Georgia, where he also finds a creative outlet in acting and directing in community theater.