Mobile Photography / Art Tutorial – Photo FX Ultra Part 3: Lighting It Up
We are delighted to publish Jerry Jobe’s latest mobile photography/art tutorial for our viewing pleasure. This time Jobe takes a deeper look at the app Photo FX Ultra in our final part three of this series. If you missed Parts One and Two, please follow the highlighted links to view. Take it away Jerry…(foreword by Joanne Carter).
Photo fx Ultra retails for $2.29/£1.49 and you can download it here
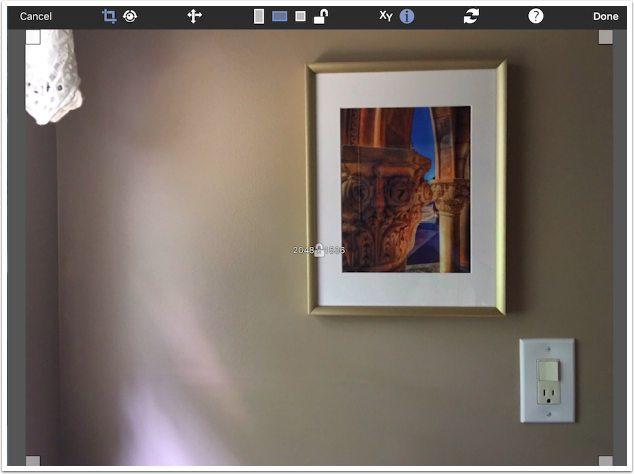
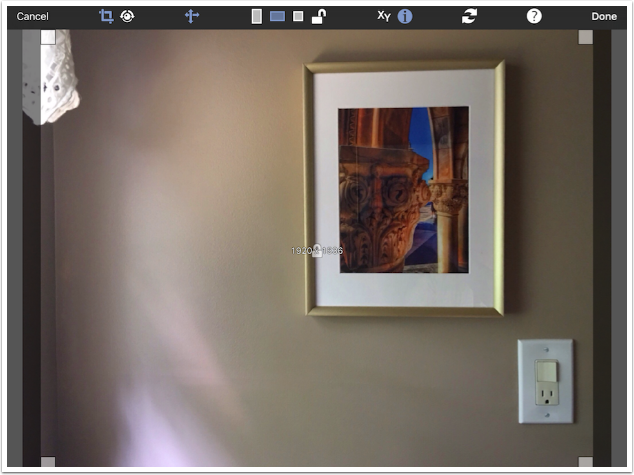
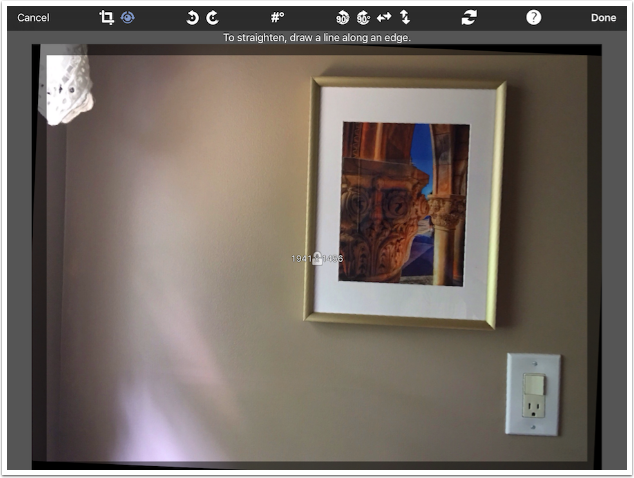
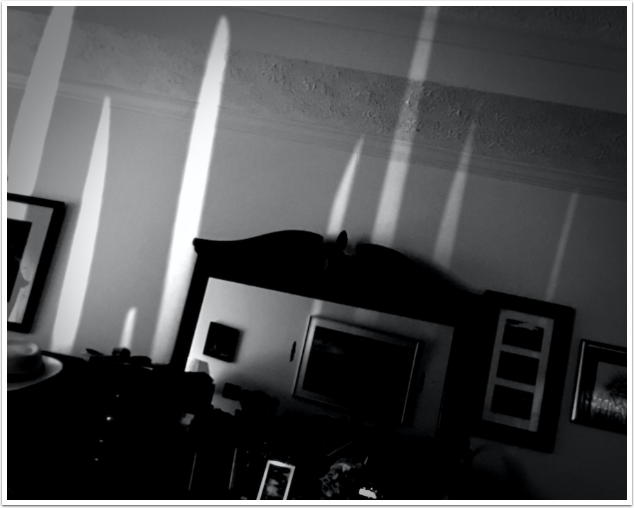
“Part three of my look at Photo FX Ultra brings me to my favorite part of the app: the Light presets. Before I get to those, however, I want to show you the Crop and Straighten tools. Once again, I’ll be using the image of the framed picture on the wall.
The Crop screen has controls for Dimensions, Portrait, Landscape, Square, Lock, and Fixed Size along the top. At the center of the image you can see the size of the image and the lock indicator. The information at the center of the image is switched on and off with the Information icon”.
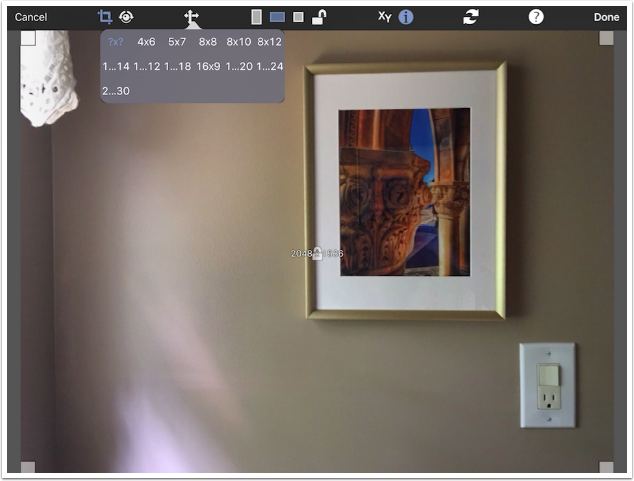
The Dimensions button gives you several different aspect ratios to use. To switch between 4×6 and 6×4 you use the Portrait and Landscape buttons. Unfortunately, several of the given ratios are unreadable. As far as I can determine, the unreadable ones are 10×14, 12×12, 12×18, 16×20, 16×24 and 20×30. There are a lot of useless duplicates; three of the last five are duplicates of 4×6.
Once you’ve chosen a ratio, then the handles move to accommodate that new ratio. You can then grab the handles or the crop window and move them.
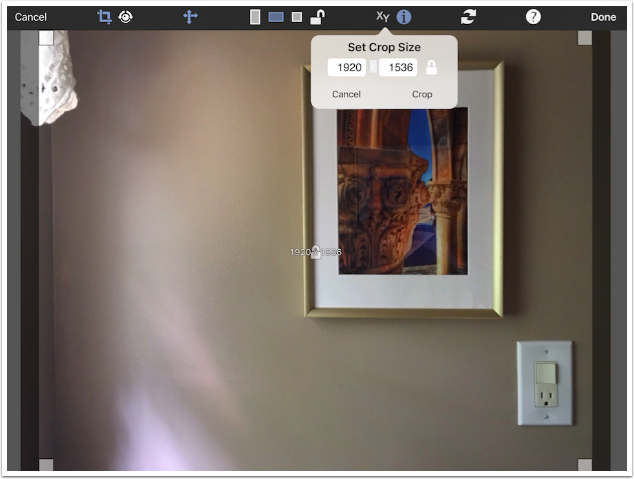
If you want a specific size crop, you can enter the size using the “XY” icon. That locks the handles, and all you can do is move the crop window.
The Straighten tool offers a lot of options, including entering an angle directly and flipping the image horizontally or vertically. The twist (if you’ll pardon the pun) with Photo FX Ultra is that you can draw in the horizon line to straighten the image.
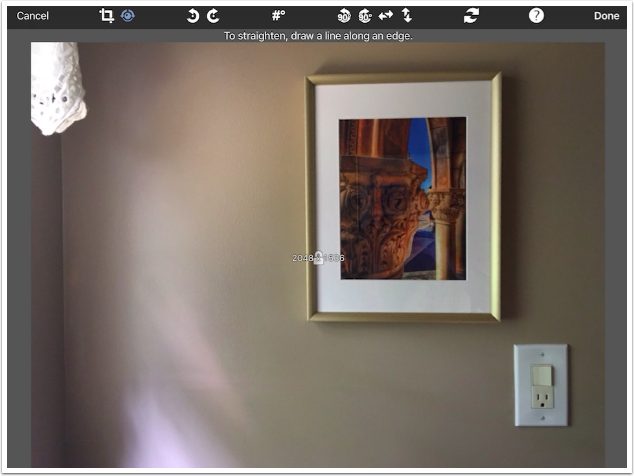
My image is already straight, so I drew a random line below.
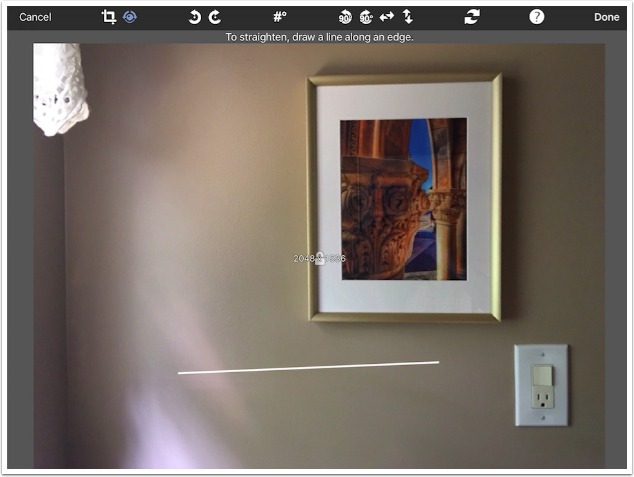
When I lift my finger, the image is straightened along the line I drew. The automatic crop that results is a bit tighter than necessary.
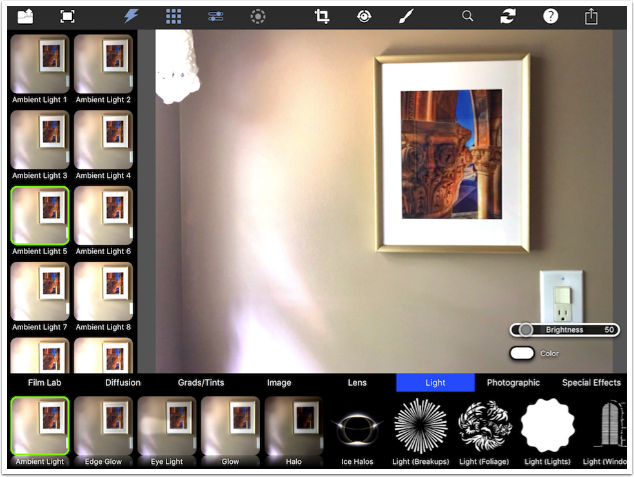
Now let’s move on to the Light presets. The first is Ambient Light, which provides an even coloured light over the entire image.
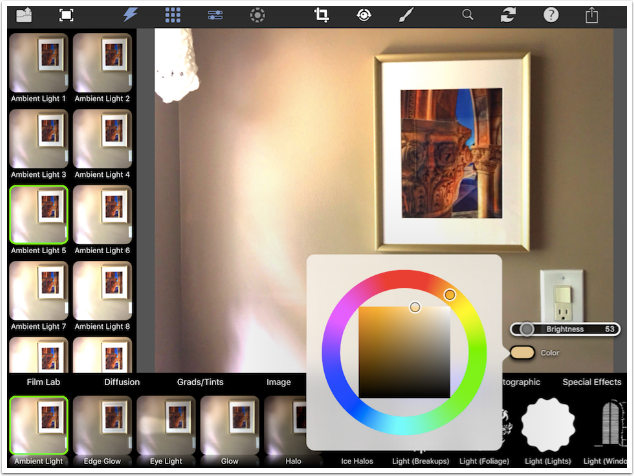
The color of the Ambient light can be changed with the color picker.
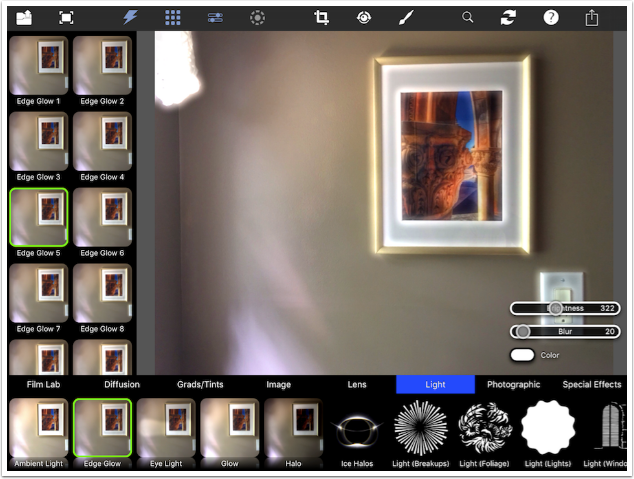
Edge Glow, which has controls for Brightness, Blur and Color, is an interesting effect but not one that I’d use often.
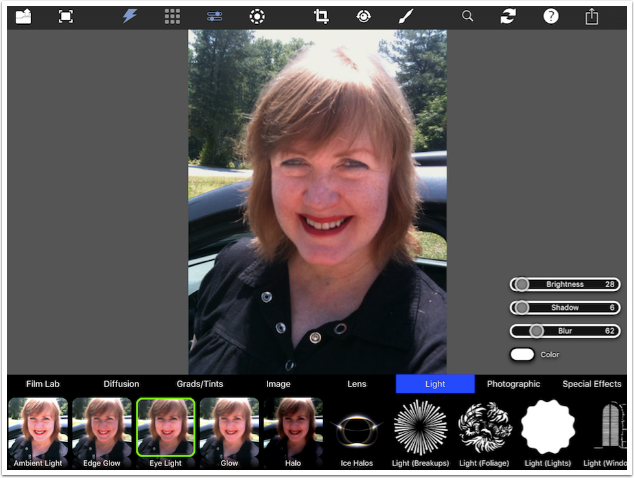
Eye Light is for use with portraits, so I switched to a photo of my lovely wife. The position and size of the added light for the eyes can be changed with the On-Screen controls (the dot with a dashed circle surround).
[PFXUltra3_11]
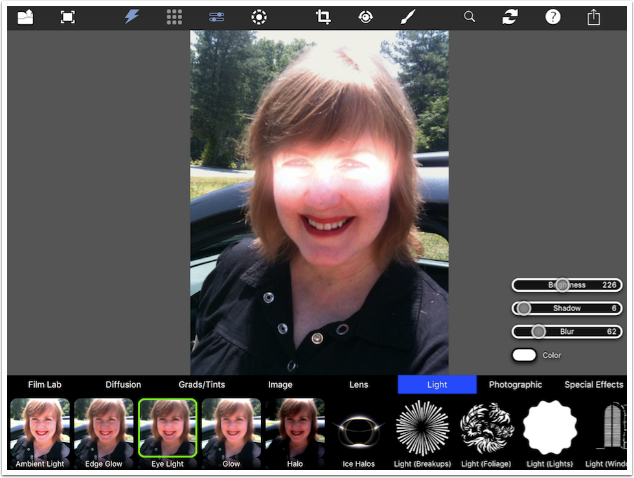
Of course, Eye Light can be way too bright at the default setting, but lowering the Brightness setting can give a nice, subtle effect.
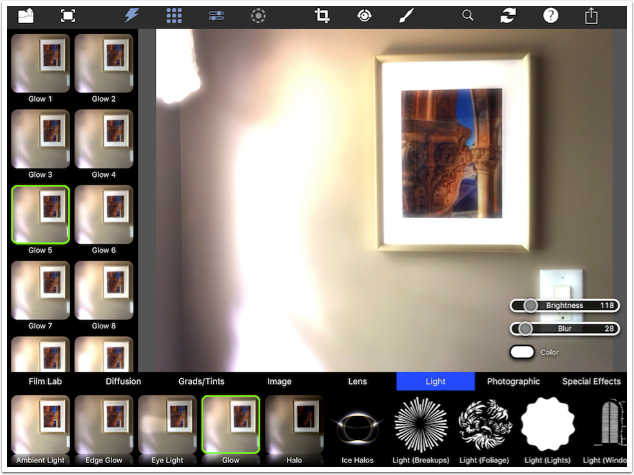
Glow gives you a fuzzy, bright glow over the entire image. The glow can be coloured using the color picker.
Halo is a dark glow for moody subjects.

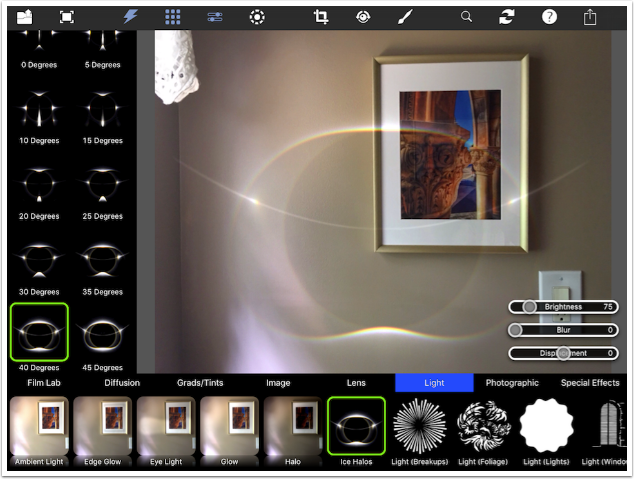
Ice Halos are the first of the patterned Light presets. This particular kind of lens flare is created in bright wintry scenes, and has little use outside of those scenes.
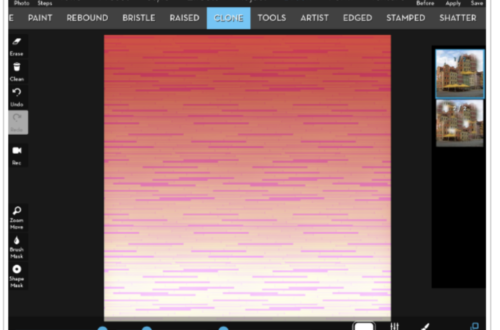
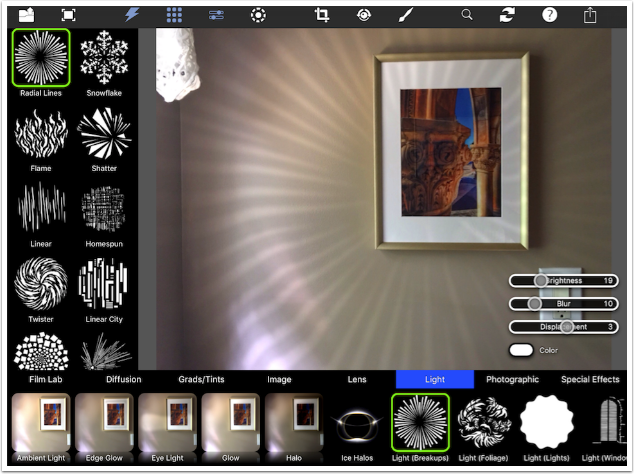
The next four presets are not flares like the Ice Halos. They produce a look like strong light coming through a cutout filter. Below you’ll see the Radial Lines preset under Breakups. Notice how the light is treated differently once it hits the right side of the framed picture, flaring as it is added to the already bright frame.
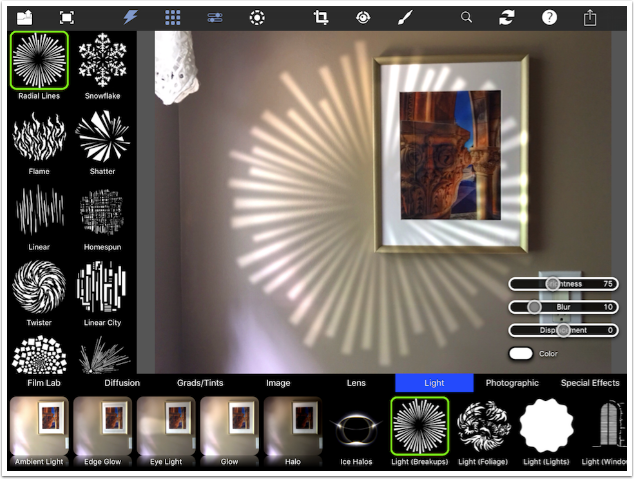
Brightness and Blur sliders can make the light more natural or unnatural.
[PFXUltra3_17]
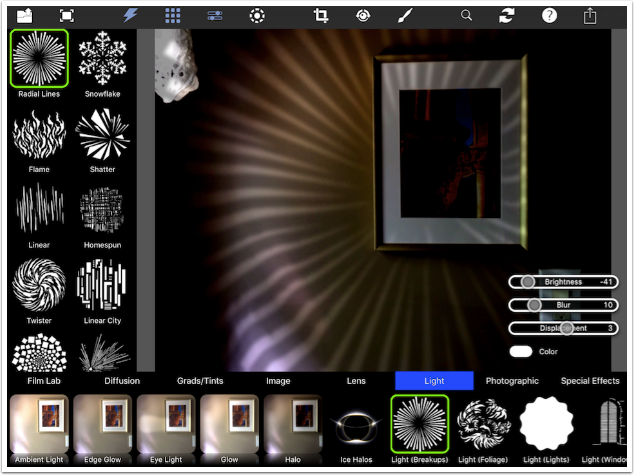
The Displacement slider warps the light based on the tone of the underlying image. This can help the light follow the natural contours of an object like a face, but can look decidedly weird when it reacts to light falling across a smooth wall, as it does below. The Radial Lines really shouldn’t be curving on a smooth wall.
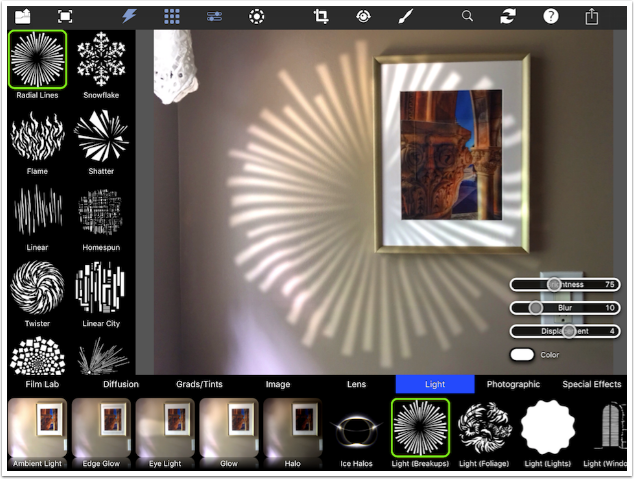
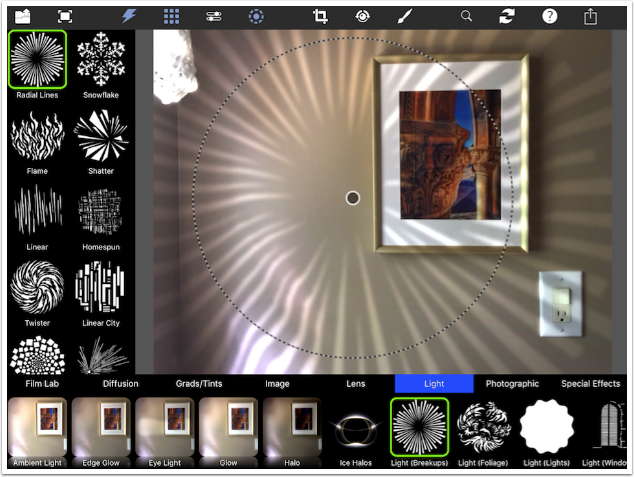
The size and placement of the pattern can be changed with the On-Screen controls. This works fine for most applications of Light presets, but additional warping tools would be useful in real-life applications. Wouldn’t the light be stretched out the farther it got from the pattern in front of the light source? Wouldn’t the light bend when it encounters the floor, ceiling, or another wall?
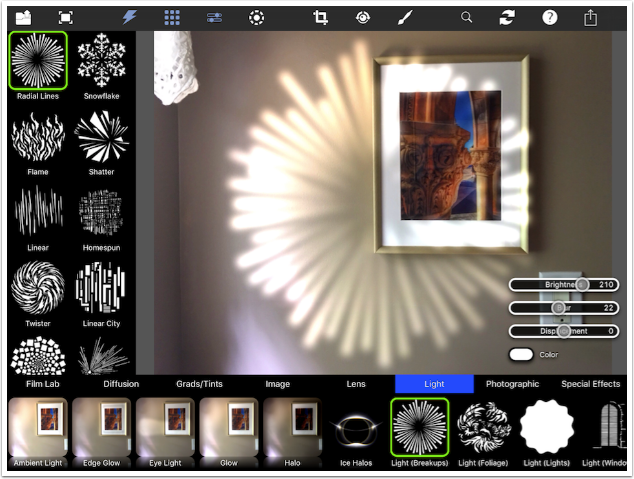
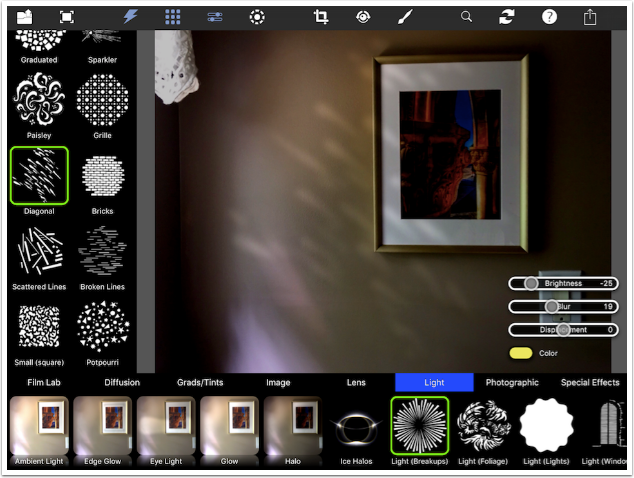
The Brightness slider can be used to create a subtler effect.
The Brightness slider does move beyond zero. When it moves into the negative numbers, it darkens the surrounding scene. The farther below zero it goes, the darker the scene gets, creating more contrast between the lit and unlit parts of the image. Eventually, you’d get a black image with only the pattern lit.
Adding color to the pattern, like adding a coloured gel to your cutout, is easily accomplished with the color picker.
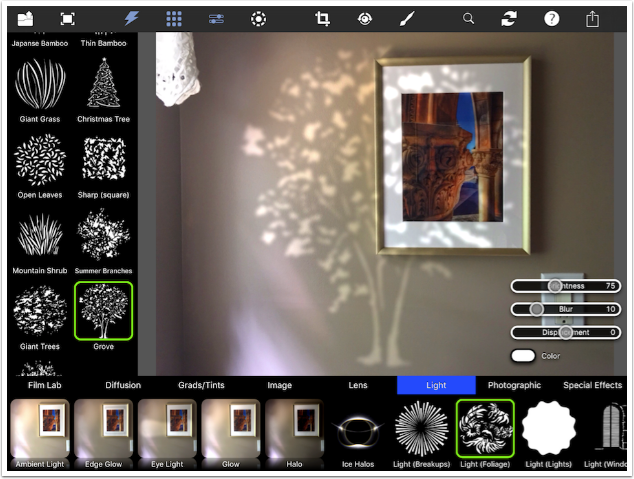
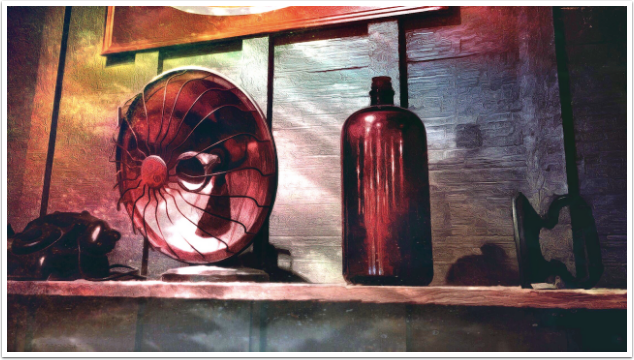
Some patterns in the Foliage category are realistic, like sunlight falling through leaves. Others, like Grove shown below, are obvious projections of light.
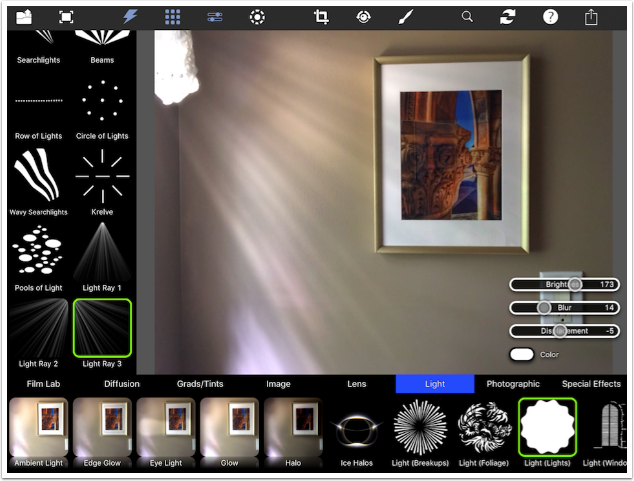
The Lights presets can come in handy as spotlights or gentle rays. Remember, you can always use the mask tool with the presets. If I were to actually use this preset, I would probably mask it off the sliver of wall on the left, since the natural light would not hit that wall.
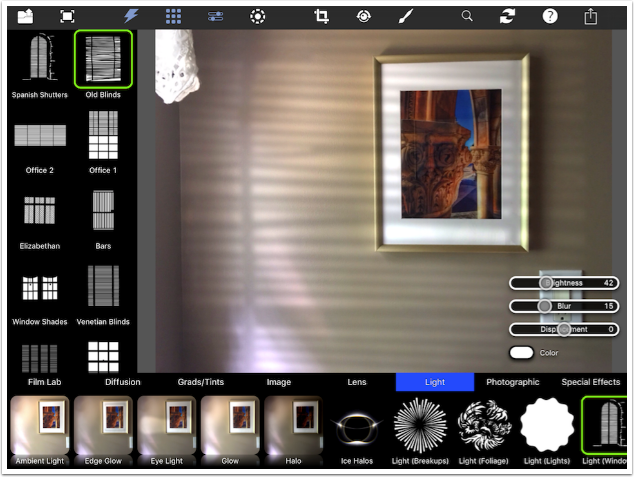
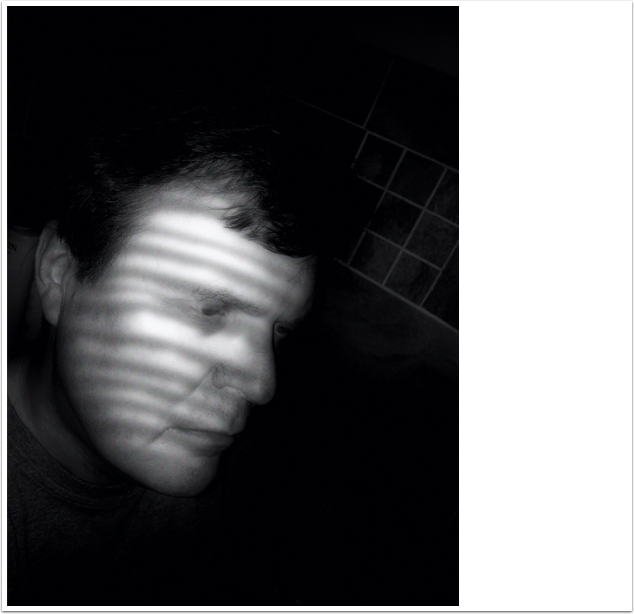
The Windows presets are my favorite, since they look like light falling through an actual window. These presets could benefit the most from a perspective warp.
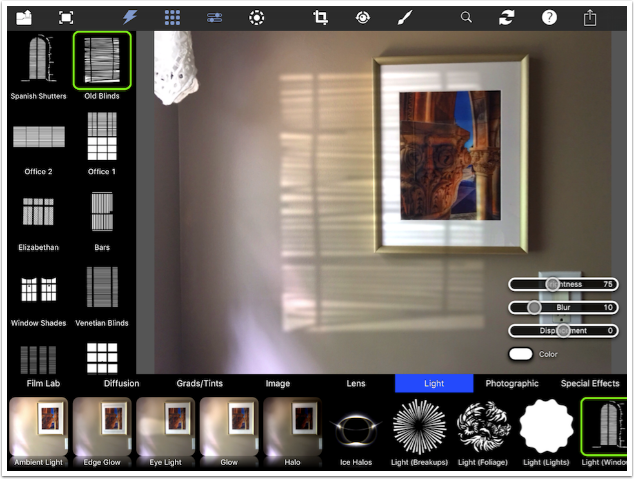
Using the On-Screen controls to change the size, rotation and placement helps to make the lighting look realistic.
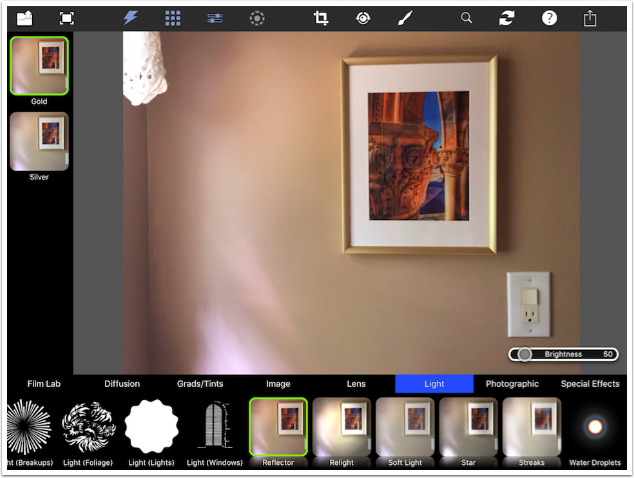
The Reflector presets give the impression that you have used a gold or silver reflector to bounce the light back at the image. It differs from Ambient Light in that it falls off some at the edges of the image.
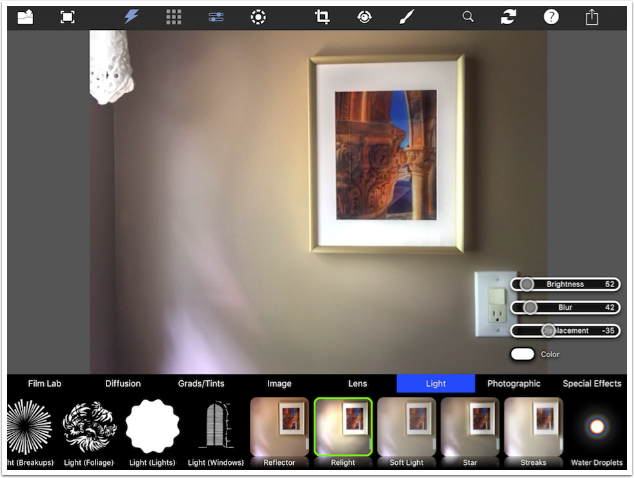
Relight is a circular spotlight. Once again, it would help if the circle could be warped. On-Screen Controls allow you to change the size and placement of the circle.
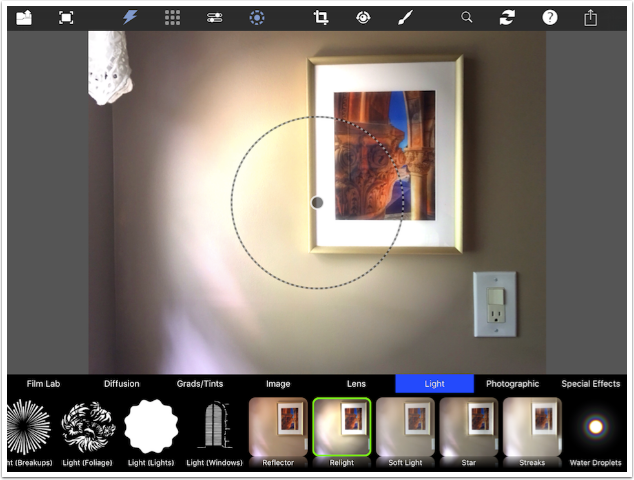
Ratcheting up the Displacement slider can give you some interesting results as the circle is warped around objects in the image.
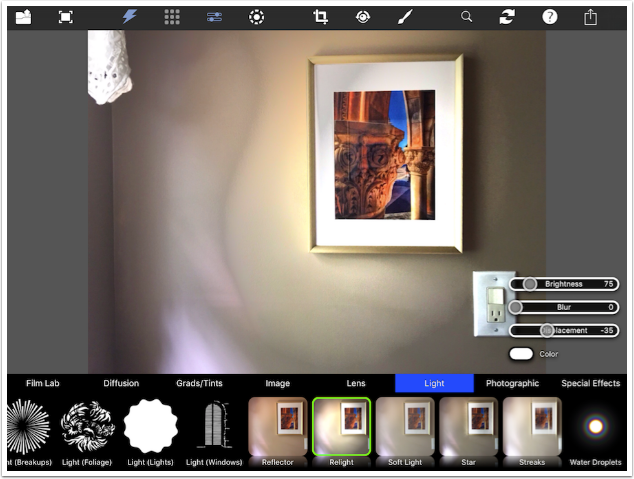
Blur in Relight doesn’t just blur the edges of the circle; it adds a fuzzy glow within the circle.
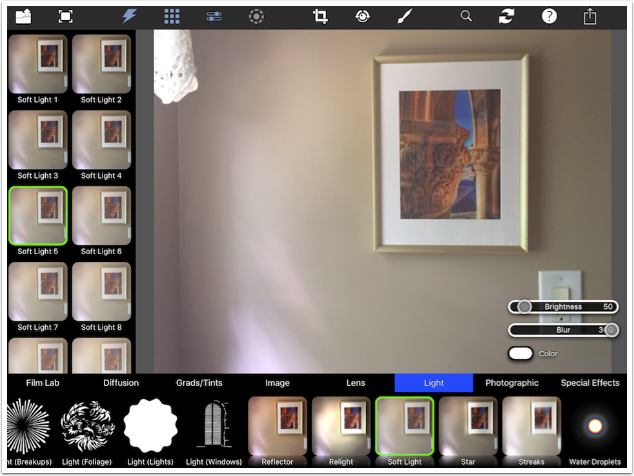
Soft Light reduces contrast by lighting shadows more than highlights.
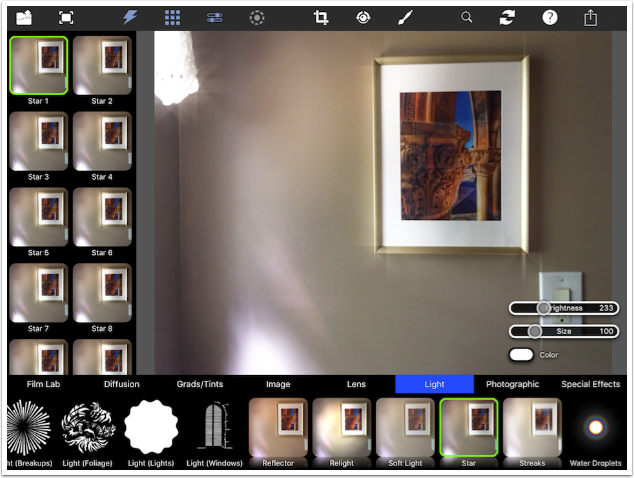
Star presets work like Edge Glow, but creates stars at corners of images.
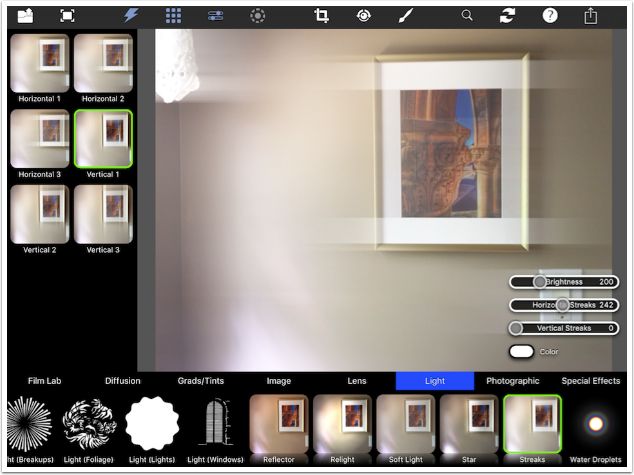
Streaks almost produce a motion blur. You will want to use either Vertical or Horizontal streaks; trying to use both just produces a general glow.
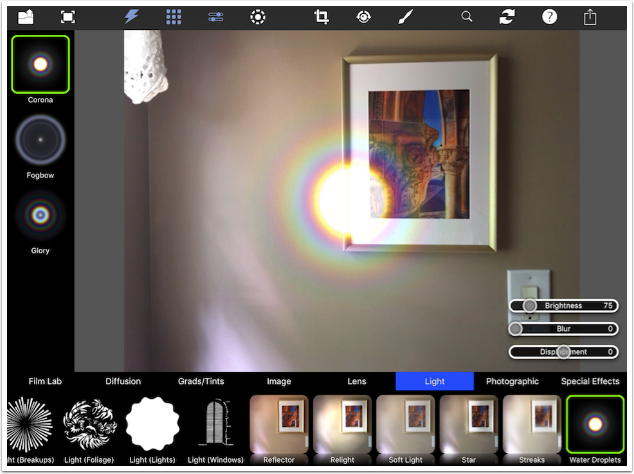
The Water Droplets effects are like having a single drop on your lens, producing a flare. I can’t see much use for these presets, either.
For my final result, I added the Day for Night filter under Special Effects.
Changing the lighting of your image using Photo FX Ultra opens up many new possibilities. You can go for a surreal look, as in this image captured with Contrast camera.
Some natural light was added to this painting.
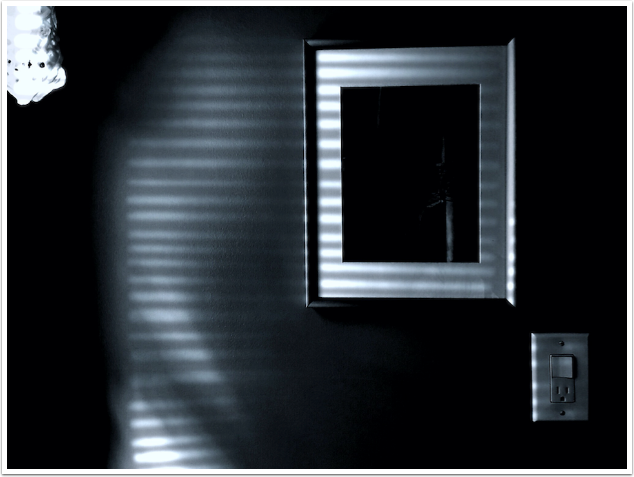
You can even go for a noir look, like those marvellous movies of the forties.
To recap: Photo FX Ultra is not an editor, but a sophisticated filtering app. It has a workable masking interface and a “layering” ability that means you can add more than one filter. Some of the filters – a majority of them, in fact – may be filters you will never use, or duplicates of other filters in the app. And the lighting presets alone are worthy of the cost and space on your device. Give it a try!
Until next time, enjoy!
TheAppWhisperer has always had a dual mission: to promote the most talented mobile artists of the day and to support ambitious, inquisitive viewers the world over. As the years passTheAppWhisperer has gained readers and viewers and found new venues for that exchange.
All this work thrives with the support of our community.
Please consider making a donation to TheAppWhisperer as this New Year commences because your support helps protect our independence and it means we can keep delivering the promotion of mobile artists that’s open for everyone around the world. Every contribution, however big or small, is so valuable for our future.
Jerry Jobe
Never content with just scratching the surface of what an app can do, Jerry Jobe decided to pass on what he learned about imaging apps to others. He’s constantly trying to figure out just what tools other artists have used, and trying to incorporate them into his own work, in an attempt to find his style. He’s written tutorials on over 145 apps so far, which you can find (along with his Song of the Day entries) at http://enthusiasmnoted.wordpress.com/ He lives near Atlanta, Georgia, where he also finds a creative outlet in acting and directing in community theater.